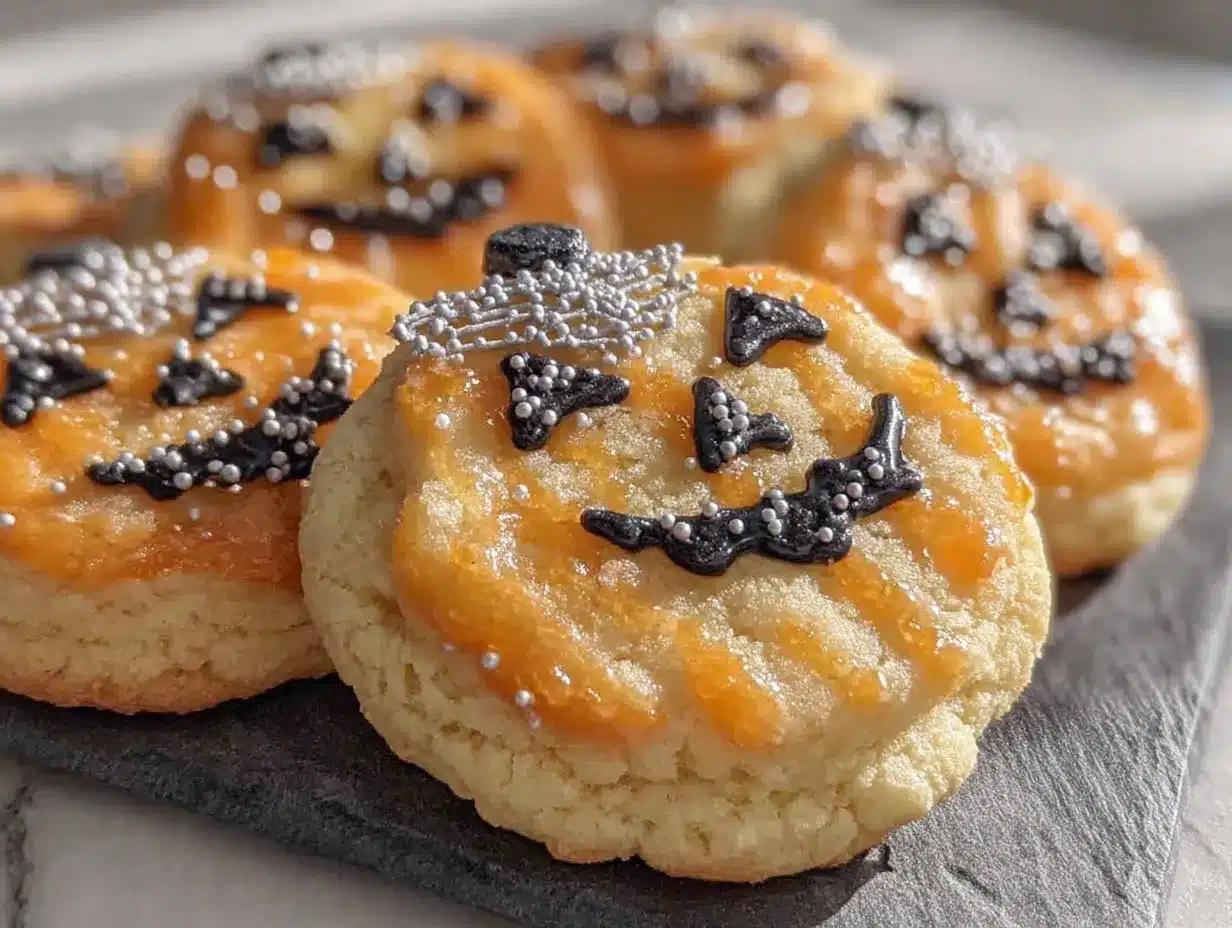
There used to be a tiny bakery tucked between a laundromat and a vintage shop in my old neighborhood that made the most incredible Halloween sugar cookies. When they closed their doors two years ago—just packed up and vanished one October—I honestly felt a little lost. Those cookies were my whole Halloween vibe. After twelve tries—some so ugly I actually threw them in the trash—I finally got it. These Easy Orange and Black Halloween Sugar Cookies are the exact recreation of that bakery magic, and let me tell you, they’re even better than I remember.
The first batch I made was a disaster. I mean, the dough was too sticky, the colors looked like mud, and I may have cried a little over a baking sheet of deformed ghosts. But you know that feeling when you just refuse to let a recipe beat you? That was me. I kept tweaking, kept testing, and somewhere around batch number seven, something clicked. The texture got that perfect soft-but-snappy edge, and the orange started popping like a real jack-o-lantern smile.
What makes these cookies so special isn’t just the nostalgia—it’s how simple they are to pull off. No fancy techniques, no weird ingredients, just good old-fashioned sugar cookies dressed up in Halloween’s finest colors. And honestly? They taste like childhood, if childhood had really good food coloring. The orange is bright and cheerful, the black is moody and dramatic, and together they make the cutest little Halloween party you’ve ever seen on a cookie sheet. Maybe you’ve been there—chasing a flavor memory that feels just out of reach. Well, this is the recipe that finally caught it.
Why You’ll Love This Recipe
Look, I’ve tested a lot of sugar cookie recipes in my day. Some were too dry, some spread into blobs, and some just tasted like sweet flour. This one? It’s the real deal. After years of recipe development and way too many butter-stained notebooks, I can tell you with confidence that these Easy Orange and Black Halloween Sugar Cookies hit every single mark.
- Quick & Easy: From start to finish, you’re looking at about 45 minutes. No chilling required—seriously, who has time for that on a busy October weeknight?
- Simple Ingredients: You probably already have everything in your pantry. Butter, sugar, flour, eggs—the usual suspects. Just grab some food coloring and you’re golden.
- Perfect for Halloween: Whether it’s a classroom party, a spooky movie night, or just because you love orange and black together, these cookies fit right in.
- Crowd-Pleaser: Kids go wild for them. Adults pretend they’re too cool, then eat four. I’ve seen it happen at every party I’ve brought them to.
- Unbelievably Delicious: The texture is that perfect sugar cookie sweet spot—crisp edges, soft centers, and a buttery flavor that lingers just long enough to make you reach for another.
What makes this recipe different from all the others? It’s the technique. I spent months figuring out the exact ratio of butter to sugar that gives you that bakery-style texture without needing any weird additives. Plus, I figured out how to get the colors to stay vibrant even after baking—no sad, faded cookies here. This isn’t just another sugar cookie recipe. It’s the one you’ll come back to every Halloween.
There’s something about biting into one of these cookies that just feels right. Maybe it’s the nostalgia, maybe it’s the perfect sweetness, or maybe it’s just knowing you made something this pretty with your own two hands. Either way, these cookies make me happy every single time.
What Ingredients You Will Need
This recipe uses simple, wholesome ingredients to deliver bold Halloween flavor and satisfying texture without the fuss. Most of these are pantry staples, which means you can whip up a batch whenever the spooky mood strikes.
For the Sugar Cookie Dough
- 1 cup (226g) unsalted butter, softened — I prefer using Land O’Lakes for consistent results, but any good-quality butter works. Make sure it’s truly softened, not melted—you want it to be spreadable but not greasy.
- 1 cup (200g) granulated sugar — Regular white sugar gives these cookies that classic sweet flavor and helps create those slightly crispy edges.
- 1 large egg, room temperature — Cold eggs can make the dough seize up. Leave yours on the counter for about 30 minutes before starting.
- 2 teaspoons vanilla extract — Pure vanilla makes a difference here. I’ve tried imitation in a pinch, and honestly, the cookies just don’t taste as rich.
- 2 ½ cups (312g) all-purpose flour — Spoon and level your flour—don’t scoop straight from the bag or you’ll end up with dry, crumbly dough.
- ½ teaspoon baking powder — This gives the cookies just the right amount of lift without making them puffy.
- ½ teaspoon salt — Don’t skip this! Salt balances the sweetness and makes the butter flavor pop.
For the Halloween Colors
- Orange gel food coloring — I swear by Americolor or Wilton gel colors. Liquid food coloring just won’t give you that vibrant orange—trust me, I learned the hard way.
- Black gel food coloring — Same deal here. Gel is the way to go. You’ll need a little more black than orange to get that deep, spooky shade.
For the Glaze (Optional but Recommended)
- 1 cup (120g) powdered sugar — Sift it first to avoid lumps. Nobody wants lumpy glaze on their pretty cookies.
- 2-3 tablespoons milk — Whole milk gives the best consistency, but any milk works. Add it slowly—you can always add more, but you can’t take it out.
- ½ teaspoon vanilla extract — A little extra vanilla in the glaze makes these cookies taste even more bakery-quality.
- Sprinkles or sanding sugar — Orange and black sprinkles, edible glitter, or even little candy eyeballs—go wild with it.
One thing I always tell people: don’t stress about finding the perfect ingredients. If you only have salted butter, just reduce the added salt to ¼ teaspoon. If you’re out of vanilla, almond extract works in a pinch (though it changes the flavor a bit). The beauty of this recipe is that it’s forgiving—it wants to work for you.
Equipment Needed
- Stand mixer or hand mixer — You can mix by hand if you’re feeling strong, but a mixer makes creaming the butter and sugar so much easier. I use my KitchenAid for everything.
- Large mixing bowls — At least two—one for dry ingredients and one for wet.
- Measuring cups and spoons — Accurate measurements matter in baking. I keep a set of metal measuring cups just for dry ingredients.
- Baking sheets — Light-colored sheets work best. Dark sheets can make the bottoms burn before the tops are done.
- Parchment paper or silicone baking mats — Non-negotiable for easy cleanup and even baking. Silpat mats are my favorite.
- Cookie cutters — Halloween shapes! Pumpkins, ghosts, bats, cats—whatever you’ve got. I have a set of six basic shapes that I use every year.
- Cooling rack — Wire racks let air circulate so your cookies cool evenly. No soggy bottoms here.
- Small piping bags or zip-top bags — For the glaze. Snip off a tiny corner and you’ve got a makeshift piping bag that works perfectly.
If you don’t have a stand mixer, don’t worry. I actually made my first few batches with a wooden spoon and a lot of elbow grease. It took longer, but the cookies turned out just as good. Sometimes the old-fashioned way has its own charm, you know?
Preparation Method
- Preheat your oven to 375°F (190°C). Line two baking sheets with parchment paper or silicone mats. This step matters—don’t skip it or your cookies will stick and spread.
- Cream the butter and sugar together. In a large bowl, beat the softened butter and granulated sugar until light and fluffy—about 3-4 minutes with a mixer on medium speed. You’re looking for a pale, airy texture that looks almost like frosting. Scrape down the sides of the bowl halfway through. I once forgot to scrape and ended up with butter chunks in my dough. Not ideal.
- Add the egg and vanilla. Crack in the room-temperature egg and pour in the vanilla extract. Beat on low until just combined. Don’t overmix here—you don’t want to incorporate too much air. The dough should look smooth and slightly glossy.
- Mix the dry ingredients separately. In another bowl, whisk together the flour, baking powder, and salt. This ensures everything is evenly distributed. I learned this one the hard way after biting into a pocket of baking powder. Not a pleasant surprise.
- Combine wet and dry ingredients. Gradually add the flour mixture to the butter mixture, mixing on low speed. Stop as soon as the dough comes together—no white streaks, but also no overmixing. The dough should be soft but not sticky. If it feels too sticky, add a tablespoon more flour. If it’s crumbly, add a teaspoon of milk.
- Divide and color the dough. Split the dough into two equal halves. Add orange gel food coloring to one half and black gel food coloring to the other. Knead the color in with your hands—it’s the fastest way and you can feel when it’s evenly distributed. Start with a small amount of coloring and add more until you’re happy with the shade. For black, you’ll need more than you think. Don’t be shy with it.
- Roll out the dough. On a lightly floured surface, roll each color to about ¼-inch thickness. Use even pressure so the cookies bake uniformly. If the dough sticks, dust your rolling pin with a little flour. I keep a small bowl of flour nearby just for this.
- Cut out your shapes. Dip your cookie cutters in flour before each cut to prevent sticking. Press firmly and lift straight up. Reroll the scraps and cut more shapes—you can usually get two rounds of rerolls before the dough gets tough.
- Bake the cookies. Place them on the prepared baking sheets about 2 inches apart—they spread a little. Bake for 8-10 minutes, rotating the pans halfway through. The edges should be just barely golden. The centers will look slightly underdone—that’s perfect. They’ll continue cooking on the hot pan.
- Cool completely. Let the cookies sit on the baking sheet for 5 minutes, then transfer to a wire rack. Don’t rush this step. If you try to glaze warm cookies, the glaze will just slide right off and make a mess. Ask me how I know.
- Make the glaze. Whisk together the powdered sugar, milk, and vanilla until smooth. It should be thick but pourable—think honey consistency. Add more milk if it’s too thick, more sugar if it’s too thin.
- Decorate your cookies. Dip the tops of cooled cookies into the glaze or use a piping bag to drizzle it on. Add sprinkles immediately before the glaze sets. Let them dry on the cooling rack for about 30 minutes. The glaze will harden into a beautiful, glossy finish.
Cooking Tips & Techniques
After twelve batches of these cookies, I’ve collected a few tricks that make all the difference. Let me save you some trial and error.
Don’t skip the room-temperature egg. I know it seems fussy, but cold eggs can make your butter seize up and create a lumpy dough. If you forgot to take your egg out ahead of time, place it in a bowl of warm water for 5 minutes. Works like a charm.
Watch your bake time like a hawk. Sugar cookies go from perfect to overdone in about 60 seconds. I start checking at 8 minutes. The cookies should look set around the edges but still soft in the center. They’ll firm up as they cool. I once walked away to answer a text and came back to cookies that could have doubled as frisbees.
Use gel food coloring, not liquid. This is non-negotiable for vibrant colors. Liquid food coloring adds too much moisture and can throw off your dough consistency. Gel colors are concentrated and won’t affect the texture. Plus, they give you that intense orange and deep black that makes these cookies so eye-catching.
Chill your dough if you have time. I said no chilling required, and that’s true—but if you can spare 20 minutes in the fridge, the cookies will hold their shape even better. Especially the black ones—black dough tends to soften faster because of the extra coloring.
Keep your workspace cool. Warm hands and warm kitchens are the enemy of good sugar cookies. If the dough starts getting sticky, pop it in the fridge for 10 minutes. I’ve been known to run my hands under cold water before handling the dough on hot days.
Multitask strategically. While one batch is baking, roll out the next. While the glaze is setting, clean up your workspace. This recipe moves fast, so staying organized helps everything feel manageable.
Variations & Adaptations
One of the best things about this recipe is how easy it is to make it your own. Here are some of my favorite twists:
Gluten-Free Version: Swap the all-purpose flour for a 1:1 gluten-free baking flour blend. I’ve had great luck with Bob’s Red Mill. Add an extra tablespoon of milk since gluten-free flours tend to absorb more moisture. The texture will be slightly more tender, but still delicious.
Vegan Option: Use vegan butter (I like Earth Balance) and a flax egg (1 tablespoon ground flaxseed mixed with 3 tablespoons water, let sit for 5 minutes). The cookies will be a little less crispy but still totally satisfying. Use plant-based milk in the glaze.
Flavor Twists: Add ½ teaspoon of almond extract along with the vanilla for a subtle nutty flavor. Or try 1 teaspoon of orange zest in the orange dough for an extra pop of citrus. I made a batch with cinnamon once, and they tasted like autumn in cookie form.
Different Colors: Who says you have to stick with orange and black? Try purple and green for a witchy vibe, or red and black for a more dramatic look. You could even make a rainbow batch for a non-Halloween party.
No Cookie Cutters? No problem! Roll the dough into logs, chill, and slice into rounds. Or use a knife to cut freehand shapes—they’ll look rustic and charming. I made a batch of ghost shapes just by cutting circles and pinching the tops. Imperfect cookies have personality.
Extra Spooky: Add black sanding sugar on top of the glaze for a sparkly finish. Or press candy eyeballs into the glaze before it sets. My niece went absolutely wild for the ones with googly eyes—she called them “monster cookies.”
Serving & Storage Suggestions
These cookies are best served at room temperature, ideally within a day or two of baking. The glaze stays glossy and the cookies maintain that perfect texture—crisp on the outside, soft in the middle.
For a Halloween party, arrange them on a platter with some orange and black napkins. They look amazing next to a bowl of candy corn or alongside a pitcher of apple cider. I like to stack them in a mason jar for a cute, rustic presentation that’s easy for guests to grab.
They pair beautifully with a hot cup of coffee or a glass of cold milk. For a grown-up twist, serve them with a warm spiced latte or even a pumpkin beer—the sweetness of the cookies balances the bitterness beautifully.
Storage: Keep your cookies in an airtight container at room temperature for up to 5 days. Layer them between sheets of parchment paper to prevent the glaze from sticking. If you’re stacking different colors, the black dye can sometimes transfer—so keep similar colors together if you’re worried about that.
Freezing: These cookies freeze like a dream. Freeze unglazed cookies in a single layer on a baking sheet, then transfer to a freezer-safe bag for up to 3 months. When you’re ready to serve, thaw at room temperature and glaze fresh. I always keep a batch in the freezer for surprise Halloween visitors.
Reheating: If you like your cookies warm, pop them in a 300°F oven for 3-4 minutes. Don’t microwave them—the glaze will get sticky and weird. Trust me on this one.
One thing I love about these cookies is that the flavors actually get better after a day. The vanilla and butter meld together, and the texture softens just a touch. They’re still delicious on day one, but day two is where the magic really happens.
Nutritional Information & Benefits
Let’s be real—these are cookies, not health food. But that doesn’t mean they can’t be part of a balanced lifestyle. Each cookie (about 2 inches in diameter, with glaze) contains approximately:
- Calories: 120-140
- Fat: 6-7g
- Carbohydrates: 16-18g
- Sugar: 10-12g
- Protein: 1-2g
The butter provides a small amount of vitamin A, and the egg adds a bit of protein. If you use whole wheat pastry flour instead of all-purpose, you’ll get a little more fiber—though the texture will be slightly denser.
For health-minded readers, here’s my perspective: these cookies are about joy, not nutrition. They’re a treat for a special occasion, made with real ingredients that you can feel good about. No preservatives, no artificial junk—just butter, sugar, flour, and a little food coloring. In a world full of processed snacks, there’s something wholesome about baking from scratch, even if the final product is pure indulgence.
If you’re watching your sugar intake, you can reduce the glaze or skip it entirely. The cookies are plenty sweet on their own. Or make smaller cookies—mini versions are perfect for portion control and they bake even faster.
Conclusion
These Easy Orange and Black Halloween Sugar Cookies are more than just a recipe—they’re a little piece of that bakery magic I’ve been chasing for two years. They’re the cookies that make Halloween feel special, the ones that get devoured at parties, the ones that make kids’ eyes light up and adults smile despite themselves.
What I love most about this recipe is how forgiving it is. You don’t need to be a professional baker to pull it off. You just need a little patience, a little creativity, and a willingness to get food coloring on your hands. And honestly? That’s the fun part. Baking should feel playful, not stressful.
So go ahead—make a mess, lick the spoon, and eat a few cookies while they’re still warm. That’s what Halloween is all about. And when you make these, I’d love to hear how they turned out. Drop a comment below and tell me about your favorite Halloween memory, or share a photo of your cookies. There’s nothing better than seeing these spooky little treats bring joy to someone else’s kitchen.
Happy Halloween, friend. Now go bake something magical.
Frequently Asked Questions
Can I make the dough ahead of time?
Absolutely! You can prepare the dough, wrap it tightly in plastic wrap, and refrigerate for up to 3 days. Let it sit at room temperature for about 10 minutes before rolling—it’ll be easier to work with when it’s slightly softened.
Why did my cookies spread too much?
This usually happens when the butter is too soft or the dough is too warm. Make sure your butter is softened but not melted, and chill the cut-out cookies on the baking sheet for 10 minutes before baking if your kitchen is warm.
Can I use natural food coloring?
You can, but the colors won’t be as vibrant. Natural orange from annatto or turmeric tends to be more muted, and natural black is really hard to achieve—it usually comes out more like dark gray. For that intense Halloween look, gel colors are your best bet.
How do I get clean edges on my cut-out cookies?
Dip your cookie cutters in flour before each use, and press straight down without twisting. Twisting can seal the edges and prevent even baking. Also, make sure your dough is evenly rolled so the cookies bake at the same rate.
Can I double this recipe?
Yes! This recipe doubles beautifully. Just make sure your mixing bowl is big enough to handle the extra dough. You might need to bake in batches, but the dough holds up well. I regularly make double batches for Halloween parties and they always disappear fast.
Pin This Recipe!

Easy Orange & Black Halloween Sugar Cookies Recipe
These Easy Orange and Black Halloween Sugar Cookies are a perfect recreation of bakery magic, with a soft-but-snappy texture and vibrant Halloween colors. Quick and easy to make with simple ingredients, they’re the ultimate crowd-pleaser for any spooky celebration.
- Prep Time: 20 minutes
- Cook Time: 10 minutes
- Total Time: 45 minutes
- Yield: 24 servings 1x
- Category: Dessert
- Cuisine: American
Ingredients
- 1 cup (226g) unsalted butter, softened
- 1 cup (200g) granulated sugar
- 1 large egg, room temperature
- 2 teaspoons vanilla extract
- 2 ½ cups (312g) all-purpose flour
- ½ teaspoon baking powder
- ½ teaspoon salt
- Orange gel food coloring
- Black gel food coloring
- 1 cup (120g) powdered sugar
- 2–3 tablespoons milk
- ½ teaspoon vanilla extract
- Sprinkles or sanding sugar (optional)
Instructions
- Preheat your oven to 375°F (190°C). Line two baking sheets with parchment paper or silicone mats.
- Cream the butter and sugar together: In a large bowl, beat the softened butter and granulated sugar until light and fluffy—about 3-4 minutes with a mixer on medium speed. Scrape down the sides of the bowl halfway through.
- Add the egg and vanilla: Crack in the room-temperature egg and pour in the vanilla extract. Beat on low until just combined.
- Mix the dry ingredients separately: In another bowl, whisk together the flour, baking powder, and salt.
- Combine wet and dry ingredients: Gradually add the flour mixture to the butter mixture, mixing on low speed. Stop as soon as the dough comes together—no white streaks, but also no overmixing.
- Divide and color the dough: Split the dough into two equal halves. Add orange gel food coloring to one half and black gel food coloring to the other. Knead the color in with your hands until evenly distributed.
- Roll out the dough: On a lightly floured surface, roll each color to about ¼-inch thickness using even pressure.
- Cut out your shapes: Dip your cookie cutters in flour before each cut to prevent sticking. Press firmly and lift straight up. Reroll the scraps and cut more shapes.
- Bake the cookies: Place them on the prepared baking sheets about 2 inches apart. Bake for 8-10 minutes, rotating the pans halfway through. The edges should be just barely golden; centers will look slightly underdone.
- Cool completely: Let the cookies sit on the baking sheet for 5 minutes, then transfer to a wire rack to cool completely.
- Make the glaze: Whisk together the powdered sugar, milk, and vanilla until smooth. It should be thick but pourable—think honey consistency.
- Decorate your cookies: Dip the tops of cooled cookies into the glaze or use a piping bag to drizzle it on. Add sprinkles immediately before the glaze sets. Let them dry on the cooling rack for about 30 minutes.
Notes
Use gel food coloring for vibrant colors. No chilling required, but chilling the cut-out cookies for 10 minutes before baking helps them hold their shape. Start checking cookies at 8 minutes to avoid overbaking. The glaze sets in about 30 minutes. Store in an airtight container at room temperature for up to 5 days. Freeze unglazed cookies for up to 3 months.
Nutrition
- Serving Size: 1 cookie (2-inch dia
- Calories: 130
- Sugar: 11
- Sodium: 75
- Fat: 6.5
- Saturated Fat: 4
- Carbohydrates: 17
- Protein: 1.5
Keywords: Halloween sugar cookies, orange and black cookies, easy sugar cookies, Halloween dessert, no-chill sugar cookies, spooky cookies


