The checkout clerk at the grocery store watched me wrestling with a bag of oranges that kept splitting open. I was two kids deep in a meltdown, my youngest was trying to climb out of the cart, and honestly, I was one wrong move away from just abandoning the whole trip. She didn’t say anything at first. She just rang up my bell peppers, set them aside, and then reached under her register for a little black marker. “You know what my mama used to do with these?” she asked, drawing a quick triangle on one orange pepper. “She’d carve little faces in them before stuffing them. Made us kids actually eat dinner on Halloween night.” She smiled, handed me the marker, and went back to scanning my groceries like she hadn’t just handed me a total lifesaver.
That conversation stuck with me. I mean, here was this simple, brilliant idea that turned a regular Tuesday night dinner into something the kids actually got excited about. No elaborate costumes, no themed plates, no sugar-fueled chaos before the candy even hit the table. Just a bell pepper with a face on it. And honestly, that’s the kind of Halloween win I can get behind.
So I tried it. I carved a few jack-o-lantern faces into orange bell peppers, stuffed them with my go-to ground beef and rice filling, and baked them up. The kids lost their minds. My oldest actually asked if we could have “Halloween peppers” every night. And the best part? It took maybe ten extra minutes to prep, and I didn’t have to buy a single special ingredient. Maybe you’ve been there—staring down a weeknight in late October, knowing the kids are hyped up on school party sugar, and you just need something, anything, that feels fun without being a whole production. These stuffed peppers are that thing. They’re the reason I keep making them year after year, and the reason I’m sharing them with you now.
Why You’ll Love This Recipe
Let me be real with you. I’ve tested this recipe about a dozen times across different weeknights, and it holds up every single time. Here’s why it’s become my go-to Halloween dinner:
- Quick & Easy: From start to finish, these are on the table in about 45 minutes. The active prep time is maybe 15 minutes, and the oven does the rest. Perfect for those nights when you’re racing against the school pickup clock.
- Simple Ingredients: You probably have most of this stuff in your pantry right now. Ground beef, rice, canned tomatoes, cheese, and bell peppers. No weird Halloween-themed products or specialty items required.
- Perfect for Halloween Weeknights: This is the dinner that keeps the fun going without the sugar crash. The kids get their spooky moment, and you get a balanced meal on the table. Win-win.
- Crowd-Pleaser: I’ve served these to picky eaters, adults who “don’t do theme dinners,” and my in-laws. Everyone loves them. The faces make them fun, but the filling is classic comfort food.
- Unbelievably Delicious: The bell peppers get tender and sweet in the oven, the filling is savory and cheesy, and that little roasted face just adds a whole new level of satisfaction. It’s comfort food with a side of charm.
What makes this recipe different from the rest? It’s the technique of pre-roasting the peppers just enough so they’re tender but still hold their shape. And the filling—I use a blend of ground beef and Italian sausage for extra flavor, plus a splash of Worcestershire sauce that just makes everything taste deeper. It’s not just another stuffed pepper recipe. It’s the one that makes you close your eyes after the first bite and think, “Okay, this is worth the extra five minutes of carving.”
This recipe is for those nights when you want to give your kids a little magic without losing your mind. It’s comfort food reimagined—spooky, simple, and soul-satisfying. Perfect for impressing your family without any stress.
What Ingredients You Will Need
This recipe uses simple, wholesome ingredients to deliver big flavor and that perfect Halloween vibe. Most of these are pantry staples, which is exactly what you need on a busy weeknight.
For the Bell Peppers
- 4 large orange bell peppers – Orange is the classic jack-o-lantern color, but you can use yellow or red too. Look for ones that are squat and round, not too tall, so they sit flat in the baking dish.
- 1 tablespoon olive oil – For brushing the peppers before roasting. Helps them get that nice, tender skin.
For the Filling
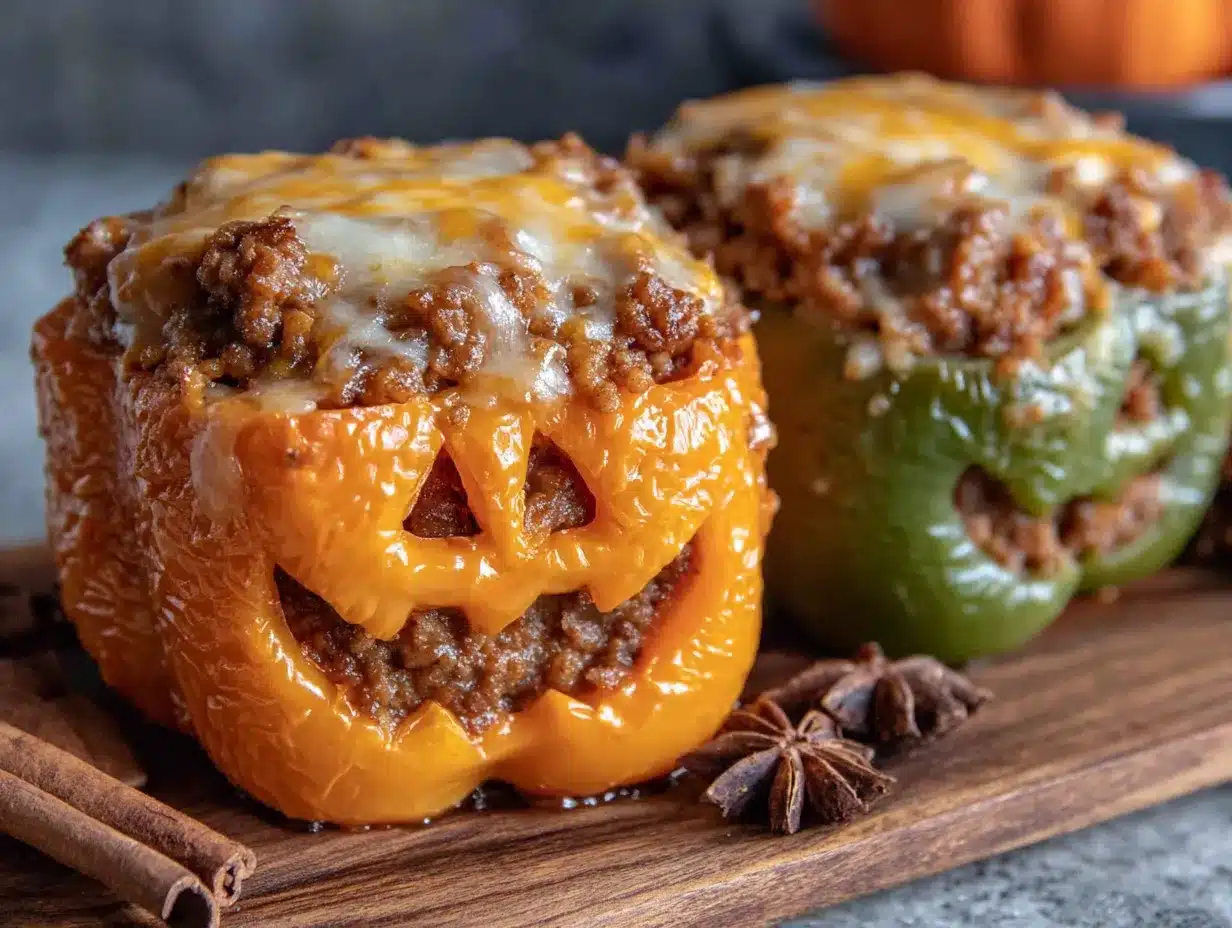
- 1 pound ground beef (80/20 blend) – I prefer this for flavor, but ground turkey or chicken works fine too. If you use leaner meat, add a splash of olive oil to the pan.
- 1/2 pound Italian sausage (casings removed) – This is my secret ingredient. It adds so much depth and a little spice. You can use all ground beef if you prefer.
- 1 cup cooked rice (white or brown) – A great way to use up leftover rice from earlier in the week. Quinoa works too.
- 1 small onion, diced – Yellow or white onion works best.
- 2 cloves garlic, minced – Fresh garlic is best, but jarred minced garlic works in a pinch.
- 1 can (15 ounces) diced tomatoes, drained – I like fire-roasted for extra flavor. You can also use crushed tomatoes if that’s what you have.
- 1 cup shredded mozzarella cheese – Plus extra for topping. Cheddar or a Mexican blend works great too.
- 1 teaspoon Worcestershire sauce – This little splash adds umami and makes the filling taste like it simmered all day. Don’t skip it.
- 1 teaspoon dried oregano – Or Italian seasoning if that’s what’s in your cabinet.
- 1/2 teaspoon salt – Adjust to taste.
- 1/4 teaspoon black pepper – Freshly ground if you have it.
For the Jack-O-Lantern Faces
- 1 small paring knife – A sharp, small knife is key for clean cuts.
- Optional: Black olives or black beans – For making the faces extra visible. Slice olives into triangles for eyes and mouths. This is totally optional but looks super cute.
Ingredient Tips from My Kitchen
I recommend using Johnsonville or your favorite local brand for the Italian sausage—the fennel seeds in it really make a difference. For the rice, I often use a quick-cook brown rice that I make ahead on Sunday. If you’re dairy-free, use a plant-based mozzarella shreds; they melt surprisingly well. And for the bell peppers, try to find ones that are all roughly the same size so they cook evenly. I’ve learned this the hard way after one pepper came out mushy and another was still crunchy.
Equipment Needed
You don’t need a lot of fancy gear for this recipe, which is exactly how I like it on a busy weeknight. Here’s what you’ll need:
- Large baking dish (9×13 inches works perfectly) – Glass or ceramic is best. Metal works too, just keep an eye on the bottoms so they don’t burn.
- Large skillet – For browning the meat and onions. A cast-iron skillet is my favorite, but any large pan will do.
- Small paring knife – This is essential for carving the jack-o-lantern faces. A serrated knife can work, but a sharp paring knife gives you cleaner lines.
- Cutting board – Preferably one with a groove to catch any pepper juice.
- Mixing bowl – For combining the filling ingredients.
- Wooden spoon or spatula – For stirring the filling.
- Measuring cups and spoons – Standard set will do.
- Aluminum foil – For covering the dish during the first part of baking.
If you don’t have a paring knife, you can use a small, sharp steak knife. I’ve done it before in a pinch, and it works. Also, if you don’t have a 9×13 dish, you can use a large cast-iron skillet or even a rimmed baking sheet—just make sure the peppers are snug so they don’t tip over. And honestly, I’ve used a cheap $5 paring knife from the grocery store for years. You don’t need the fancy knife set. Just something sharp.
Preparation Method
Alright, let’s get cooking. This recipe comes together in about 45 minutes, and most of that is hands-off oven time. Here’s how I do it:
- Preheat your oven to 375°F (190°C). Get that going first so it’s hot when you’re ready.
- Cook your rice if you haven’t already. You need about 1 cup of cooked rice. I usually make a batch of brown rice on Sunday and use it throughout the week. If you’re starting from scratch, cook 1/3 cup of dry rice according to package directions. It takes about 15-20 minutes for white rice.
- Prep the bell peppers. Wash them and pat them dry. Using your paring knife, cut a small circle around the stem of each pepper, about 1.5 inches in diameter. Pull out the stem and seed pod. Shake out any loose seeds. Now, here’s the fun part: carve your jack-o-lantern faces. Cut triangles for eyes, a zigzag or crescent mouth, and maybe a little nose. Cut all the way through the pepper skin. Don’t worry if it’s not perfect—my first one looked like a sad potato, and the kids still loved it. Set the carved peppers aside.
- Brown the meat. Heat your large skillet over medium-high heat. Add the ground beef and Italian sausage (if using). Break it up with your wooden spoon and cook until browned, about 5-7 minutes. If there’s a lot of fat, drain most of it off, leaving about a tablespoon for flavor. I’ve forgotten to drain it before, and the filling was a little greasy. Still delicious, but draining makes it better.
- Sauté the aromatics. Add the diced onion to the skillet with the meat. Cook for 3-4 minutes until the onion is soft and translucent. Add the minced garlic and cook for another 30 seconds until fragrant. Your kitchen should smell amazing right now.
- Build the filling. Add the drained diced tomatoes, cooked rice, Worcestershire sauce, oregano, salt, and pepper to the skillet. Stir everything together and let it cook for 2-3 minutes so the flavors meld. Taste it and adjust the salt if needed. This is your moment to make it yours.
- Add the cheese. Remove the skillet from the heat and stir in 1 cup of shredded mozzarella. The residual heat will melt it into the filling. This is what makes the filling so creamy and delicious.
- Stuff the peppers. Place your carved peppers in the baking dish, sitting upright. If they wobble, you can trim a tiny slice off the bottom to make them flat. Spoon the filling into each pepper, packing it gently. Don’t overstuff—you want them to be full but not bursting. Top each pepper with a little extra shredded cheese. I use about 2 tablespoons per pepper.
- Bake covered. Cover the baking dish with aluminum foil and bake for 25 minutes. This steams the peppers and makes them tender without drying out the filling.
- Bake uncovered. Remove the foil and bake for another 10-15 minutes. The cheese on top should be melted and bubbly, and the peppers should be tender when pierced with a fork. If you want the cheese more golden, you can broil for the last 2 minutes. Watch it closely—I’ve burned the cheese more times than I care to admit.
- Rest and serve. Let the peppers rest for 5 minutes before serving. This helps them hold their shape when you plate them. Serve them as is, or with a side salad and some crusty bread.
A quick sensory cue: when the peppers are done, they should be tender but not collapsing. The skin will be slightly wrinkled and the cheese on top will be golden and bubbly. The smell is incredible—savory, slightly sweet from the peppers, and that warm oregano aroma. It’s the smell of a cozy Halloween night.
Cooking Tips & Techniques
I’ve made this recipe enough times to have a few tricks up my sleeve. Let me share what I’ve learned the hard way so you don’t have to.
Don’t overcook the peppers. This is my number one mistake. If you bake them too long, the peppers get mushy and lose their shape, and your jack-o-lantern faces just look sad. The 25 minutes covered plus 10-15 minutes uncovered is the sweet spot. If your peppers are on the smaller side, check them at the 20-minute mark.
Carve the faces after a quick pre-roast. I learned this from a friend who’s a professional chef. If you want really clean, crisp faces, roast the empty peppers (just the shells, no filling) at 375°F for 5-7 minutes first. This firms up the skin slightly, making it easier to carve without tearing. Then carve your faces and stuff them. It adds a few minutes but makes a big difference if you’re going for perfection.
Make the filling ahead. This is a huge time-saver on a busy weeknight. You can cook the filling up to two days in advance and keep it in the fridge. When you’re ready to eat, just carve the peppers, stuff them, and bake. The filling actually gets more flavorful as it sits. I’ve done this on a Sunday afternoon and then had dinner ready in 35 minutes on Halloween night.
Use a melon baller for the seeds. If you have one, it makes scooping out the seeds so much faster and cleaner than using a spoon. If you don’t, a regular teaspoon works fine. Just be gentle so you don’t tear the pepper.
Don’t skip the Worcestershire sauce. I know it’s a small ingredient, but it adds this deep, savory note that makes the filling taste like it cooked all day. I’ve made it without when I was out, and it was still good, but not as good. It’s worth the trip to the pantry.
Multitask like a pro. While the peppers are baking covered, you can make a quick salad or set the table. When you uncover them, that’s your cue to slice some bread or warm up a side. The timing works out perfectly if you plan ahead.
Variations & Adaptations
This recipe is super flexible. Here are some ways I’ve changed it up depending on what I have on hand or who I’m feeding:
Vegetarian Version
Skip the meat and use two cans of black beans (drained and rinsed) plus one cup of cooked quinoa instead of rice. Add a teaspoon of cumin and a pinch of smoked paprika to the filling. It’s hearty, protein-packed, and my vegetarian friends always ask for the recipe.
Low-Carb / Keto Version
Replace the rice with riced cauliflower. You can buy it frozen or grate a head of cauliflower yourself. Cook it in the skillet with the onions for 5 minutes before adding the other ingredients. It’s just as satisfying and cuts the carbs way down.
Spicy Version
Use hot Italian sausage instead of sweet, and add a diced jalapeño (seeds removed unless you want extra heat) when you cook the onions. Top the finished peppers with sliced fresh jalapeños and a drizzle of hot honey. My husband loves this version.
Cheese Lover’s Version
Add 1/2 cup of cream cheese to the filling along with the mozzarella. It makes the filling extra creamy and rich. Top with a mix of mozzarella and sharp cheddar for a golden, bubbly crust.
Make It a Freezer Meal
Assemble the stuffed peppers completely, but don’t bake them. Wrap each pepper tightly in plastic wrap, then place them in a freezer bag. They’ll keep for up to 3 months. To cook, thaw in the fridge overnight, then bake as directed, adding about 10 minutes to the covered baking time.
Serving & Storage Suggestions
These peppers are best served warm, right out of the oven. Let them rest for 5 minutes so the filling sets, then plate them with the jack-o-lantern face facing up. The faces are the star of the show, so make sure they’re visible.
What to serve with them: A simple green salad with a tangy vinaigrette cuts through the richness of the filling. Crusty bread or garlic bread is great for soaking up any juices in the bottom of the dish. If you’re feeling extra festive, serve them with a side of roasted pumpkin seeds or a small bowl of black bean soup.
For drinks: Adults will love a light red wine like a Pinot Noir or a crisp lager. For the kids, apple cider or sparkling water with a splash of cranberry juice feels special.
Storage: Leftover stuffed peppers keep well in the fridge for up to 4 days. Store them in an airtight container. The flavors actually get better as they sit—the peppers absorb more of the sauce and the filling becomes even more tender.
Reheating: The best way to reheat is in the oven at 350°F for 15-20 minutes, covered with foil. This keeps the peppers from drying out. You can also microwave them for 2-3 minutes, but the peppers will be softer. I’ve microwaved them at work for lunch and they’re still delicious, just not as pretty.
Freezing: You can freeze the baked peppers for up to 3 months. Let them cool completely, then wrap individually in plastic wrap and place in a freezer bag. To reheat, thaw in the fridge overnight and bake at 350°F for 20-25 minutes.
Nutritional Information & Benefits
Here’s the approximate nutritional breakdown per serving (one stuffed pepper):
- Calories: 420
- Protein: 32g
- Fat: 22g
- Carbohydrates: 24g
- Fiber: 4g
- Sugar: 8g
These numbers will vary depending on the exact ingredients you use, but this is a solid estimate for the recipe as written.
Health benefits: Bell peppers are packed with vitamin C—one pepper has more than an orange. They’re also a great source of vitamin A, which is great for eye health. The protein from the meat and cheese keeps you full and satisfied, and the rice provides steady energy. This is a balanced meal that doesn’t feel like a sacrifice.
Dietary considerations: This recipe is naturally gluten-free if you use gluten-free Worcestershire sauce (most are, but check the label). For a dairy-free version, use plant-based cheese and skip the Worcestershire (some brands contain anchovies). It’s also nut-free and egg-free as written.
Potential allergens: Dairy (cheese), and the Worcestershire sauce may contain anchovies (fish). If you’re serving someone with allergies, adjust accordingly.
Honestly, I love that this recipe feels indulgent but is actually pretty balanced. It’s the kind of meal that makes you feel good about feeding your family, even on a chaotic Halloween night.
Conclusion
So there you have it—Easy Jack-o-Lantern Stuffed Bell Peppers that are fun, fast, and genuinely delicious. This recipe has saved my sanity on more Halloween weeknights than I can count. It’s the dinner that makes my kids cheer, my husband happy, and me feel like I actually have my act together, even when I definitely don’t.
I hope you make these your own. Carve silly faces, try different fillings, get the kids involved in the carving (with supervision, of course). The beauty of this recipe is that it’s a canvas for your own creativity. And honestly, even if the faces come out a little wonky, they’ll still be delicious. That’s the whole point.
I’d love to hear how yours turn out. Drop a comment below and tell me what faces your kids carved, or what filling variation you tried. Share a photo on Pinterest and tag me—I love seeing your creations. And if you have a friend who’s dreading Halloween dinner, send them this recipe. Trust me, they’ll thank you.
Happy Halloween, and happy cooking. You’ve got this.
Frequently Asked Questions
Can I use other colors of bell peppers?
Absolutely! Orange is the classic for jack-o-lanterns, but yellow, red, or even green peppers work fine. Just know that green peppers are less sweet and have a slightly bitter edge. Red peppers are the sweetest. Mix and match for a colorful platter.
How do I keep the peppers from tipping over in the dish?
If your peppers are wobbly, trim a thin slice off the bottom to create a flat surface. Don’t cut too much, or you’ll create a hole. You can also nestle them close together in the dish so they support each other. A snug fit is your friend here.
Can I make these in an air fryer?
Yes, you can! Preheat your air fryer to 350°F. Cook the stuffed peppers for 15-18 minutes, checking for doneness. The air fryer will give you a slightly crispier pepper skin and faster cooking time. Just make sure your peppers fit without touching the heating element.
My kids are picky eaters. Will they like these?
I can’t promise anything, but I’ve had great success with picky eaters. The fun faces make them curious, and the filling is basically a familiar taco-style meat and rice mixture. If your kids are extra picky, you can serve the filling on the side and let them assemble their own “deconstructed” version.
Can I use leftover filling for something else?
Definitely! Leftover filling is amazing in tacos, on top of a baked potato, or mixed into a quick pasta sauce. It also freezes well for up to 3 months. I’ve even used it as a topping for nachos on movie night. Waste not, want not.
Pin This Recipe!
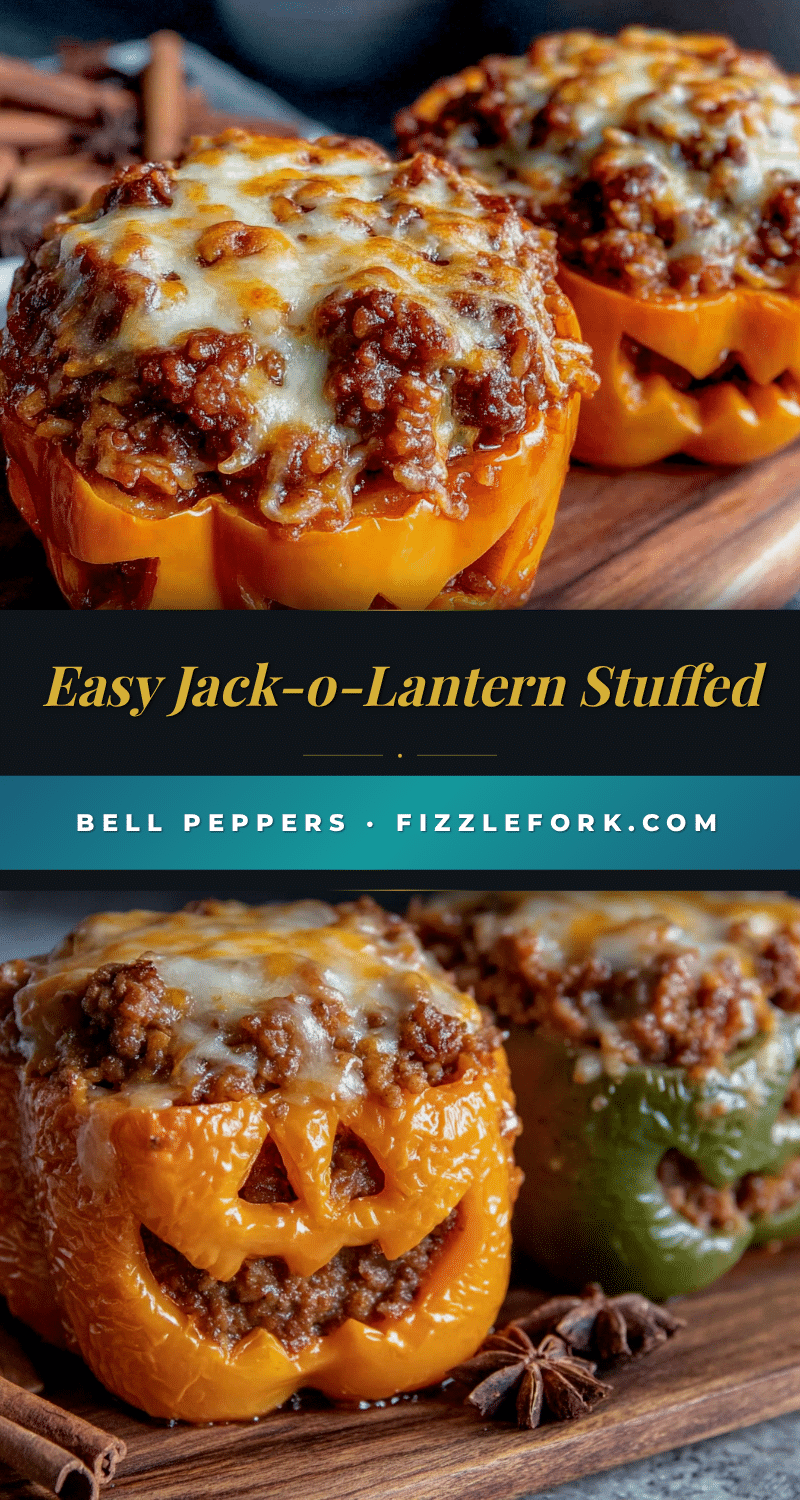
Easy Jack-o-Lantern Stuffed Bell Peppers: Best Halloween Dinner
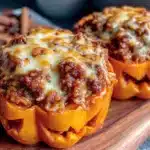
Fun and festive Halloween dinner featuring bell peppers carved like jack-o-lanterns and stuffed with a savory ground beef and rice filling. Ready in about 45 minutes with simple ingredients.
- Prep Time: 15 minutes
- Cook Time: 30 minutes
- Total Time: 45 minutes
- Yield: 4 servings 1x
- Category: Main Course
- Cuisine: American
Ingredients
- 4 large orange bell peppers
- 1 tablespoon olive oil
- 1 pound ground beef (80/20 blend)
- 1/2 pound Italian sausage (casings removed)
- 1 cup cooked rice (white or brown)
- 1 small onion, diced
- 2 cloves garlic, minced
- 1 can (15 ounces) diced tomatoes, drained
- 1 cup shredded mozzarella cheese, plus extra for topping
- 1 teaspoon Worcestershire sauce
- 1 teaspoon dried oregano
- 1/2 teaspoon salt
- 1/4 teaspoon black pepper
- Optional: black olives or black beans for faces
Instructions
- Preheat your oven to 375°F (190°C).
- Cook your rice if you haven’t already; you need about 1 cup of cooked rice.
- Wash and dry the bell peppers. Cut a small circle around the stem, about 1.5 inches in diameter, and remove the stem and seed pod. Shake out loose seeds. Carve jack-o-lantern faces into the peppers using a small paring knife.
- Heat a large skillet over medium-high heat. Add the ground beef and Italian sausage (if using). Break up the meat and cook until browned, about 5-7 minutes. Drain excess fat, leaving about 1 tablespoon.
- Add the diced onion to the skillet and cook for 3-4 minutes until soft. Add the minced garlic and cook for 30 seconds until fragrant.
- Add the drained diced tomatoes, cooked rice, Worcestershire sauce, oregano, salt, and pepper to the skillet. Stir and cook for 2-3 minutes. Taste and adjust seasoning.
- Remove the skillet from heat and stir in 1 cup of shredded mozzarella until melted.
- Place the carved peppers upright in a 9×13-inch baking dish. Spoon the filling into each pepper, packing gently. Top each with extra shredded cheese (about 2 tablespoons per pepper).
- Cover the dish with aluminum foil and bake for 25 minutes.
- Remove the foil and bake for another 10-15 minutes, until the cheese is melted and bubbly and the peppers are tender. Optionally, broil for the last 2 minutes for a golden top.
- Let the peppers rest for 5 minutes before serving.
Notes
For cleaner faces, pre-roast empty pepper shells at 375°F for 5-7 minutes before carving. The filling can be made up to 2 days ahead. To freeze, assemble unbaked peppers and freeze for up to 3 months; thaw overnight and bake as directed, adding 10 minutes to covered time.
Nutrition
- Serving Size: 1 stuffed pepper
- Calories: 420
- Sugar: 8
- Sodium: 780
- Fat: 22
- Saturated Fat: 9
- Carbohydrates: 24
- Fiber: 4
- Protein: 32
Keywords: Halloween dinner, stuffed bell peppers, jack-o-lantern peppers, easy weeknight dinner, ground beef recipe, kid-friendly dinner


