There used to be a tiny, red-brick café tucked behind a used bookstore in Portland that made a gluten-free stuffing so good, it ruined all other stuffings for me. When they closed their doors three years ago—just a handwritten sign in the window saying “Thanks for the memories”—I actually felt a little pang of grief. I mean, I know that sounds dramatic for a side dish. But you know that feeling when you lose access to something that made a holiday feel right?
After seven tries—and one truly sad batch that tasted like cardboard soaked in chicken broth—I finally got it. This quick gluten-free Thanksgiving stuffing with fresh herbs is the exact recreation of that café’s magic, and honestly, it’s better than most gluten-filled versions I’ve had since. Let me tell you, the secret isn’t about what you take out. It’s about what you add. And how fast you can get it on the table.
The first time I made this for my family, my dad—who has zero patience for “healthy swaps”—asked for seconds before I could even sit down. That’s when I knew this recipe had legs. Maybe you’ve been there, staring at a box of gluten-free bread cubes and wondering if they’ll ever taste like the real thing. I promise you, this is different. This is the stuffing that makes people forget it’s gluten-free. And it comes together in thirty minutes flat, which is basically a Thanksgiving miracle.
Why You’ll Love This Recipe
This isn’t just another gluten-free stuffing recipe that leaves you feeling disappointed. I’ve tested this version more times than I care to count, tweaking the herb ratios and bread-to-broth balance until it hit that sweet spot between crispy edges and tender, savory middle. Here’s why this one actually works:
- Quick & Easy: From start to table in under 30 minutes. No pre-toasting bread, no complicated steps. Perfect for the chaos of Thanksgiving morning when the turkey’s in the oven and you’re juggling three other sides.
- Simple Ingredients: You’ll find everything at a regular grocery store. No weird specialty flours or hard-to-find items. The gluten-free bread aisle is your friend here.
- Perfect for Thanksgiving: This stuffing holds its own next to a golden turkey and all the classic sides. It’s the dish that gluten-free guests actually get excited about.
- Crowd-Pleaser: I’ve served this to gluten-eaters who didn’t even notice the difference. That’s the real test, right?
- Unbelievably Delicious: The combination of fresh rosemary, sage, and thyme with perfectly toasted bread cubes creates that nostalgic, savory flavor you crave. The texture is spot-on—crispy on top, soft and steamy underneath.
What makes this recipe different from every other gluten-free stuffing out there? It’s the technique. I figured out that skipping the pre-toasting step actually works better if you use the right bread and let it sit for five minutes after adding the broth. That little rest period lets the bread absorb all that herby goodness without turning into mush. It’s a game-changer, honestly.
This recipe is the kind that makes you close your eyes after the first bite. It’s comfort food reimagined—faster, gluten-free, but with the same soul-soothing satisfaction that makes Thanksgiving dinner feel complete. Perfect for impressing guests without stress, or turning a simple Thursday night meal into something memorable.
What Ingredients You Will Need
This recipe uses simple, wholesome ingredients to deliver bold flavor and satisfying texture without the fuss. Most of these are pantry staples or easy to find at any grocery store, which is exactly what you need when you’re already planning a big holiday meal.
- For the bread base:
- 1 loaf (about 16 ounces) day-old gluten-free bread, cut into 1-inch cubes (I prefer Canyon Bakehouse or Schar brand for the best texture—they hold up without getting gummy)
- 3 tablespoons unsalted butter (or dairy-free butter if needed), melted
- For the savory foundation:
- 1 medium yellow onion, finely diced (about 1 cup)
- 3 celery stalks, diced (about 1 cup) (adds that classic crunch)
- 3 cloves garlic, minced
- 2 tablespoons olive oil
- For the herb blend:
- 2 tablespoons fresh sage, finely chopped (this is non-negotiable—dried just isn’t the same)
- 1 tablespoon fresh rosemary, finely chopped
- 1 tablespoon fresh thyme leaves (strip them off the stems—it’s worth the five minutes)
- 2 tablespoons fresh parsley, chopped (for a fresh finish)
- For the liquid and seasoning:
- 1 ½ cups low-sodium chicken or vegetable broth (warm—this helps absorption)
- 1 large egg, lightly beaten (acts as a binder since gluten-free bread is fragile)
- ½ teaspoon salt
- ¼ teaspoon black pepper
- ¼ teaspoon poultry seasoning (optional, but I love the extra depth)
A few notes from my testing: Look for a gluten-free bread that’s sturdy and not too sweet. Some brands are more cake-like, and those will turn into paste. I’ve had the best luck with sliced sandwich bread that’s been left out overnight to dry slightly. If you’re in a pinch, you can spread the cubes on a baking sheet and bake at 300°F for 10 minutes to dry them out.
For substitutions: Use dairy-free butter and vegetable broth to make this vegan (just skip the egg or use a flax egg). Fresh herbs really do make a difference here, but if you’re in a bind, use 1 teaspoon each of dried sage, rosemary, and thyme instead. Just add them to the onion mixture while it cooks to rehydrate them.
Equipment Needed
You don’t need a fancy kitchen to pull this off. Here’s what you’ll need:
- Large skillet or sauté pan (12-inch works best for even cooking)
- Large mixing bowl
- Sharp knife and cutting board
- 9×13-inch baking dish (or similar size casserole dish)
- Wooden spoon or spatula
- Measuring cups and spoons
- Small bowl for beating the egg
If you don’t have a 9×13 dish, an 8×8 or a 10-inch cast iron skillet works too—just adjust the baking time slightly. I’ve used my trusty old Pyrex for years, and it’s never let me down. No need for anything fancy here.
Preparation Method
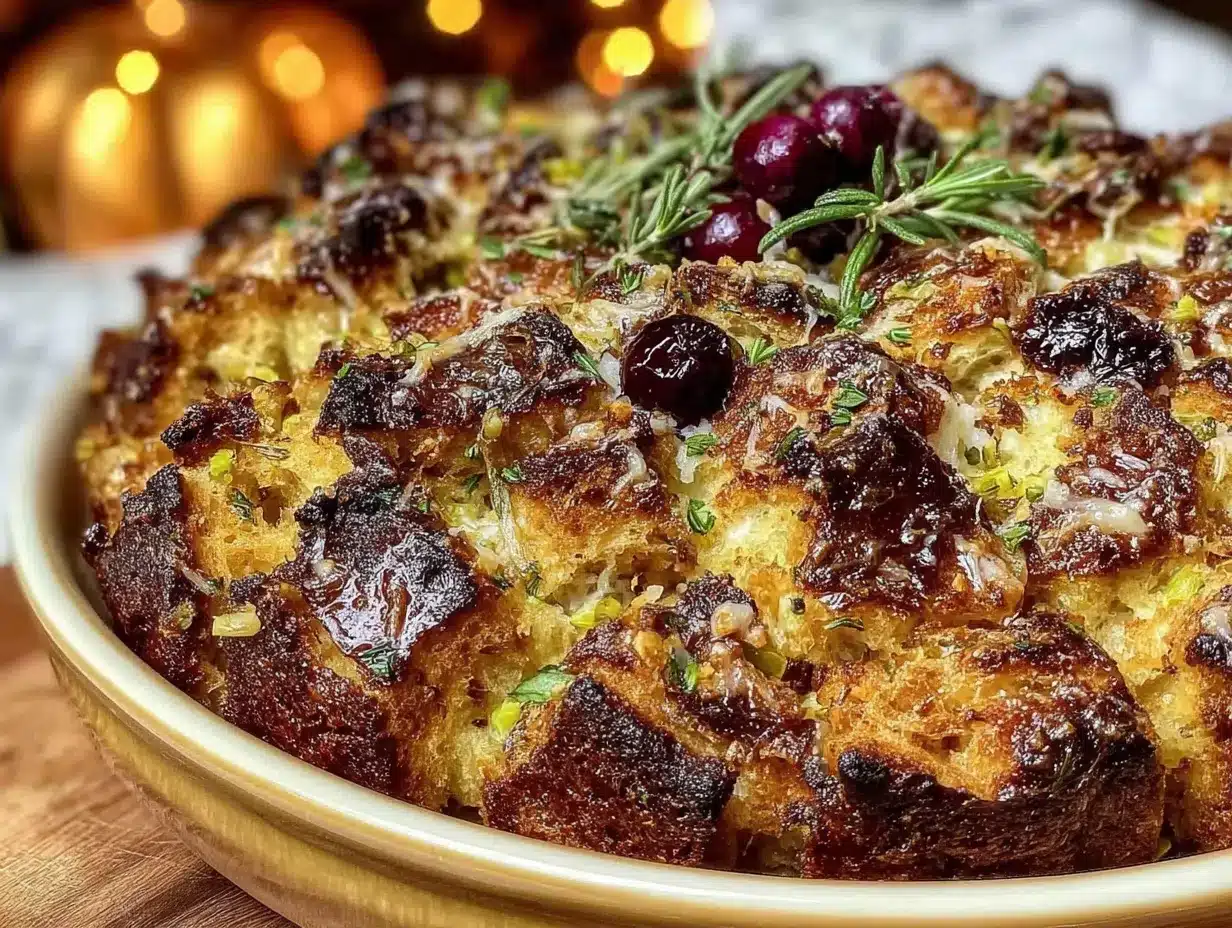
Let’s get this stuffing on the table. The whole thing takes about 30 minutes from start to finish, and I’ve broken it down so you can multitask like a pro.
- Preheat your oven to 375°F (190°C). While it’s heating, spread your gluten-free bread cubes on a baking sheet. Bake for 5-7 minutes, just until they’re slightly dry and barely golden. Don’t overdo it—you want them dry, not hard. Set aside in a large mixing bowl.
- Heat the olive oil and 1 tablespoon of butter in a large skillet over medium heat. Add the diced onion and celery. Cook for 5-6 minutes, stirring occasionally, until the onions are translucent and the celery has softened. You’ll smell that sweet, savory aroma filling your kitchen—that’s the good stuff.
- Add the minced garlic and fresh herbs (sage, rosemary, and thyme). Cook for another minute, stirring constantly. The garlic should be fragrant but not brown. If it starts to brown, turn the heat down. I learned this the hard way after burning three batches of garlic in a row. Trust me, it’s worth the extra attention.
- Pour the warm broth into the skillet with the onion mixture. Stir to combine and let it come to a gentle simmer. Turn off the heat. This step infuses the broth with all those herby flavors before it even touches the bread.
- Pour the warm broth mixture over the bread cubes in the large bowl. Add the beaten egg, salt, pepper, and poultry seasoning if using. Gently fold everything together with a spatula. Be careful not to overmix—you want the bread to absorb the liquid, not turn into paste. Let it sit for 5 minutes. This is the magic rest period I mentioned earlier.
- Melt the remaining 2 tablespoons of butter and drizzle it over the stuffing mixture. Fold once or twice to distribute. Transfer the mixture to your greased 9×13 baking dish and spread it into an even layer.
- Bake for 20-25 minutes, until the top is golden brown and crispy. The edges should be slightly darker and crunchy—that’s the best part. Let it rest for 5 minutes before serving. The texture will set up perfectly during this time.
A quick note: Your stuffing should look moist but not wet when it goes into the oven. If you see liquid pooling at the bottom of the dish, you’ve added too much broth. Next time, start with 1 ¼ cups and add more if needed. Every gluten-free bread absorbs differently, so trust your eyes over the recipe.
Cooking Tips & Techniques
After making this stuffing more times than I can count, I’ve picked up a few tricks that make a real difference. Let me share what I’ve learned—including the mistakes so you don’t have to make them yourself.
Don’t skip the bread-drying step. I know it feels like an extra thing to do, but gluten-free bread is naturally more moist than regular bread. If you skip drying it out, you’ll end up with stuffing that’s gummy and dense. The 5-7 minutes in the oven makes all the difference between sad stuffing and spectacular stuffing.
Warm your broth. Cold broth doesn’t absorb well into gluten-free bread. It just sits there, making the bread soggy on the outside and dry in the middle. Heat it in the microwave for 60 seconds or in a small saucepan before adding it to the skillet. This was the single biggest improvement I made in my testing.
Let it rest before baking. That 5-minute rest after mixing isn’t just me being dramatic. It gives the bread time to soak up all the flavorful liquid evenly. I once skipped this step because I was in a hurry, and the stuffing came out uneven—some parts were dry, others were wet. Never again.
Watch your oven temperature. Every oven runs a little differently. If your stuffing is browning too fast on top but isn’t heated through, tent it loosely with foil for the last 10 minutes. If it’s not browning at all, move it to the top rack for the last 5 minutes.
Make it ahead. You can assemble the stuffing up to 24 hours in advance. Just cover it and refrigerate. Add 10 minutes to the baking time if starting from cold. This is a lifesaver on Thanksgiving morning when you’re trying to do seventeen things at once.
Variations & Adaptations
One of the best things about this recipe is how flexible it is. Here are a few ways I’ve adapted it over the years:
- Vegan Version: Swap the butter for vegan butter, use vegetable broth, and replace the egg with a flax egg (1 tablespoon ground flaxseed mixed with 3 tablespoons water, let sit for 5 minutes). It works beautifully—the flax adds a bit of nuttiness that actually complements the herbs.
- Sausage Stuffing: Brown ½ pound of gluten-free Italian sausage (casings removed) in the skillet before adding the onion and celery. Drain excess fat, then proceed with the recipe. This adds richness and makes it more of a main dish. My brother-in-law requests this version every year.
- Mushroom & Leek Version: Sauté 8 ounces of sliced cremini mushrooms with the onion and celery, and swap half the onion for chopped leeks. The earthy mushrooms pair perfectly with the fresh herbs. This is my personal favorite for a non-traditional Thanksgiving.
- Apple & Cranberry: Add 1 diced apple and ½ cup dried cranberries to the onion mixture during the last 2 minutes of cooking. The sweetness balances the savory herbs beautifully. Great for when you want a hint of sweetness without going full dessert.
- Herb Swap: No fresh herbs? Use 1 teaspoon each of dried sage, rosemary, and thyme. Add them to the skillet with the garlic so they rehydrate and release their oils. It’s not quite the same as fresh, but it works in a pinch.
Serving & Storage Suggestions
This stuffing is best served hot, right out of the oven, when the top is still crispy and the inside is steamy and fragrant. Spoon it onto plates alongside your turkey, mashed potatoes, and cranberry sauce. I like to garnish with a sprinkle of fresh parsley for color.
For leftovers: Store in an airtight container in the refrigerator for up to 4 days. The flavors actually meld together overnight, so day-two stuffing is pretty amazing. To reheat, spread it on a baking sheet and warm in a 350°F oven for 10-15 minutes. The microwave works in a pinch, but the oven restores some of that crispy texture.
Freezing: This stuffing freezes surprisingly well. Portion it into freezer-safe containers and freeze for up to 3 months. Thaw overnight in the refrigerator, then reheat in the oven. I’ve done this for pre-Thanksgiving prep, and it’s a huge time-saver.
A note on texture: The stuffing will be slightly softer on day two, but the flavor is even better. If you’re serving it as leftovers and want to revive the crunch, spread it thin on a baking sheet and broil for 2-3 minutes. Watch it carefully—broilers work fast.
Nutritional Information & Benefits
Here’s the approximate nutritional breakdown per serving (based on 8 servings):
- Calories: 195
- Fat: 9g
- Carbohydrates: 24g
- Fiber: 3g
- Protein: 5g
- Sodium: 410mg
This stuffing is naturally gluten-free, making it safe for those with celiac disease or gluten sensitivity. The fresh herbs aren’t just for flavor—sage has anti-inflammatory properties, rosemary is rich in antioxidants, and thyme is packed with vitamin C. The celery adds fiber and crunch without many calories.
If you’re watching your sodium, use low-sodium broth and skip the added salt. You can also reduce the butter to 2 tablespoons without sacrificing too much flavor. This version is lighter than traditional stuffing but still feels indulgent enough for a holiday table.
Conclusion
This quick gluten-free Thanksgiving stuffing with fresh herbs is proof that gluten-free doesn’t mean flavor-free. It’s the dish that brings everyone to the table—gluten-free or not—and makes them ask for the recipe. After years of testing and tweaking, I can honestly say this is the version I’m proud to serve at my own Thanksgiving table.
I’d love to hear how it turns out for you. Did you add sausage? Try the mushroom version? Forget the egg and improvise? Drop a comment below and let me know. Your tweaks might inspire someone else’s holiday dinner. And if you snap a photo, tag me—I love seeing these creations in the wild.
Here’s to stress-free holidays, full bellies, and stuffing that actually tastes like the real deal. You’ve got this. Now go make some memories.
Frequently Asked Questions
Can I use any gluten-free bread for this recipe?
Not all gluten-free breads are created equal. I’ve had the best results with sturdy sandwich breads like Canyon Bakehouse or Schar. Avoid soft, cake-like breads that turn mushy. If you’re unsure, test one cube by soaking it in broth—if it holds its shape after 5 minutes, you’re good.
Do I have to dry out the bread first?
Yes, and it’s worth the extra 5 minutes. Gluten-free bread is naturally more moist than regular bread, so drying it out prevents gummy stuffing. Skip this step at your own risk—I did once, and I regretted it.
Can I make this stuffing ahead of time?
Absolutely. Assemble the stuffing up to 24 hours in advance, cover it, and refrigerate. When you’re ready to bake, add 10 minutes to the cooking time since you’re starting from cold. This is my go-to Thanksgiving strategy.
Is this recipe dairy-free friendly?
Yes, with a few swaps. Use dairy-free butter (I like Miyoko’s or Earth Balance) and skip the butter drizzle on top. The recipe works perfectly without it—you’ll still get a golden, crispy top from the olive oil and oven heat.
Can I freeze leftover stuffing?
Yes! Portion it into freezer-safe containers and freeze for up to 3 months. Thaw overnight in the fridge, then reheat in a 350°F oven for 15-20 minutes. The texture will be slightly softer, but the flavor is still fantastic.
Pin This Recipe!
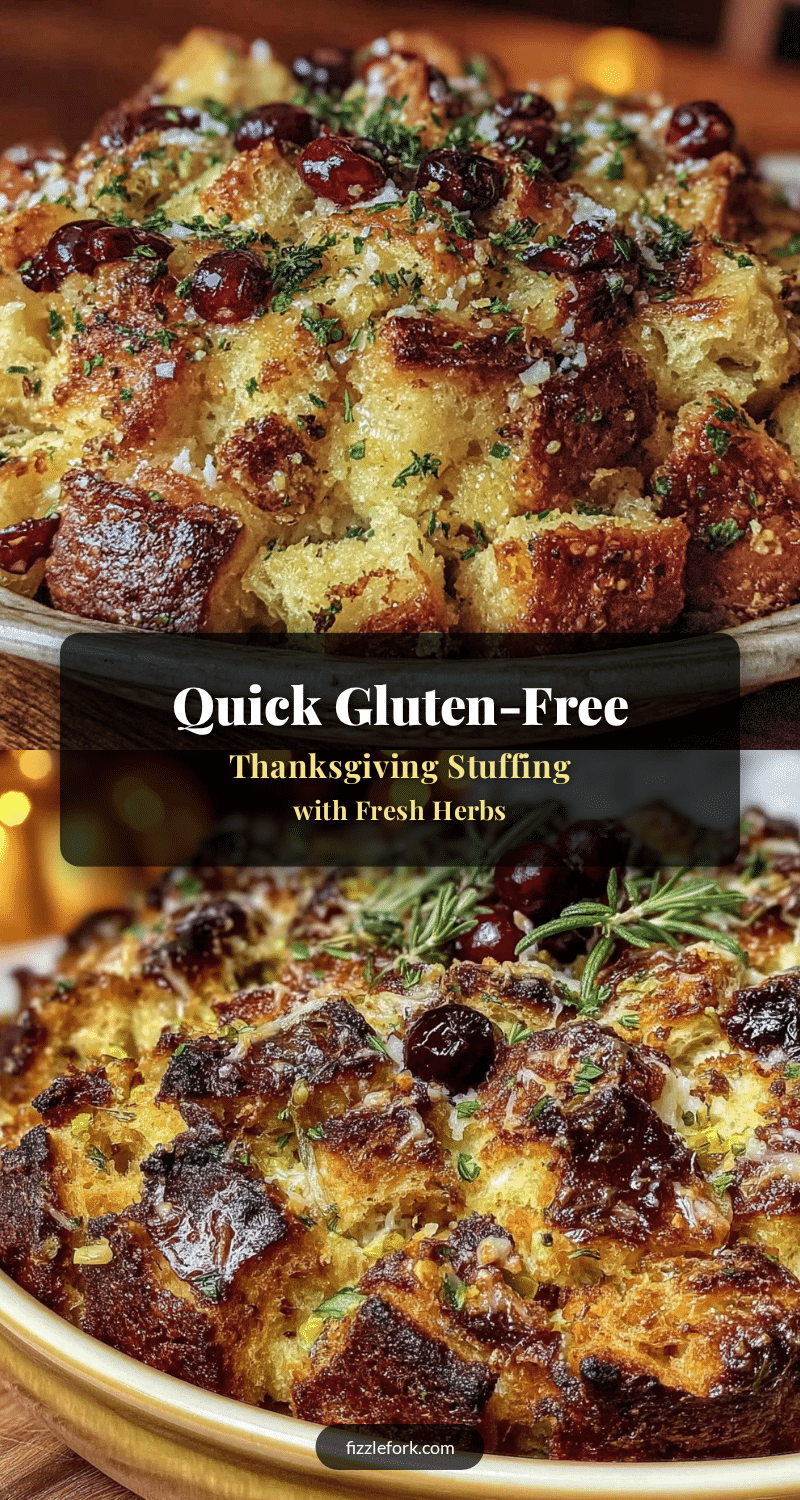
Easy Gluten-Free Thanksgiving Stuffing with Herbs in 30 Minutes
A quick and easy gluten-free stuffing with fresh herbs that comes together in 30 minutes. This recipe recreates the magic of a beloved Portland café’s stuffing, with crispy edges and a tender, savory center that even gluten-eaters love.
- Prep Time: 10 minutes
- Cook Time: 20 minutes
- Total Time: 30 minutes
- Yield: 8 servings 1x
- Category: Side Dish
- Cuisine: American
Ingredients
- 1 loaf (about 16 ounces) day-old gluten-free bread, cut into 1-inch cubes
- 3 tablespoons unsalted butter (or dairy-free butter if needed), melted
- 1 medium yellow onion, finely diced (about 1 cup)
- 3 celery stalks, diced (about 1 cup)
- 3 cloves garlic, minced
- 2 tablespoons olive oil
- 2 tablespoons fresh sage, finely chopped
- 1 tablespoon fresh rosemary, finely chopped
- 1 tablespoon fresh thyme leaves
- 2 tablespoons fresh parsley, chopped
- 1 ½ cups low-sodium chicken or vegetable broth, warm
- 1 large egg, lightly beaten
- ½ teaspoon salt
- ¼ teaspoon black pepper
- ¼ teaspoon poultry seasoning (optional)
Instructions
- Preheat your oven to 375°F (190°C). Spread gluten-free bread cubes on a baking sheet and bake for 5-7 minutes until slightly dry and barely golden. Set aside in a large mixing bowl.
- Heat olive oil and 1 tablespoon butter in a large skillet over medium heat. Add diced onion and celery. Cook for 5-6 minutes, stirring occasionally, until onions are translucent and celery has softened.
- Add minced garlic and fresh herbs (sage, rosemary, thyme). Cook for another minute, stirring constantly, until fragrant but not browned.
- Pour warm broth into the skillet with the onion mixture. Stir to combine and let it come to a gentle simmer. Turn off the heat.
- Pour the warm broth mixture over the bread cubes in the large bowl. Add beaten egg, salt, pepper, and poultry seasoning if using. Gently fold together with a spatula. Let it sit for 5 minutes.
- Melt the remaining 2 tablespoons of butter and drizzle over the stuffing mixture. Fold once or twice to distribute. Transfer to a greased 9×13 baking dish and spread into an even layer.
- Bake for 20-25 minutes until the top is golden brown and crispy. Let it rest for 5 minutes before serving.
Notes
For best results, use sturdy gluten-free bread like Canyon Bakehouse or Schar. Dry the bread cubes before using to prevent gummy stuffing. Warm the broth for better absorption. Let the mixture rest for 5 minutes before baking to allow even absorption. For make-ahead, assemble up to 24 hours in advance and refrigerate; add 10 minutes to baking time.
Nutrition
- Serving Size: 1 serving
- Calories: 195
- Sugar: 3
- Sodium: 410
- Fat: 9
- Saturated Fat: 3
- Carbohydrates: 24
- Fiber: 3
- Protein: 5
Keywords: gluten-free stuffing, Thanksgiving stuffing, herb stuffing, quick stuffing, gluten-free Thanksgiving, easy stuffing recipe