I was standing in my own kitchen last Tuesday, staring at a carton of egg whites left over from making dinner, when a specific, almost-forgotten feeling hit me—the cool, still air of my Aunt Maggie’s pantry and the faint scent of vanilla and sugar. I was maybe seven years old, and she was pulling a baking sheet out of the turned-off oven, her hands wrapped in a faded dish towel. “These are magic,” she whispered, handing me a cloud-like cookie that melted on my tongue. I couldn’t remember the last time I thought about those cookies, or about Aunt Maggie, who moved to Arizona years ago. But there I was, holding a whisk, trying to chase down that exact memory.
That’s the thing about forgotten meringue cookies, isn’t it? They’re not just a recipe—they’re a little piece of kitchen magic that feels almost impossible to recreate. I mean, you literally put them in a hot oven, turn it off, and walk away. No peeking, no fussing, no hovering. You just forget about them, and somehow, they turn into these light, airy, perfectly sweet bites that dissolve the second they hit your mouth. Honestly, I was skeptical the first time I tried making them myself. My kitchen timer went off, I opened the oven door, and there they were—pale, crisp, and absolutely perfect.
These kid-approved forgotten meringue cookies with easy chocolate chips are the kind of treat that makes you feel like you’ve stumbled onto a secret. They’re impossibly simple, made with just a handful of ingredients you probably already have, and they’re the perfect project for a lazy afternoon when you want something sweet but don’t feel like pulling out the stand mixer and making a mess. Maybe you’ve been there—staring at leftover egg whites, wondering what to do with them, and suddenly remembering that one cookie your grandmother or aunt or neighbor used to make. Let me tell you, this is the recipe you’ve been looking for.
The best part? These cookies are genuinely kid-approved. My own picky eaters, who usually turn up their noses at anything that isn’t chocolate chip cookies or ice cream, devoured an entire batch in one afternoon. There’s something about the texture—light as air, with tiny chocolate chips scattered throughout—that feels like a special treat. And honestly, knowing they’re made with just egg whites and sugar makes me feel a little less guilty about letting them have a third one. So if you’re looking for a cookie that’s fun to make, even more fun to eat, and comes with a built-in story, you’ve found it.
Why You’ll Love This Recipe
I’ve tested this recipe more times than I care to count, and let me tell you—it’s the kind of thing that makes you look like a kitchen genius without actually having to do much work. Here’s why these cookies are going to become a regular in your rotation:
- Quick & Easy: The active prep time is about 15 minutes. After that, you just pop them in the oven, turn it off, and walk away. No constant checking, no complicated steps.
- Simple Ingredients: You need egg whites, sugar, vanilla, a pinch of salt, and chocolate chips. That’s it. No fancy extracts, no specialty flours, no trips to a gourmet grocery store.
- Perfect for Picky Eaters: These are light, sweet, and melt-in-your-mouth tender. My kids, who are notoriously suspicious of new textures, couldn’t get enough. They’re also naturally gluten-free, which makes them a great option for parties or playdates.
- Crowd-Pleaser: I’ve brought these to potlucks, school events, and family gatherings, and they always disappear first. Adults love the nostalgic feel, and kids love the sweetness.
- Unbelievably Delicious: The texture is unlike any other cookie—crisp on the outside, airy on the inside, with little pockets of melted chocolate in every bite. It’s comfort food reimagined.
What makes this recipe different from the rest? It’s the technique. The “forgotten” method—baking the meringues in a hot oven that’s been turned off—creates a perfectly dry, crisp texture without any risk of browning or cracking. I’ve tried other methods, and honestly, nothing compares. Plus, I’ve tweaked the sugar-to-egg-white ratio to get that ideal balance of sweetness and structure. It’s not just another version—it’s the version that works every single time.
This recipe isn’t just good—it’s the kind that makes you close your eyes after the first bite. It’s comfort food at its simplest, and it’s perfect for turning a quiet afternoon into something memorable.
What Ingredients You Will Need
This recipe uses simple, pantry-friendly ingredients to deliver a cookie that’s light, sweet, and absolutely irresistible. You probably already have most of these in your kitchen, which makes it perfect for those “I need a treat right now” moments.
- 4 large egg whites, at room temperature (this is important—cold egg whites won’t whip up as well; let them sit on the counter for about 30 minutes)
- 1 cup (200g) granulated sugar (I prefer regular white sugar; it dissolves more easily than coarser sugars)
- 1 teaspoon vanilla extract (pure vanilla extract gives the best flavor, but imitation works in a pinch)
- 1/4 teaspoon cream of tartar (this stabilizes the meringue and helps it hold its shape; don’t skip it)
- Pinch of salt (just a tiny bit to balance the sweetness)
- 1/2 cup (90g) mini chocolate chips (I like mini chips because they distribute more evenly and don’t sink to the bottom; Ghirardelli or Enjoy Life are my go-to brands)
Ingredient Tips:
- For the best texture, use fresh egg whites. Older eggs actually whip up better, so if your eggs have been in the fridge for a week, you’re in luck.
- If you’re worried about separating eggs, crack each one into a small bowl first, then transfer the white to your mixing bowl. That way, if a yolk breaks, you don’t ruin the whole batch.
- For a dairy-free option, most chocolate chips are naturally dairy-free, but double-check the label if you’re serving someone with allergies.
- You can swap the vanilla extract for almond extract or peppermint extract for a fun flavor twist. Just use 1/2 teaspoon instead of a full teaspoon, as those extracts are stronger.
Equipment Needed
You don’t need a lot of fancy equipment to make these cookies, which is part of their charm. Here’s what you’ll need:
- Electric mixer (handheld or stand mixer—either works, but a stand mixer makes the job easier since you can walk away while it whips)
- Large mixing bowl (make sure it’s completely clean and dry; any grease will prevent the egg whites from whipping up properly)
- Baking sheet (a standard half-sheet pan works great)
- Parchment paper (silicon baking mats also work, but parchment is my preference for easy cleanup)
- Rubber spatula (for folding in the chocolate chips gently)
- Cooling rack (optional, but helpful for cooling the cookies completely)
If you don’t have an electric mixer, you can whip the egg whites by hand with a whisk, but be prepared for a serious arm workout—it’ll take about 10-15 minutes of steady whisking. I’ve done it once, and honestly, I wouldn’t recommend it unless you’re looking for a challenge. A handheld mixer is a budget-friendly option if you don’t have a stand mixer, and it works just as well.
Preparation Method
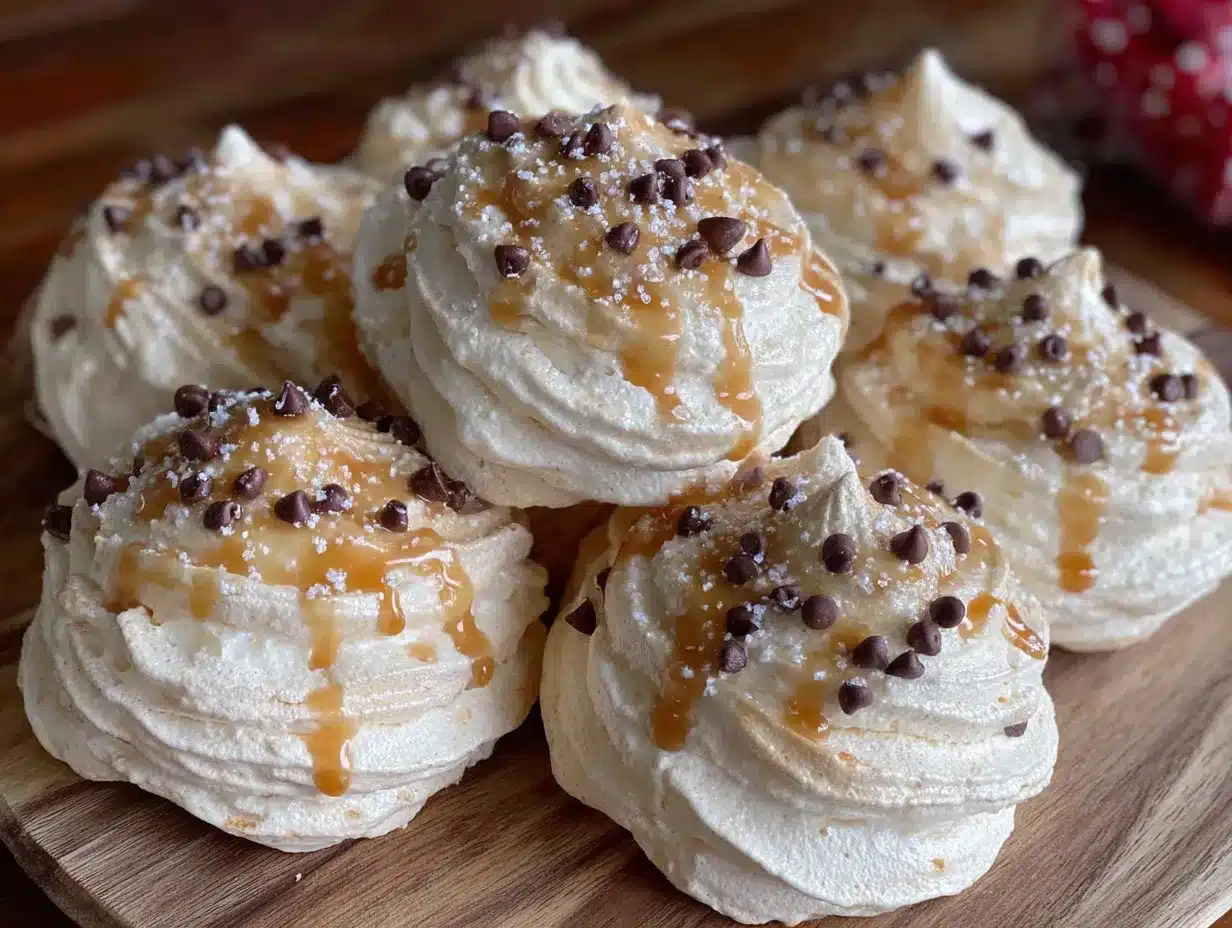
Making these cookies is almost magical—you do a little bit of work upfront, then walk away and let the oven do the rest. Here’s how to get perfect results every time.
- Preheat your oven to 350°F (175°C). Line a baking sheet with parchment paper and set it aside. Make sure your oven rack is in the middle position.
- Whip the egg whites. In a large, clean mixing bowl, combine the room-temperature egg whites and cream of tartar. Beat on medium speed until soft peaks form—this means when you lift the beaters, the egg whites form gentle peaks that flop over. This usually takes about 2-3 minutes.
- Add the sugar gradually. With the mixer running on medium-high speed, add the sugar one tablespoon at a time. I know it feels tedious, but adding it slowly helps it dissolve completely. Once all the sugar is added, increase the speed to high and beat until stiff, glossy peaks form. You’ll know it’s ready when you rub a little bit of the meringue between your fingers and it feels smooth, not grainy. This takes about 5-7 minutes total.
- Add the vanilla and salt. With the mixer on low speed, add the vanilla extract and pinch of salt. Mix just until combined—about 10 seconds. Don’t overmix, or you’ll deflate the meringue.
- Fold in the chocolate chips. Remove the bowl from the mixer and use a rubber spatula to gently fold in the mini chocolate chips. Use a slow, sweeping motion—fold the meringue over itself rather than stirring. You want the chips evenly distributed without knocking the air out of the meringue.
- Drop the cookies onto the baking sheet. Use a spoon or a small cookie scoop to drop dollops of meringue onto the prepared baking sheet. You want them to be about 1.5 inches in diameter, spaced about an inch apart. They won’t spread much, so you can fit about 24 cookies on one sheet. For a more uniform look, you can pipe them using a piping bag with a star tip, but I honestly prefer the rustic, homemade look of spoon-dropped cookies.
- Bake and forget. Place the baking sheet in the preheated oven. Close the door, and immediately turn the oven OFF. Do not open the oven door for at least 6 hours—overnight is even better. I know it’s tempting to peek, but every time you open the door, you let heat and moisture escape, which can ruin the texture.
- Remove and enjoy. After 6 hours (or the next morning), open the oven door and gently lift a cookie off the parchment. It should come off easily and feel dry and crisp. If it’s still sticky or soft, let them sit in the turned-off oven for another hour or two.
Troubleshooting Tip: If your meringue looks weepy or has liquid pooling at the bottom, it means the sugar didn’t dissolve fully. Make sure your bowl is completely dry and free of any grease, and add the sugar slowly. Also, humidity is the enemy of meringues—try to make these on a dry day for best results.
Cooking Tips & Techniques
I’ve made my fair share of meringue mistakes, and I’m here to help you avoid them. Here are the tips I’ve learned the hard way:
- Room temperature egg whites are non-negotiable. Cold egg whites don’t whip up as well, and they won’t hold their structure. Set your eggs out on the counter for at least 30 minutes before you start. If you’re in a hurry, place the eggs in a bowl of warm water for 5 minutes.
- Make sure your bowl is spotless. Any trace of grease or egg yolk will prevent the egg whites from whipping up. I like to wipe my bowl and beaters with a little lemon juice or white vinegar on a paper towel before I start—it removes any residual grease.
- Don’t rush the sugar. Adding the sugar slowly is the key to a smooth, stable meringue. If you dump it all in at once, the sugar won’t dissolve properly, and you’ll end up with a grainy texture.
- Humidity is your enemy. Meringues are hygroscopic, which means they absorb moisture from the air. If it’s a rainy or humid day, your cookies might end up sticky or chewy instead of crisp. Save this recipe for a dry day if you can.
- Don’t skip the cream of tartar. It stabilizes the egg whites and helps them hold their shape. If you don’t have cream of tartar, you can use 1 teaspoon of lemon juice or white vinegar as a substitute.
- Be patient with the “forgotten” part. I know it’s hard to resist peeking, but trust me—opening the oven door lets out heat and moisture, which can ruin the texture. Set a timer and walk away.
One of my biggest failures? I once tried to make these on a humid summer day, and they came out sticky and flat. I was so frustrated until I realized it wasn’t the recipe—it was the weather. Now I only make them when the forecast is clear, and they turn out perfect every time.
Variations & Adaptations
One of the best things about this recipe is how versatile it is. Here are some of my favorite variations:
- Double Chocolate: Swap 2 tablespoons of the granulated sugar for 2 tablespoons of unsweetened cocoa powder. Fold in white chocolate chips instead of semi-sweet for a fun twist.
- Peppermint Holiday: Replace the vanilla extract with 1/2 teaspoon of peppermint extract. Crush up a few candy canes and sprinkle them on top before baking for a festive touch.
- Citrus Burst: Add 1 teaspoon of lemon or orange zest along with the vanilla. The citrus flavor pairs beautifully with the sweetness of the meringue.
- Nutty Crunch: Fold in 1/4 cup of finely chopped toasted almonds or pecans along with the chocolate chips. It adds a nice crunch and a little protein.
- Berry Swirl: Gently swirl in 2 tablespoons of seedless raspberry jam or strawberry preserves before dropping the cookies onto the baking sheet. It creates a beautiful marbled effect.
If you need to make these dairy-free, just double-check that your chocolate chips are dairy-free—most dark chocolate chips are. For a lower-sugar version, you can use a sugar substitute like Swerve, but keep in mind that the texture might be slightly different. I’ve tried it with monk fruit sweetener, and while the cookies were still good, they weren’t quite as crisp.
Serving & Storage Suggestions
These cookies are best served at room temperature, straight from the oven (or the turned-off oven, in this case). They have a delicate, airy texture that’s perfect on their own, but they also pair beautifully with a cup of hot tea, coffee, or a glass of cold milk for the kids.
For a pretty presentation, arrange the cookies on a platter and dust them lightly with powdered sugar or cocoa powder. You can also drizzle a little melted chocolate over the top for an extra-special touch. They’re great for birthday parties, holiday cookie exchanges, or just as a fun afternoon treat.
Storage: Store the cookies in an airtight container at room temperature for up to 2 weeks. Do not refrigerate them—the moisture in the fridge will make them sticky. If you live in a humid climate, add a silica gel packet or a piece of dry bread to the container to absorb excess moisture.
Freezing: These cookies freeze beautifully. Place them in a single layer in a freezer-safe container, with parchment paper between layers. They’ll keep for up to 3 months. To thaw, let them sit at room temperature for about 15 minutes—no need to reheat.
One thing I love about these cookies is that the flavor actually improves after a day or two. The vanilla and chocolate meld together, and the texture becomes even more delicate. So if you can resist eating them all on day one, you’re in for a treat on day two.
Nutritional Information & Benefits
While these cookies are definitely a treat, they’re made with simple, wholesome ingredients. Here’s the estimated nutritional breakdown per cookie (based on 24 cookies):
- Calories: 55
- Total Fat: 1.5g
- Saturated Fat: 1g
- Cholesterol: 0mg
- Sodium: 10mg
- Total Carbohydrates: 10g
- Sugars: 9g
- Protein: 1g
These cookies are naturally gluten-free, low in fat, and contain no butter or oil. The egg whites provide a small amount of protein, and the chocolate chips offer a touch of antioxidants. They’re a great option for anyone with celiac disease or gluten sensitivity, and they’re also suitable for a low-fat diet.
From a wellness perspective, I love that these cookies let you indulge without the heaviness of traditional cookies. They’re light, satisfying, and perfect for when you want something sweet but don’t want to feel weighed down.
Conclusion
These kid-approved forgotten meringue cookies with easy chocolate chips are more than just a recipe—they’re a little piece of kitchen magic that anyone can make. They’re simple enough for a beginner baker, impressive enough to serve at a party, and delicious enough to become a family favorite. I love that they use ingredients I always have on hand, and I love even more that they practically make themselves.
I hope you give these cookies a try and make them your own. Maybe you’ll add a sprinkle of cinnamon or a drizzle of caramel. Maybe you’ll double the chocolate chips or swap in butterscotch chips. Whatever you do, I’d love to hear about it. Drop a comment below and let me know how your batch turned out—did your kids love them as much as mine did? Share your photos, your tweaks, and your stories. Happy baking, friend!
Frequently Asked Questions
Can I use a sugar substitute in this recipe?
Yes, but the texture may be slightly different. I’ve tried monk fruit sweetener and Swerve, and while the cookies were still tasty, they weren’t quite as crisp as the original. For best results, stick with granulated sugar.
Why did my meringue cookies turn out sticky?
Sticky meringues are usually a sign of humidity or under-baking. Try making these on a dry day, and make sure you leave them in the turned-off oven for at least 6 hours. If they’re still sticky, let them dry out in the oven for another hour or two.
Can I make these cookies without cream of tartar?
Absolutely. You can substitute 1 teaspoon of lemon juice or white vinegar for the cream of tartar. It serves the same purpose—stabilizing the egg whites and helping them hold their shape.
How do I know when the meringue is whipped enough?
You’re looking for stiff, glossy peaks that hold their shape when you lift the beaters. Rub a little bit of the meringue between your fingers—if it feels smooth and not grainy, the sugar is fully dissolved and you’re good to go.
Can I add food coloring to these cookies?
Yes! Gel food coloring works best because it doesn’t add extra liquid. Add it along with the vanilla extract, and fold it in gently until you reach your desired color. Perfect for holidays or themed parties.
Pin This Recipe!
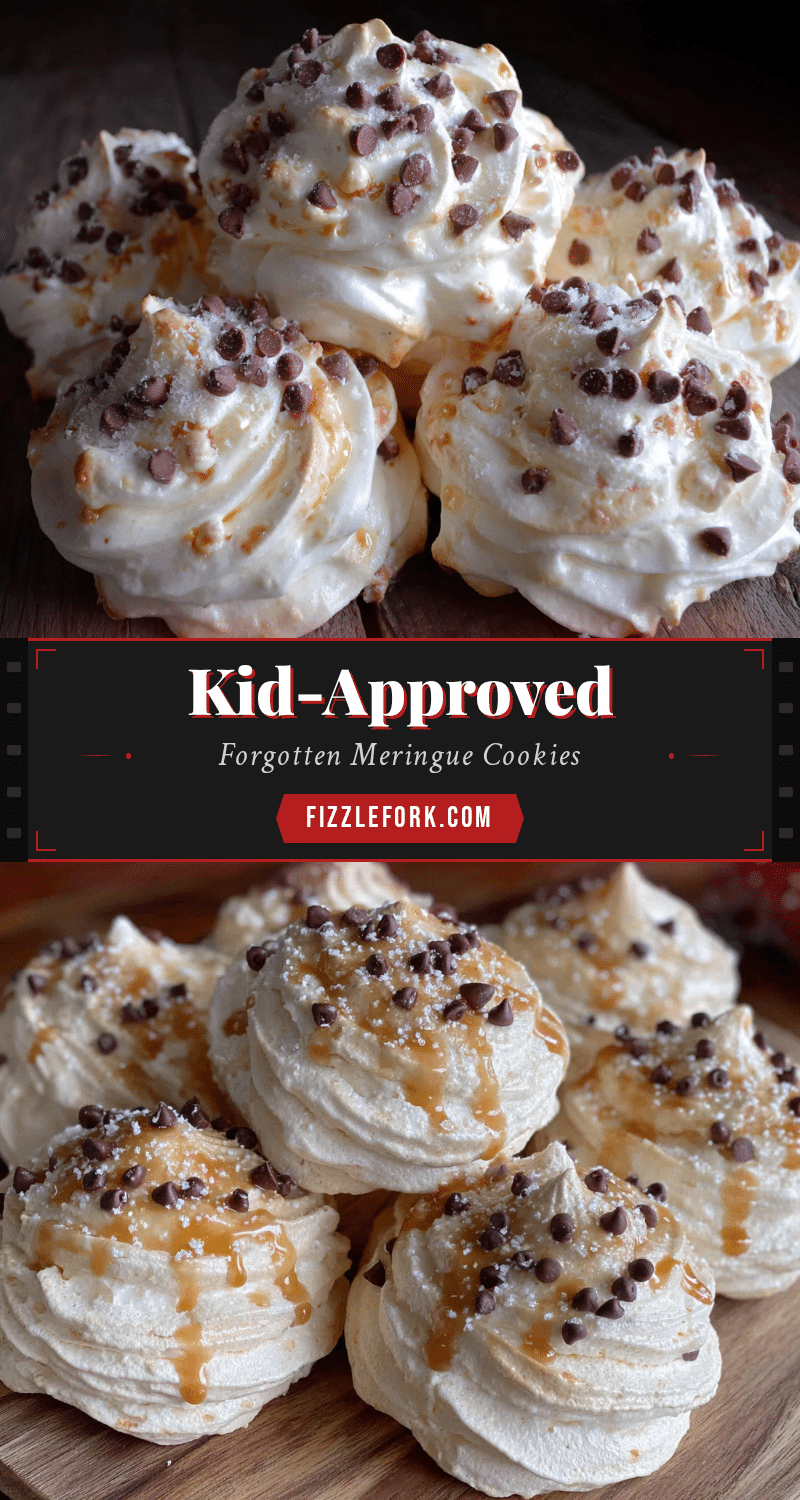
Kid-Approved Forgotten Meringue Cookies with Easy Chocolate Chips

These light, airy meringue cookies are made with a handful of simple ingredients and a magical ‘forgotten’ method—bake them in a hot oven, turn it off, and walk away. They’re naturally gluten-free, kid-approved, and perfect for a sweet treat that melts in your mouth.
- Prep Time: 15 minutes
- Cook Time: 0 minutes (oven is turned off)
- Total Time: 6 hours 15 minutes (includes inactive time in oven)
- Yield: 24 cookies 1x
- Category: Dessert
- Cuisine: American
Ingredients
- 4 large egg whites, at room temperature
- 1 cup (200g) granulated sugar
- 1 teaspoon vanilla extract
- 1/4 teaspoon cream of tartar
- Pinch of salt
- 1/2 cup (90g) mini chocolate chips
Instructions
- Preheat your oven to 350°F (175°C). Line a baking sheet with parchment paper and set it aside. Make sure your oven rack is in the middle position.
- In a large, clean mixing bowl, combine the room-temperature egg whites and cream of tartar. Beat on medium speed until soft peaks form, about 2-3 minutes.
- With the mixer running on medium-high speed, add the sugar one tablespoon at a time. Once all the sugar is added, increase the speed to high and beat until stiff, glossy peaks form, about 5-7 minutes total. The meringue should feel smooth, not grainy, when rubbed between your fingers.
- With the mixer on low speed, add the vanilla extract and pinch of salt. Mix just until combined, about 10 seconds. Do not overmix.
- Remove the bowl from the mixer and use a rubber spatula to gently fold in the mini chocolate chips. Use a slow, sweeping motion to keep the meringue airy.
- Drop dollops of meringue onto the prepared baking sheet, about 1.5 inches in diameter and spaced about an inch apart. You should get about 24 cookies.
- Place the baking sheet in the preheated oven. Close the door, and immediately turn the oven OFF. Do not open the oven door for at least 6 hours, or overnight.
- After 6 hours (or the next morning), open the oven door and gently lift a cookie off the parchment. It should come off easily and feel dry and crisp. If still sticky or soft, let them sit in the turned-off oven for another hour or two.
Notes
For best results, use room temperature egg whites and a completely clean, grease-free bowl. Humidity can cause sticky meringues, so make these on a dry day. Do not open the oven door during the ‘forgotten’ phase. Store in an airtight container at room temperature for up to 2 weeks. Freeze for up to 3 months.
Nutrition
- Serving Size: 1 cookie
- Calories: 55
- Sugar: 9
- Sodium: 10
- Fat: 1.5
- Saturated Fat: 1
- Carbohydrates: 10
- Protein: 1
Keywords: meringue cookies, forgotten cookies, chocolate chip meringue, gluten-free cookies, easy dessert, kid-friendly cookies


