My husband claimed to hate red velvet cake for eleven years. Eleven years. He called it “chocolate that forgot to be chocolate” and swore it was just vanilla cake with food coloring and a weird tang. Every Valentine’s Day, I’d make something else—chocolate lava cakes, strawberry shortcakes, even a sad little tiramisu that collapsed on the plate. Then last February, I found him standing over the kitchen counter at 10 p.m., eating one of these heart-shaped cupcakes I’d made “just for the blog” with his bare hands, red crumbs all over his work shirt.
“These are different,” he said, mouth half-full. “These are actually good.”
I didn’t say a word. I just handed him a napkin and poured myself a glass of wine, savoring the quiet victory. Because honestly? He was right. These perfect red velvet heart-shaped cupcakes are different. The crumb is tender without being fragile. The cocoa is present but not pushy. And the tang—that classic buttermilk-and-vinegar tang—lands exactly where it should, cutting through the cream cheese frosting like a little wink. Maybe you’ve been on the fence about red velvet yourself. Maybe you’ve made a box mix version that tasted fine but didn’t feel special. Let me tell you: this one changed my husband’s mind after more than a decade. If that’s not a recipe worth keeping, I don’t know what is.
I baked the first batch on a Tuesday afternoon when the power flickered twice and my toddler decided to “help” by dumping half a bag of powdered sugar on the dog. It was chaos. But those cupcakes? They came out perfect. That’s the thing about this recipe—it forgives small disasters and still delivers something that looks like you spent hours on it. Which, between us, you don’t.
Why You’ll Love This Recipe
These aren’t just another red velvet recipe you’ll bake once and forget. I’ve tested this version six times across three different ovens (my gas range, my mother-in-law’s electric coil stove, and a friend’s convection oven) to make sure it works everywhere. Here’s why this one earns a permanent spot in your rotation:
- Quick & Easy: From mixing bowl to cooling rack in under 40 minutes. The batter comes together in one bowl with a whisk—no stand mixer required, no sifting dry ingredients into a separate bowl like some fussy recipes demand.
- Simple Ingredients: You probably have everything except buttermilk and cream cheese in your pantry right now. And if you don’t have buttermilk? I’ll show you the two-ingredient substitute that works every time.
- Perfect for Valentine’s Day: The heart shape makes them instantly festive, but they’re also great for birthdays, anniversaries, Galentine’s brunches, or a random Tuesday when everyone needs a little pink-and-red pick-me-up.
- Crowd-Pleaser: My kids devour these. My neighbor who “doesn’t do dessert” ate three. And my husband—the eleven-year red velvet hater—polished off the leftovers before breakfast.
- Unbelievably Delicious: The texture hits that sweet spot between cakey and velvety. The cream cheese frosting is thick enough to pipe into beautiful swirls but light enough that you don’t feel like you’re eating a block of butter.
What makes this recipe different from the rest? It’s the technique of blooming the cocoa powder in hot coffee before adding it to the batter. I know—coffee in red velvet sounds weird. But trust me on this. The coffee doesn’t make it taste like coffee. It deepens the chocolate flavor and makes the color richer without needing extra food coloring. Plus, the tiny amount of vinegar reacts with the baking soda to create a tender crumb that stays moist for days. This isn’t just another version—it’s my best version, tested by a decade of Valentine’s Day disappointments and one very stubborn husband.
What Ingredients You Will Need
This recipe uses simple, everyday ingredients that work together to create that signature red velvet flavor and texture. No specialty items, no trips to three different stores. Here’s what you’ll need:
For the Cupcakes
- All-purpose flour – 1 ½ cups (190g). Spoon and level it into your measuring cup; don’t scoop straight from the bag or you’ll pack in too much flour and end up with dry cupcakes.
- Granulated sugar – 1 cup (200g). Regular white sugar works perfectly here.
- Unsweetened cocoa powder – 2 tablespoons (10g). I prefer Hershey’s Special Dark for a deeper color, but any unsweetened cocoa works. Don’t use Dutch-processed—the natural cocoa’s acidity helps the leavening reaction.
- Baking soda – 1 teaspoon. Make sure it’s fresh (test it by dropping a pinch into vinegar—it should fizz immediately).
- Salt – ½ teaspoon. Fine sea salt or table salt, not coarse kosher.
- Vegetable oil – ½ cup (120ml). Canola or any neutral oil works. Oil keeps these cupcakes moist longer than butter would.
- Buttermilk – ½ cup (120ml), room temperature. Full-fat gives the best texture, but low-fat works too. If you don’t have buttermilk, add 1 ½ teaspoons of white vinegar or lemon juice to regular milk and let it sit for 5 minutes.
- Large eggs – 2, room temperature. Cold eggs can seize the batter. Set them out 30 minutes before baking, or place them in a bowl of warm water for 5 minutes.
- White vinegar – 1 teaspoon. This reacts with the baking soda for lift and tender crumb. Don’t skip it—it’s not just for show.
- Vanilla extract – 1 teaspoon. Pure vanilla if you have it, imitation works fine for this recipe.
- Red gel food coloring – 1 tablespoon (or about 15-20 drops). Liquid food coloring won’t give you the same vibrant red; you’ll need gel or paste. I use Wilton’s “No-Taste Red” because it doesn’t leave that bitter aftertaste some red dyes have.
- Hot coffee – ½ cup (120ml), freshly brewed. This blooms the cocoa powder and deepens both the color and flavor. Decaf works if that’s what you have.
For the Cream Cheese Frosting
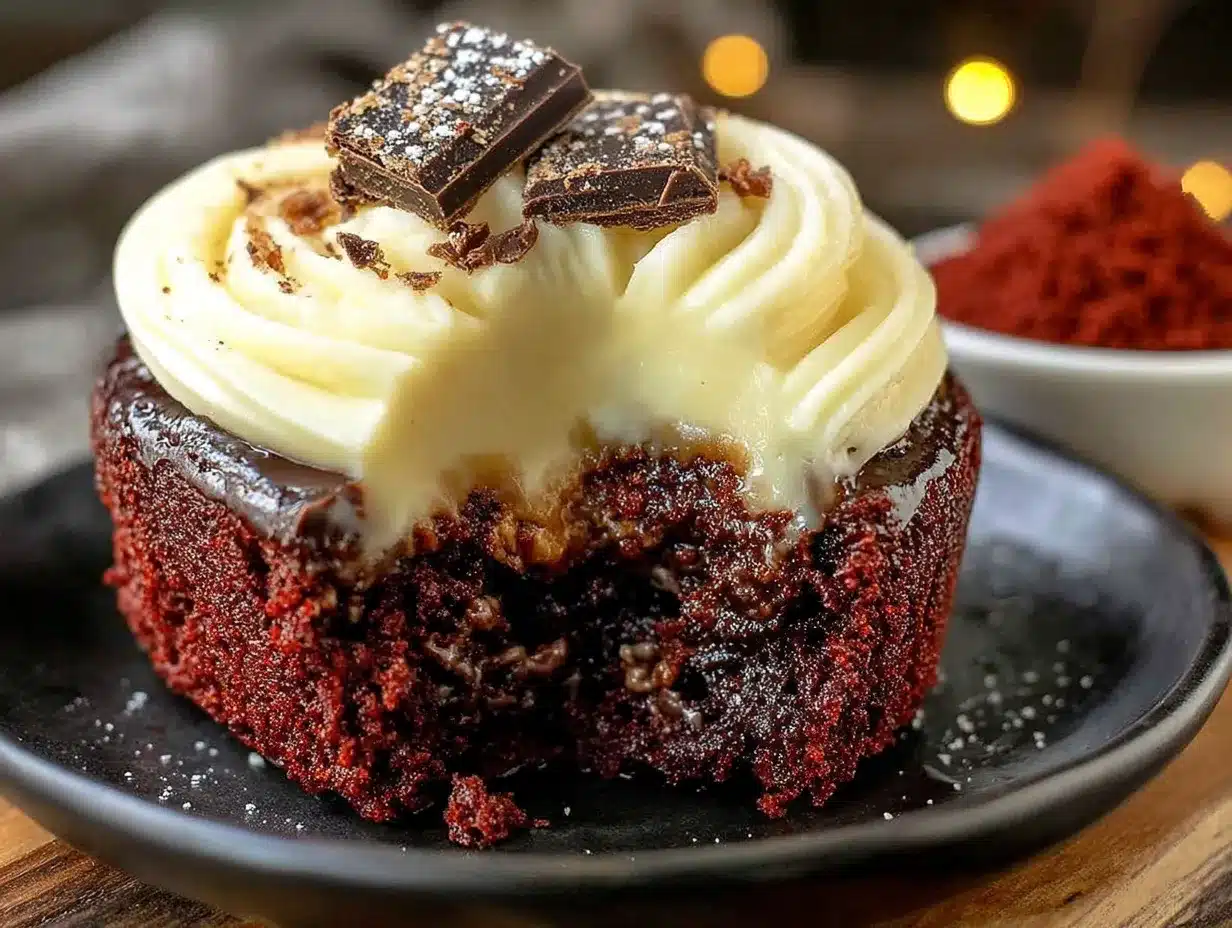
- Cream cheese – 8 ounces (226g), softened. Full-fat block cream cheese, not the spreadable kind from a tub. Philadelphia is my go-to; it has the right fat content for stable frosting.
- Unsalted butter – ½ cup (113g), softened. Let it sit out with the cream cheese for at least an hour so both are the same temperature.
- Powdered sugar – 3 cups (360g), sifted if it’s lumpy. I don’t always sift mine, and it’s fine, but if your sugar has hard clumps, sifting saves you from little white specks in the finished frosting.
- Vanilla extract – 1 teaspoon. This rounds out the tangy cream cheese flavor beautifully.
- Pinch of salt – Just a tiny one, to balance the sweetness.
For Decoration (Optional)
- Heart-shaped sprinkles – About ¼ cup, or whatever you have on hand.
- White nonpareils or sanding sugar – For sparkle, if you’re feeling fancy.
Equipment Needed
You don’t need a bakery-level setup for these cupcakes. Here’s what I use and what you can substitute if you’re improvising:
- Heart-shaped cupcake pan – This is the one non-negotiable piece. I bought mine at a kitchen supply store for $12, and it’s paid for itself in birthday parties and bake sales. Wilton makes a good non-stick version. If you don’t have one, you can bake the batter in a standard round cupcake pan and add heart-shaped toppers cut from extra cake.
- Cupcake liners – Heart-shaped or standard paper liners. I’ve used both; the heart-shaped ones are adorable but slightly more expensive. Regular liners work perfectly—just pipe the frosting into a heart shape on top.
- Mixing bowls – One large bowl for the dry ingredients, one medium bowl for the wet ingredients. I use glass Pyrex bowls because they don’t hold onto odors or stains.
- Whisk – A good balloon whisk. You won’t need an electric mixer for the cupcake batter—whisking by hand keeps you from overmixing.
- Measuring cups and spoons – Dry measuring cups for flour and sugar, liquid measuring cup for buttermilk and oil, and a set of measuring spoons. The difference matters more than you’d think.
- Rubber spatula – For scraping down the bowl and folding in the coffee at the end. A silicone spatula with a wooden handle is my favorite.
- Electric hand mixer or stand mixer – For the cream cheese frosting. You can make it by hand with a whisk and some elbow grease, but your arm will thank you for using a mixer.
- Piping bag and star tip – A large piping bag with a 1M or 2D star tip creates those beautiful swirls. If you don’t have a piping bag, snip the corner off a zip-top bag and use a large round tip—or just spread the frosting with a knife. It’ll still taste amazing.
- Cooling rack – Letting cupcakes cool completely on a wire rack prevents soggy bottoms. I use a simple metal one that cost $6.
- Toothpicks – For testing doneness. A cake tester or skewer works too.
Preparation Method
Let’s make these perfect red velvet heart-shaped cupcakes. The whole process takes about 40 minutes from start to finish, plus cooling time. I’ve broken it down so you can follow along without stress.
Step 1: Preheat and Prep
Preheat your oven to 350°F (175°C). Line your heart-shaped cupcake pan with liners—if you’re using a non-stick pan, you can also grease it well with butter or cooking spray and skip the liners. I prefer liners because they make cleanup faster and keep the hearts intact when you pop them out. Brew a half cup of strong coffee and set it aside to cool slightly. You don’t want it boiling hot when it hits the batter, but warm is fine.
Step 2: Mix the Dry Ingredients
In a large mixing bowl, whisk together the flour, sugar, cocoa powder, baking soda, and salt. Whisk for about 20 seconds to aerate everything evenly. I usually do this while the coffee is brewing—multitasking makes the whole process feel faster. Make sure there are no cocoa lumps hiding at the bottom of the bowl; I’ve missed them before and ended up with little dark spots in the finished cupcakes. Not the end of the world, but not ideal.
Step 3: Combine the Wet Ingredients
In a separate medium bowl, whisk together the vegetable oil, buttermilk, eggs, vinegar, and vanilla extract. Whisk until the eggs are fully incorporated and the mixture looks smooth and slightly frothy. This takes about 30 seconds. If your buttermilk or eggs are cold, the oil might seize up a little—don’t panic, just keep whisking. Room temperature ingredients really do make a difference here, so try to plan ahead.
Step 4: Bring It Together
Pour the wet ingredients into the dry ingredients and whisk gently until just combined. A few streaks of flour are okay at this point—you don’t want to overmix, or the cupcakes will be tough. The batter will look thick and a little lumpy, which is normal. Now add the red gel food coloring and whisk until the color is evenly distributed. The batter should be a vibrant, deep red—if it looks more pink than red, add another teaspoon of gel. I once added too much and ended up with cupcakes that looked like they belonged in a horror movie, so start with the recommended amount and adjust from there.
Step 5: Add the Coffee
Pour the warm coffee into the batter and fold it in gently with a rubber spatula. The batter will thin out significantly—that’s exactly what you want. It should be pourable, like a thick milkshake. The coffee doesn’t make the cupcakes taste like coffee; it just deepens the chocolate flavor and makes the crumb extra tender. Fold until the coffee is fully incorporated, about 10 to 15 strokes. Don’t overmix here either; once you don’t see any streaks, stop.
Step 6: Fill the Liners
Divide the batter evenly among the cupcake liners, filling each about two-thirds full. I use a ¼-cup cookie scoop for consistency, but a regular spoon works too. The heart-shaped pans hold slightly less batter than standard round cups, so you’ll get about 14 to 16 cupcakes instead of the usual 12. If you have extra batter, you can bake a few mini cupcakes on the side—just reduce the baking time to 10 to 12 minutes.
Step 7: Bake
Bake at 350°F (175°C) for 15 to 18 minutes. Start checking at the 15-minute mark by inserting a toothpick into the center of a cupcake. If it comes out clean or with just a few moist crumbs, they’re done. If the toothpick has wet batter on it, give them another 2 minutes and check again. The tops should spring back when you touch them lightly. Let the cupcakes cool in the pan for 5 minutes, then transfer them to a wire rack to cool completely. Don’t skip this cooling step—if you frost them while they’re still warm, the frosting will slide right off.
Step 8: Make the Frosting
While the cupcakes cool, make the cream cheese frosting. In a large bowl (or the bowl of a stand mixer), beat the softened cream cheese and butter together on medium speed until smooth and creamy, about 2 minutes. Scrape down the sides of the bowl with a spatula. Add the powdered sugar one cup at a time, beating on low speed after each addition to avoid a sugar cloud. Once all the sugar is incorporated, add the vanilla and salt, then increase the speed to medium-high and beat for 2 to 3 minutes until the frosting is light, fluffy, and spreadable. If it looks too soft to pipe, refrigerate it for 10 to 15 minutes to firm up.
Step 9: Frost and Decorate
Fit a piping bag with a large star tip (I use a 1M for those classic swirls) and fill it with the frosting. Pipe a generous swirl onto each completely cooled cupcake. If you don’t have a piping bag, you can spread the frosting with a small offset spatula or even a butter knife—it’ll still look beautiful. Top with heart-shaped sprinkles or a dusting of sanding sugar while the frosting is still soft so they stick.
Cooking Tips & Techniques
After testing this recipe six times (and failing twice), I’ve learned a few things that make the process smoother. Here are my best tips:
Don’t overmix the batter. I know I said this already, but it bears repeating. Red velvet is a delicate balance of acid and base that creates a tender crumb. Overmixing develops too much gluten, and you’ll end up with dense, tough cupcakes. Mix until the flour disappears, then stop. A few tiny lumps are fine—they’ll bake out.
Room temperature ingredients are non-negotiable. Cold buttermilk and eggs can cause the oil to separate from the batter, leaving you with greasy spots in the finished cupcakes. Take everything out of the fridge 30 to 45 minutes before you start baking. If you forget (I forget constantly), place the eggs in a bowl of warm water for 5 minutes and microwave the buttermilk for 15 seconds—just don’t let it get hot.
Use gel food coloring, not liquid. Liquid food coloring has a lot of water in it, which can throw off the liquid ratio in the batter and make the cupcakes gummy. Gel or paste colors are concentrated, so you need less of them, and they won’t affect the texture. I learned this the hard way when my first batch of red velvet turned out more like red Play-Doh than cake.
Let the cupcakes cool completely. I know it’s tempting to rush this step, especially when your kitchen smells amazing and you want to eat one immediately. But warm cupcakes + cream cheese frosting = a melty, sliding mess. Give them at least 30 minutes on a wire rack. If you’re really pressed for time, you can pop them in the fridge for 15 minutes to speed things up.
Toast the cream cheese frosting for extra flavor. This is a trick I picked up from a pastry chef friend: after you’ve piped the frosting, use a kitchen torch to lightly toast the edges. It gives the frosting a slightly caramelized flavor that pairs beautifully with the tangy cream cheese. If you don’t have a torch, you can skip this—it’s optional but impressive.
One mistake I made: I once forgot the vinegar entirely. The cupcakes still tasted okay, but they were denser and didn’t have that classic red velvet tang. The vinegar isn’t just for show—it reacts with the baking soda to create lift and contributes to the signature flavor profile. Don’t skip it.
Variations & Adaptations
This recipe is forgiving enough to adapt to different dietary needs and flavor preferences. Here are a few variations I’ve tried and loved:
Gluten-Free Version
Substitute the all-purpose flour with a 1:1 gluten-free baking blend that contains xanthan gum. I’ve used King Arthur’s Measure for Measure blend with great results—the texture is slightly more delicate, but the flavor is identical. Add an extra tablespoon of buttermilk to compensate for the drier gluten-free flour.
Dairy-Free Version
Replace the buttermilk with ½ cup of unsweetened almond milk mixed with 1 ½ teaspoons of lemon juice (let it sit for 5 minutes to curdle). Use a dairy-free cream cheese alternative like Kite Hill or Miyoko’s for the frosting, and substitute the butter with a plant-based butter stick (not the spreadable kind from a tub). The frosting won’t be quite as stable, so refrigerate the cupcakes before serving.
Chocolate Lover’s Version
Increase the cocoa powder to ¼ cup (20g) for a more pronounced chocolate flavor. Reduce the flour by 2 tablespoons to maintain the liquid balance. This version is less traditional but absolutely delicious if you’re a chocolate purist.
Mini Cupcakes Version
Use a mini heart-shaped cupcake pan and reduce the baking time to 10 to 12 minutes. You’ll get about 36 mini cupcakes—perfect for parties or lunchbox surprises. Pipe a small rosette of frosting on each one and top with a single heart-shaped sprinkle.
No-Food-Coloring Version
If you want to avoid artificial colors, you can use beet powder instead of red gel. Mix 2 tablespoons of beet powder with 2 tablespoons of hot water to form a paste, then add it to the batter along with the coffee. The color will be more of a deep burgundy than bright red, but the flavor is lovely—slightly earthy and sweet.
Serving & Storage Suggestions
These perfect red velvet heart-shaped cupcakes are best served at room temperature, which allows the cream cheese frosting to soften slightly and the cake to feel velvety on your tongue. If you’ve refrigerated them, let them sit on the counter for 20 minutes before serving. Pair them with a hot cup of coffee, a glass of cold milk, or a dessert wine like a late-harvest Riesling for a grown-up treat.
For a Valentine’s Day presentation, arrange the cupcakes on a white cake stand or a wooden board and scatter heart-shaped sprinkles and fresh raspberries around them. The red and white color scheme is classic and romantic. If you’re serving them at a party, you can make the cupcakes a day ahead and frost them the morning of—the cake actually gets more moist after a day in the fridge.
Storage instructions: Store unfrosted cupcakes in an airtight container at room temperature for up to 3 days. Frosted cupcakes should be refrigerated in a single layer in an airtight container for up to 5 days. The cream cheese frosting will soften at room temperature, so if you’re storing them for more than a day, keep them in the fridge and pull them out 30 minutes before serving.
Freezer instructions: You can freeze unfrosted cupcakes for up to 3 months. Wrap each one tightly in plastic wrap, then place them in a freezer-safe bag. Thaw at room temperature for about an hour before frosting. Frosted cupcakes can also be frozen, but the frosting might lose some of its texture—I prefer to freeze unfrosted and make fresh frosting when I’m ready to serve. The flavor of the cupcakes actually improves after freezing; I’m not sure why, but they taste even more velvety.
Reheating tip: If you want that just-baked warmth, microwave an unfrosted cupcake for 10 seconds. Don’t microwave the frosting—it’ll melt into a puddle. Instead, microwave the cake part and add the frosting after.
Nutritional Information & Benefits
Per cupcake (based on 16 servings with frosting): approximately 320 calories, 18g fat, 38g carbohydrates, 4g protein, 1g fiber, 28g sugar. These are estimates and will vary based on your specific ingredients and portion sizes.
While these are definitely a treat (let’s not pretend red velvet cupcakes are health food), they do have a few redeeming qualities. The cocoa powder contains antioxidants called flavonoids that can support heart health—ironic, given the heart shape. The buttermilk provides calcium and probiotics, and the eggs offer a small amount of protein. Plus, the cream cheese frosting has less sugar than a traditional buttercream, so you’re getting a slightly more balanced dessert.
If you’re watching your sugar intake, you can reduce the sugar in the cupcake batter to ¾ cup without compromising the texture too much—just know that the cupcakes will be slightly less tender. For a lower-fat option, use Neufchâtel cheese (reduced-fat cream cheese) in the frosting and swap half the oil for unsweetened applesauce. The texture will be a bit more muffin-like, but the flavor is still excellent.
These cupcakes contain gluten, dairy, and eggs. For allergen-friendly alternatives, see the variations section above.
Conclusion
These perfect red velvet heart-shaped cupcakes earned a permanent spot in my recipe box the moment my husband—the eleven-year red velvet skeptic—asked me to make them again. And again. And again. They’re the kind of recipe that proves first impressions aren’t always right, whether it’s about a flavor you thought you hated or a dessert you assumed was overhyped.
What I love most about this recipe is how it brings people together. I’ve made them for Valentine’s Day parties, classroom celebrations, and quiet nights at home when everyone needed a little sweetness. They’re forgiving enough for beginner bakers and impressive enough to make you look like you know what you’re doing—even if you’re sneaking a bite before the frosting sets.
I’d love to hear how yours turn out. Did you add a special touch? Did your kids help with the sprinkles? Did you serve them with something unexpected? Drop a comment below and let me know—I read every single one, and your stories always make my day. And if you loved these, share the recipe with a friend who needs a little red velvet magic in their life. Happy baking, friends. You’ve got this.
Frequently Asked Questions
Can I make these cupcakes without a heart-shaped pan?
Absolutely. Use a standard 12-cup muffin pan with paper liners. To make them heart-shaped, you can pipe the cream cheese frosting into a heart shape on top of each cupcake, or cut heart shapes out of extra cake and place them on top of the frosting like little toppers. The taste is the same either way.
Why did my red velvet cupcakes turn out brown instead of red?
This usually happens when you use liquid food coloring instead of gel, or when you don’t use enough coloring. The cocoa powder naturally darkens the batter, so you need a concentrated red gel to overcome that brown base. Make sure you’re using gel or paste food coloring, and don’t be shy with it—a full tablespoon is usually enough, but you can add up to 1 ½ tablespoons for a more vibrant color.
Can I make the batter ahead of time?
I don’t recommend it. The chemical reaction between the buttermilk, vinegar, and baking soda starts as soon as you mix them, and the batter will lose its lift if it sits too long. You can, however, mix the dry ingredients and wet ingredients separately and store them in the fridge for up to 24 hours. Combine them right before baking.
Why did my cream cheese frosting turn out runny?
Runny frosting usually means the cream cheese or butter was too soft, or you overbeat it. Cream cheese should be softened but still cool to the touch—if it’s room temperature and feels greasy, it’s too soft. Pop it in the fridge for 10 minutes before beating. Also, make sure you’re using block cream cheese, not the spreadable kind from a tub, which has a higher water content.
How do I get perfectly shaped heart cupcakes every time?
Fill the heart-shaped liners evenly—about two-thirds full—and use a toothpick to gently spread the batter into the corners of the heart shape before baking. This helps the cupcakes rise evenly and maintain the heart shape. Also, let them cool in the pan for exactly 5 minutes before transferring to a wire rack; if you wait too long, the steam can make the edges soggy and the shape less defined.
Pin This Recipe!
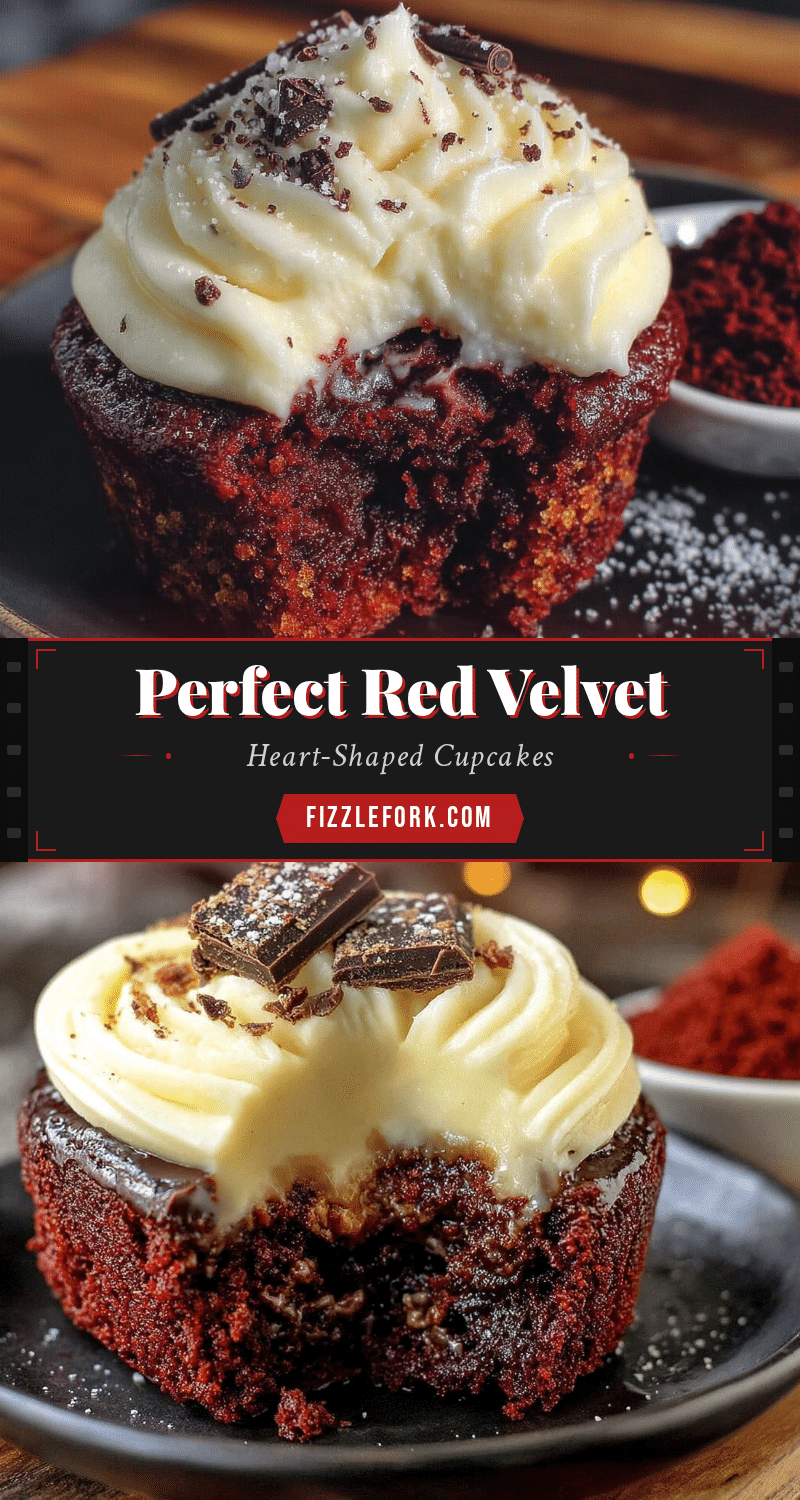
Perfect Red Velvet Heart-Shaped Cupcakes: Easy Valentines Dessert
These tender, velvety red velvet cupcakes are made with a secret ingredient—hot coffee—that deepens the chocolate flavor and creates an incredibly moist crumb. Topped with a tangy cream cheese frosting, they’re the perfect Valentine’s Day treat that even red velvet skeptics will love.
- Prep Time: 15 minutes
- Cook Time: 18 minutes
- Total Time: 33 minutes
- Yield: 14-16 cupcakes 1x
- Category: Dessert
- Cuisine: American
Ingredients
- 1 ½ cups (190g) all-purpose flour
- 1 cup (200g) granulated sugar
- 2 tablespoons (10g) unsweetened cocoa powder
- 1 teaspoon baking soda
- ½ teaspoon fine sea salt
- ½ cup (120ml) vegetable oil
- ½ cup (120ml) buttermilk, room temperature
- 2 large eggs, room temperature
- 1 teaspoon white vinegar
- 1 teaspoon vanilla extract
- 1 tablespoon red gel food coloring
- ½ cup (120ml) hot coffee, freshly brewed
- 8 ounces (226g) cream cheese, softened
- ½ cup (113g) unsalted butter, softened
- 3 cups (360g) powdered sugar
- 1 teaspoon vanilla extract
- Pinch of salt
- ¼ cup heart-shaped sprinkles (optional)
- White nonpareils or sanding sugar (optional)
Instructions
- Preheat oven to 350°F (175°C). Line a heart-shaped cupcake pan with liners or grease well. Brew ½ cup strong coffee and set aside to cool slightly.
- In a large bowl, whisk together flour, sugar, cocoa powder, baking soda, and salt for about 20 seconds.
- In a separate medium bowl, whisk together vegetable oil, buttermilk, eggs, vinegar, and vanilla extract until smooth and slightly frothy.
- Pour wet ingredients into dry ingredients and whisk gently until just combined. Add red gel food coloring and whisk until evenly distributed.
- Pour warm coffee into batter and fold gently with a rubber spatula until fully incorporated. Batter will be thin.
- Divide batter evenly among liners, filling each about two-thirds full. Bake for 15–18 minutes, until a toothpick inserted in center comes out clean or with a few moist crumbs.
- Let cupcakes cool in pan for 5 minutes, then transfer to a wire rack to cool completely.
- For frosting: In a large bowl, beat cream cheese and butter on medium speed until smooth, about 2 minutes. Add powdered sugar one cup at a time, beating on low. Add vanilla and salt, then beat on medium-high for 2–3 minutes until light and fluffy.
- Pipe or spread frosting onto completely cooled cupcakes. Decorate with sprinkles or sanding sugar while frosting is still soft.
Notes
Don’t overmix the batter; a few lumps are fine. Use room temperature ingredients for best results. Gel food coloring is essential for vibrant red color. Let cupcakes cool completely before frosting to prevent melting. For a dairy-free version, use almond milk with lemon juice and dairy-free cream cheese. For gluten-free, use a 1:1 gluten-free baking blend.
Nutrition
- Serving Size: 1 cupcake
- Calories: 320
- Sugar: 28
- Sodium: 220
- Fat: 18
- Saturated Fat: 8
- Carbohydrates: 38
- Fiber: 1
- Protein: 4
Keywords: red velvet cupcakes, heart-shaped cupcakes, Valentine's Day dessert, cream cheese frosting, easy cupcake recipe


