I was standing in my neighbor Carol’s kitchen last Tuesday, waiting for her kettle to boil, when the smell hit me. It wasn’t her tea—it was the faint, sweet scent of overripe bananas drifting from her compost bin. And suddenly I was seven years old, standing on a wobbly wooden stool in my Aunt Lena’s tiny apartment, my fingers sticky with banana mush.
Aunt Lena wasn’t a fancy cook. She didn’t own a mixer, not even a hand-held one. She’d mash bananas with a fork, dump everything into one bowl, and stir until it looked “right.” I remember watching the way her wrist moved, slow and steady, like she was calming the batter down. She’d let me lick the spatula, and I’d sit on her linoleum floor, waiting for that loaf to bake, convinced the whole building smelled like happiness.
She passed away a few years ago, and honestly, I haven’t thought about that stool in ages. But standing there in Carol’s kitchen, I got this ache to make that bread again. Not a fancy version with streusel topping or chocolate chips—just the simple, one-bowl, no-mixer loaf that tasted like a hug. Maybe you’ve had that feeling before, where a random scent just yanks you back in time.
So I went home, grabbed three spotted bananas from my counter, and got to work. This is that bread. The one that doesn’t need fancy equipment, doesn’t need a trip to the store for weird ingredients, and somehow always makes you close your eyes on the first bite. It’s the recipe I keep coming back to, and I think you’ll see why.
Why You’ll Love This Recipe
Let me be honest with you—I’ve tested a lot of banana bread recipes over the years. Some were too dry, some were too dense, and some required so much cleanup that I regretted the whole thing before the first slice was even cut. This one? It’s different. It’s the kind of recipe that makes you wonder why you ever bothered with complicated baking in the first place.
- Quick & Easy: From start to oven in about 10 minutes. No mixer, no sifting, no fuss. Just one bowl and a fork.
- Simple Ingredients: You probably have everything already. Butter, sugar, eggs, flour, bananas—the usual suspects. No fancy extracts or hard-to-find flours.
- Perfect for Busy Mornings or Cozy Afternoons: It works for breakfast with a smear of butter, or as a 3 p.m. snack with a cup of coffee. It’s not picky.
- Crowd-Pleaser: I’ve brought this to potlucks, book club, and even a work meeting. It disappears every single time. Kids love it, adults love it, and nobody guesses it’s on the healthier side.
- Unbelievably Moist: The secret is using really ripe bananas and a little yogurt. The texture is tender, almost creamy, without being gummy. It’s comfort food in loaf form.
What makes this version different from all the others? It’s the balance. I’ve played with the ratio of wet to dry ingredients until it was just right—moist but not heavy, sweet but not cloying. And the one-bowl method isn’t just about convenience; it actually helps keep the batter from getting overmixed, which is the number one cause of tough banana bread. So you get a tender crumb without even trying.
This recipe is the one I make when I need something reliable. It’s the one I make when I have sad, spotty bananas on the counter and not a lot of energy. And it’s the one I make when I want to feel like I’m seven again, sitting on that linoleum floor, waiting for something good.
What Ingredients You Will Need
This recipe uses simple, wholesome ingredients that work together to create a loaf that’s moist, flavorful, and perfectly tender. Most of these are pantry staples, so you likely won’t need a special trip to the store. Here’s what you’ll need and why each one matters:
- 3 large ripe bananas (about 1 ½ cups mashed): The riper, the better. Look for bananas with plenty of brown spots—they’re sweeter and easier to mash. If your bananas aren’t quite ready, you can speed things up by baking them at 300°F for 15 minutes until the skins darken.
- ⅓ cup melted unsalted butter (75g): Butter adds richness and flavor. I prefer unsalted so I can control the salt level. If you only have salted butter, just reduce the added salt to ¼ teaspoon.
- ½ cup granulated sugar (100g): White sugar gives the bread structure and sweetness. You can reduce this to ⅓ cup if your bananas are very sweet, but I wouldn’t go lower than that.
- ¼ cup packed light brown sugar (50g): Brown sugar adds moisture and a subtle molasses flavor. It’s what gives the crust that lovely golden color.
- 1 large egg, room temperature: The egg binds everything together and adds richness. If your egg is cold, just place it in a bowl of warm water for 5 minutes to bring it to room temperature quickly.
- ¼ cup plain yogurt or sour cream (60g): This is my secret ingredient for extra moisture. Greek yogurt works great and adds a little protein. Use dairy-free yogurt if needed.
- 1 teaspoon vanilla extract: Vanilla rounds out the flavors and makes the bread taste more “bakery-style.” I recommend pure vanilla extract, not imitation, for the best flavor.
- 1 ½ cups all-purpose flour (190g): All-purpose flour gives the bread a tender crumb. You can substitute up to half the flour with whole wheat flour for a heartier loaf, but the texture will be a bit denser.
- 1 teaspoon baking soda: This is the leavening agent that makes the bread rise. Make sure it’s fresh—test it by dropping a little into vinegar; if it fizzes, it’s good to go.
- ½ teaspoon salt: Salt balances the sweetness and enhances the banana flavor. Don’t skip it!
- ½ teaspoon ground cinnamon (optional but recommended): Cinnamon and banana are a classic pair. It adds warmth without overpowering the banana flavor.
Optional add-ins: Feel free to fold in ½ cup of chopped walnuts, pecans, or chocolate chips. If you’re adding nuts, toast them lightly in a dry pan first for extra flavor.
Equipment Needed
One of the best things about this recipe is how little equipment it requires. You don’t need a stand mixer, a hand mixer, or any fancy gadgets. Here’s what you’ll need:
- One large mixing bowl: Any bowl will do, but a medium-to-large one gives you room to mash and stir without spilling.
- A fork or potato masher: A fork works perfectly for mashing bananas. A potato masher is faster if you have one.
- A wooden spoon or rubber spatula: For mixing the batter. A spatula is great for scraping the sides of the bowl.
- A 9×5-inch loaf pan: This is the standard size. If you use an 8×4-inch pan, your loaf will be taller and可能需要增加 baking time by 5-10 minutes.
- Parchment paper or non-stick spray: To line the pan for easy removal. Parchment paper with overhanging edges makes lifting the loaf out a breeze.
- Cooling rack: A wire rack allows air to circulate around the loaf so it cools evenly and doesn’t get soggy on the bottom.
- Measuring cups and spoons: For accuracy. I prefer using a kitchen scale for the flour, but measuring cups work fine if you spoon and level.
That’s it! No sifter, no whisk attachment, no stand mixer. Just a bowl and a spoon. Honestly, that’s part of the charm—less cleanup means more time to actually enjoy the bread.
Preparation Method
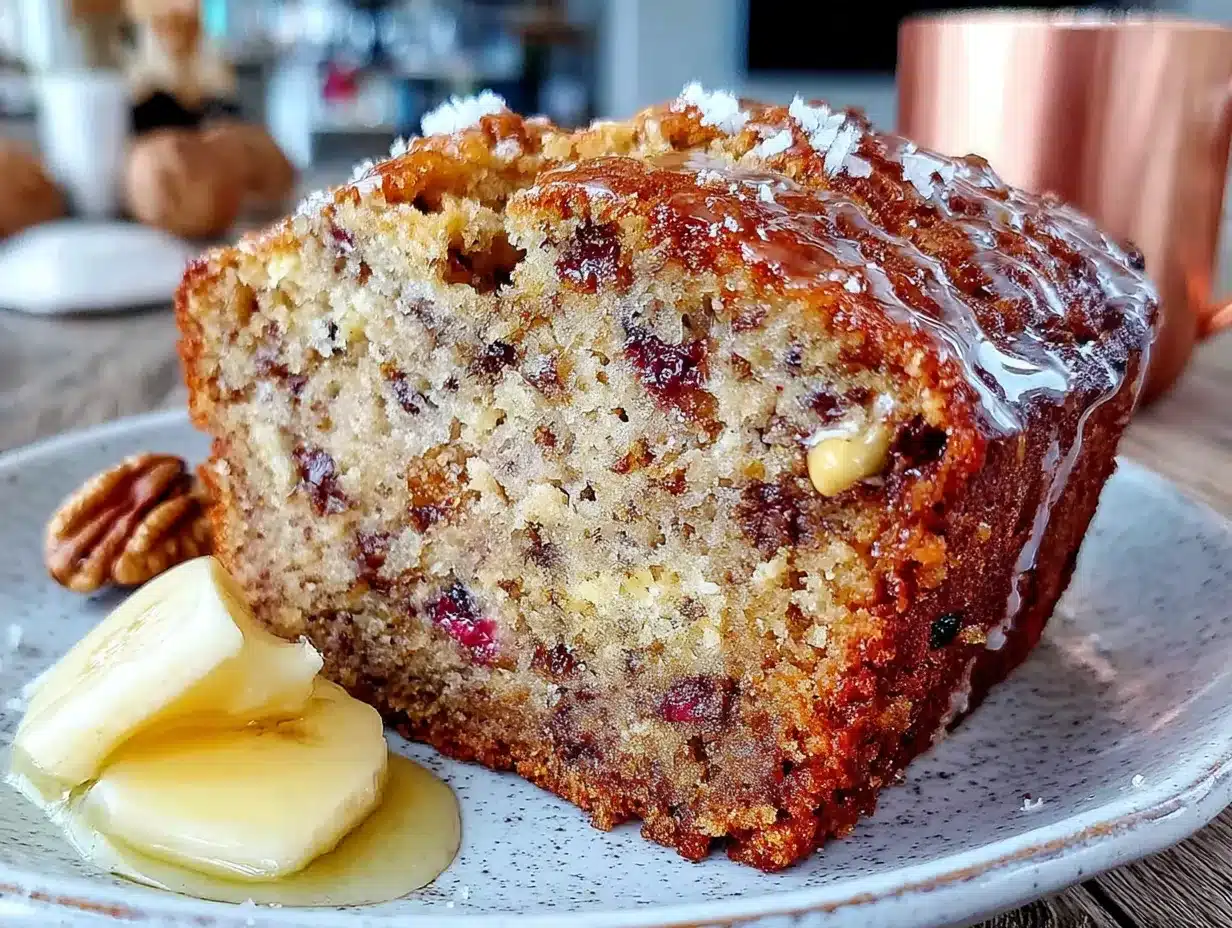
Alright, let’s get to the good part. This method is simple, but I’ve included all the little details that make the difference between a good loaf and a great one. Follow these steps, and you’ll be golden.
- Preheat your oven to 350°F (175°C). Position the rack in the center of the oven. While it’s heating, grease your 9×5-inch loaf pan with butter or non-stick spray, or line it with parchment paper, leaving some overhang on the long sides for easy lifting.
- Mash the bananas. Peel the bananas and place them in your large mixing bowl. Mash them with a fork or potato masher until they’re mostly smooth with a few small lumps. You want some texture, so don’t go overboard—a few chunks are fine and actually add nice pockets of banana flavor.
- Add the wet ingredients. To the mashed bananas, add the melted butter, granulated sugar, brown sugar, egg, yogurt, and vanilla extract. Stir with your wooden spoon or spatula until everything is well combined. The mixture should look smooth and slightly glossy. Don’t worry if it seems a little thin—that’s normal.
- Add the dry ingredients. Sprinkle the flour, baking soda, salt, and cinnamon (if using) over the wet mixture. Stir gently until just combined. This is the most important step: stop stirring as soon as you no longer see streaks of flour. Overmixing develops gluten, which makes the bread tough and dense. A few lumps are totally fine—they’ll bake out.
- Fold in any add-ins (optional). If you’re using nuts or chocolate chips, gently fold them in with a few strokes of the spatula. Don’t overmix here either.
- Pour the batter into the prepared pan. Use your spatula to scrape every last bit of batter into the pan. Smooth the top gently—it will level out as it bakes.
- Bake for 50-60 minutes. Place the pan in the preheated oven and bake until a toothpick inserted into the center comes out clean or with just a few moist crumbs. The top should be golden brown and cracked in a few places—that’s a good sign. If the top is browning too quickly (after about 40 minutes), tent the pan loosely with aluminum foil.
- Cool in the pan for 10 minutes. Set the pan on a wire rack and let it cool for 10 minutes. This allows the loaf to set so it doesn’t fall apart when you remove it.
- Remove from the pan and cool completely. Use the parchment overhang or a butter knife to loosen the edges, then turn the loaf out onto the wire rack. Let it cool completely before slicing—about 1 hour. I know it’s tempting, but slicing while it’s warm will make it crumble. Trust me, I’ve learned this the hard way.
Pro tip: If you want a bakery-style crackly top, let the batter rest in the pan for 10 minutes before baking. This allows the flour to hydrate fully and creates a nicer crust.
Cooking Tips & Techniques
After making this recipe more times than I can count, I’ve picked up a few tricks that make the process smoother and the results more consistent. Here are my best tips:
- Use a kitchen scale for flour. I know, I know—it’s an extra step. But flour is notoriously easy to over-measure with cups. Scooping directly from the bag can add up to 25% more flour, which makes your bread dry. If you don’t have a scale, spoon the flour into your measuring cup and level it off with a knife.
- Don’t skip the yogurt. I’ve tested this recipe without it, and the bread was noticeably drier. The yogurt adds moisture and a slight tang that complements the sweetness. Sour cream works too, but yogurt is my go-to because it’s usually what I have on hand.
- Check your baking soda’s freshness. Baking soda loses its potency over time. If your loaf doesn’t rise well, that’s usually the culprit. To test, drop a pinch of baking soda into a little vinegar—if it fizzes vigorously, it’s good.
- Rotate the pan halfway through baking. Ovens can have hot spots. About 25 minutes in, quickly rotate the pan 180 degrees to ensure even browning. Do this quickly so the oven doesn’t lose too much heat.
- Let it cool completely. I mentioned this in the method, but it bears repeating. The loaf continues to cook internally as it cools, and cutting too early releases steam that makes the bread gummy. Be patient—your future self will thank you.
- One mistake I made early on: I used to mash my bananas into a complete paste, thinking smoother was better. Turns out, leaving a few small chunks gives the bread more banana flavor in every bite. So don’t over-mash!
Variations & Adaptations
This recipe is wonderfully adaptable. Here are a few ways to change it up depending on what you’re in the mood for or what you have in your pantry:
- Gluten-Free Version: Substitute the all-purpose flour with a 1:1 gluten-free baking flour blend that contains xanthan gum. I’ve had good results with Bob’s Red Mill 1-to-1 Baking Flour. The texture will be slightly more tender, but it’s still delicious.
- Whole Wheat Version: Swap half the all-purpose flour for whole wheat flour. This adds a nuttier flavor and more fiber. The loaf will be a bit denser, so add an extra tablespoon of yogurt to keep it moist.
- Vegan Version: Replace the egg with a flax egg (1 tablespoon ground flaxseed mixed with 3 tablespoons water, let sit for 5 minutes). Use coconut oil or vegan butter instead of regular butter, and use a dairy-free yogurt. The texture will be slightly more dense, but it works beautifully.
- Chocolate Chip Banana Bread: Fold in ½ cup of semi-sweet or dark chocolate chips. I like to toss them in a tablespoon of flour first to prevent them from sinking to the bottom of the loaf.
- Nutty Banana Bread: Add ½ cup of toasted walnuts or pecans. To toast them, spread on a baking sheet and bake at 350°F for 5-7 minutes until fragrant. Let them cool before folding into the batter.
- Spiced Banana Bread: Add ¼ teaspoon of nutmeg and ¼ teaspoon of ginger along with the cinnamon. This gives the bread a warm, almost chai-like flavor that’s perfect for fall.
I once made a version with chopped dark chocolate and toasted coconut flakes—it was gone in two days. Don’t be afraid to experiment!
Serving & Storage Suggestions
This banana bread is wonderful in so many ways. Here’s how to serve it and keep it fresh:
- Serving temperature: I love it at room temperature, but it’s also amazing warm. To reheat a slice, pop it in the toaster for about 2 minutes or microwave for 15 seconds. A little pat of butter on a warm slice is pure heaven.
- Perfect pairings: Serve with a hot cup of coffee or tea for a cozy afternoon treat. For breakfast, I like it alongside a bowl of fresh fruit and a yogurt parfait. It’s also great with a drizzle of honey or a spread of cream cheese.
- Storing at room temperature: Wrap the loaf tightly in plastic wrap or aluminum foil, or store it in an airtight container. It will stay fresh for up to 4 days at room temperature. I find it actually tastes better on day two—the flavors have time to meld.
- Refrigerating: You can refrigerate the bread for up to a week. Just make sure it’s well-wrapped so it doesn’t dry out. Let it come to room temperature before serving, or warm it up.
- Freezing: This bread freezes beautifully. Wrap the cooled loaf (or individual slices) tightly in plastic wrap, then again in aluminum foil, and place in a freezer bag. It will keep for up to 3 months. To thaw, leave it on the counter for a few hours or microwave individual slices for 30-45 seconds.
- Flavor development: The banana flavor actually deepens overnight. If you can resist eating it the day you bake it, you’ll be rewarded with an even more intense banana taste the next day. It’s a little trick I learned from Aunt Lena—she always said “the bread needs to sleep.”
Nutritional Information & Benefits
While this banana bread is definitely a treat, it does have some redeeming qualities. Here’s a rough estimate per slice (based on 10 slices):
- Calories: Approximately 220-250 per slice
- Fat: 8-10g
- Carbohydrates: 35-40g
- Fiber: 2-3g
- Sugar: 18-22g
- Protein: 4-5g
Health highlights: Bananas are a great source of potassium, vitamin B6, and vitamin C. They also provide natural sweetness, which allows us to use less refined sugar. The yogurt adds a small amount of protein and calcium. If you use whole wheat flour, you’ll get extra fiber and nutrients.
Dietary considerations: This recipe is vegetarian. For gluten-free or vegan options, see the variations section above. It contains dairy (butter, yogurt), eggs, and gluten (flour).
I’m not a nutritionist, and I don’t pretend this is a health food. But I do believe in balance—sometimes you need a slice of banana bread, and that’s okay. Making it at home with real ingredients is always a win.
Conclusion
This one-bowl banana bread is more than just a recipe—it’s a little piece of comfort that fits into any day, whether you’re having a quiet morning or a hectic afternoon. It’s the kind of bread that doesn’t ask for much, but gives back so much in return. A warm slice, a cup of coffee, and maybe a quiet moment to yourself—that’s the whole point.
I hope you give it a try, and I hope it brings you the same simple joy it brings me. Don’t be afraid to make it your own—throw in some chocolate chips, swap the nuts, or just keep it plain and perfect. There’s no wrong way to do this.
I’d love to hear how yours turns out! Did you make any changes? Was it a hit with your family? Drop a comment below and let me know. And if you loved it, share it with a friend who could use a little homemade comfort. Happy baking!
Frequently Asked Questions
Can I use frozen bananas for this recipe?
Absolutely! Frozen bananas work great. Thaw them completely first, then drain off any excess liquid before mashing. They’ll be very soft and almost liquidy, but that’s fine—just mash them well and proceed with the recipe. The flavor is often even more intense because freezing concentrates the natural sugars.
Why did my banana bread sink in the middle?
This usually happens for one of three reasons: the batter was overmixed, the oven temperature was too low, or the bread was underbaked. Make sure your oven is properly preheated to 350°F and that you’re not opening the door too often during baking. Also, be gentle when mixing—overmixing creates too much air, which then collapses.
Can I reduce the sugar in this recipe?
Yes, you can reduce the total sugar to ½ cup (instead of ¾ cup) if your bananas are very ripe and sweet. I wouldn’t go lower than that, as sugar contributes to the bread’s moisture and texture. You can also try using coconut sugar or a blend of sugar and a natural sweetener like maple syrup, but that will change the liquid ratio slightly.
How do I know when the banana bread is done baking?
The best test is the toothpick test—insert a toothpick or a thin knife into the center of the loaf. If it comes out clean or with just a few moist crumbs, it’s done. The top should be golden brown and cracked, and the edges should pull away slightly from the pan. If the toothpick comes out with wet batter, bake for another 5 minutes and test again.
Can I make this into muffins instead of a loaf?
Yes! This batter makes about 12 standard muffins. Line a muffin tin with paper liners and fill each cup about ¾ full. Bake at 350°F for 18-22 minutes, or until a toothpick inserted into the center comes out clean. Muffins bake much faster than a loaf, so keep an eye on them after the 15-minute mark.
Pin This Recipe!
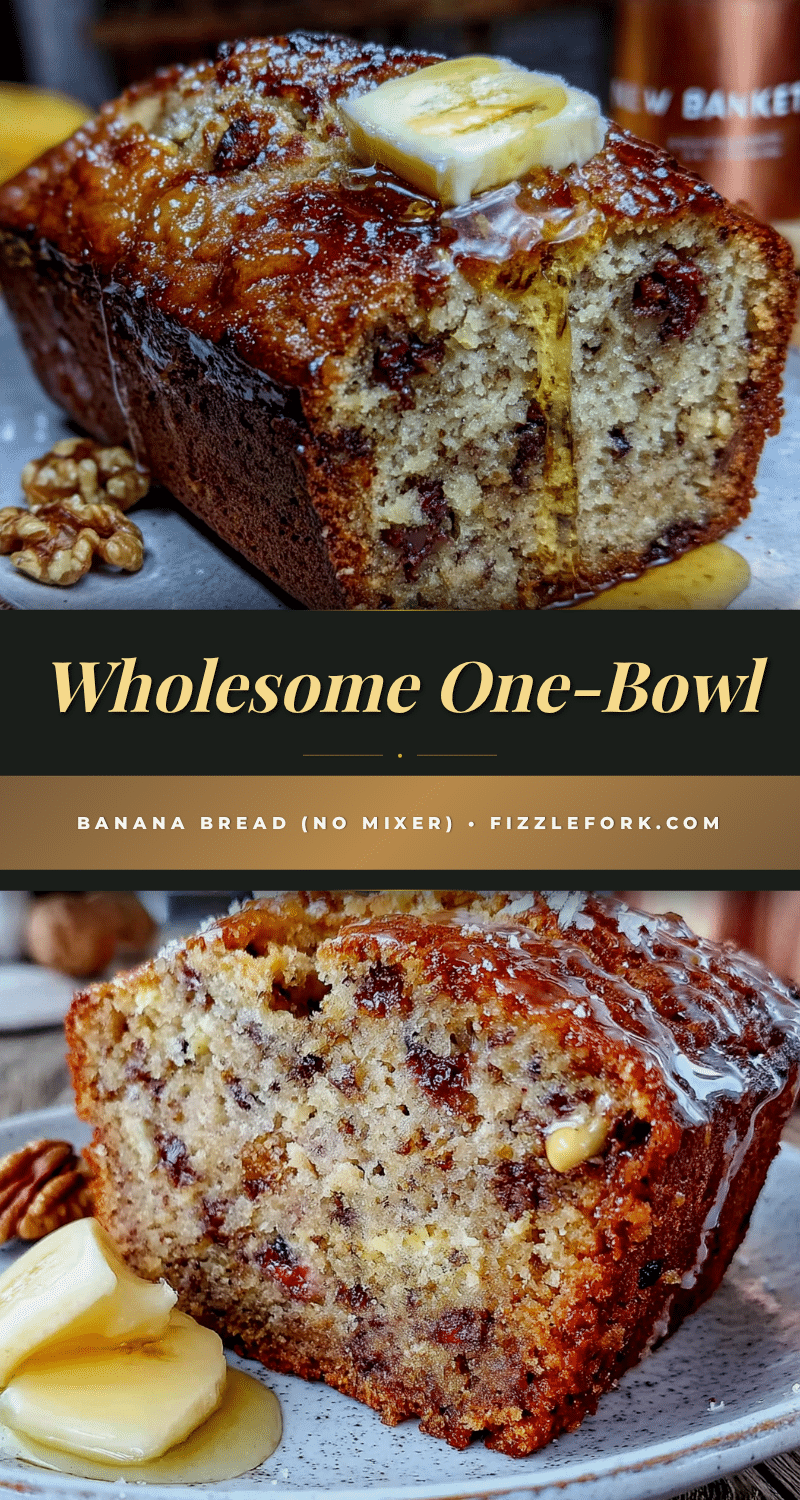
Easy One-Bowl Banana Bread Recipe (No Mixer Needed)
This simple, one-bowl banana bread requires no mixer and uses basic pantry staples. It’s incredibly moist, tender, and full of banana flavor—perfect for breakfast, snack, or dessert.
- Prep Time: 10 minutes
- Cook Time: 55 minutes
- Total Time: 1 hour 5 minutes
- Yield: 10 servings 1x
- Category: Dessert
- Cuisine: American
Ingredients
- 3 large ripe bananas (about 1 ½ cups mashed)
- ⅓ cup melted unsalted butter (75g)
- ½ cup granulated sugar (100g)
- ¼ cup packed light brown sugar (50g)
- 1 large egg, room temperature
- ¼ cup plain yogurt or sour cream (60g)
- 1 teaspoon vanilla extract
- 1 ½ cups all-purpose flour (190g)
- 1 teaspoon baking soda
- ½ teaspoon salt
- ½ teaspoon ground cinnamon (optional but recommended)
- Optional add-ins: ½ cup chopped walnuts, pecans, or chocolate chips
Instructions
- Preheat your oven to 350°F (175°C). Grease a 9×5-inch loaf pan with butter or non-stick spray, or line with parchment paper, leaving overhang on the long sides.
- Mash the bananas in a large mixing bowl with a fork or potato masher until mostly smooth with a few small lumps.
- Add melted butter, granulated sugar, brown sugar, egg, yogurt, and vanilla extract to the mashed bananas. Stir until well combined and smooth.
- Sprinkle flour, baking soda, salt, and cinnamon (if using) over the wet mixture. Stir gently until just combined—do not overmix. A few lumps are fine.
- If using add-ins, gently fold them in with a few strokes of the spatula.
- Pour the batter into the prepared pan and smooth the top gently.
- Bake for 50-60 minutes, until a toothpick inserted into the center comes out clean or with a few moist crumbs. If the top browns too quickly, tent with foil after 40 minutes.
- Cool in the pan on a wire rack for 10 minutes.
- Remove from the pan using the parchment overhang or by loosening edges with a knife, then cool completely on the wire rack (about 1 hour) before slicing.
Notes
For a bakery-style crackly top, let the batter rest in the pan for 10 minutes before baking. Use a kitchen scale for flour to avoid over-measuring. The banana flavor deepens overnight, so it tastes even better the next day.
Nutrition
- Serving Size: 1 slice
- Calories: 235
- Sugar: 20
- Sodium: 280
- Fat: 9
- Saturated Fat: 5
- Carbohydrates: 37
- Fiber: 2
- Protein: 4
Keywords: banana bread, easy banana bread, one bowl banana bread, no mixer banana bread, moist banana bread, simple banana bread


