I was standing in the canned vegetable aisle last December — a place I have no business being during the holiday rush — when this scent hit me. Not the metallic tang of green beans or the dusty smell of cardboard boxes. It was sharp and sweet, like someone had just peeled a thousand oranges right there between the creamed corn and the beets. And just like that, I was eight years old again, standing in my neighbor Mrs. Kowalski’s kitchen, watching her slice oranges so thin you could see the afternoon light right through them.
She wasn’t my grandmother, and this wasn’t some cherished family heirloom recipe passed down through generations. Mrs. Kowalski was just this lovely older lady who lived three doors down and apparently had strong opinions about store-bought garnishes. “You can’t fake sunshine,” she told me once, sliding a tray of orange slices into her ancient oven. I had no idea what she meant at the time. I was just there for the free cookies she always offered afterward. But I remembered the way her kitchen smelled — like a warm citrus hug — and how those slices looked when they came out, all shrunken and crinkly at the edges, like little stained-glass windows you could eat.
She moved away years ago, and I never got her recipe. So I’ve spent the last few Decembers trying to recreate it through trial and error. Honestly, my first batch looked like burnt frisbees. The second batch was so thick they never dried properly and got moldy in the jar — that was a fun discovery. But the third batch? That was it. That was the moment I finally understood what she meant about sunshine. These simple oven-dried orange slices are my attempt to bottle up that feeling, that memory, that perfect little burst of brightness.
Maybe you’ve been there — chasing a taste or a smell from your past, trying to get it just right. This is that recipe. And the best part? It’s almost embarrassingly easy. I mean, you’re basically just putting fruit in the oven and walking away. But the result is something that looks like you spent hours on it, which is honestly my favorite kind of cooking.
Why You’ll Love This Recipe
Let me tell you why these simple oven-dried orange slices have become my absolute go-to for gifting, garnishing, and just making my kitchen smell incredible. I’ve tested this method more times than I care to admit, and this version is the one that works every single time, no fancy equipment required.
- Incredibly Easy: You only need two ingredients — oranges and a little patience. The oven does all the hard work. This is the kind of recipe you can start on a Tuesday night after work and have beautiful results by bedtime.
- Budget-Friendly Gifting: A bag of oranges costs a few dollars, but a jar of these slices looks like something from a fancy boutique. Perfect for hostess gifts, teacher appreciation, or holiday cookie plates. Your wallet will thank you.
- Lasts For Months: Properly dried and stored, these slices keep for up to a year. That means you can make them now and have them ready for any occasion that pops up. No last-minute scrambling.
- So Versatile: Use them in cocktails, teas, baked goods, or just as pretty decorations. They’re not just for looks either — they add a concentrated burst of citrus flavor to anything they touch.
- Zero Special Skills Needed: If you can slice an orange and set a timer, you can make these. No candy thermometers, no complicated techniques. Just fruit and heat.
What makes this recipe different from the other drying methods out there? It’s all about the temperature and timing. I’ve found that a low-and-slow approach at 200°F gives you the most even drying without burning the edges or leaving the centers too moist. I’ve tried higher temperatures, and trust me, you end up with orange-scented charcoal. This method gives you those beautiful, translucent slices that look like jewels in a jar.
This recipe isn’t just good — it’s the kind of thing that makes people ask, “Wait, you made these yourself?” It’s that satisfying. Plus, there’s something deeply calming about watching fruit transform in the oven, like a little science experiment happening in your own kitchen. Perfect for those busy weeks when you need a low-stress project that still feels productive.
What Ingredients You Will Need
This recipe uses the simplest ingredients imaginable, which is exactly why ingredient quality matters so much. Since oranges are the star of the show, you want to pick the best ones you can find.
- Fresh Oranges (3-4 large): This is the only real ingredient, so choose wisely. I prefer navel oranges for their sweetness and seedless interior, but blood oranges create stunning deep red slices, and cara cara oranges give a beautiful pinkish hue. Look for firm, heavy oranges with smooth skin — lighter ones tend to be dry inside. Organic is ideal since you’re eating the peel, but conventional works fine if you wash them thoroughly. I’ve had great luck with the big bag of navels from Costco when I’m making large batches for gifting.
- Optional: Simple Syrup (1 cup water + 1 cup sugar): This is completely optional, but if you want candied-style slices that are sweeter and slightly chewier, a quick dip in simple syrup before drying makes a difference. I only do this when I’m making slices specifically for eating (like on cakes or as a snack). For garnish and decoration, skip it — the natural sugars concentrate beautifully on their own.
- Optional: Cinnamon Sticks or Vanilla Bean: If you’re making the simple syrup version, simmering a cinnamon stick or a split vanilla bean in the syrup adds a lovely warmth that complements the citrus. This is a nice touch for holiday gifting but totally unnecessary for everyday use.
Ingredient Selection Tips: The thickness of the peel matters more than you’d think. Thicker-skinned oranges take longer to dry and can end up with a tough, chewy rind. I look for oranges with thinner, tighter skin — they dry more evenly and have a better texture. Also, avoid any oranges with soft spots or blemishes, as these can harbor mold that will ruin your entire batch during the long drying process.
Substitution Guidance: This method works beautifully with other citrus fruits too. Lemons, limes, and grapefruits all dry wonderfully using the exact same technique. Just adjust the slicing thickness slightly — thinner for limes (about 1/8 inch) and slightly thicker for grapefruits (about 1/4 inch) since they have more moisture to lose. I’ve even done kumquats, which are adorable but tedious to slice. Meyer lemons are my personal favorite variation — they’re sweeter and less acidic than regular lemons, with a gorgeous yellow color.
Equipment Needed
You don’t need much for this recipe, which is part of its beauty. Here’s what I use:
- A Sharp Knife or Mandoline Slicer: A sharp chef’s knife works perfectly, but a mandoline gives you the most consistent slices. I use my Benriner mandoline for large batches because it makes quick work of slicing and keeps every piece uniform. If you’re using a knife, make sure it’s sharp — dull knives will crush the fruit and release too much juice. A serrated knife also works well for slicing through the peel cleanly.
- Baking Sheets (2-3): You’ll need enough pans to arrange the slices in a single layer without overlapping. I use standard half-sheet pans. If you only have one pan, you’ll need to work in batches, which takes longer but is totally doable.
- Parchment Paper or Silicone Baking Mats: This is non-negotiable for easy cleanup. The natural sugars in the oranges will caramelize and stick to your pans. Parchment paper makes removal a breeze. Silicone mats work great too, though they can sometimes slow down drying slightly.
- Paper Towels: For blotting the slices before they go into the oven. This step removes excess surface moisture and speeds up the drying process.
- Airtight Storage Containers: Mason jars, glass containers with tight lids, or even zip-top bags work for storage. I prefer glass jars because they look pretty on the counter and keep the slices crisp.
- Optional: Cooling Racks: Placing the orange slices on cooling racks set inside your baking sheets allows air to circulate underneath, which speeds up drying significantly. This is my preferred method for large batches.
Budget-Friendly Tip: If you don’t have a mandoline, don’t run out and buy one. A sharp knife and a steady hand work perfectly. I made dozens of batches with just a knife before I finally invested in a mandoline. The key is taking your time and trying to make each slice the same thickness — about 1/8 to 1/4 inch.
Preparation Method
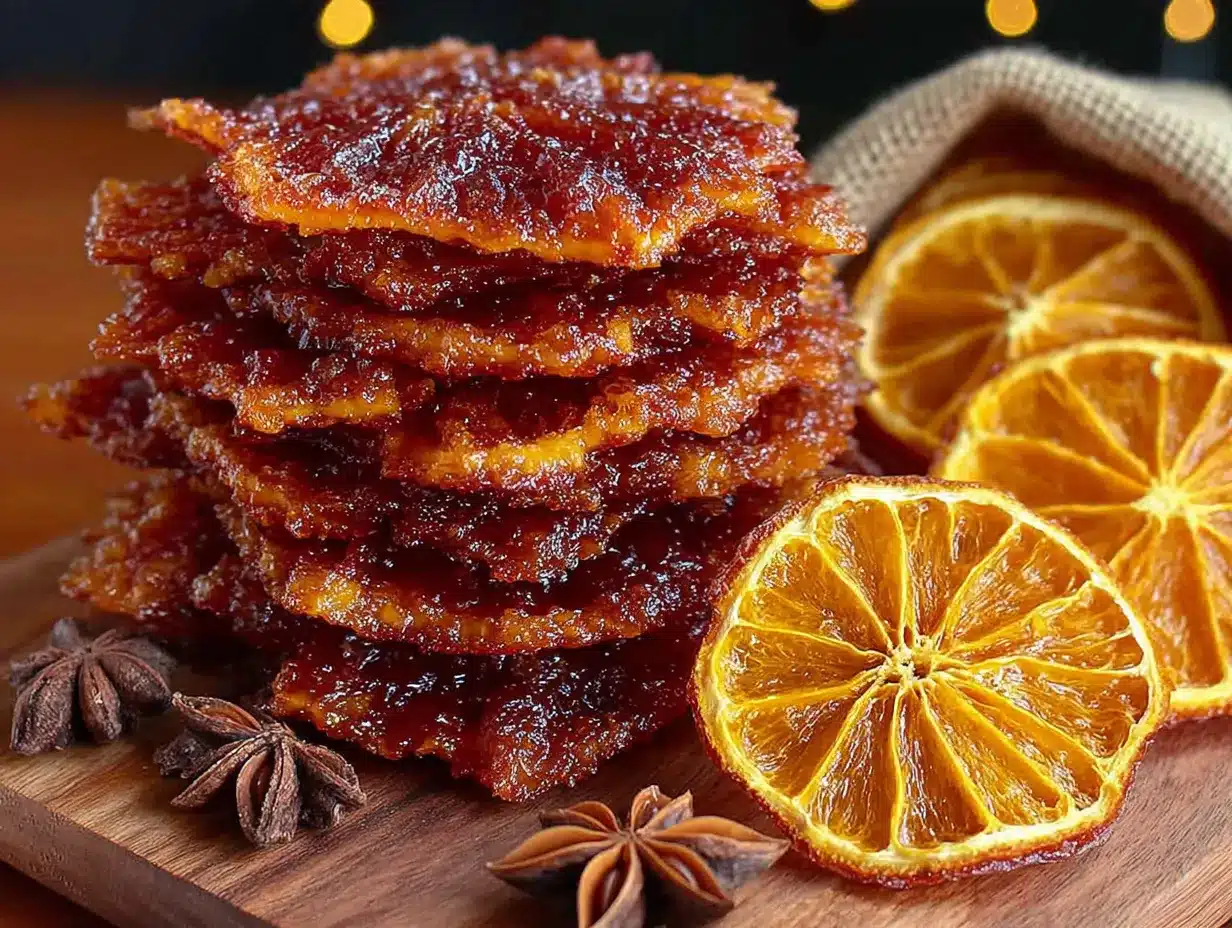
Alright, let’s get to the actual process. I’m going to walk you through this step by step, including all the little things I’ve learned from my failures. Trust me, I’ve made every mistake in the book so you don’t have to.
- Preheat your oven to 200°F (93°C). This is important — don’t be tempted to crank up the heat to speed things up. Higher temperatures will cook the oranges rather than dry them, resulting in burnt edges and underdone centers. I learned this the hard way when I tried 250°F and ended up with a kitchen full of smoke and a tray of ruined slices.
- Wash and dry your oranges thoroughly. Even if they’re organic, give them a good scrub under warm water to remove any wax or residue. Dry them completely with a clean towel. Any moisture on the skin will affect how they dry.
- Slice the oranges evenly. Aim for slices between 1/8 inch (3mm) and 1/4 inch (6mm) thick. Too thin and they’ll become fragile and break easily. Too thick and they’ll take forever to dry and might not dry all the way through. I find the sweet spot is about the thickness of a quarter. If you’re using a mandoline, set it to 3-4mm. If you’re using a knife, take your time and try to keep your slices consistent. This is the most important step for even drying.
- Blot the slices with paper towels. Lay the slices out on a clean kitchen towel or several layers of paper towels. Place another towel on top and press gently to absorb excess juice. This step removes surface moisture and helps prevent the slices from steaming instead of drying. You’ll be surprised how much liquid comes off — that’s good! The less moisture going into the oven, the faster and more evenly they’ll dry.
- Arrange on prepared baking sheets. Line your baking sheets with parchment paper or silicone mats. Place the orange slices in a single layer, making sure none of them overlap. Overlapping will create steamy spots that won’t dry properly. If you’re using cooling racks, place the slices on the racks and set the racks on the baking sheets for better air circulation.
- Bake for 2.5 to 4 hours, flipping halfway through. The exact time depends on the thickness of your slices, the water content of your oranges, and your oven. At the 2-hour mark, flip each slice over with a spatula. This ensures even drying. Check them at 2.5 hours — they should be dry to the touch but still slightly pliable. If they’re still sticky or wet in the center, keep going. I’ve had batches that took nearly 5 hours with particularly juicy oranges.
- Check for doneness. Properly dried orange slices should feel leathery and dry to the touch, with no sticky or wet spots. They should be slightly translucent around the edges and the peel should feel firm but not brittle. If you bend a slice gently, it should hold its shape without cracking. If it cracks, they’re overdone. If it feels spongy or moist, they need more time.
- Cool completely on the baking sheets. This is crucial — they’ll continue to dry and firm up as they cool. Leave them on the pans for at least 30 minutes. Don’t try to move them while they’re still warm, as they’re more fragile at this stage.
- Store in an airtight container. Once completely cool, transfer your dried orange slices to a glass jar or airtight container. Store in a cool, dark place. They’ll keep for up to a year, though they’re at their most vibrant in color and flavor within the first 6 months.
Pro tip from my many failures: If you’re making these for the first time, do a test batch with just one orange. This way you can figure out your oven’s quirks without risking a whole bag of fruit. My first attempt with a full bag of blood oranges was heartbreaking — they all came out burnt because my oven runs hot. Now I know to check early and often.
Cooking Tips & Techniques
After making these slices more times than I can count, I’ve picked up a few tricks that make the process smoother and the results prettier. Here’s what I wish someone had told me before I started.
The thickness trap. I cannot stress this enough — consistent thickness is everything. If some slices are 1/8 inch and others are 1/4 inch, the thin ones will burn before the thick ones are dry. I ruined a whole batch this way and ended up picking out the burnt ones like I was sorting through a bag of mixed nuts. Take your time with the slicing, or use a mandoline for perfect uniformity.
The moisture test. Here’s a trick I learned from a pastry chef friend: before you put the slices in the oven, press a paper towel firmly against each one. If the paper towel comes away wet, blot again. The drier they go in, the faster they dry and the better the color. I now blot twice — once right after slicing, and again after they’ve sat for 10 minutes and released more moisture.
Rotate your pans. Most ovens have hot spots, and the back corners tend to get more heat. Halfway through drying, not only should you flip the slices, but you should also rotate your pans front to back and top to bottom if you’re using multiple racks. This ensures even drying across all your slices.
The overnight method. If you have the time, here’s my favorite technique: dry the slices at 200°F for 2 hours, then turn the oven off and leave the slices inside overnight without opening the door. The residual heat continues to dry them gently, and you wake up to perfectly dried slices. This works especially well for thicker slices that need more time. Just make sure your oven stays completely closed — opening it lets moisture in.
Don’t crowd the pan. I know it’s tempting to fit as many slices as possible on each sheet, but overcrowding creates steam, and steam is the enemy of drying. Leave at least half an inch between each slice for proper air circulation. If you have a lot of oranges, it’s better to do multiple batches than to cram them all in at once.
Variations & Adaptations
One of the best things about this recipe is how easy it is to customize. Here are some of my favorite variations that I’ve tested and loved.
Spiced Orange Slices: Before baking, lightly brush the slices with a mixture of melted butter and honey, then sprinkle with cinnamon, cloves, and a pinch of nutmeg. This creates a holiday-spiced version that’s incredible in mulled wine or hot cider. I made these for a Christmas party last year and they disappeared within minutes from the drink garnish tray.
Chocolate-Dipped Orange Slices: After drying, dip half of each slice in melted dark chocolate and let set on parchment paper. The combination of sweet chocolate and concentrated citrus is absolutely divine. These make amazing edible gifts — I package them in little cellophane bags with a ribbon. Just note that once you add chocolate, they need to be eaten within a week or stored in the fridge.
Powdered Orange Sugar: Take your fully dried slices and grind them in a spice grinder or food processor until they form a fine powder. Mix this powder with granulated sugar (about 1 tablespoon powder to 1 cup sugar) for an incredible orange-infused sugar. Use it in cookies, cakes, or sprinkle it over French toast. This is my favorite way to use up slices that broke during drying.
Savory Application: Don’t limit these to sweet dishes! Dried orange slices are fantastic in savory cooking too. Add a slice to braised pork shoulder, tuck one into a roasting chicken, or simmer one in a pot of rice for subtle citrus notes. The concentrated flavor adds depth without the acidity of fresh juice.
Different Citrus Blend: For a stunning visual effect, dry a mix of oranges, lemons, limes, and pink grapefruits together. The color variation is gorgeous in a jar and gives you options for different drinks and dishes. Just remember that different citrus fruits may dry at slightly different rates — check thinner slices like limes earlier than thicker ones like grapefruits.
Serving & Storage Suggestions
These orange slices are incredibly versatile, so let me share some of my favorite ways to use them and how to keep them at their best.
In Beverages: This is the most common use, and for good reason. Drop a dried slice into hot tea, mulled wine, sangria, or even plain water for a subtle citrus infusion. In cocktails, they make a stunning garnish that looks professional and fancy. I love floating one in a glass of prosecco for a simple but elegant touch. For iced tea or lemonade, rehydrate the slice in warm water for a few minutes first to soften it up.
As Edible Decor: String dried orange slices with cranberries and popcorn for a beautiful garland. Tie them onto gift packages with twine for a natural, rustic look. Arrange them on a cheese board for a pop of color. They’re also lovely tucked into wreaths or used as tree ornaments — just don’t eat them if they’ve been sitting out for weeks.
In Baking: Chop dried orange slices finely and add them to scone dough, shortbread cookies, or quick breads. They rehydrate slightly during baking and add intense orange flavor without the moisture of fresh zest. I’ve been adding them to my morning muffin recipe and it’s a game-changer.
Storage: Store your dried orange slices in an airtight container in a cool, dark place. A glass jar on the pantry shelf works perfectly. They’ll keep for up to a year, but the color will start to fade after about 6 months. If you notice any moisture in the jar, that means they weren’t fully dried — take them out and pop them back in the oven at 200°F for another 30 minutes. I’ve had to do this rescue mission more times than I’d like to admit.
Flavor Development: Here’s something interesting — the flavor of dried orange slices actually mellows and deepens over the first few weeks of storage. The sharp acidity fades and the sweetness concentrates. So if you make them a month before you plan to gift them, they’ll actually taste better. I always try to make my holiday batch in early November for this reason.
Nutritional Information & Benefits
While these are mostly used as garnish, it’s good to know what you’re working with. Here’s the nutritional breakdown for one dried orange slice (based on a medium navel orange, sliced into 8 pieces):
- Calories: Approximately 15-20 calories per slice
- Carbohydrates: 4-5 grams (mostly natural sugars that concentrate during drying)
- Fiber: 1 gram (the peel contains most of the fiber)
- Vitamin C: About 15% of your daily value (some is lost during heating, but a good amount remains)
- Calcium: Small amount from the peel
Health Benefits: Oranges are packed with vitamin C, antioxidants, and flavonoids that support immune health and reduce inflammation. The peel, which you eat in dried form, contains higher concentrations of certain beneficial compounds like d-limonene, which has been studied for its anti-inflammatory and antioxidant properties. That said, these are still a concentrated source of natural sugar, so enjoy them in moderation — they’re a garnish, not a snack.
Dietary Considerations: These are naturally gluten-free, vegan, dairy-free, and nut-free. They contain no added sugar unless you use the simple syrup method. The only potential allergen concern is citrus itself, which is rare but possible. If you’re making these for someone with citrus allergies, obviously skip this recipe.
Conclusion
These simple oven-dried orange slices have become a staple in my kitchen, and I think they deserve a spot in yours too. They’re the kind of recipe that looks complicated but isn’t, that impresses people without requiring any real skill, and that fills your home with the most incredible smell while they’re drying. Honestly, I make them just for the aroma sometimes.
Whether you’re making them for holiday gifts, fancy cocktails, or just to have something beautiful sitting on your counter, I hope you give this recipe a try. And don’t be afraid to experiment — try different citrus fruits, add spices, dip them in chocolate, or find your own creative use. That’s the beauty of a simple recipe like this — it’s a starting point, not a rulebook.
I’d love to hear how yours turn out! Drop a comment below and let me know what you used them for, or share your own variation. Did you try the chocolate-dipped version? Did you make a beautiful garland? Did your kitchen smell like heaven for an entire afternoon? Tell me all about it. And if you’re looking for more easy homemade gift ideas, check out our candied lemon peel recipe and homemade vanilla extract — they pair beautifully with these orange slices in a gift basket.
Happy drying, friends. And remember — you can’t fake sunshine.
Frequently Asked Questions
Can I use a dehydrator instead of an oven?
Absolutely! A dehydrator actually works even better than an oven for drying orange slices because it provides consistent airflow. Set your dehydrator to 135°F (57°C) and dry for 6-8 hours, checking periodically. The results are just as good, if not better, and you free up your oven for other things.
Why did my orange slices turn brown?
Browning usually happens when the oven temperature is too high or the slices were too thick. The natural sugars in oranges caramelize and darken when exposed to too much heat. Stick to 200°F and check early. Some browning around the edges is normal, but if the whole slice is brown, lower your temperature next time.
Can I eat the dried orange slices whole?
Yes, you can! They’re fully edible, though the texture is chewy and the peel can be slightly tough. They taste like concentrated orange candy — sweet and slightly tart. If you find the peel too tough, try slicing them thinner next time, or dip them in chocolate to soften the texture.
How do I know if my orange slices are fully dried?
Fully dried slices should feel leathery and dry to the touch, with no sticky or wet spots. They should bend slightly without cracking. If they crack when you bend them, they’re overdone. If they feel spongy or moist, they need more time. When in doubt, let them go another 30 minutes — it’s better to over-dry slightly than to under-dry and risk mold.
Can I dry other fruits using this same method?
Yes! This low-temperature oven method works beautifully for lemons, limes, grapefruits, and even kiwis. Apples and pears also dry well, though they benefit from a quick dip in lemon water to prevent browning. Just adjust the slicing thickness and drying time based on the fruit’s water content. Thinner slices and higher water content mean longer drying times.
Pin This Recipe!

Simple Oven-Dried Orange Slices: Easy Homemade Gift Recipe

Learn how to make beautiful, translucent oven-dried orange slices with just two ingredients. Perfect for garnishing cocktails, teas, baked goods, or as edible gifts that last for months.
- Prep Time: 15 minutes
- Cook Time: 3 hours
- Total Time: 3 hours 15 minutes
- Yield: 24-32 slices 1x
- Category: Garnish
- Cuisine: American
Ingredients
- 3–4 large fresh oranges (navel, blood, or cara cara)
- Optional: 1 cup water + 1 cup sugar (for simple syrup)
- Optional: Cinnamon sticks or vanilla bean (for syrup)
Instructions
- Preheat your oven to 200°F (93°C).
- Wash and dry your oranges thoroughly.
- Slice the oranges evenly between 1/8 inch (3mm) and 1/4 inch (6mm) thick.
- Blot the slices with paper towels to remove excess surface moisture.
- Arrange on prepared baking sheets lined with parchment paper or silicone mats in a single layer without overlapping.
- Bake for 2.5 to 4 hours, flipping halfway through, until dry to the touch but still slightly pliable.
- Check for doneness: slices should feel leathery and dry, with no sticky or wet spots, and bend slightly without cracking.
- Cool completely on the baking sheets for at least 30 minutes.
- Store in an airtight container in a cool, dark place for up to a year.
Notes
For best results, use oranges with thin, tight skin. Consistent slice thickness is crucial for even drying. If making for the first time, do a test batch with one orange. For the overnight method, dry at 200°F for 2 hours, then turn off the oven and leave slices inside overnight without opening the door. Store in a cool, dark place for up to a year; color fades after 6 months.
Nutrition
- Serving Size: 1 dried orange slice
- Calories: 1520
- Sugar: 34
- Carbohydrates: 45
- Fiber: 1
Keywords: dried orange slices, oven-dried oranges, homemade gift, citrus garnish, edible decorations, orange slices recipe


