Jen wasn’t trying to impress anyone. I’d stopped by to borrow a bundt pan—mine had mysteriously vanished after a friend’s birthday cake incident—and the smell hit me before I even got through the door. It wasn’t the usual vanilla-and-sugar cookie smell either. This was deeper. Nutty, warm, and there was this unmistakable coffee shop vibe hanging in her kitchen air.
“Oh, that?” she said when I asked, pointing a flour-dusted spatula at a cooling rack. “Just some cookies. I was bored.”
Bored. Let me tell you, these cookies were anything but boring. I took one bite and honestly, I had to sit down. The edges were perfectly crisp, the centers were soft and chewy, and there was this whole other layer of flavor happening that I couldn’t quite name. It was like the cookie version of a really good hug on a rainy afternoon. You know that feeling when something tastes so good you almost forget to chew? That was me, standing in her kitchen, holding a stolen cookie, pretending I was just being polite.
I asked her what she did differently. She shrugged and said she browned the butter and threw in some espresso powder. Like it was nothing. Like she hadn’t just created the cookie that would haunt my dreams for the next three weeks. I made her write down the recipe on the back of an old receipt, and I’ve been making them ever since. These cozy brown butter espresso chocolate chip cookies are the kind of thing you make when you want the house to smell like comfort and you want to eat something that feels a little bit special without actually trying very hard. And honestly? That’s the best kind of recipe to have in your back pocket.
Why You’ll Love This Recipe
Look, I’ve tested a lot of cookie recipes. A lot. And these brown butter espresso chocolate chip cookies are the ones I keep coming back to. Here’s why they’re different:
- That Brown Butter Magic : Browning the butter adds this incredible nutty, toasty depth that regular butter just can’t touch. It makes the cookies taste almost caramelized.
- The Coffee Kick : The espresso powder doesn’t make these taste like coffee. It intensifies the chocolate flavor and adds this subtle, sophisticated warmth. It’s the secret ingredient that makes people say “what IS that?”
- Perfect Texture Combo : Crispy edges, soft and chewy centers, and melty pools of chocolate in every bite. It’s the cookie texture trifecta.
- Simple, Cozy Ingredients : You probably have most of these in your pantry right now. No weird specialty items, just smart technique with everyday staples.
- Incredibly Forgiving : The dough chills beautifully, so you can make it ahead. It’s perfect for holiday baking, weekend projects, or Tuesday night cravings.
- Crowd-Pleaser Status : I brought these to a potluck and watched a grown man close his eyes while eating one. They’re that good.
These cookies aren’t just another chocolate chip cookie. They’re the upgraded, sophisticated, still-comforting version that makes you wonder why you ever made them any other way. The first time you pull a tray out of the oven and the whole kitchen smells like browned butter and coffee, you’ll understand.
What Ingredients You Will Need
This recipe uses simple, wholesome ingredients to create something truly special. The magic is in the technique, not a long list of obscure items. Most of these are probably in your kitchen right now.
- Unsalted butter, 1 cup (2 sticks) – This is non-negotiable. You need unsalted so you can control the salt level. We’re browning this, so quality matters. I like using Kerrygold for its higher butterfat content, which browns beautifully.
- Brown sugar, 1 cup, packed – Light or dark brown sugar works. Dark brown sugar gives a deeper molasses flavor that pairs gorgeously with the espresso. I use dark brown sugar here for maximum cozy vibes.
- Granulated sugar, ½ cup – The white sugar helps with spreading and gives those crispy edges. Don’t skip it or substitute it all with brown sugar.
- Large eggs, 2, at room temperature – Room temperature eggs incorporate more smoothly into the brown butter mixture. If you forget to take them out, place them in a bowl of warm water for 5 minutes.
- Vanilla extract, 2 teaspoons – Pure vanilla extract makes a difference here. The vanilla and espresso are a fantastic flavor pairing.
- All-purpose flour, 2 ¼ cups – Spoon and level your flour. Scooping directly from the bag packs in too much and makes dense cookies.
- Baking soda, 1 teaspoon – This gives the cookies their spread and chew. Make sure it’s fresh.
- Salt, 1 teaspoon – I use flaky sea salt. A little sprinkle on top before baking is also highly recommended.
- Espresso powder, 1 tablespoon – This is the star. Do not use regular coffee grounds. Espresso powder dissolves easily and gives that deep, roasty flavor. I recommend King Arthur Flour’s espresso powder or Medaglia d’Oro.
- Semi-sweet chocolate chips, 2 cups – Use good quality chips. Ghirardelli or Guittard are my go-to brands. You can also chop up a good chocolate bar for those beautiful chocolate puddles.
- Flaky sea salt, for topping (optional but highly recommended) – A sprinkle of Maldon salt right out of the oven takes these over the top.
Substitution Notes: You can use salted butter, just reduce the added salt to ½ teaspoon. For a dairy-free version, use a high-quality vegan butter stick (I like Miyoko’s) and dairy-free chocolate chips. The flavor will be slightly different, but still delicious.
Equipment Needed
You don’t need a professional bakery setup for these. Just a few reliable tools that make the process smooth and enjoyable.
- Medium saucepan – A light-colored saucepan is ideal for browning butter because you can see the color change. Dark pans make it harder to judge.
- Large mixing bowl – You’ll need room to cream the butter and sugars.
- Whisk – For combining dry ingredients.
- Rubber spatula – For folding in the chocolate chips and scraping every last bit of dough.
- Hand mixer or stand mixer – A hand mixer works perfectly. A stand mixer with the paddle attachment is also great, but honestly, you can do this by hand with a little elbow grease.
- Baking sheets – Two large, light-colored baking sheets. Dark sheets can cause cookies to brown too quickly on the bottom.
- Parchment paper or silicone baking mats – Non-stick is essential for easy cleanup and even baking.
- Cookie scoop – A 1.5-tablespoon scoop gives you uniform cookies. It’s worth the investment.
- Cooling rack – For letting those cookies set up properly.
I’ve made these with a cheap hand mixer and a bent spatula, and they still turned out amazing. Don’t stress about having the fanciest tools.
Preparation Method
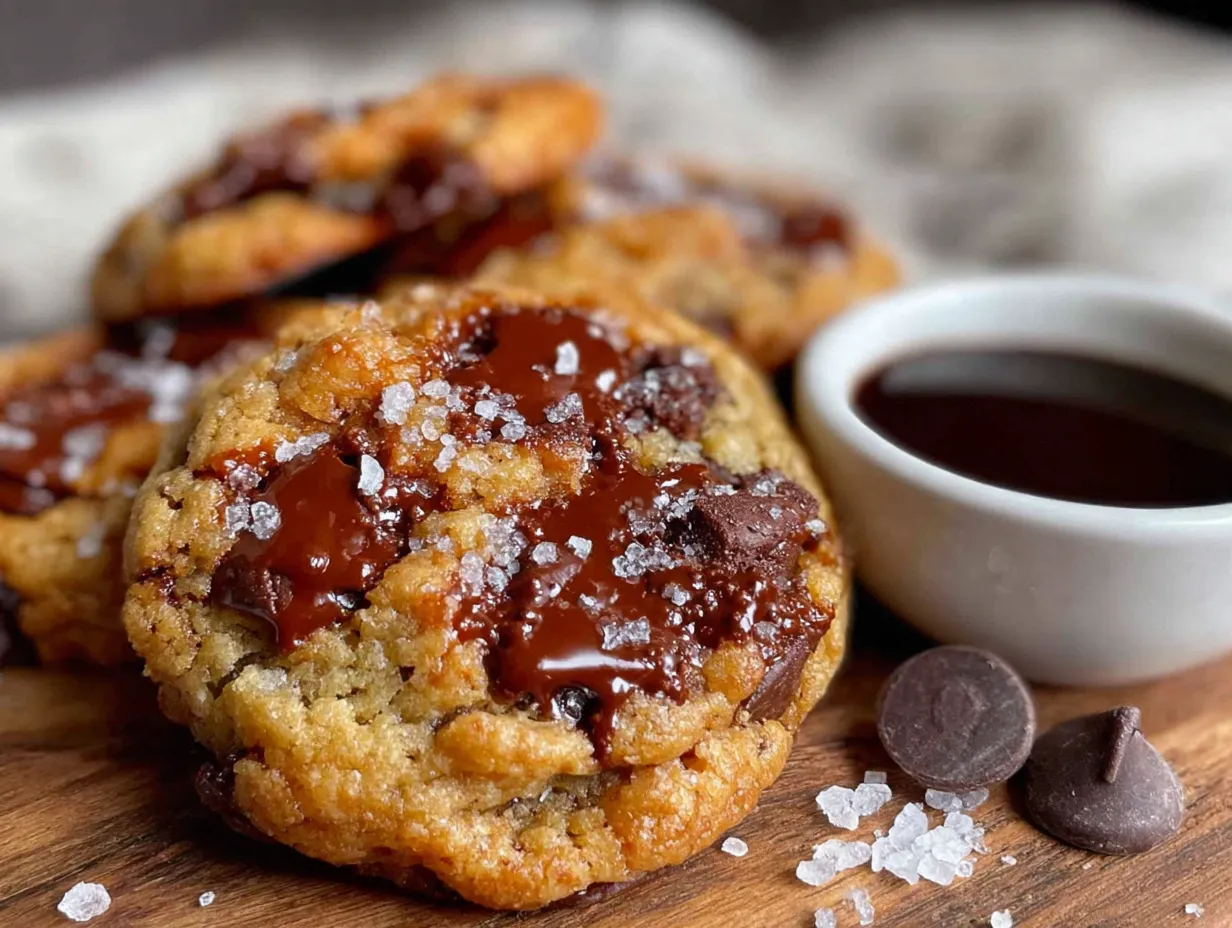
Let’s get to the good part. This method is broken down step-by-step so you can follow along without any guesswork.
- Brown the butter. Place the butter in your medium saucepan over medium heat. Let it melt completely, then continue cooking, swirling the pan occasionally. The butter will foam up, then the foam will subside, and you’ll see browned milk solids forming at the bottom. This takes about 5-7 minutes. Watch it closely—it goes from perfect to burnt quickly. When it smells nutty and the solids are a deep amber color, remove it from the heat immediately. Pour it into a heatproof bowl and let it cool for 10-15 minutes. Do not skip this cooling step, or you’ll end up with greasy cookies.
- Mix the wet ingredients. In your large mixing bowl, combine the cooled brown butter with the brown sugar and granulated sugar. Beat with a hand mixer on medium speed for 2-3 minutes until the mixture looks like wet sand and is slightly lighter in color. Add the eggs one at a time, beating well after each addition. Stir in the vanilla extract. The mixture should look smooth and glossy.
- Combine the dry ingredients. In a separate medium bowl, whisk together the all-purpose flour, baking soda, salt, and espresso powder. Make sure the espresso powder is evenly distributed—nobody wants a pocket of pure espresso in one bite.
- Bring it all together. Gradually add the dry ingredients to the wet ingredients, mixing on low speed or folding with a spatula until just combined. A few streaks of flour are okay. Overmixing at this stage will make your cookies tough.
- Add the chocolate chips. Fold in the chocolate chips with your rubber spatula. Make sure they’re evenly distributed throughout the dough. The dough will be thick and slightly sticky.
- Chill the dough. This is not optional. Cover the bowl with plastic wrap and refrigerate for at least 30 minutes, or up to 72 hours. Chilling firms up the butter, prevents excessive spreading, and allows the flavors to meld together. The longer you chill, the more developed the flavor.
- Preheat and prepare. When you’re ready to bake, preheat your oven to 350°F (175°C). Line your baking sheets with parchment paper or silicone mats.
- Scoop and bake. Using your cookie scoop, portion out rounded tablespoons of dough and place them 2 inches apart on the prepared baking sheets. If you want bakery-style cookies, place a few extra chocolate chips on top of each dough ball. Bake for 10-12 minutes, or until the edges are golden brown and the centers look just set. They will look slightly underdone in the middle—that’s perfect.
- Cool and finish. Let the cookies cool on the baking sheet for 5 minutes. This is crucial for them to set up properly. Then, transfer them to a wire rack. While they’re still warm, sprinkle with a pinch of flaky sea salt if you’re using it. The salt cuts through the sweetness and makes the flavors pop.
Sensory Cue: When the cookies are done, your kitchen will smell like a cozy coffee shop and a bakery had a baby. The edges should be a deep golden brown, and the centers should look slightly puffy and soft.
Cooking Tips & Techniques
I’ve made these cookies probably fifty times by now, and I’ve learned a few things the hard way. Let me save you the trouble.
Watch that butter like a hawk. The first time I browned butter, I got distracted by a phone call and ended up with black, burnt butter. It smelled like a campfire disaster. Start over if that happens—there’s no saving burnt butter. The sweet spot is when it smells like toasted nuts and the milk solids are a warm amber color.
Room temperature eggs matter more than you think. Cold eggs will seize up the brown butter and create a lumpy mess. I learned this when I was rushing and cracked in a cold egg straight from the fridge. The mixture looked curdled. It still baked up okay, but the texture wasn’t as good. Take the extra 5 minutes to warm your eggs.
Don’t skip the chill. I know, you want cookies now. But trust me. I once baked a batch after only 15 minutes of chilling, and they spread into flat, greasy pucks. They still tasted good, but they looked sad. The 30-minute minimum chill is your friend.
Use a cookie scoop for uniform size. This isn’t just about aesthetics. Uniform cookies bake evenly. If you have some big and some small, you’ll end up with burnt edges on the little ones and underdone centers on the big ones. A scoop takes the guesswork out.
Bake one tray at a time. Your oven needs airflow. If you cram two trays in there, the cookies won’t brown evenly. I rotate my tray halfway through baking for good measure.
Variations & Adaptations
This recipe is a fantastic base for experimentation. Here are some of my favorite twists.
Double Chocolate Espresso Cookies: Replace ¼ cup of the flour with ¼ cup of unsweetened cocoa powder. You’ll get a rich, fudgy chocolate cookie with that same espresso kick. It’s dangerously good.
White Chocolate and Macadamia Nut Version: Swap the semi-sweet chips for white chocolate chips and add ½ cup of chopped macadamia nuts. The buttery nuts and creamy white chocolate are a lovely contrast to the nutty brown butter.
Gluten-Free Adaptation: Use a 1:1 gluten-free baking flour blend (I like Bob’s Red Mill). Add ½ teaspoon of xanthan gum if your blend doesn’t already include it. The texture will be slightly more tender, but the flavor is spot on.
Mint Chocolate Chip Variation: Add ½ teaspoon of peppermint extract along with the vanilla. Use dark chocolate chips instead of semi-sweet. The cool mint and warm espresso are a surprisingly fantastic pair. I made these for a holiday party and they vanished.
Nutty Crunch: Fold in ½ cup of toasted, chopped pecans or walnuts along with the chocolate chips. The added crunch is wonderful, and the nuts get even toastier during baking.
Serving & Storage Suggestions
These cookies are best enjoyed warm, obviously. That moment when the chocolate is still slightly melty and the edges are crisp? Perfection. Serve them with a cold glass of milk, a hot cup of coffee (ironic, I know), or a scoop of vanilla ice cream for an indulgent dessert.
For storage, keep the cookies in an airtight container at room temperature. They’ll stay fresh for up to 5 days, though I doubt they’ll last that long. Place a slice of bread in the container to keep them soft—the bread absorbs excess air and releases moisture.
You can also freeze the baked cookies for up to 3 months. Layer them between sheets of parchment paper in a freezer-safe container. Thaw at room temperature for about 15 minutes, or pop them in a 300°F oven for 5 minutes to re-crisp the edges.
The dough itself freezes beautifully. Scoop the dough into balls, freeze them solid on a baking sheet, then transfer to a freezer bag. You can bake them straight from frozen—just add 2-3 minutes to the baking time. This is my secret weapon for unexpected guests or late-night cravings.
The flavors actually develop and deepen over the first 24 hours. I’m not saying you should wait that long, but if you can resist, the cookies are even better the next day.
Nutritional Information & Benefits
Let’s be real—these are cookies, not a health food. But here’s the breakdown per cookie (based on 36 cookies):
| Nutrient | Amount per Cookie |
|---|---|
| Calories | 175 |
| Total Fat | 10g |
| Saturated Fat | 6g |
| Cholesterol | 25mg |
| Sodium | 115mg |
| Total Carbohydrates | 22g |
| Dietary Fiber | 1g |
| Sugars | 15g |
| Protein | 2g |
On the bright side, dark chocolate contains antioxidants, and the espresso powder gives you a tiny caffeine boost. The brown butter adds a richness that means one or two cookies is genuinely satisfying—not that I’m suggesting you stop there. These are a treat, and treats are good for the soul. Balance is everything.
Conclusion
These cozy brown butter espresso chocolate chip cookies are more than just a recipe. They’re the kind of cookie you make when you want the house to smell amazing, when you want to feel like you’ve done something special with your afternoon, and when you want to eat something that makes you close your eyes and sigh. The brown butter brings this incredible depth, the espresso makes the chocolate sing, and the texture is absolutely spot-on.
I love that this recipe came from a completely casual, unpretentious moment in a friend’s kitchen. That’s the best kind of cooking—no pressure, no performance, just good food made for the joy of it. I hope you make these your own. Add more chocolate. Sprinkle extra salt. Double the batch. Make them for a rainy Tuesday or a holiday party or just because you want your kitchen to smell like a hug.
When you make them—and I really hope you do—come back and tell me how they turned out. Drop a comment below, share your tweaks, or tag me in your photos. I genuinely love hearing about your baking adventures. Now go brown some butter. You won’t regret it.
Frequently Asked Questions
Can I use regular coffee instead of espresso powder?
I wouldn’t recommend it. Regular coffee grounds are much coarser and won’t dissolve fully into the dough. You’ll end up with gritty bits of coffee that don’t taste great. Espresso powder is finely ground and dissolves easily. If you don’t have it, you can skip it, but the cookies won’t have that same depth of flavor.
My cookies spread too much. What went wrong?
This usually happens for one of three reasons: the dough wasn’t chilled long enough, the butter was too warm when you mixed it, or you used too much sugar. Make sure you chill the dough for at least 30 minutes, and let the browned butter cool properly before mixing. Also, make sure you’re measuring your flour correctly by spooning and leveling it.
Can I make the dough ahead of time?
Absolutely. The dough can be refrigerated for up to 3 days. The flavor actually improves as the espresso and brown butter notes meld together. You can also freeze the dough balls for up to 3 months. Bake from frozen, adding a couple of minutes to the baking time.
Why did my brown butter turn out bitter?
You likely cooked it too long. Brown butter goes from perfect to burnt very quickly. When you see the milk solids turn a deep amber color and smell that nutty aroma, remove it from the heat immediately. Pour it into a cool bowl to stop the cooking process. If it smells burnt or looks very dark, start over.
Can I use dark chocolate chips instead of semi-sweet?
Yes, absolutely. Dark chocolate chips will give you a more intense, less sweet cookie. I sometimes use a mix of semi-sweet and dark chocolate chips for a more complex chocolate flavor. Just keep in mind that the espresso powder already adds a touch of bitterness, so the overall cookie will be less sweet if you use all dark chocolate.
Pin This Recipe!
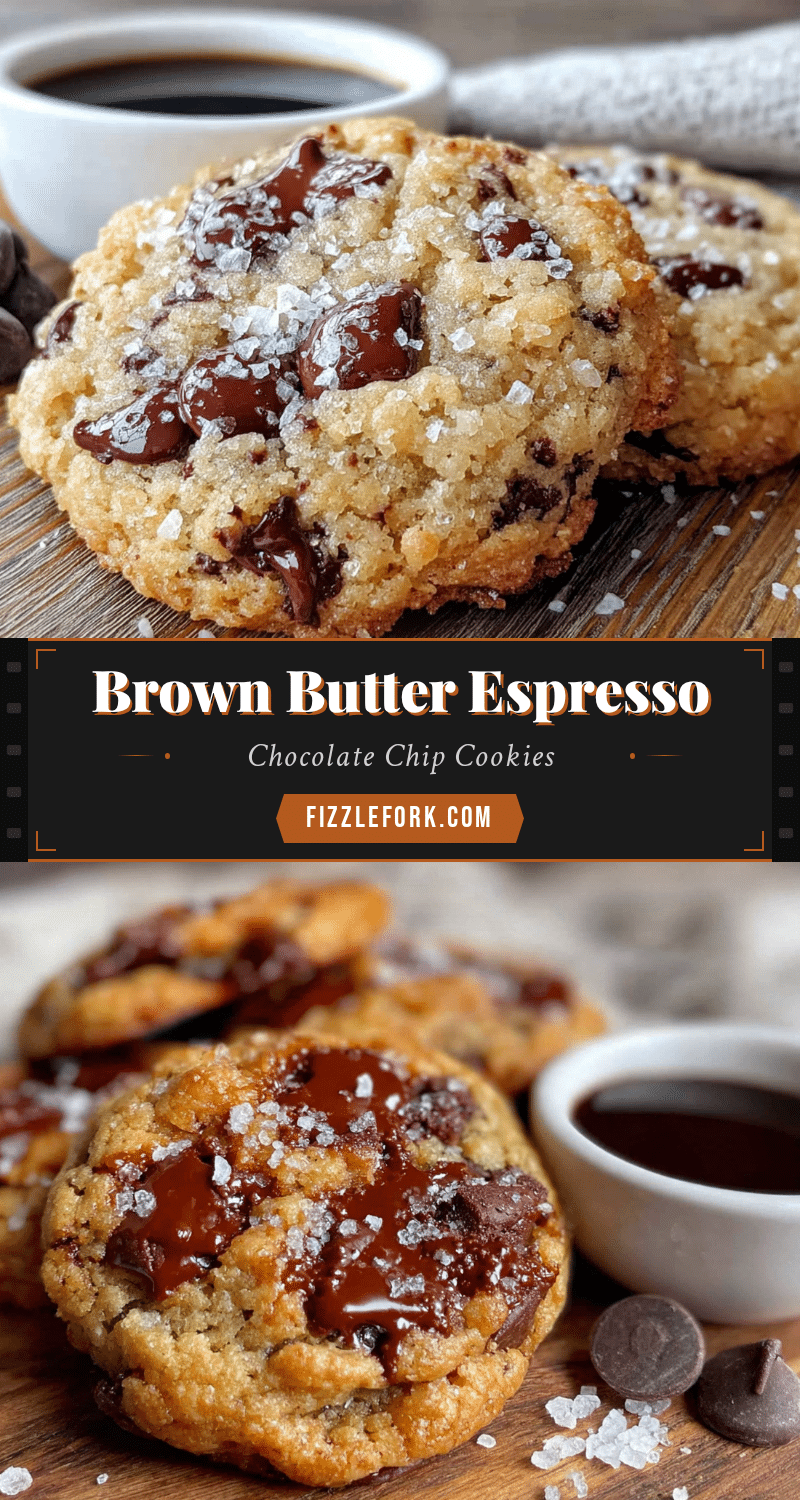
Cozy Brown Butter Espresso Chocolate Chip Cookies
These cookies combine nutty browned butter with espresso powder to create a deeply flavorful, sophisticated chocolate chip cookie with crispy edges, soft centers, and melty chocolate in every bite.
- Prep Time: 20 minutes
- Cook Time: 12 minutes
- Total Time: 1 hour 2 minutes (including 30 minutes chilling)
- Yield: 36 cookies 1x
- Category: Dessert
- Cuisine: American
Ingredients
- 1 cup (2 sticks) unsalted butter
- 1 cup packed brown sugar (light or dark)
- ½ cup granulated sugar
- 2 large eggs, at room temperature
- 2 teaspoons vanilla extract
- 2 ¼ cups all-purpose flour
- 1 teaspoon baking soda
- 1 teaspoon salt (flaky sea salt recommended)
- 1 tablespoon espresso powder
- 2 cups semi-sweet chocolate chips
- Flaky sea salt for topping (optional)
Instructions
- Brown the butter: Place butter in a medium saucepan over medium heat. Melt completely, then continue cooking, swirling occasionally, until it foams, the foam subsides, and browned milk solids form at the bottom (about 5-7 minutes). When it smells nutty and the solids are deep amber, remove from heat immediately. Pour into a heatproof bowl and let cool for 10-15 minutes.
- Mix wet ingredients: In a large mixing bowl, combine cooled brown butter with brown sugar and granulated sugar. Beat with a hand mixer on medium speed for 2-3 minutes until mixture looks like wet sand and is slightly lighter. Add eggs one at a time, beating well after each. Stir in vanilla extract until smooth and glossy.
- Combine dry ingredients: In a separate medium bowl, whisk together flour, baking soda, salt, and espresso powder until evenly distributed.
- Combine wet and dry: Gradually add dry ingredients to wet ingredients, mixing on low speed or folding with a spatula until just combined. A few streaks of flour are okay; do not overmix.
- Add chocolate chips: Fold in chocolate chips with a rubber spatula until evenly distributed. Dough will be thick and slightly sticky.
- Chill dough: Cover bowl with plastic wrap and refrigerate for at least 30 minutes, or up to 72 hours.
- Preheat and prepare: When ready to bake, preheat oven to 350°F (175°C). Line baking sheets with parchment paper or silicone mats.
- Scoop and bake: Using a cookie scoop, portion rounded tablespoons of dough and place 2 inches apart on prepared sheets. Optionally press extra chocolate chips on top. Bake for 10-12 minutes, until edges are golden brown and centers look just set (slightly underdone).
- Cool and finish: Let cookies cool on baking sheet for 5 minutes, then transfer to a wire rack. While still warm, sprinkle with flaky sea salt if desired.
Notes
Watch the butter closely when browning; it goes from perfect to burnt quickly. Room temperature eggs are important to prevent the brown butter from seizing. Chilling the dough is not optional—it prevents spreading and develops flavor. For best results, bake one tray at a time and rotate halfway through. Cookies can be stored in an airtight container at room temperature for up to 5 days, or frozen for up to 3 months. Dough can be frozen for up to 3 months; bake from frozen adding 2-3 minutes.
Nutrition
- Serving Size: 1 cookie
- Calories: 175
- Sugar: 15
- Sodium: 115
- Fat: 10
- Saturated Fat: 6
- Carbohydrates: 22
- Fiber: 1
- Protein: 2
Keywords: brown butter cookies, espresso chocolate chip cookies, chocolate chip cookies, coffee cookies, easy cookie recipe


