This was supposed to be a pumpkin pie. I had it all planned out—the deep dish, the flaky crust from scratch, the careful lattice top that would make me look like I actually knew what I was doing in the kitchen. But somewhere between the grocery store and my tiny apartment kitchen, the plan fell apart. I grabbed the wrong kind of cream cheese (the brick, not the block—you know the one), my gingersnap cookies were already crushed because I dropped the bag on the sidewalk, and I was already running late for the Friendsgiving dinner I was supposed to bring dessert to. Honestly, I almost cried right there over my counter, staring at a bowl of crushed cookies and softened cream cheese that had no business being in the same room together.
But here’s the thing about cooking under pressure—sometimes it forces you to stop panicking and just make something work. I dumped the gingersnap crumbs into melted butter, pressed them into a pan, and figured I’d at least show up with something. The pumpkin mixture went together in a haze of improvisation, and I threw the whole thing in the oven with zero expectations. When I pulled those bars out an hour later, the kitchen smelled like fall had exploded inside it. The edges were slightly caramelized, the center had that perfect jiggle, and I honestly stood there for a full minute just staring at them. Maybe you’ve been there—that moment when a mistake turns into something you can’t stop thinking about.
I brought those pumpkin cheesecake bars to the party, and they disappeared before the actual pie even got sliced. Someone asked for the recipe, and I had to admit I didn’t really have one—it was just the happy result of a distracted afternoon and a bag of crushed cookies. But I’ve made them so many times since then that I’ve got it down to a science now. These bars have become my go-to for every fall gathering, and every time I make them, I remember that afternoon when I learned that sometimes the best recipes come from the moments when everything goes wrong.
Why You’ll Love This Recipe
Let me tell you why these pumpkin cheesecake bars have earned a permanent spot in my fall baking rotation. I’ve tested this recipe at least a dozen times—for potlucks, family dinners, and even a few times just because I needed to use up that can of pumpkin sitting in my pantry. Every single time, people ask for the recipe before they’ve even finished their first bite.
Here’s what makes these bars stand out:
- Quick & Easy: These come together in about 20 minutes of active prep time. No rolling dough, no blind baking, no complicated techniques. The gingersnap crust presses right into the pan, and the filling whips up in one bowl.
- Simple Ingredients: You probably have most of these in your kitchen right now. Canned pumpkin, cream cheese, eggs, sugar, and a box of gingersnap cookies. No fancy grocery store runs required.
- Perfect for Fall Gatherings: Whether it’s Thanksgiving, a Friendsgiving potluck, or just a cozy dinner with friends, these bars travel well and feed a crowd. I’ve brought them to at least five different gatherings this season alone.
- Crowd-Pleaser: Kids love the creamy texture, adults love the spiced pumpkin flavor, and everyone loves that crunchy gingersnap crust. I’ve never brought home leftovers—not once.
- Unbelievably Delicious: The combination of tangy cream cheese, warm pumpkin spices, and that spicy-sweet gingersnap crust is honestly next-level. It’s comfort food that feels special without being fussy.
What makes this version different from all the other pumpkin cheesecake bars out there? It’s the crust, honestly. Most recipes use graham crackers, but gingersnaps bring this warm, molasses-spiced flavor that pairs perfectly with pumpkin. And the filling has just the right balance—not too sweet, not too dense, with that silky texture that comes from room-temperature ingredients and gentle mixing. This isn’t just another pumpkin dessert. It’s the one that makes people close their eyes after the first bite.
What Ingredients You Will Need
This recipe uses simple, everyday ingredients to create something that tastes anything but ordinary. Most of these are pantry staples, especially during fall baking season. Here’s what you’ll need:
For the Gingersnap Crust
- 2 cups (about 200g) crushed gingersnap cookies (I prefer Nabisco or a store brand with strong molasses flavor)
- 5 tablespoons (70g) unsalted butter, melted
- 2 tablespoons (25g) granulated sugar
- 1/4 teaspoon salt
For the Pumpkin Cheesecake Filling
- 16 ounces (450g) cream cheese, softened to room temperature (full-fat works best for texture)
- 3/4 cup (150g) granulated sugar
- 1/2 cup (100g) packed light brown sugar
- 1 cup (245g) canned pumpkin puree (not pumpkin pie filling)
- 3 large eggs, room temperature
- 1 teaspoon vanilla extract
- 1 1/2 teaspoons ground cinnamon
- 1/2 teaspoon ground ginger
- 1/4 teaspoon ground nutmeg
- 1/4 teaspoon ground cloves
- 1 tablespoon (8g) all-purpose flour
- 1/2 teaspoon salt
For the Optional Topping
- 1/2 cup (120ml) heavy cream
- 1 tablespoon (12g) powdered sugar
- 1/2 teaspoon vanilla extract
- Crushed gingersnap cookies for garnish
A few notes on ingredients: Make sure your cream cheese is truly at room temperature—cold cream cheese will leave you with lumpy filling. I usually take it out of the fridge about an hour before I start baking. For the pumpkin, stick with pure pumpkin puree, not the pre-sweetened pie filling. Libby’s is my go-to brand because it’s consistently thick and not watery. If you can’t find gingersnap cookies, you can substitute graham crackers with an extra 1/2 teaspoon of ground ginger and 1/4 teaspoon of molasses mixed into the melted butter. For a dairy-free version, use vegan cream cheese and a plant-based butter substitute—just know the texture will be slightly less creamy.
Equipment Needed
You don’t need a professional bakery setup for these bars. Here’s what I use:
- 9×9-inch baking pan (an 8×8 works too, but your bars will be slightly thicker and need a few extra minutes of baking time)
- Food processor or zip-top bag and rolling pin for crushing cookies (I’ve used both; the food processor is faster, but the bag method works just fine)
- Electric hand mixer or stand mixer (a hand mixer is totally fine—I actually prefer it because there’s less cleanup)
- Large mixing bowls (one for crust, one for filling)
- Parchment paper (makes lifting the bars out so much easier—don’t skip this)
- Rubber spatula for scraping every bit of filling into the pan
- Measuring cups and spoons
- Sharp knife for clean cuts (I learned the hard way that a dull knife ruins the layers)
If you don’t have a food processor, no worries. Put the gingersnaps in a zip-top bag and crush them with a rolling pin or even a heavy saucepan. It’s a little more work, but honestly, it’s kind of therapeutic. And if you don’t have a 9×9 pan, a 9-inch round cake pan works—just adjust the baking time by about 5 minutes.
Preparation Method
Let’s walk through this step by step. I’ve made these bars enough times to know exactly where things can go wrong, so I’ll share those little tricks along the way.
- Preheat your oven to 350°F (175°C). Line your 9×9 baking pan with parchment paper, leaving some overhang on two sides. This creates little handles that make lifting the bars out so much easier later. Lightly spray the parchment with non-stick spray.
- Make the crust. In a food processor, pulse the gingersnap cookies until they become fine crumbs. You should have about 2 cups. Transfer to a medium bowl, add the sugar and salt, then pour in the melted butter. Stir with a fork until all the crumbs are moistened and the mixture looks like wet sand. If it doesn’t clump when you press it between your fingers, add another tablespoon of melted butter.
- Press the crust into the pan. Dump the crumb mixture into your prepared pan and press it down firmly and evenly. I use the bottom of a measuring cup to really compact it—this prevents the crust from crumbling when you cut the bars later. Bake for 8 minutes, then set aside to cool while you make the filling. Leave the oven on.
- Beat the cream cheese. In a large bowl, beat the softened cream cheese with an electric mixer on medium speed until smooth and creamy—about 2 minutes. Scrape down the sides and bottom of the bowl with a rubber spatula. This step is crucial; if your cream cheese isn’t smooth now, it won’t be smooth later.
- Add the sugars. Add both the granulated and brown sugars to the cream cheese and beat on medium until combined, about 1 minute. Scrape the bowl again. Don’t overmix—you don’t want to incorporate too much air, which can cause cracks.
- Mix in the pumpkin and vanilla. Add the pumpkin puree and vanilla extract, then beat on low until just combined. The mixture should be a beautiful orange color and smell like fall.
- Add the eggs one at a time. Crack each egg into a small bowl first (this catches any shell pieces), then add to the mixture. Beat on low after each addition just until the yolk disappears. Overmixing at this stage adds too much air and can cause your cheesecake to puff up and crack.
- Add the dry ingredients. Sprinkle the cinnamon, ginger, nutmeg, cloves, flour, and salt over the filling. Mix on low until just combined. Give it one final scrape with your spatula to make sure everything is incorporated.
- Pour the filling over the crust. Gently pour the pumpkin cheesecake filling over the pre-baked crust. Use your spatula to spread it evenly to the edges. Tap the pan on the counter a few times to release any air bubbles.
- Bake. Place the pan in the center of the oven and bake for 35-40 minutes. The edges should be set and slightly puffed, but the center should still have a slight jiggle when you gently shake the pan. It will continue to set as it cools. If the top starts browning too quickly, tent loosely with foil after 25 minutes.
- Cool completely. Place the pan on a wire rack and let it cool to room temperature—about 1 hour. Then cover with plastic wrap and refrigerate for at least 4 hours, but overnight is better. This is the hardest part, I know, but it’s non-negotiable for clean slices.
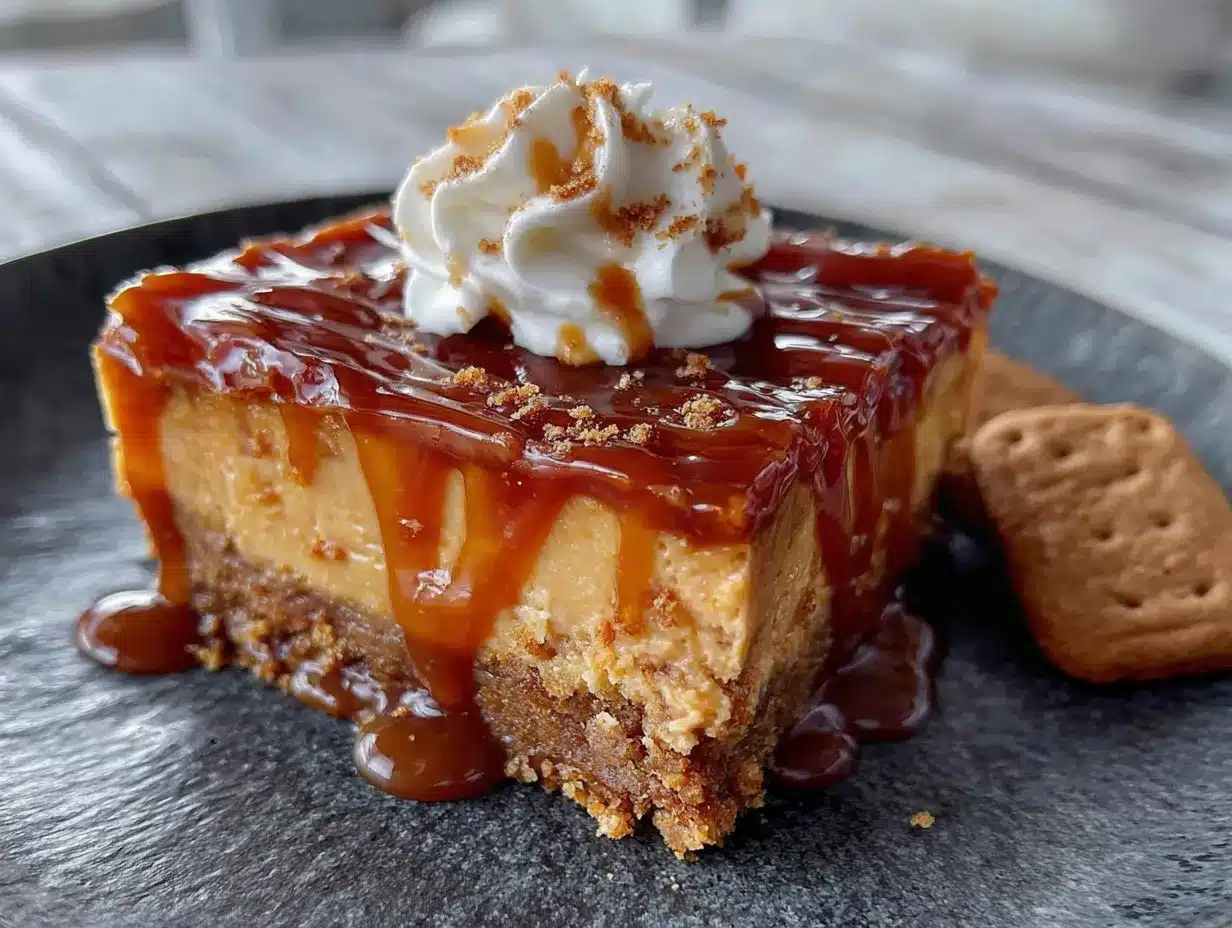
- Slice and serve. Once chilled, use the parchment handles to lift the entire block out of the pan. Use a sharp knife to cut into 16 squares, wiping the knife clean between cuts for those picture-perfect edges. If you’re adding the whipped cream topping, whip the heavy cream, powdered sugar, and vanilla together until soft peaks form, then dollop on each bar and sprinkle with crushed gingersnaps.
Cooking Tips & Techniques
After making these pumpkin cheesecake bars more times than I can count, I’ve collected some hard-earned wisdom. Let me save you from my mistakes.
Room temperature ingredients matter more than you think. I learned this the hard way when I used cold cream cheese straight from the fridge and ended up with a lumpy filling that no amount of beating could fix. Take your cream cheese and eggs out an hour before you start. Set a timer if you have to—I’ve forgotten and had to microwave the cream cheese, which works in a pinch but isn’t ideal.
Don’t overmix the filling. This is probably the most common mistake I see. When you beat too much air into the cheesecake batter, it rises in the oven, then collapses and cracks as it cools. Mix on low speed and stop as soon as each ingredient is incorporated. A few small lumps are better than a cracked surface.
The water bath debate. I don’t use a water bath for these bars, and here’s why—the shallow pan and shorter baking time mean they’re less prone to cracking than a full cheesecake. Plus, the gingersnap crust would get soggy. If you’re nervous about cracks, place a pan of hot water on the oven rack below the cheesecake bars. The steam creates a humid environment that helps prevent cracking.
Patience is a virtue. I know it’s tempting to cut into these bars while they’re still warm, but trust me on this one. The filling needs time to set completely. I once served them after only two hours in the fridge, and they were a runny, messy disaster. Give them the full overnight chill, and you’ll be rewarded with clean, beautiful slices.
Timing strategy for hosting. These are perfect for dinner parties because you can make them a day ahead. I often bake them the night before, let them cool and set overnight, then slice and garnish right before guests arrive. It frees up your oven and your stress levels on the day of the event.
Variations & Adaptations
One of the things I love about this recipe is how adaptable it is. Here are some variations I’ve tried and loved:
Gluten-Free Version: Use gluten-free gingersnap cookies for the crust. Most brands work well, just check the package. The filling is naturally gluten-free as long as you use a gluten-free flour blend or substitute the tablespoon of flour with cornstarch.
Dairy-Free Adaptation: Substitute the cream cheese with a high-quality vegan cream cheese (I like Miyoko’s or Kite Hill) and use melted coconut oil or vegan butter for the crust. The texture will be slightly less dense but still delicious. Skip the whipped cream topping or use coconut cream instead.
Spice It Up: If you love warm spices, add an extra 1/2 teaspoon of cinnamon and a pinch of cardamom. I tried this once when I ran out of cloves, and it was honestly amazing. The cardamom adds this floral note that pairs beautifully with the pumpkin.
Chocolate Twist: Melt 1/2 cup of semi-sweet chocolate chips and drizzle it over the cooled bars before slicing. Or swirl melted chocolate into the filling before baking for a marbled effect. My niece requests this version every Thanksgiving.
Mini Version: Press the crust into a lined muffin tin and fill each cup about 3/4 full with the cheesecake mixture. Bake for 18-20 minutes. These are perfect for parties where people want their own individual dessert. Just make sure to line the muffin cups with parchment strips for easy removal.
Serving & Storage Suggestions
These pumpkin cheesecake bars are at their best when served cold, straight from the fridge. The texture is firm and creamy, and the flavors are more pronounced. If you’re serving them at a party, take them out about 10 minutes before serving to take the chill off slightly—but not much longer, or they’ll start to soften.
For presentation, I like to arrange the bars on a wooden board or a white platter to make the orange color pop. A dollop of whipped cream and a sprinkle of crushed gingersnaps on top adds that bakery-finished look. If you’re feeling fancy, add a few candied pecans or a drizzle of caramel sauce.
What to serve alongside: These bars pair beautifully with a cup of hot coffee or spiced apple cider. For a full dessert spread, serve them with vanilla ice cream or alongside a slice of apple pie. They’re also lovely with a glass of cold milk—trust me, the contrast is perfect.
Storage: Keep the bars in an airtight container in the refrigerator for up to 5 days. Layer them with parchment paper between each layer to prevent sticking. The flavors actually deepen after a day or two, so they’re even better the next day.
Freezing: These freeze beautifully. Wrap individual bars tightly in plastic wrap, then place them in a freezer-safe bag or container. They’ll keep for up to 3 months. To thaw, just transfer to the refrigerator overnight. I often make a double batch and freeze half for unexpected guests.
Reheating: I actually prefer these cold, but if you want a warm dessert, microwave an individual bar for about 15 seconds. The crust will soften slightly, and the filling will become almost pudding-like. It’s a completely different experience but equally delicious.
Nutritional Information & Benefits
Here’s the estimated nutritional breakdown for one bar (based on 16 servings, without the whipped cream topping):
- Calories: 285
- Total Fat: 17g
- Saturated Fat: 10g
- Cholesterol: 85mg
- Sodium: 260mg
- Total Carbohydrates: 30g
- Dietary Fiber: 1g
- Sugars: 22g
- Protein: 5g
These numbers are estimates and will vary based on your specific ingredients and portion sizes.
On the health front, pumpkin is a nutritional powerhouse. It’s packed with vitamin A (great for eye health), fiber, and antioxidants. The cream cheese provides calcium and protein, while the eggs add additional protein and healthy fats. The gingersnap crust contains molasses, which is a good source of iron and calcium.
If you’re watching your sugar intake, you can reduce the sugar in the filling by 1/4 cup without significantly affecting the texture. For a lower-fat version, use reduced-fat cream cheese, though the texture will be slightly less creamy.
Potential allergens to note: This recipe contains dairy, eggs, and wheat (from the cookies). It can be adapted to be gluten-free and dairy-free using the substitutions mentioned in the variations section.
I believe in balance, so I don’t stress over the numbers too much. These bars are a treat, and they’re meant to be enjoyed. One bar with a cup of coffee is a perfectly reasonable way to celebrate fall.
Conclusion
These pumpkin cheesecake bars with gingersnap crust have become my signature fall dessert for a reason. They’re the recipe that started as a mistake and turned into something I’m genuinely proud of. Every time I make them, I remember that afternoon when I learned that the best things in the kitchen often come from moments of improvisation and grace.
I hope you’ll give these bars a try, whether you’re hosting a Friendsgiving, bringing dessert to a family dinner, or just treating yourself on a cozy fall evening. Don’t be afraid to make them your own—add extra spices, swap the crust, or experiment with toppings. That’s the beauty of baking, after all.
When you make them, I’d love to hear how they turned out. Leave a comment below and let me know if you tried any variations, or share a photo of your creation. And if you’re looking for more fall dessert inspiration, check out my easy pumpkin bread recipe or these apple cider donut cake bars for more seasonal treats.
Happy baking, friends. May your crust be crunchy, your filling be creamy, and your kitchen smell like fall.
Frequently Asked Questions
Can I use fresh pumpkin instead of canned?
Yes, you can! Just make sure to cook and puree your pumpkin first, then drain it well in a cheesecloth or fine-mesh strainer to remove excess water. Fresh pumpkin has more moisture than canned, so you might need to reduce the eggs by one or add an extra tablespoon of flour to compensate.
Why did my cheesecake bars crack on top?
Cracks usually happen from overmixing the filling (which incorporates too much air) or from overbaking. Make sure you mix on low speed and stop as soon as ingredients are combined. Also, remember that the center should still jiggle slightly when you take it out of the oven—it will continue to set as it cools.
Can I make these bars ahead of time for a party?
Absolutely! In fact, I recommend it. These bars need at least 4 hours to set in the fridge, but they’re even better after a full day. You can bake them up to 2 days ahead, keep them covered in the refrigerator, and add the whipped cream topping right before serving.
Can I freeze these pumpkin cheesecake bars?
Yes, they freeze wonderfully. Wrap individual bars tightly in plastic wrap, then place them in a freezer-safe bag. They’ll keep for up to 3 months. Thaw in the refrigerator overnight before serving. I wouldn’t recommend freezing them with the whipped cream topping—add that fresh after thawing.
What can I use instead of gingersnap cookies for the crust?
Graham crackers are the most common substitute. To get a similar flavor, add 1/2 teaspoon of ground ginger and 1/4 teaspoon of molasses to the melted butter before mixing with the crumbs. You can also use vanilla wafers, shortbread cookies, or even crushed pretzels for a sweet-salty twist.
Pin This Recipe!
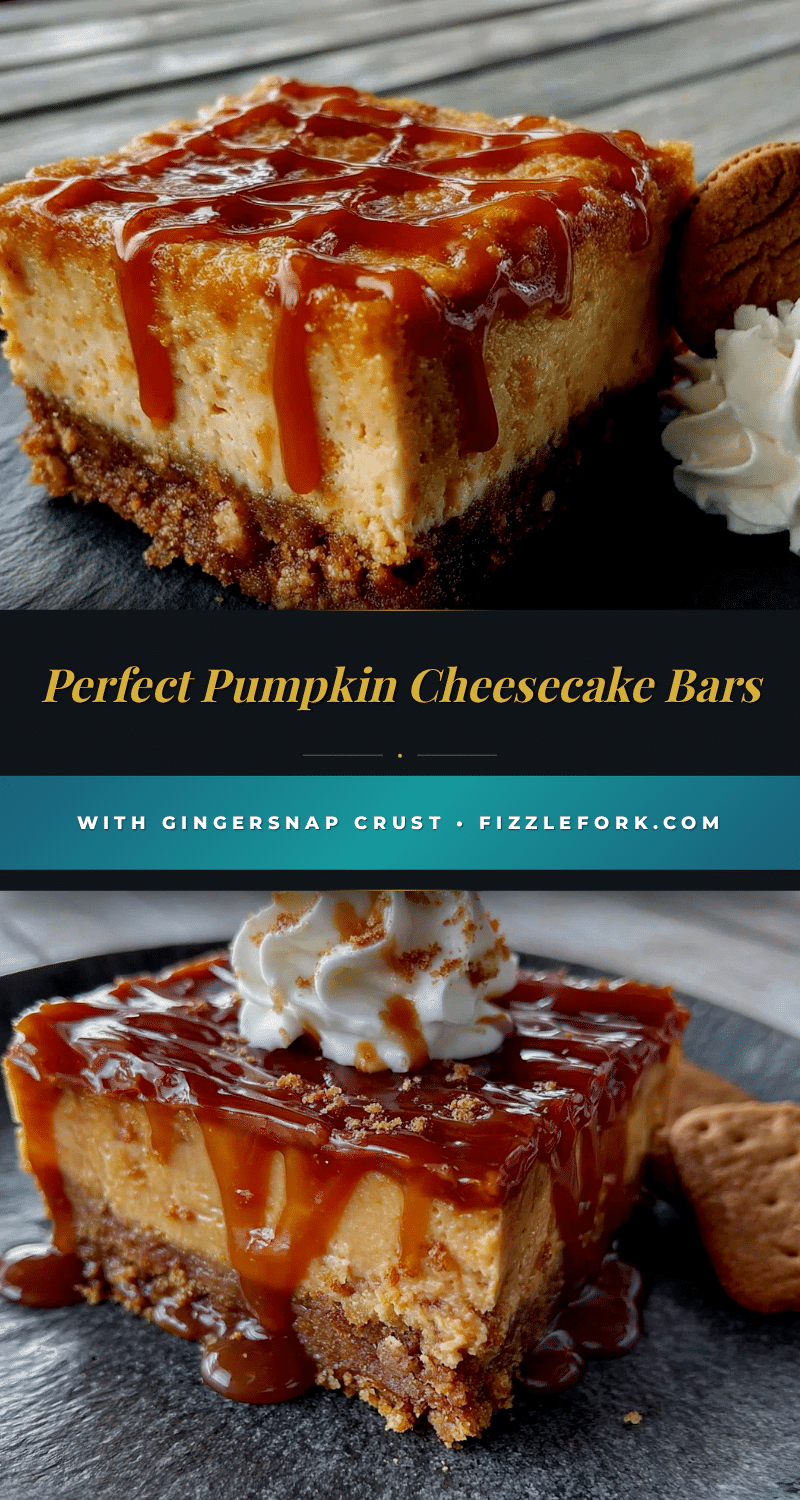
Perfect Pumpkin Cheesecake Bars: Easy Gingersnap Dessert
These pumpkin cheesecake bars feature a crunchy gingersnap crust and a creamy, spiced pumpkin filling. They’re quick to make, perfect for fall gatherings, and always a crowd-pleaser.
- Prep Time: 20 minutes
- Cook Time: 40 minutes
- Total Time: 5 hours (includes chilling time)
- Yield: 16 servings 1x
- Category: Dessert
- Cuisine: American
Ingredients
- 2 cups (about 200g) crushed gingersnap cookies
- 5 tablespoons (70g) unsalted butter, melted
- 2 tablespoons (25g) granulated sugar
- 1/4 teaspoon salt
- 16 ounces (450g) cream cheese, softened to room temperature
- 3/4 cup (150g) granulated sugar
- 1/2 cup (100g) packed light brown sugar
- 1 cup (245g) canned pumpkin puree
- 3 large eggs, room temperature
- 1 teaspoon vanilla extract
- 1 1/2 teaspoons ground cinnamon
- 1/2 teaspoon ground ginger
- 1/4 teaspoon ground nutmeg
- 1/4 teaspoon ground cloves
- 1 tablespoon (8g) all-purpose flour
- 1/2 teaspoon salt
- 1/2 cup (120ml) heavy cream (optional topping)
- 1 tablespoon (12g) powdered sugar (optional topping)
- 1/2 teaspoon vanilla extract (optional topping)
- Crushed gingersnap cookies for garnish (optional)
Instructions
- Preheat your oven to 350°F (175°C). Line a 9×9-inch baking pan with parchment paper, leaving overhang on two sides. Lightly spray with non-stick spray.
- Make the crust: In a food processor, pulse gingersnap cookies until fine crumbs (about 2 cups). Transfer to a medium bowl, add 2 tablespoons sugar and 1/4 teaspoon salt, then pour in 5 tablespoons melted butter. Stir until all crumbs are moistened and mixture looks like wet sand.
- Press the crust mixture firmly and evenly into the prepared pan using the bottom of a measuring cup. Bake for 8 minutes, then set aside to cool. Leave the oven on.
- Beat the cream cheese: In a large bowl, beat softened cream cheese with an electric mixer on medium speed until smooth and creamy, about 2 minutes. Scrape down the sides and bottom of the bowl.
- Add both sugars (3/4 cup granulated and 1/2 cup brown sugar) and beat on medium until combined, about 1 minute. Scrape the bowl again. Do not overmix.
- Add pumpkin puree and 1 teaspoon vanilla extract, then beat on low until just combined.
- Add eggs one at a time, beating on low after each addition just until the yolk disappears.
- Sprinkle cinnamon, ginger, nutmeg, cloves, flour, and 1/2 teaspoon salt over the filling. Mix on low until just combined. Scrape the bowl one final time.
- Pour the filling over the pre-baked crust and spread evenly. Tap the pan on the counter a few times to release air bubbles.
- Bake for 35-40 minutes. The edges should be set and slightly puffed, but the center should still have a slight jiggle. If the top browns too quickly, tent loosely with foil after 25 minutes.
- Cool completely on a wire rack (about 1 hour), then cover with plastic wrap and refrigerate for at least 4 hours, preferably overnight.
- Once chilled, use the parchment handles to lift the block out of the pan. Use a sharp knife to cut into 16 squares, wiping the knife clean between cuts.
- For optional topping: Whip heavy cream, powdered sugar, and vanilla extract together until soft peaks form. Dollop on each bar and sprinkle with crushed gingersnaps.
Notes
Make sure cream cheese and eggs are at room temperature to avoid lumps. Do not overmix the filling to prevent cracks. For best results, chill overnight before slicing. The bars can be frozen for up to 3 months.
Nutrition
- Serving Size: 1 bar
- Calories: 285
- Sugar: 22
- Sodium: 260
- Fat: 17
- Saturated Fat: 10
- Carbohydrates: 30
- Fiber: 1
- Protein: 5
Keywords: pumpkin cheesecake bars, gingersnap crust, fall dessert, Thanksgiving dessert, easy cheesecake bars


