My aunt had claimed to hate cheddar in desserts for forty-seven years. Forty-seven years of wrinkling her nose at cheesecake crusts, of pushing aside cheese plates at holiday parties, of declaring that fruit and cheese belonged on a charcuterie board and nowhere else. Then I caught her last Thanksgiving, standing alone in my kitchen at midnight, eating a slice of this pie straight from the tin with a fork. She froze when she saw me, fork halfway to her mouth, and whispered, “Don’t tell your uncle.” I didn’t. But I did refill her coffee the next morning with a little extra cream, and we’ve never spoken of it since.
Honestly, I didn’t set out to convert anyone that day. I was just trying to solve a problem I’d been wrestling with for months—how to make an apple pie that felt indulgent but didn’t leave me in a food coma. You know that feeling when you want the comfort of a classic dessert but also want to wake up the next morning feeling human? That was me. I’d been playing around with lighter versions of traditional recipes, swapping butter for Greek yogurt in some places, cutting sugar in others, but nothing felt quite right. The crust was always either too dry or too sad. And then it hit me: sharp cheddar. Not as a garnish, but actually baked into the crust itself. It was one of those ideas that sounds either genius or insane, and I wasn’t sure which until I pulled that first pie out of the oven.
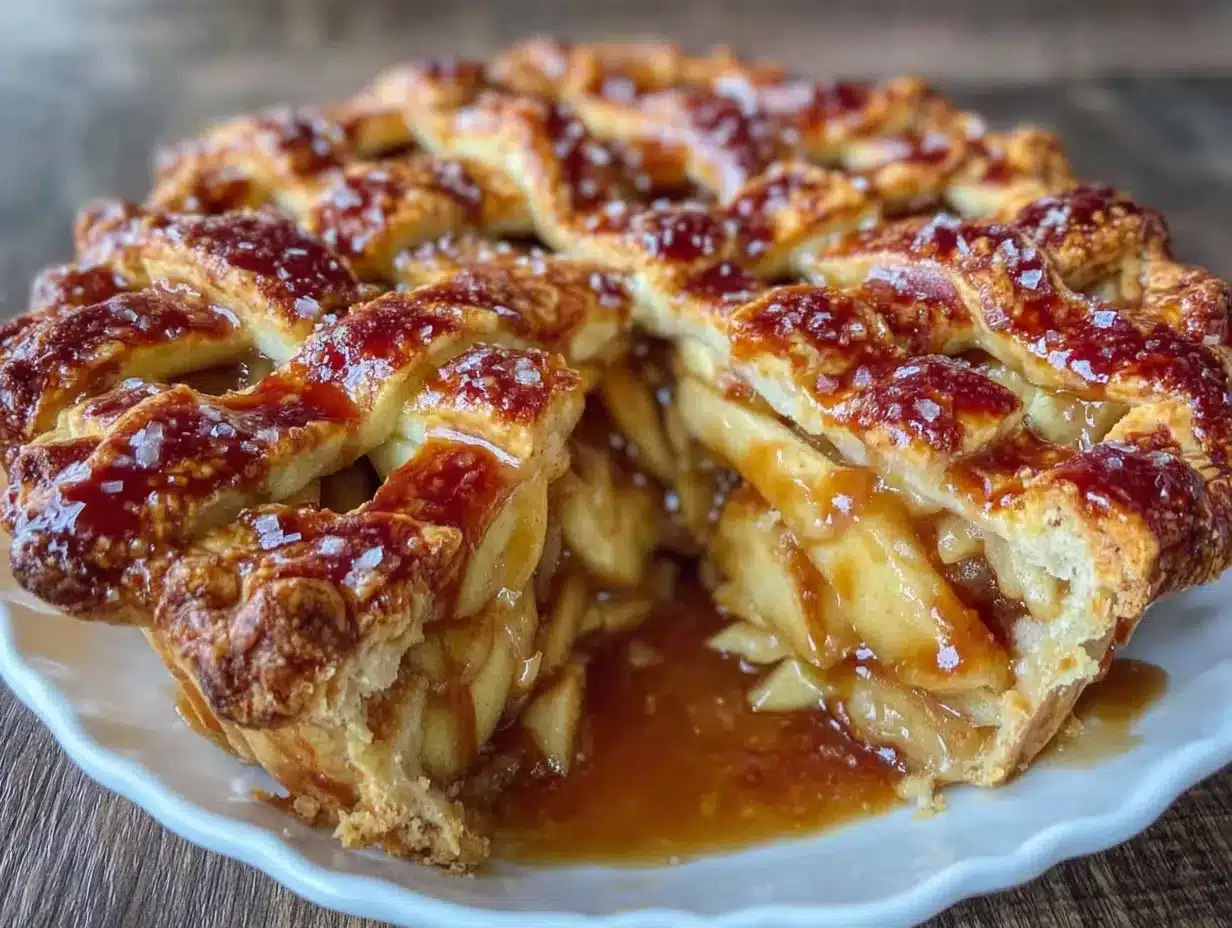
The smell alone was enough to make me question every pie I’d made before. That salty, nutty cheddar aroma mingling with the sweet, spiced apples and the caramel—let me tell you, it’s the kind of scent that makes neighbors suddenly remember they need to borrow a cup of sugar. I dropped the pie on the counter to cool and literally sat there staring at it for ten minutes. The crust was this gorgeous golden-brown, almost lacy at the edges where the cheese had bubbled and crisped. It looked like a pie that had been baked by someone who actually knew what they were doing, not someone who had accidentally dropped an entire stick of butter on the floor fifteen minutes earlier. (I did. I won’t tell you how long it took me to clean it up.)
This pie has stayed with me because it doesn’t ask you to pretend. It’s not trying to be a kale smoothie in disguise. It’s a real, honest-to-goodness apple pie with a buttery, flaky crust and a filling that’s sweet and salty and deeply caramelized. But it’s also lighter—less butter, less sugar, less guilt—without tasting like a compromise. Maybe you’ve been there, standing in the grocery store aisle, holding a bag of apples and wondering if you can really justify making a full-fat, full-sugar pie on a random Tuesday. This is the pie that says yes, you can. And you should.
Why You’ll Love This Recipe
This isn’t just another apple pie recipe. I’ve tested this thing six times in the last three months, and my neighbors have been very patient taste-testers. Here’s what makes it different:
- Quick & Easy-ish: Look, it’s still a pie, so it takes a little time. But the active prep is under 30 minutes. The oven does the rest.
- Simple Ingredients: Nothing weird. Apples, flour, butter, cheese, sugar, and a few pantry staples. You probably have most of it right now.
- Perfect for Fall Gatherings: Thanksgiving, Friendsgiving, that cozy dinner party where you want to impress without spending all day in the kitchen.
- Crowd-Pleaser: I’ve served this to kids who “don’t like pie” and adults who “don’t like cheese with fruit.” Everyone goes quiet after the first bite.
- Unbelievably Delicious: The sharp cheddar crust is salty and flaky, the caramel is rich without being cloying, and the apples stay tender but not mushy. It’s comfort food that actually comforts.
What makes this recipe different from every other apple pie out there? It’s the crust, honestly. That sharp cheddar isn’t just for show. It adds a savory depth that balances the sweetness of the caramel and apples in a way that plain butter crust never could. Plus, by cutting back on the butter and using a touch of Greek yogurt, the crust stays tender and flaky with less fat. It’s not a health food—let’s be real—but it’s a pie you can feel good about eating a second slice of.
This is the kind of pie that makes you close your eyes after the first bite. It’s comfort food reimagined—healthier, faster, but with the same soul-soothing satisfaction. Perfect for impressing guests without stress, or turning a simple Tuesday into something memorable.
What Ingredients You Will Need
This recipe uses simple, wholesome ingredients to deliver bold flavor and satisfying texture without the fuss. Most of these are pantry staples, but a few deserve a little explanation.
For the Sharp Cheddar Crust
- 1 ¼ cups all-purpose flour (plus more for dusting)
- ½ teaspoon salt
- ¼ teaspoon black pepper (trust me, it’s subtle but good)
- 4 tablespoons cold unsalted butter, cubed (I use Kerrygold for the flavor)
- ½ cup sharp cheddar cheese, finely grated (use a microplane or the small holes of a box grater—pre-shredded cheese won’t melt the same way)
- 3 tablespoons plain Greek yogurt (full-fat works best, but 2% is fine)
- 2-3 tablespoons ice water
For the Lighter Caramel Sauce
- ¼ cup unsalted butter
- ½ cup brown sugar, packed (light or dark both work; dark gives deeper flavor)
- ¼ cup heavy cream (you can use half-and-half for even lighter, but it won’t be as thick)
- ½ teaspoon vanilla extract
- ¼ teaspoon flaky sea salt (like Maldon—don’t skip this)
For the Apple Filling
- 6 medium apples, peeled, cored, and sliced ¼-inch thick (I recommend a mix of Granny Smith and Honeycrisp—tart and sweet together)
- 2 tablespoons all-purpose flour
- 2 tablespoons brown sugar
- 1 tablespoon lemon juice
- 1 teaspoon ground cinnamon
- ¼ teaspoon ground nutmeg
- Pinch of salt
Ingredient Tips & Substitutions: For the cheddar, I’ve found that a good aged sharp cheddar (like Cabot or Tillamook) gives the best flavor. Avoid mild cheddar—it won’t stand up to the caramel. If you’re dairy-free, you can try a vegan butter and a plant-based cheddar, but honestly, the texture won’t be the same. For the apples, stay away from Red Delicious or Gala—they get mushy. Stick with firm, tart-sweet varieties. And if you don’t have Greek yogurt for the crust, sour cream works too.
Equipment Needed
You don’t need a fancy kitchen for this pie, but a few tools make life easier.
- 9-inch pie dish (glass or ceramic—metal can over-brown the crust)
- Rolling pin (a wine bottle works in a pinch, I’ve done it)
- Box grater or microplane (for grating the cheddar finely)
- Large mixing bowls (one for crust, one for filling)
- Saucepan (for the caramel—heavy-bottomed is best to prevent burning)
- Parchment paper (for easier rolling and cleanup)
- Sharp knife or apple peeler
- Pastry blender or two forks (for cutting butter into flour)
- Cooling rack
Budget Tip: If you don’t have a pastry blender, just use your fingertips. Cold hands are a bonus here—run them under cold water first if you tend to run warm.
Preparation Method
- Make the crust (30 minutes active, 1 hour chill time): In a large bowl, whisk together the flour, salt, and pepper. Add the cold butter cubes. Using a pastry blender or your fingertips, work the butter into the flour until it looks like coarse meal with some pea-sized butter pieces remaining. This is key—those little butter bits create flakiness. Add the grated cheddar and toss to distribute. Add the Greek yogurt and 2 tablespoons of ice water, stirring with a fork until the dough just comes together. If it seems dry, add the remaining tablespoon of water. Turn the dough out onto a lightly floured surface, shape into a disk, wrap in plastic, and refrigerate for at least 1 hour. (I’ve rushed this before and regretted it—the dough needs to firm up so it doesn’t stick everywhere.)
- Make the lighter caramel sauce (10 minutes): While the dough chills, make the caramel. In a small saucepan over medium heat, melt the butter. Add the brown sugar and stir until dissolved, about 2 minutes. Slowly pour in the heavy cream while stirring constantly—it will bubble up, so be careful. Let it simmer for 2-3 minutes until slightly thickened. Remove from heat, stir in vanilla and flaky sea salt. Let it cool to room temperature. It will thicken more as it cools. Warning: Don’t taste it straight from the pan. You will burn your tongue. I have done this. It hurts.
- Prepare the apples (15 minutes): In a large bowl, toss the sliced apples with flour, brown sugar, lemon juice, cinnamon, nutmeg, and salt. Let them sit for 10 minutes while the oven preheats. This draws out some liquid, which helps prevent a soggy bottom. Your kitchen will smell like fall already.
- Roll out the crust (10 minutes): Preheat your oven to 375°F (190°C). On a lightly floured surface, roll the chilled dough into a 12-inch circle, about ⅛-inch thick. Carefully transfer it to your pie dish—I fold it in quarters, then unfold it in the dish. Gently press it into the bottom and up the sides. Trim the overhang to about ½ inch, then fold it under and crimp the edges however you like. I’m a basic fork-crimp person, and it works fine.
- Assemble the pie (5 minutes): Arrange the apple mixture in the crust, mounding it slightly in the center. Drizzle about half of the cooled caramel sauce over the apples. (Reserve the rest for serving.)
- Bake the pie (50-60 minutes): Place the pie on a baking sheet to catch any drips. Bake for 50-60 minutes, until the crust is golden brown and the filling is bubbly. If the edges start browning too quickly, cover them loosely with foil or a pie shield after 30 minutes. Sensory cue: You’ll know it’s done when you can see the caramel bubbling up through the apples and the crust smells nutty and toasty.
- Cool and serve (at least 2 hours): Let the pie cool on a rack for at least 2 hours before slicing. I know this is the hardest part, but if you cut it too early, the filling will run everywhere and you’ll have apple soup. Drizzle with the remaining caramel sauce before serving.
Cooking Tips & Techniques
I’ve made this pie enough times to have a few battle scars. Here’s what I’ve learned the hard way:
- Keep everything cold: For the flakiest crust, your butter, yogurt, and even the bowl should be cold. If your kitchen is warm, pop the flour in the fridge for 10 minutes before starting.
- Don’t overwork the dough: Overmixing develops gluten, which makes the crust tough. Mix just until it comes together—lumps are fine.
- Blind baking isn’t necessary here: Because the caramel helps seal the bottom, you don’t need to pre-bake the crust. Saves time and dishes.
- Apple variety matters: I once used only Fuji apples because that’s what I had. The pie was sweet and mushy. Stick with firm apples like Granny Smith or Braeburn.
- Caramel troubleshooting: If your caramel seizes up or gets grainy, don’t panic. Add a tablespoon of warm water and whisk vigorously over low heat. It’ll come back together.
- Let it rest: I cannot stress this enough. That 2-hour cooling time is not optional. The filling needs to set so you get clean slices. Trust the process.
Variations & Adaptations
This recipe is forgiving. Here are some ways to make it your own:
- Gluten-Free Version: Swap the all-purpose flour for a 1:1 gluten-free baking blend. Add an extra tablespoon of Greek yogurt to compensate for the drier texture.
- Vegan Option: Use vegan butter, a plant-based cheddar (like Violife), and coconut cream instead of heavy cream. The crust will be a bit more delicate, so handle it gently.
- Spiced-Up Version: Add ¼ teaspoon of cardamom or ginger to the apple filling for a warmer flavor profile. I tried this once with a pinch of cayenne too—surprisingly good if you like heat.
- Nutty Twist: Sprinkle ½ cup of chopped pecans or walnuts over the apples before adding the caramel. Adds crunch and richness.
- No-Cheddar Crust: If you’re really not into cheese with dessert, make a traditional all-butter crust. Just increase the butter to 6 tablespoons and skip the cheddar. It’s still a great pie, just less interesting.
Serving & Storage Suggestions
This pie is best served warm, not hot. Let it cool for at least 2 hours, then reheat slices in a 300°F oven for 5-10 minutes if you want that fresh-from-the-oven feel. Serve with a scoop of vanilla ice cream or a dollop of whipped cream—the cold creaminess against the warm, salty-sweet pie is pure magic.
For drinks, a cup of black coffee or a glass of cold milk is perfect. If you’re feeling fancy, a bourbon or rye whiskey pairs beautifully with the caramel and cheddar.
Storage: Cover the pie loosely with foil and store at room temperature for up to 2 days. After that, refrigerate for up to 5 days. The crust will soften a bit in the fridge, but it’s still delicious.
Freezing: You can freeze the unbaked pie for up to 3 months. Assemble it completely, wrap tightly in plastic and foil, then bake directly from frozen—just add 15-20 minutes to the baking time. Or freeze baked, cooled pie slices individually for quick desserts.
Reheating: Microwave individual slices for 20-30 seconds, or reheat in a 350°F oven for 10 minutes. The oven method keeps the crust crispier.
Flavor development: Honestly, this pie tastes even better the next day. The caramel soaks into the apples, and the cheddar flavor in the crust mellows and deepens. It’s a great make-ahead dessert for holidays.
Nutritional Information & Benefits
Per slice (1/8 of pie): Approximately 320 calories, 14g fat, 48g carbs, 4g protein, 3g fiber, 28g sugar. These are estimates—actual values depend on specific ingredients and portion sizes.
Health Highlights: This pie is lighter than traditional versions thanks to the reduced butter in the crust and the controlled caramel. Apples are a good source of fiber and vitamin C, and the cheddar adds calcium and protein. The Greek yogurt in the crust provides probiotics and extra protein without the fat of more butter.
Dietary Considerations: This recipe is vegetarian. For gluten-free or vegan options, see the variations above. Contains dairy and gluten. If you’re watching sugar, you can reduce the brown sugar in the filling by half—the caramel provides plenty of sweetness.
My Take: I don’t believe in calling dessert “healthy,” but I do believe in making desserts that don’t wreck your day. This pie strikes that balance. It satisfies the craving without the sugar crash.
Conclusion
This lighter salted caramel apple pie with a sharp cheddar crust is everything I want in a fall dessert: comforting, surprising, and just a little bit rebellious. It’s the kind of recipe that makes people raise their eyebrows and then go back for seconds. The cheddar crust is the star—you’ll never look at a plain pie crust the same way again.
I hope you give this a try, and I hope you make it your own. Maybe you’ll add more cinnamon, or skip the salt, or double the caramel (I wouldn’t blame you). The beauty of cooking is that you get to decide. If you make it, I’d love to hear how it turned out. Leave a comment below, tag me in your photos, or tell me about the time you accidentally burned the caramel (we’ve all been there).
Go ahead. Make the pie. You deserve a slice of something good.
Frequently Asked Questions
Can I use pre-shredded cheddar cheese for the crust?
I wouldn’t recommend it. Pre-shredded cheese is coated in anti-caking agents that prevent it from melting smoothly. Grating it fresh from a block gives you a much better texture and flavor in the crust.
What’s the best apple for this pie?
A mix of Granny Smith and Honeycrisp is my go-to. Granny Smith holds its shape and adds tartness, while Honeycrisp brings sweetness and juiciness. Avoid Red Delicious or Gala—they turn to mush.
Can I make the caramel sauce ahead of time?
Absolutely. Make it up to a week in advance and store it in an airtight container in the fridge. Reheat it gently on the stove or in the microwave before using. It will thicken as it cools, so you may need to thin it with a splash of cream or water.
Why is my crust tough?
You likely overworked the dough. When you mix the flour and butter, stop as soon as it comes together. Overmixing develops gluten, which makes the crust tough and dense. Also, make sure your butter and yogurt are very cold.
Can I skip the cheddar in the crust?
You can, but then it’s just a regular apple pie with caramel. The cheddar is what makes this recipe special. If you really don’t want it, use an all-butter crust recipe instead and increase the butter to 6 tablespoons.
Pin This Recipe!
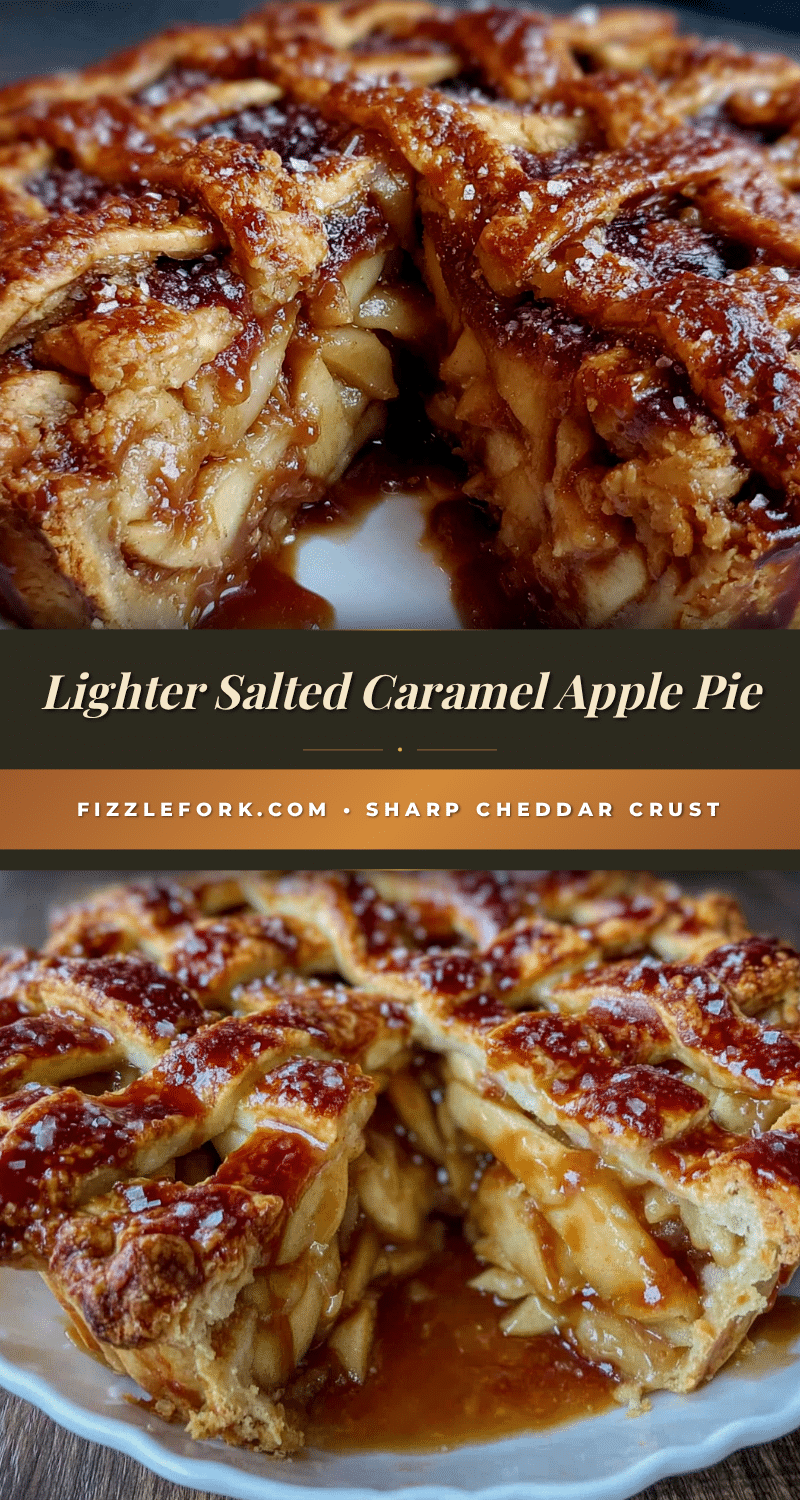
Lighter Salted Caramel Apple Pie with Sharp Cheddar Crust
A lighter, indulgent apple pie with a sharp cheddar crust and salted caramel, perfect for fall gatherings. This recipe balances sweet and savory flavors with less butter and sugar, offering comfort without the guilt.
- Prep Time: 30 minutes
- Cook Time: 50-60 minutes
- Total Time: 1 hour 20 minutes (plus 1 hour chill time and 2 hours cooling)
- Yield: 8 servings 1x
- Category: Dessert
- Cuisine: American
Ingredients
- 1 ¼ cups all-purpose flour (plus more for dusting)
- ½ teaspoon salt
- ¼ teaspoon black pepper
- 4 tablespoons cold unsalted butter, cubed
- ½ cup sharp cheddar cheese, finely grated
- 3 tablespoons plain Greek yogurt (full-fat or 2%)
- 2–3 tablespoons ice water
- ¼ cup unsalted butter
- ½ cup brown sugar, packed (light or dark)
- ¼ cup heavy cream (or half-and-half)
- ½ teaspoon vanilla extract
- ¼ teaspoon flaky sea salt
- 6 medium apples, peeled, cored, and sliced ¼-inch thick (mix of Granny Smith and Honeycrisp)
- 2 tablespoons all-purpose flour
- 2 tablespoons brown sugar
- 1 tablespoon lemon juice
- 1 teaspoon ground cinnamon
- ¼ teaspoon ground nutmeg
- Pinch of salt
Instructions
- Make the crust: In a large bowl, whisk together flour, salt, and pepper. Add cold butter cubes. Using a pastry blender or fingertips, work butter into flour until it resembles coarse meal with some pea-sized butter pieces. Add grated cheddar and toss. Add Greek yogurt and 2 tablespoons ice water, stirring with a fork until dough just comes together. Add remaining water if dry. Turn dough onto floured surface, shape into a disk, wrap in plastic, and refrigerate for at least 1 hour.
- Make the lighter caramel sauce: In a small saucepan over medium heat, melt butter. Add brown sugar and stir until dissolved, about 2 minutes. Slowly pour in heavy cream while stirring constantly. Let simmer for 2-3 minutes until slightly thickened. Remove from heat, stir in vanilla and flaky sea salt. Cool to room temperature.
- Prepare the apples: In a large bowl, toss sliced apples with flour, brown sugar, lemon juice, cinnamon, nutmeg, and salt. Let sit for 10 minutes while oven preheats.
- Roll out the crust: Preheat oven to 375°F (190°C). On a lightly floured surface, roll chilled dough into a 12-inch circle, about ⅛-inch thick. Transfer to a 9-inch pie dish. Trim overhang to ½ inch, fold under, and crimp edges.
- Assemble the pie: Arrange apple mixture in crust, mounding slightly. Drizzle about half of cooled caramel sauce over apples. Reserve rest for serving.
- Bake the pie: Place pie on a baking sheet. Bake for 50-60 minutes, until crust is golden brown and filling is bubbly. Cover edges with foil after 30 minutes if browning too quickly.
- Cool and serve: Let pie cool on a rack for at least 2 hours before slicing. Drizzle with remaining caramel sauce before serving.
Notes
Keep all ingredients cold for flakiest crust. Don’t overwork the dough. Blind baking is not necessary. Let pie rest for at least 2 hours before slicing to allow filling to set. Pie tastes even better the next day.
Nutrition
- Serving Size: 1 slice (1/8 of pie)
- Calories: 320
- Sugar: 28
- Sodium: 220
- Fat: 14
- Saturated Fat: 8
- Carbohydrates: 48
- Fiber: 3
- Protein: 4
Keywords: apple pie, salted caramel, cheddar crust, lighter dessert, fall recipe, Thanksgiving pie, comfort food


