I was standing in line at the DMV—honestly, the worst possible place to be on a Tuesday afternoon—when the woman behind me started talking about mac and cheese. She was maybe seventy, wearing a floral blouse and holding a number that was thirty spots behind mine. I wasn’t expecting cooking advice from a stranger at the DMV, but there I was, clutching my expired license, listening to her describe exactly how to make smoked Gouda mac and cheese that her grandkids apparently fought over. She called it “the quiet-maker” because it stopped arguments mid-sentence. I laughed, but I also took out my phone and typed her instructions into my notes app while she kept talking. The woman’s name was Ruth, and she told me she’d been making this recipe since 1987, when her son brought home a block of smoked Gouda from a deli that was going out of business. “I just threw it in,” she said with a shrug. “And nobody ever wanted the regular kind again.”
I’ll be honest—I forgot about the notes for about three months. Then one rainy Thursday, I had a block of smoked Gouda in my fridge that I’d bought on a whim, and I remembered Ruth. I pulled up that DMV notes app entry and made her mac and cheese. Let me tell you, my kids didn’t just eat it—they actually paused their tablet game to ask for seconds. That never happens. Maybe you’ve been there, where you’re just trying to get dinner on the table without complaints, and something magical happens instead. This was that moment for me. The smoked Gouda gives it this deep, almost nutty flavor that regular cheddar just can’t touch, and the texture is so creamy it’s almost ridiculous. I’ve tweaked Ruth’s original recipe a bit over the years to make it more family-friendly—a little more milk, a little less fancy cheese—but the heart of it is still hers. This is the mac and cheese I bring to potlucks, the one I make when friends have babies, and the one my kids request for their birthdays. It’s that good, and I think you’re going to love it.
Why You’ll Love This Recipe
This isn’t just another mac and cheese recipe—it’s the one that actually works for real families. I’ve tested it more times than I can count, and here’s what makes it different:
- Kid-Approved Without Being Boring: The smoked Gouda adds flavor without being scary. My kids call it “the fancy mac and cheese” but they still eat three servings. It’s not too smoky, not too sharp—it’s just right.
- Budget-Friendly Ingredients: You don’t need to hunt down expensive cheeses. Smoked Gouda is usually affordable at regular grocery stores, and everything else is pantry staples. I’ve made this for under $12 to feed a family of four.
- Comes Together in 45 Minutes: From start to table, this is a weeknight dinner hero. No complicated steps, no waiting around—just good food fast.
- Leftovers That Actually Reheat Well: This is huge for us. The sauce stays creamy even after a day in the fridge. I’ve reheated this for lunch three days in a row and it was still delicious.
- Picky Eater Approved: I have one kid who hates anything “weird” and another who loves strong flavors. This mac and cheese somehow pleases both. It’s the peace treaty of our dinner table.
What makes this recipe different from every other mac and cheese out there is the technique. Instead of making a complicated roux that can go wrong, I use a simple method that guarantees a smooth, creamy sauce every single time. No lumps, no graininess, no stress. And the combination of smoked Gouda with a little sharp cheddar and cream cheese gives you that perfect balance—smoky, tangy, and ultra-creamy. Honestly, it’s the kind of recipe that makes you close your eyes after the first bite. It’s comfort food that actually delivers.
What Ingredients You Will Need
This recipe uses simple ingredients to deliver big flavor. Most of these are probably already in your kitchen, and the ones that aren’t are easy to find at any grocery store. Let me walk you through what you need and why each one matters.
For the Pasta
- 1 pound (450g) elbow macaroni – I prefer Barilla or De Cecco for the best texture. They hold up well and don’t get mushy. You can use any short pasta shape though—rotini, shells, or cavatappi all work great.
- Salt for the pasta water – Don’t skip this! Seasoning the water is the first chance to add flavor. Use about 1 tablespoon of salt per 4 quarts of water.
For the Cheese Sauce
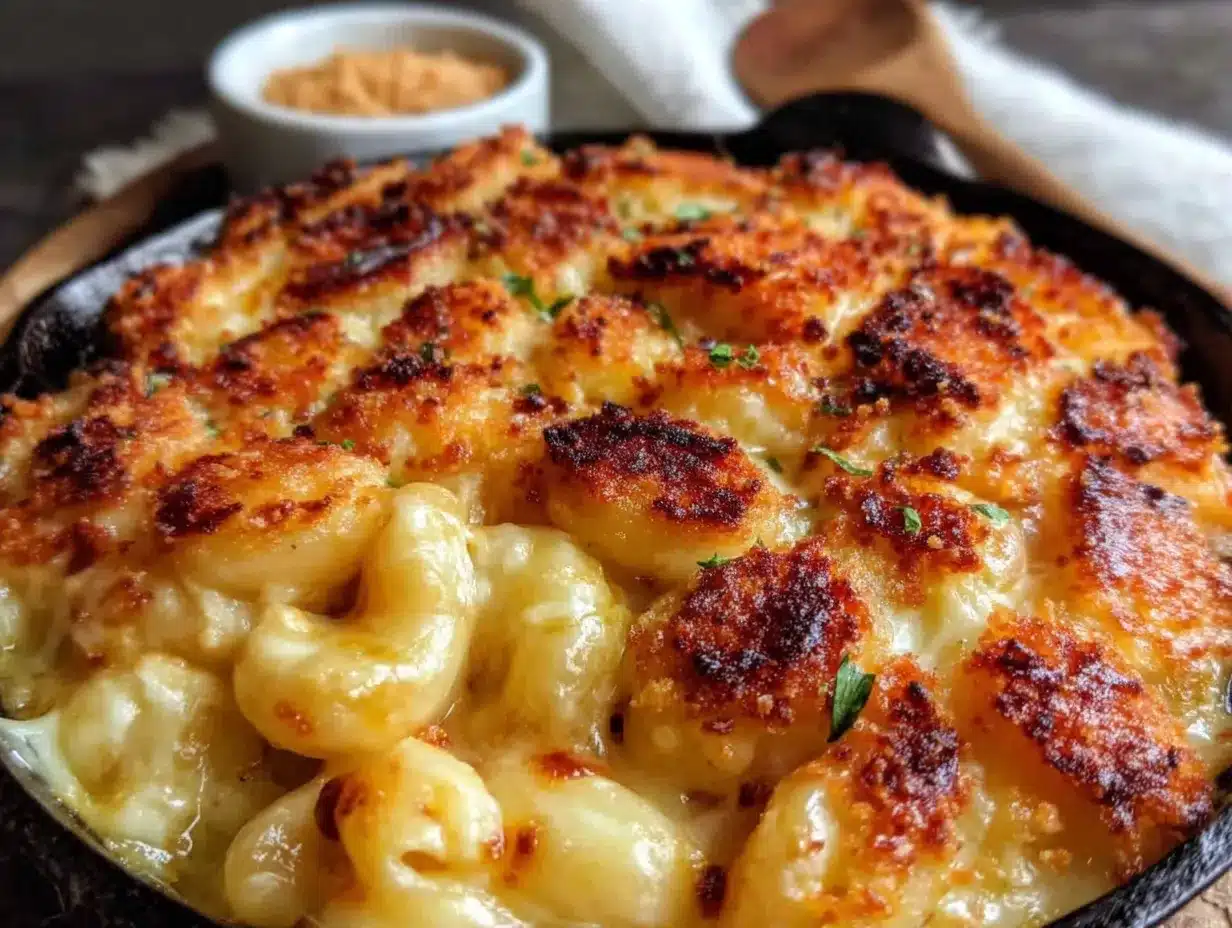
- 8 ounces (225g) smoked Gouda, shredded – This is the star of the show. Look for Gouda that’s actually smoked, not just labeled “smoked flavor.” I’ve found that Boar’s Head or store brands from Whole Foods usually have good quality. Shred it yourself if you can—pre-shredded cheese has anti-caking agents that can make the sauce grainy.
- 4 ounces (115g) sharp cheddar, shredded – This adds tanginess and color. I use Cabot or Tillamook for consistent results. White or yellow cheddar both work fine.
- 4 ounces (115g) cream cheese, softened – This is my secret weapon. It makes the sauce incredibly creamy and stable. Just make sure it’s softened to room temperature so it melts smoothly.
- 4 tablespoons (56g) unsalted butter – Use real butter here, not margarine. It makes a difference in flavor and texture.
- 3 cups (710ml) whole milk – Whole milk gives the best creamy texture. You can use 2% in a pinch, but don’t go lower than that. The fat is what makes the sauce velvety.
- 1/4 cup (30g) all-purpose flour – This thickens the sauce. No need for anything fancy—just regular all-purpose flour works perfectly.
- 1/2 teaspoon garlic powder – Adds a subtle savory note without being overpowering. My kids don’t even notice it.
- 1/2 teaspoon mustard powder – This is a classic mac and cheese trick. It doesn’t taste like mustard—it just enhances the cheese flavor. Trust me on this one.
- 1/4 teaspoon smoked paprika – Optional, but it reinforces the smoky flavor from the Gouda. My kids actually like the little red specks in the sauce.
- Salt and black pepper to taste – I usually start with 1/2 teaspoon salt and 1/4 teaspoon pepper, then adjust at the end.
For the Topping (Optional but Recommended)
- 1/2 cup (60g) panko breadcrumbs – These get so crispy and golden in the oven. Regular breadcrumbs work too, but panko gives the best crunch.
- 2 tablespoons (28g) melted butter – To mix with the breadcrumbs for toasting.
- 1/4 cup (30g) grated Parmesan – Adds extra savory flavor to the topping. I use the stuff in the green can when I’m lazy, but fresh-grated is better.
One thing I want to mention about substitutions—if you can’t find smoked Gouda, you can use regular Gouda and add a drop of liquid smoke. But honestly, it’s not quite the same. The real thing is worth tracking down. And if you’re dairy-free, this recipe is going to be tough to adapt. I’ve tried with plant-based cheeses and it just doesn’t work the same way.
Equipment Needed
You don’t need fancy equipment for this recipe. Here’s what I use and what you can substitute if needed:
- Large pot (6-quart or larger) – For boiling the pasta. I use my old Calphalon pot that’s seen better days, but any large pot works. Just make sure it’s big enough so the pasta doesn’t stick together.
- Medium saucepan (3-quart) – For making the cheese sauce. A heavy-bottomed saucepan is ideal because it distributes heat evenly and prevents scorching.
- Whisk – This is crucial for a smooth sauce. A silicone-coated whisk is nice because it won’t scratch your pans, but a regular metal one works fine.
- Wooden spoon or silicone spatula – For stirring the pasta and scraping the sauce. I prefer silicone because it doesn’t absorb flavors.
- 9×13-inch baking dish – For baking the mac and cheese. You can use an 8×8 dish for a thicker version, but you’ll need to adjust the baking time slightly.
- Box grater or food processor – For shredding cheese. I use my Cuisinart food processor with the shredding disc when I’m making a big batch. It saves so much time. But a box grater works perfectly too—just watch your knuckles.
- Measuring cups and spoons – For accuracy. I’ve learned the hard way that eyeballing ingredients in mac and cheese can lead to disaster.
- Cutting board and knife – For cutting the cream cheese into cubes if needed.
If you don’t have a baking dish, you can make this entirely on the stovetop. Just skip the baking step and serve it straight from the pot. It’s still delicious—just without the crispy topping. And if you have a cast-iron skillet, you can make the sauce and bake it all in one pan. That’s my favorite way to make it, actually.
Preparation Method
Let me walk you through this step by step. I’ve made this recipe dozens of times, so I’ll share all the little tricks I’ve learned along the way.
Step 1: Preheat and Prep
Preheat your oven to 375°F (190°C). While it’s heating up, start a large pot of salted water boiling for the pasta. Use about 1 tablespoon of salt—it should taste like the sea. I usually start this before I do anything else so the water is ready when I need it.
Step 2: Shred Your Cheese
Shred the smoked Gouda and sharp cheddar. This is the most important step for a smooth sauce. Pre-shredded cheese has cellulose and other anti-caking agents that prevent it from melting smoothly. I learned this the hard way after making a grainy sauce that my kids refused to eat. So take the extra five minutes and shred it yourself. Cut the cream cheese into small cubes and let it sit on the counter to soften while you work.
Step 3: Cook the Pasta
Add the elbow macaroni to the boiling water and cook according to package directions until al dente. For most brands, that’s about 7-8 minutes. Here’s the trick—undercook it by about 1 minute. The pasta will continue cooking in the oven, and you don’t want it mushy. Drain the pasta but don’t rinse it. Rinsing removes the starch that helps the sauce stick. Just let it drain well in a colander.
Step 4: Make the Roux
While the pasta is cooking, melt the butter in a medium saucepan over medium heat. Once it’s fully melted and starting to bubble, add the flour. Whisk constantly for about 1-2 minutes until the mixture turns a light golden color. This is called a roux, and it’s the foundation of your sauce. Don’t walk away during this step—burnt roux tastes awful and you’ll have to start over. I’ve done that more times than I care to admit.
Step 5: Add the Milk
Slowly pour in the milk while whisking continuously. I add it in a thin stream, about 1/4 cup at a time, whisking until smooth between additions. This prevents lumps from forming. Once all the milk is added, continue whisking until the mixture comes to a gentle simmer and thickens enough to coat the back of a spoon. This usually takes about 5-7 minutes. The sauce should be smooth and glossy at this point.
Step 6: Add the Cheese
Reduce the heat to low and start adding the shredded cheese, a handful at a time. Stir gently until each addition is fully melted before adding the next. This gradual process ensures the cheese melts evenly without breaking the sauce. Add the cream cheese cubes next and stir until completely smooth. The sauce will look a little thin at first, but that’s okay—it will thicken as it sits.
Step 7: Season the Sauce
Add the garlic powder, mustard powder, smoked paprika, salt, and pepper. Stir well to combine. Taste the sauce and adjust the seasoning. I usually add a little more salt at this point because the pasta will absorb some. The sauce should taste slightly salty on its own since it will be balanced by the pasta.
Step 8: Combine Pasta and Sauce
Pour the drained pasta back into the large pot or into a large mixing bowl. Pour the cheese sauce over the top and stir gently until every piece of pasta is coated. Don’t stir too vigorously or you’ll break the pasta. The sauce should coat each piece evenly—if it looks too thick, you can add a splash of warm milk to thin it out.
Step 9: Assemble and Bake
Transfer the mac and cheese to your greased 9×13-inch baking dish. Spread it into an even layer. If you’re making the topping, mix the panko breadcrumbs with melted butter and Parmesan, then sprinkle it evenly over the top. Bake for 20-25 minutes until the sauce is bubbly and the topping is golden brown. If you want extra color, you can broil it for the last 2 minutes, but watch it carefully so it doesn’t burn.
Step 10: Rest and Serve
Let the mac and cheese rest for 5-10 minutes after it comes out of the oven. This is so important—if you serve it immediately, the sauce will be runny. Resting allows it to set up and become perfectly creamy. I know it’s hard to wait, but trust me on this one. Serve hot with extra black pepper on top if you like.
Cooking Tips & Techniques
After making this recipe more times than I can count, I’ve picked up some tricks that make a real difference. Let me share the ones that matter most.
Don’t overheat the sauce. This is the number one mistake people make with mac and cheese. If you keep the heat too high, the cheese can separate and become greasy. Always melt cheese over low heat, and remove the pan from the heat source once everything is combined. I learned this after ruining a batch for a potluck—it was a sad, oily mess that I had to throw away.
Grate your own cheese. I know I keep saying this, but it really matters. Pre-shredded cheese is coated with starches and cellulose that prevent clumping in the bag, but they also prevent smooth melting. A box grater costs less than $10 and takes five minutes. Just do it.
Season in layers. Don’t just add salt at the end. Season the pasta water, season the roux, and season the final sauce. Each layer builds flavor. My husband once asked me why my mac and cheese tastes better than his, and this is the reason—he only seasons at the end.
Use room temperature ingredients. Cold milk and cold cheese can cause the sauce to seize up and become grainy. Let your milk sit out for 15 minutes before you start, and make sure your cream cheese is soft. This small step makes a huge difference in texture.
Undercook the pasta. This is crucial for baked mac and cheese. If you cook the pasta to al dente according to the package, it will be overcooked after 20 minutes in the oven. Cook it 1-2 minutes less than the package says. The pasta should still have a slight bite to it when you drain it.
Make extra sauce. Pasta absorbs liquid as it bakes, so your sauce should be a little thinner than you think it should be before baking. If it looks perfect in the pot, it will be too dry after baking. Add an extra 1/4 cup of milk to the sauce if you’re unsure.
Variations & Adaptations
One of the best things about this recipe is how adaptable it is. Here are some variations I’ve tried and loved:
Make It Gluten-Free
Use gluten-free pasta and swap the all-purpose flour for a 1:1 gluten-free flour blend. I’ve had good results with Bob’s Red Mill and King Arthur brands. The sauce might be slightly thinner, but it still tastes great. Just be careful not to overcook the gluten-free pasta—it gets mushy faster than regular pasta.
Add Some Protein
My family loves when I add shredded rotisserie chicken or crumbled bacon to this mac and cheese. Stir in about 2 cups of cooked chicken or 6 strips of crumbled bacon right before baking. It turns a side dish into a complete meal. I’ve also used leftover pulled pork, which is amazing with the smoky Gouda.
Vegetable Boost
If you’re trying to sneak in some veggies, this recipe is perfect for it. Steam some broccoli or cauliflower and fold it in with the pasta. Roasted butternut squash cubes are also amazing—they add sweetness that complements the smoky cheese. My kids don’t even notice when I add finely chopped spinach that’s been wilted in the microwave.
Spicy Version
For adults who like heat, add 1/4 teaspoon of cayenne pepper or a diced jalapeño to the sauce. You can also top the finished dish with pickled jalapeño slices before baking. My husband loves this version, though the kids stick to the original.
Different Cheese Combinations
Smoked Gouda is the star, but you can play with the supporting cheeses. Try using Gruyère instead of cheddar for a nuttier flavor, or add some fontina for extra creaminess. I once made it with all smoked Gouda and no cheddar, and it was still delicious—just a little one-dimensional. The combination is what makes it special.
Serving & Storage Suggestions
This mac and cheese is versatile enough for any occasion. Here’s how to serve, store, and reheat it.
Serving Suggestions
Serve this mac and cheese hot, straight from the oven. I like to let it rest for 5-10 minutes before serving so it sets up properly. It pairs beautifully with a simple green salad dressed with vinaigrette—the acidity cuts through the richness. For a complete meal, serve it alongside roasted chicken, meatloaf, or grilled sausages. My kids love it with steamed broccoli on the side, which makes me feel like a responsible parent.
Storage Instructions
Leftover mac and cheese can be stored in an airtight container in the refrigerator for up to 5 days. The flavor actually gets better after a day or two as the cheese continues to meld. I often make a double batch on purpose just for leftovers.
Freezing Instructions
This recipe freezes beautifully. Assemble the mac and cheese in a freezer-safe baking dish, but don’t bake it. Cover tightly with foil and freeze for up to 3 months. When you’re ready to eat it, thaw it in the refrigerator overnight, then bake as directed, adding about 10 minutes to the baking time. You can also freeze individual portions in freezer-safe containers for easy lunches.
Reheating Tips
The best way to reheat mac and cheese is in the oven. Place it in an oven-safe dish, add a splash of milk, cover with foil, and bake at 350°F (175°C) for 15-20 minutes. The microwave works in a pinch, but it can make the sauce grainy. If you must use the microwave, add a tablespoon of milk and stir every 30 seconds until heated through.
Nutritional Information & Benefits
Here’s the estimated nutritional information for one serving (about 1 cup, based on 8 servings):
- Calories: 480
- Total Fat: 28g
- Saturated Fat: 16g
- Cholesterol: 85mg
- Sodium: 680mg
- Total Carbohydrates: 38g
- Dietary Fiber: 2g
- Sugars: 6g
- Protein: 22g
This mac and cheese provides a good amount of protein and calcium from the cheese and milk. Smoked Gouda is a good source of vitamin B12 and zinc, which support immune function and energy metabolism. The whole milk and cheese also provide vitamin D and phosphorus for bone health.
If you’re watching your sodium, you can reduce the salt in the recipe and use low-sodium cheese options. For a lighter version, use 2% milk and reduce the butter to 2 tablespoons. The sauce won’t be quite as creamy, but it will still be delicious.
This recipe contains dairy and gluten. For dairy-free options, I recommend trying a cashew-based cheese sauce, though I haven’t tested it with this specific recipe. For gluten-free, use the substitutions mentioned in the variations section.
Conclusion
This smoked Gouda mac and cheese has become a staple in our house for good reason. It’s the recipe that brings everyone to the table—even my pickiest eater—and it makes weeknight dinners feel special without any extra stress. The smoky flavor, the creamy sauce, the crispy topping—it all comes together in a way that feels both familiar and exciting.
I hope you’ll give this recipe a try, and I hope it becomes a favorite in your home too. Don’t be afraid to customize it based on what your family loves—that’s the beauty of cooking, after all. Add bacon, throw in some broccoli, or keep it simple. However you make it, I think you’ll be surprised at how something so simple can feel so special.
If you make this recipe, I’d love to hear how it turned out! Leave a comment below and let me know what your family thought. Did your kids ask for seconds? Did you add any fun twists? Share your photos and tag me—I love seeing your creations. And if you’re looking for more family-friendly dinner ideas, check out my creamy one-pot pasta recipe or my easy chicken pot pie casserole—they’re both huge hits in our house. Happy cooking, friends!
Frequently Asked Questions
Can I make this mac and cheese ahead of time?
Absolutely! You can assemble the mac and cheese completely, cover it, and refrigerate it for up to 24 hours before baking. Just add 5-10 minutes to the baking time since you’re starting from cold. This is perfect for holidays or busy weeknights.
Why did my cheese sauce turn out grainy?
Grainy sauce usually happens for one of two reasons: the heat was too high when you added the cheese, or you used pre-shredded cheese. Keep the heat on low and stir gently. If you’re using pre-shredded cheese, the anti-caking agents can cause graininess. Always shred your own cheese for the smoothest sauce.
Can I use liquid smoke instead of smoked Gouda?
You can, but it won’t taste the same. If you can’t find smoked Gouda, use regular Gouda and add 1/4 teaspoon of liquid smoke to the sauce. Start with less and taste as you go—liquid smoke is powerful and can easily overpower the dish.
How do I make this recipe dairy-free?
This recipe is dairy-heavy, so it’s tricky to make dairy-free. I’ve had the best luck using a combination of unsweetened oat milk, vegan butter, and vegan cream cheese. For the cheese, use a good-quality vegan smoked Gouda-style shred. The texture won’t be exactly the same, but it can still be delicious.
Can I skip the baking step?
Yes! This mac and cheese is delicious straight from the stovetop. Just skip the topping and serve it right after combining the pasta and sauce. The texture will be a little looser, but it’s still incredibly creamy and satisfying. This is my go-to method when I’m short on time.
Pin This Recipe!
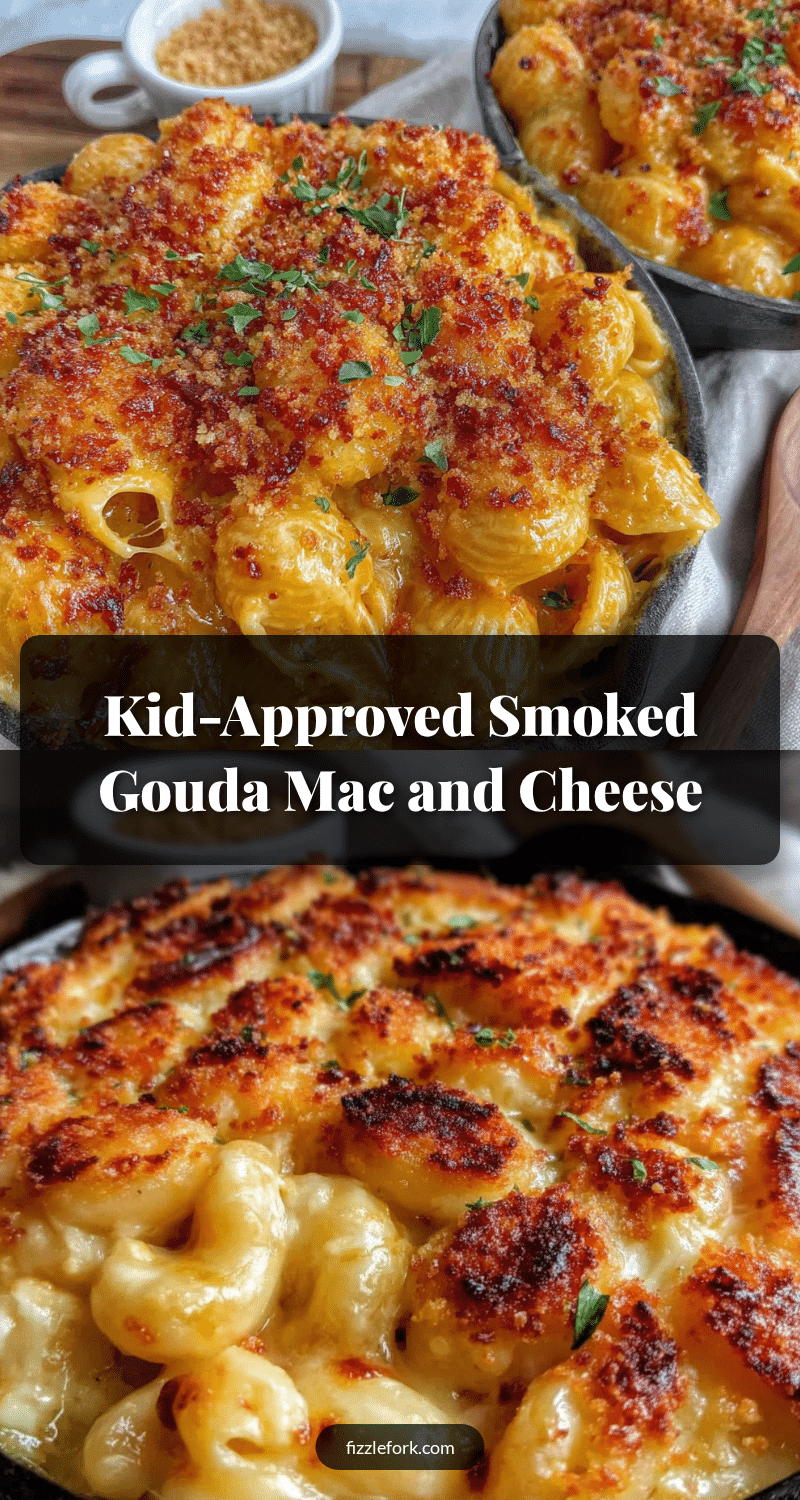
Easy Smoked Gouda Mac and Cheese: Best Kid-Approved Recipe
This creamy, smoky mac and cheese is a family favorite that comes together in 45 minutes. Made with smoked Gouda, sharp cheddar, and cream cheese, it’s kid-approved and perfect for weeknight dinners or potlucks.
- Prep Time: 15 minutes
- Cook Time: 30 minutes
- Total Time: 45 minutes
- Yield: 8 servings 1x
- Category: Main Course
- Cuisine: American
Ingredients
- 1 pound (450g) elbow macaroni
- Salt for the pasta water
- 8 ounces (225g) smoked Gouda, shredded
- 4 ounces (115g) sharp cheddar, shredded
- 4 ounces (115g) cream cheese, softened
- 4 tablespoons (56g) unsalted butter
- 3 cups (710ml) whole milk
- 1/4 cup (30g) all-purpose flour
- 1/2 teaspoon garlic powder
- 1/2 teaspoon mustard powder
- 1/4 teaspoon smoked paprika (optional)
- Salt and black pepper to taste
- 1/2 cup (60g) panko breadcrumbs (optional)
- 2 tablespoons (28g) melted butter (for topping, optional)
- 1/4 cup (30g) grated Parmesan (for topping, optional)
Instructions
- Preheat your oven to 375°F (190°C). Start a large pot of salted water boiling for the pasta.
- Shred the smoked Gouda and sharp cheddar. Cut the cream cheese into small cubes and let it soften.
- Cook the elbow macaroni in the boiling water according to package directions until al dente, undercooking by about 1 minute. Drain (do not rinse).
- While the pasta cooks, melt the butter in a medium saucepan over medium heat. Add the flour and whisk constantly for 1-2 minutes until light golden.
- Slowly pour in the milk while whisking continuously. Continue whisking until the mixture simmers and thickens enough to coat the back of a spoon (about 5-7 minutes).
- Reduce heat to low. Add the shredded cheese a handful at a time, stirring until melted. Add the cream cheese cubes and stir until smooth.
- Stir in the garlic powder, mustard powder, smoked paprika, salt, and pepper. Taste and adjust seasoning.
- Pour the drained pasta into a large bowl. Pour the cheese sauce over the top and stir gently until every piece is coated.
- Transfer the mac and cheese to a greased 9×13-inch baking dish. If using topping, mix panko with melted butter and Parmesan, then sprinkle over the top.
- Bake for 20-25 minutes until bubbly and golden. For extra color, broil for the last 2 minutes. Let rest for 5-10 minutes before serving.
Notes
For the smoothest sauce, always shred your own cheese and melt it over low heat. Undercook the pasta by 1 minute to avoid mushiness after baking. Let the dish rest for 5-10 minutes after baking to allow the sauce to set. Leftovers can be stored in the refrigerator for up to 5 days or frozen for up to 3 months.
Nutrition
- Serving Size: 1 cup
- Calories: 480
- Sugar: 6
- Sodium: 680
- Fat: 28
- Saturated Fat: 16
- Carbohydrates: 38
- Fiber: 2
- Protein: 22
Keywords: smoked Gouda mac and cheese, easy mac and cheese, kid-friendly mac and cheese, creamy mac and cheese, baked mac and cheese


