My neighbor Karen wasn’t trying to impress anyone. I’d stopped by to return her cake pan—the one she’d loaned me three weeks ago, and honestly, I was embarrassed it took me that long—and the smell hit me before I even got through the door. It was buttery and sweet, with this warm, toasted aroma that made me stop mid-step. “What is that?” I asked, probably sounding a little too desperate. She just shrugged and pointed to a baking dish on the counter. “Oh, just some treats I threw together for the kids’ holiday party.” Just some treats. She said it like it was nothing.
But let me tell you, one bite and I knew I’d never look at a Rice Krispie treat the same way again. They were chewy, but somehow also a little crisp on the edges. There was a deep, nutty flavor—brown butter, obviously—and a soft, buttery sweetness that reminded me of those Lofthouse sugar cookies from the grocery store, only way better. I stood there in her kitchen, eating one, then another, while she talked about the school bake sale. Maybe you’ve been there—that moment when you taste something so simple yet so perfect, and you know you have to figure out how to make it yourself.
I asked for the recipe, of course. She kind of waved her hand and said, “Oh, it’s nothing special. Just brown the butter, throw in some marshmallows, and use a box of sugar cookie mix instead of cereal.” That was it. No dramatic reveal, no secret technique. Just a casual, thrown-together thing she’d thought up one afternoon. And honestly, that’s what makes these Brown Butter Sugar Cookie Rice Krispie Treats so brilliant. They’re not pretentious. They’re just really, really good. I’ve been making them every holiday season since, and they always disappear faster than anything else on the table.
Why You’ll Love This Recipe
These Brown Butter Sugar Cookie Rice Krispie Treats are the kind of recipe that makes you look like a kitchen genius without actually doing much work. I mean, who doesn’t love that? Here’s why they’ve become my go-to for holiday baking:
- Quick & Easy : Comes together in under 20 minutes, with just a handful of ingredients. Perfect for when you need a last-minute treat for a cookie swap or school party.
- Simple Ingredients : No fancy grocery trips needed. You probably already have butter, marshmallows, and a box of sugar cookie mix in your pantry.
- Perfect for Holiday Baking : These treats have that nostalgic, buttery flavor that screams Christmas, but they’re so much easier than rolling out actual sugar cookies.
- Crowd-Pleaser : Kids love the chewy, marshmallow texture, and adults can’t get enough of that nutty brown butter flavor. Honestly, I’ve never seen a pan last more than an hour.
- Unbelievably Delicious : The combination of toasted brown butter, sweet marshmallow, and soft sugar cookie crumbles is pure comfort food magic.
What makes this recipe different from all the other Rice Krispie treat variations out there? It’s the brown butter, sure, but it’s also the sugar cookie mix. Instead of using puffed rice cereal, you’re using crushed sugar cookie mix, which gives the treats this soft, almost cake-like texture with little crumbles of cookie throughout. It’s not just another version—it’s the best version. Trust me on this one.
This recipe is the kind that makes you close your eyes after the first bite. It’s comfort food reimagined—faster, easier, but with the same soul-soothing satisfaction as a warm sugar cookie fresh from the oven. Perfect for impressing guests without stress, or turning a simple Tuesday night into something a little more special.
What Ingredients You Will Need
This recipe uses simple, wholesome ingredients to deliver that rich, buttery flavor and satisfying texture. Most of these are pantry staples, which makes these treats perfect for spontaneous holiday baking sessions.
- Unsalted butter (1 cup / 2 sticks) – You’ll be browning this, so the quality matters. I prefer Kerrygold for its rich flavor, but any good unsalted butter works. The browning process removes some water content, so don’t try to substitute margarine here.
- Mini marshmallows (10 oz bag) – Mini marshmallows melt more evenly than the big ones. If you only have large marshmallows, chop them into smaller pieces first. I’ve made that mistake before—trust me, it’s worth the extra step.
- Boxed sugar cookie mix (17.5 oz box) – This is the secret ingredient. Use a good quality brand like Betty Crocker or Pillsbury. The dry mix adds sweetness and that signature soft cookie texture. Don’t prepare it according to the box directions—you’re using it dry, right out of the box.
- Vanilla extract (1 teaspoon) – Pure vanilla extract makes a difference here. The brown butter and vanilla combo is just heavenly. Avoid imitation vanilla if you can.
- Sea salt (½ teaspoon, plus extra for sprinkling) – A flaky sea salt like Maldon is perfect for that finishing touch. The salt cuts through the sweetness and makes the brown butter flavor pop.
- Optional: Sprinkles (¼ cup) – Holiday-themed sprinkles add a festive touch. I like using red and green jimmies for Christmas, but rainbow works year-round.
Ingredient Selection Tips: Look for a sugar cookie mix that doesn’t require additional butter or eggs—just water or milk. Some mixes have different instructions, so check the box. If your mix calls for an egg, you might need to adjust the texture slightly. I’ve found that Betty Crocker’s mix works best because it just needs butter and water, which we’re already using.
Substitution Guidance: For a gluten-free version, use a gluten-free sugar cookie mix. Most brands offer one now. You can also swap the butter for a plant-based alternative, but make sure it’s suitable for browning. I’ve had good luck with Miyoko’s European Style Cultured Vegan Butter.
Equipment Needed
You don’t need much for this recipe, which is part of its charm. Here’s what you’ll need:
- Large pot or Dutch oven (at least 4-quart) – You need space to stir everything together without marshmallow spilling over the sides. I use my Le Creuset, but any heavy-bottomed pot works.
- Wooden spoon or silicone spatula – A wooden spoon is great for stirring the hot marshmallow mixture. Silicone works too, but make sure it’s heat-resistant.
- 9×13-inch baking dish – This is the standard size for a full batch. If you want thicker treats, use an 8×8-inch dish instead.
- Parchment paper – Line your baking dish with parchment paper, leaving some overhang on the sides. This makes lifting the treats out so much easier. Trust me, you don’t want to be scraping them out of the pan.
- Sharp knife or bench scraper – For cutting clean squares. A bench scraper works better than a knife for getting straight edges.
If you don’t have a heavy-bottomed pot, use a regular pot and watch the heat carefully. Brown butter can burn quickly in thin pans. I learned this the hard way when I scorched my first batch—my kitchen smelled like burnt popcorn for days.
Preparation Method
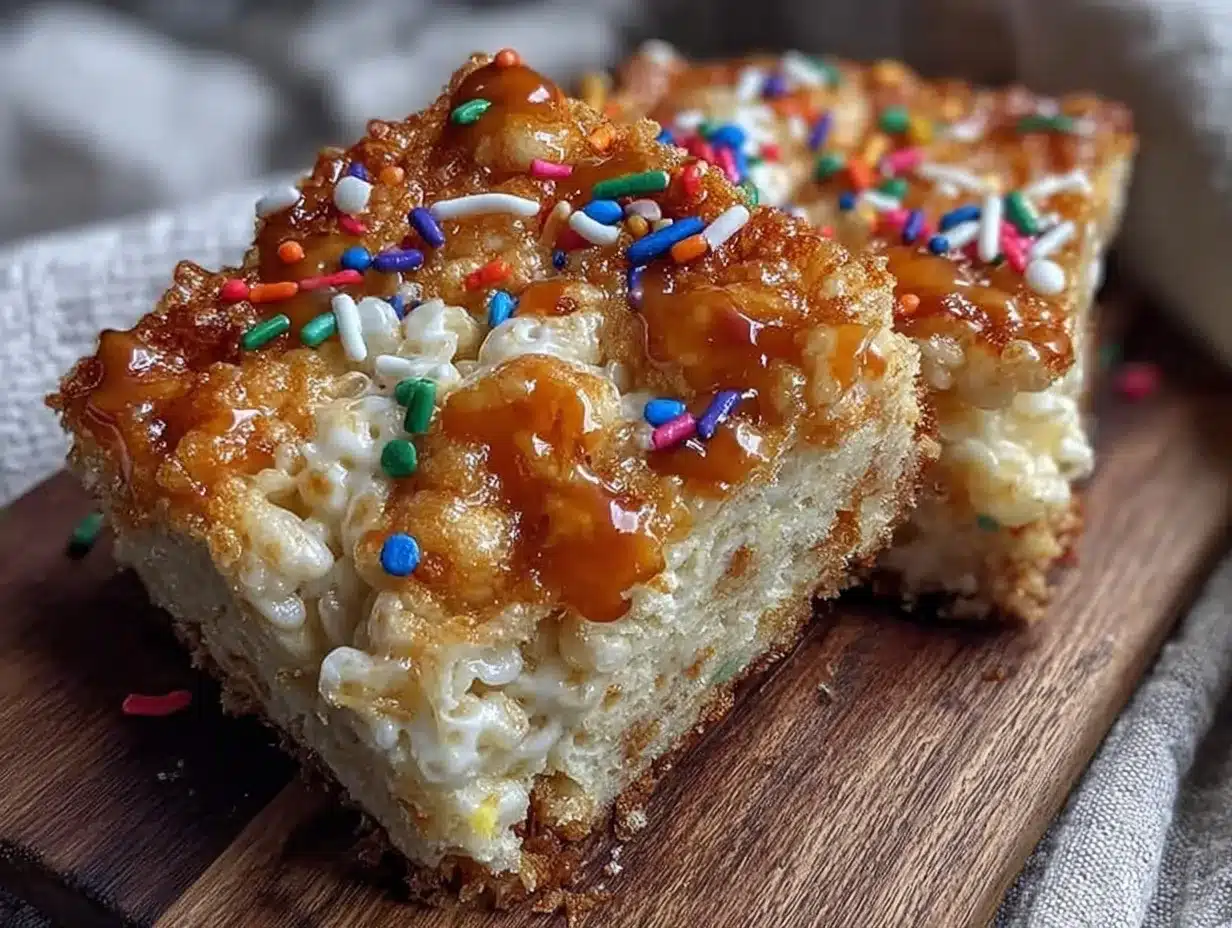
Ready to make these amazing treats? Here’s how to do it, step by step.
- Prepare your baking dish. Line a 9×13-inch baking dish with parchment paper, leaving about 2 inches of overhang on two opposite sides. Lightly grease the parchment with butter or non-stick spray. This will make lifting the treats out a breeze later.
- Brown the butter. Place 1 cup (2 sticks) of unsalted butter in a large pot or Dutch oven over medium heat. Let it melt completely, swirling the pan occasionally. As it melts, it will start to foam and bubble. Keep a close eye on it—you’re looking for the milk solids to turn a golden brown color and smell nutty. This usually takes about 5-7 minutes. Once it’s a deep amber color and smells like toasted hazelnuts, remove it from the heat immediately. Don’t walk away from this step—brown butter can go from perfect to burnt in seconds. I’ve ruined more batches than I’d like to admit by getting distracted.
- Add the marshmallows. Pour the entire 10 oz bag of mini marshmallows into the pot with the hot brown butter. Stir gently with a wooden spoon until the marshmallows are completely melted and smooth. This should take about 2-3 minutes. The mixture will be very hot, so be careful not to splash it.
- Mix in the sugar cookie mix. Pour the entire 17.5 oz box of sugar cookie mix into the marshmallow mixture. Add 1 teaspoon of vanilla extract and ½ teaspoon of sea salt. Stir everything together until the cookie mix is fully incorporated and no dry patches remain. The mixture will be thick and sticky—that’s normal. Keep stirring until it forms a cohesive, dough-like mass.
- Fold in sprinkles (optional). If you’re using sprinkles, fold them in now. Stir gently to distribute them evenly without crushing them too much. I like to reserve a few to sprinkle on top for a prettier presentation.
- Transfer to the baking dish. Scrape the mixture into the prepared baking dish. It will be very sticky, so I recommend greasing your hands or a spatula with a little butter or non-stick spray to press it down evenly. Spread the mixture into an even layer, pressing firmly into the corners. Don’t press too hard—you want them chewy, not dense.
- Let them set. Let the treats cool at room temperature for at least 30 minutes. Don’t rush this step—if you try to cut them while they’re still warm, they’ll be a gooey mess. I know it’s tempting, but patience pays off here. For cleaner cuts, you can even refrigerate them for 15-20 minutes.
- Cut and serve. Once set, lift the treats out of the dish using the parchment overhang. Place them on a cutting board and use a sharp knife or bench scraper to cut them into squares. I usually cut them into 12 large squares or 24 smaller ones, depending on the occasion.
Sensory Cues: When the butter is properly browned, it should look like liquid amber with tiny dark specks floating in it—those are the toasted milk solids. The smell should be nutty and rich, almost like toasted almonds. When you stir in the marshmallows, the mixture should be smooth and glossy, stretching slightly as you lift the spoon. The final mixture should be thick enough to hold its shape but still soft and pliable.
Cooking Tips & Techniques
I’ve made these Brown Butter Sugar Cookie Rice Krispie Treats more times than I can count, and I’ve learned a few things along the way. Here are my best tips:
Don’t rush the brown butter. This is the most important step. Low and slow is the way to go. Use medium heat and swirl the pan constantly. The butter will go through stages—first it melts, then it foams, then the foam subsides, and finally the milk solids start to brown. That’s when you need to pay attention. The moment you see golden specks forming, take it off the heat. The residual heat will continue to cook it slightly.
Watch the marshmallows. Overheating the marshmallows can make the treats tough and hard. Once the marshmallows are melted, remove the pot from the heat before adding the cookie mix. You want the mixture to be smooth and stretchy, not boiling. If you notice the mixture getting too thick, you can add a tablespoon of water to loosen it up.
Use a light touch when pressing. I used to press the mixture down really hard, thinking it would make the treats more compact and easier to cut. But that actually makes them dense and hard. Instead, use a gentle pressing motion—just enough to spread them evenly. The treats should be chewy, not brick-like.
Grease your tools. The mixture is incredibly sticky, so grease your hands, spatula, and even the knife you’re using to cut them. A light coating of butter or non-stick spray makes everything easier. I keep a small bowl of melted butter nearby when I’m working with this mixture.
Cut with confidence. When cutting the treats, use a sharp knife and cut straight down in one motion. Don’t saw back and forth—that will make the edges messy. If you’re having trouble with sticking, run the knife under hot water between cuts.
My biggest failure: The first time I made these, I used regular butter instead of browning it first. The treats were good, but they lacked that deep, nutty flavor that makes them special. I also forgot to grease my hands when pressing the mixture into the pan, and I ended up with marshmallow goo all over my fingers. Lesson learned!
Variations & Adaptations
One of the best things about this recipe is how easy it is to customize. Here are some variations I’ve tried and loved:
Chocolate Drizzle: After the treats have set, melt ½ cup of semi-sweet chocolate chips with 1 teaspoon of coconut oil and drizzle it over the top. Let the chocolate set before cutting. The combination of brown butter and chocolate is absolutely divine.
Peppermint Holiday Twist: Add ½ teaspoon of peppermint extract along with the vanilla, and fold in ¼ cup of crushed candy canes along with the sprinkles. This gives the treats a festive, minty flavor that’s perfect for Christmas. Just be sure to crush the candy canes finely so they don’t create sharp pieces.
Cinnamon Sugar Crunch: Mix 1 teaspoon of cinnamon into the sugar cookie mix before adding it to the marshmallow mixture. After pressing the treats into the pan, sprinkle the top with a mixture of 2 tablespoons of sugar and 1 teaspoon of cinnamon. This adds a lovely warm spice flavor that pairs beautifully with the brown butter.
Gluten-Free Version: Use a gluten-free sugar cookie mix and check that your marshmallows are gluten-free (most are, but some brands use wheat starch). I’ve tried this with King Arthur’s gluten-free sugar cookie mix and it worked perfectly.
Vegan Adaptation: Use a plant-based butter that’s suitable for browning, like Miyoko’s or Earth Balance. Most marshmallows contain gelatin, so look for vegan marshmallows—Dandies is a good brand. The texture will be slightly different, but still delicious.
Serving & Storage Suggestions
These treats are best served at room temperature. I like to arrange them on a festive platter, sometimes with a light dusting of powdered sugar or a few extra sprinkles on top. They’re perfect for holiday cookie exchanges, school parties, or just as a sweet treat with a cup of coffee.
Storage: Store the treats in an airtight container at room temperature for up to 5 days. Place a piece of parchment paper between layers to prevent sticking. Don’t refrigerate them—the cold air can make them hard and dry.
Freezing: These treats freeze beautifully. Wrap each square individually in plastic wrap, then place them in a freezer-safe bag or container. They’ll keep for up to 3 months. To thaw, just leave them at room temperature for about 30 minutes. The texture stays soft and chewy—honestly, I sometimes prefer them after they’ve been frozen and thawed.
Reheating: If you want that fresh-from-the-pan warmth, pop a treat in the microwave for about 10 seconds. Don’t overheat it, or the marshmallow will become too soft and sticky.
Flavor Development: These treats actually taste even better the next day. The flavors meld together overnight, and the texture becomes perfectly chewy. So if you can resist eating them all right away, your patience will be rewarded.
Nutritional Information & Benefits
Let’s be honest—these are a treat, not a health food. But here’s the estimated nutritional information per serving (based on 12 large squares):
| Nutrient | Amount per Serving |
|---|---|
| Calories | 310 |
| Total Fat | 16g |
| Saturated Fat | 10g |
| Carbohydrates | 42g |
| Sugar | 28g |
| Protein | 2g |
| Sodium | 210mg |
Health Considerations: These treats contain dairy and gluten. If you have dietary restrictions, check the variations section for adaptations. The brown butter does add a significant amount of saturated fat, but it also provides a small amount of vitamin A and other fat-soluble nutrients.
My Perspective: I believe in balance. These treats are meant to be enjoyed in moderation, especially during the holiday season. They’re a special occasion food, not an everyday snack. And honestly, the joy they bring to a holiday gathering is worth every calorie. If you’re looking for a way to make them slightly lighter, you can reduce the butter to ¾ cup, but the texture won’t be quite as rich.
Conclusion
These Brown Butter Sugar Cookie Rice Krispie Treats are the kind of recipe that makes holiday baking feel effortless. They’re quick, they’re simple, and they taste like something you spent hours on. The nutty brown butter, the soft sugar cookie crumbles, the chewy marshmallow—it’s a combination that just works.
I love that this recipe came from a casual moment in my neighbor’s kitchen. It reminds me that the best recipes don’t have to be complicated or fancy. Sometimes they’re just a happy accident, a little bit of creativity, and a whole lot of butter. And that’s what makes them special.
I’d love to hear how these turn out for you! Did you add any fun variations? Did your family devour them as fast as mine does? Drop a comment below and let me know. And if you’re looking for more holiday baking inspiration, check out our Christmas cookie recipes or this easy fudge recipe that’s perfect for gift-giving. Happy baking, friends!
Frequently Asked Questions
Can I use salted butter instead of unsalted?
Yes, you can. Just reduce or omit the added sea salt in the recipe. Salted butter has about ¼ teaspoon of salt per stick, so adjust accordingly. I prefer unsalted so I can control the salt level myself.
Why did my brown butter burn?
Brown butter burns easily because the milk solids toast quickly once they start browning. Use medium heat, swirl the pan constantly, and remove it from the heat as soon as you see golden specks. The residual heat will continue to cook it, so don’t wait until it looks too dark.
Can I use a different cookie mix?
Absolutely! You can try using a chocolate chip cookie mix, a snickerdoodle mix, or even a gingerbread mix for a holiday twist. Just keep in mind that different mixes have different textures and sweetness levels, so you may need to adjust the marshmallow amount slightly.
How do I get cleaner cuts?
For the cleanest cuts, refrigerate the treats for 15-20 minutes before cutting. Use a sharp knife or bench scraper, and wipe it clean between cuts. You can also run the knife under hot water and dry it off before each cut.
Can I double this recipe?
Yes, but you’ll need a larger pot and a 12×17-inch half-sheet pan. Double all the ingredients and follow the same steps. The cooking time for browning the butter will be slightly longer since there’s more butter in the pot. Just keep a close eye on it.
Pin This Recipe!
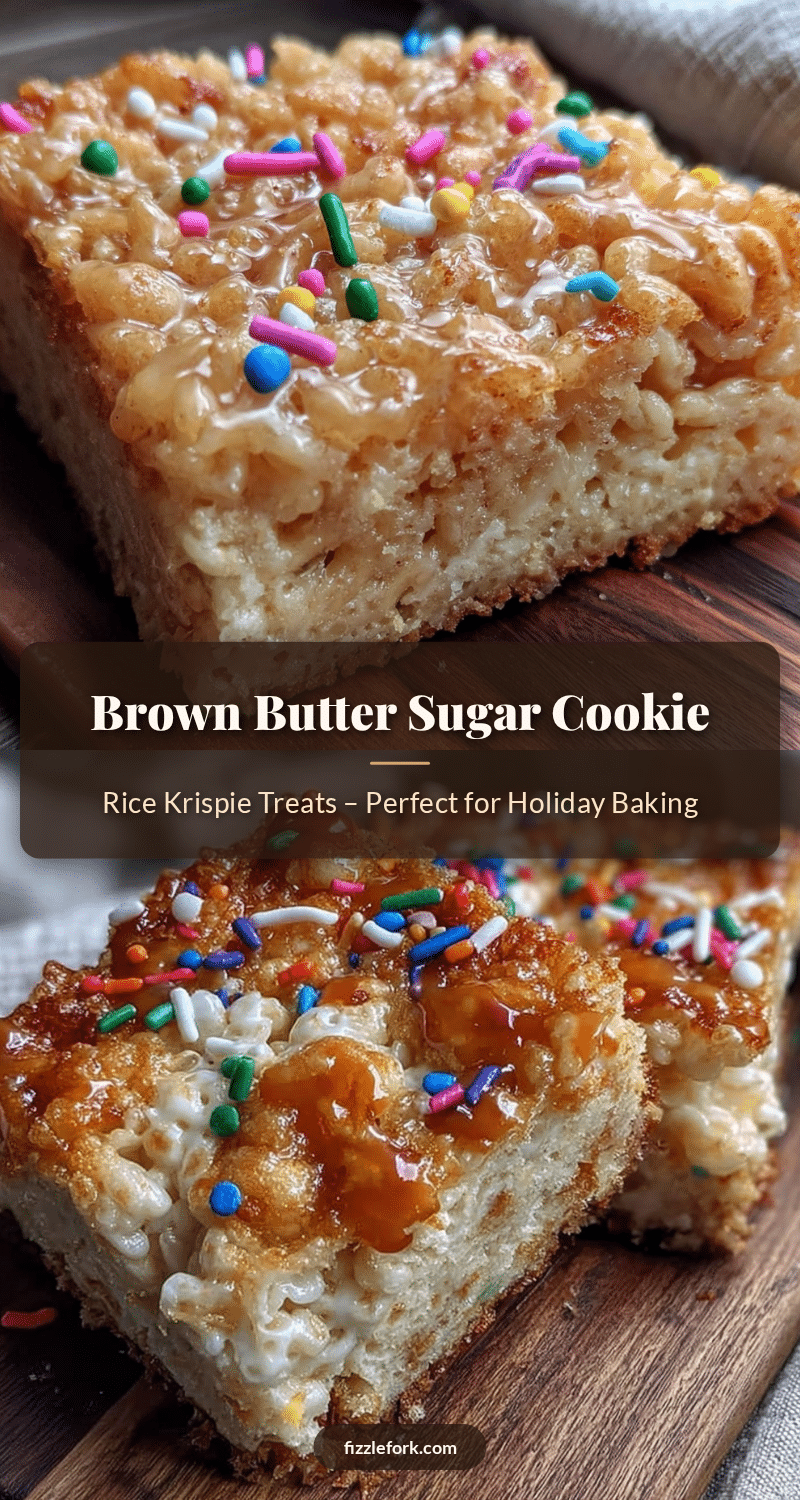
Brown Butter Sugar Cookie Rice Krispie Treats
These Brown Butter Sugar Cookie Rice Krispie Treats are a quick and easy holiday bake that combines nutty brown butter, sweet marshmallow, and soft sugar cookie crumbles for a chewy, crowd-pleasing treat that comes together in under 20 minutes.
- Prep Time: 10 minutes
- Cook Time: 10 minutes
- Total Time: 20 minutes
- Yield: 12 servings 1x
- Category: Dessert
- Cuisine: American
Ingredients
- 1 cup (2 sticks) unsalted butter
- 10 oz bag mini marshmallows
- 17.5 oz box sugar cookie mix (e.g., Betty Crocker or Pillsbury)
- 1 teaspoon vanilla extract
- ½ teaspoon sea salt (plus extra for sprinkling)
- ¼ cup holiday-themed sprinkles (optional)
Instructions
- Line a 9×13-inch baking dish with parchment paper, leaving about 2 inches of overhang on two opposite sides. Lightly grease the parchment with butter or non-stick spray.
- Place 1 cup (2 sticks) of unsalted butter in a large pot or Dutch oven over medium heat. Let it melt completely, swirling the pan occasionally. Continue cooking until the milk solids turn golden brown and the butter smells nutty, about 5-7 minutes. Remove from heat immediately.
- Pour the entire 10 oz bag of mini marshmallows into the pot with the hot brown butter. Stir gently with a wooden spoon until the marshmallows are completely melted and smooth, about 2-3 minutes.
- Pour the entire 17.5 oz box of sugar cookie mix into the marshmallow mixture. Add 1 teaspoon of vanilla extract and ½ teaspoon of sea salt. Stir until fully incorporated and no dry patches remain. The mixture will be thick and sticky.
- If using sprinkles, fold them in gently. Reserve a few to sprinkle on top for presentation.
- Scrape the mixture into the prepared baking dish. Grease your hands or a spatula with butter or non-stick spray, then press the mixture into an even layer. Do not press too hard.
- Let the treats cool at room temperature for at least 30 minutes. For cleaner cuts, refrigerate for 15-20 minutes.
- Once set, lift the treats out of the dish using the parchment overhang. Place on a cutting board and cut into squares using a sharp knife or bench scraper. Cut into 12 large squares or 24 smaller ones.
Notes
Don’t rush the brown butter—watch it closely to avoid burning. Use a light touch when pressing the mixture into the pan to keep treats chewy. Grease your hands and tools to prevent sticking. For cleaner cuts, refrigerate before cutting. These treats taste even better the next day. Store in an airtight container at room temperature for up to 5 days, or freeze for up to 3 months.
Nutrition
- Serving Size: 1 large square
- Calories: 310
- Sugar: 28
- Sodium: 210
- Fat: 16
- Saturated Fat: 10
- Carbohydrates: 42
- Protein: 2
Keywords: brown butter, sugar cookie, rice krispie treats, holiday baking, easy dessert, no-bake, marshmallow treats


