“You really think you can pull off a red velvet flag cake?” my friend asked over the phone, her voice a mix of doubt and amusement. Honestly, I didn’t blame her. I’d only ever seen those gorgeous layered flag cakes online — the kind that look like they belong in a fancy bakery window, with perfect stripes of red velvet and glowing white cream cheese frosting. Me? I’m more of a “quick, get it done” baker than a showstopper kind of person. But that afternoon, with a fridge full of cream cheese and a craving that wouldn’t quit, I gave it a shot.
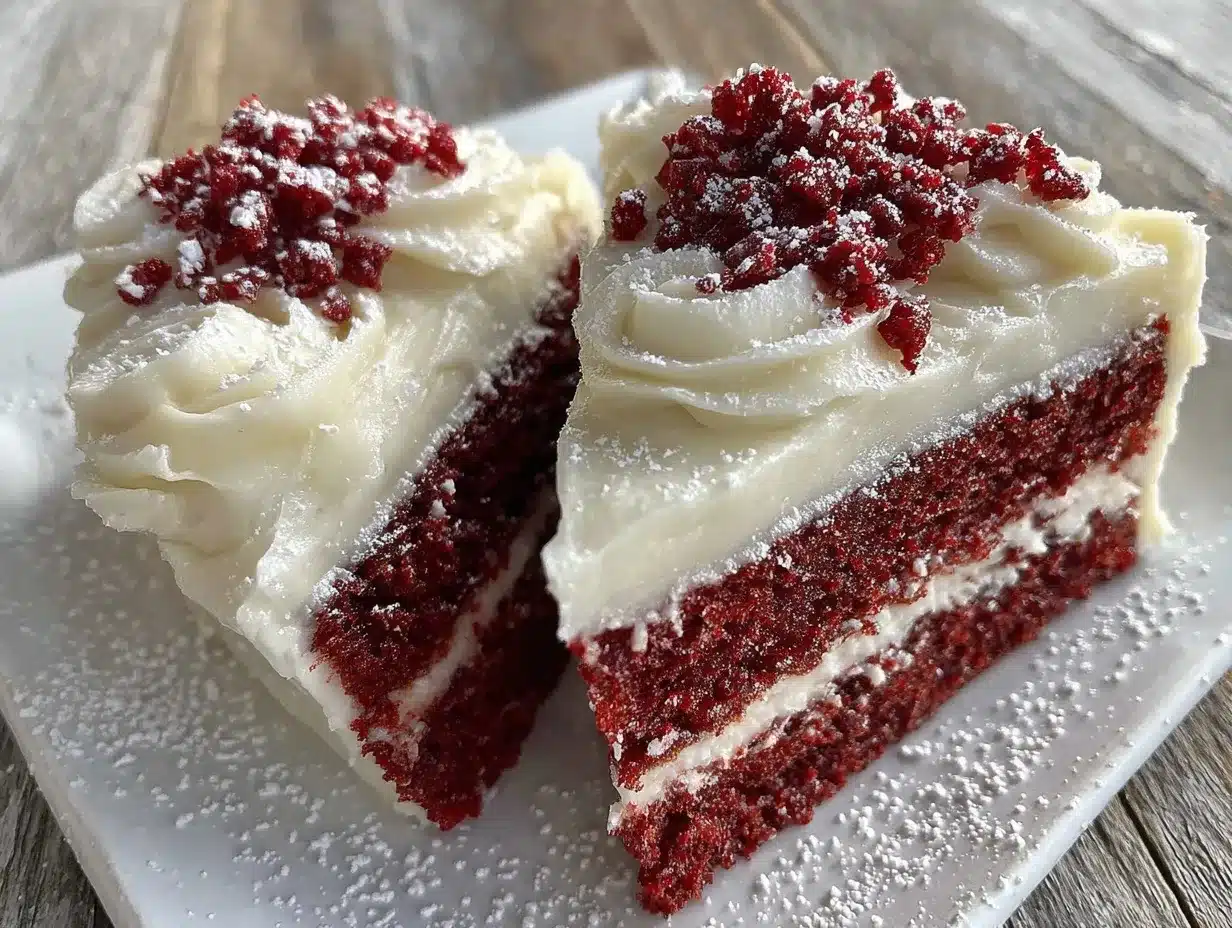
The kitchen smelled like a warm hug as the batter baked, the red velvet layers rising beautifully, just like I hoped. I wasn’t expecting perfection — heck, I was just trying to keep the layers from collapsing. But when I finally assembled the cake and sliced into it, revealing that striking flag pattern, it felt like a quiet little victory. The cream cheese frosting was tangy and smooth, balancing the cocoa-kissed layers just right.
That first flag cake wasn’t flawless (the stripes were a bit uneven, and I might have over-beaten the frosting), but it was mine. Since then, I’ve made this perfect red velvet flag cake with cream cheese frosting more times than I can count — sometimes for a last-minute celebration or just because the craving hit again. It’s become the kind of recipe that’s both approachable and a little special, the one I trust to impress without the stress. And I’m pretty sure once you try it, you’ll feel the same quiet satisfaction I do whenever that first forkful melts in your mouth.
Why You’ll Love This Recipe
After testing this perfect red velvet flag cake with cream cheese frosting multiple times, I can say it’s truly a keeper for several reasons that make it stand out from the crowd:
- Quick & Easy: You can put this cake together in under 90 minutes, including baking and frosting. No all-day marathon required.
- Simple Ingredients: No need for fancy or hard-to-find items. Most are pantry staples like cocoa powder, buttermilk, and cream cheese.
- Perfect for Celebrations: Whether it’s the Fourth of July, a birthday, or a casual get-together, the flag design brings a festive touch without extra fuss.
- Crowd-Pleaser: This cake gets rave reviews from kids and adults alike — partly because of the rich, velvety texture and partly because who says no to cream cheese frosting?
- Unbelievably Delicious: The subtle cocoa flavor layered with that tangy-sweet frosting is honestly next-level comfort food.
What really makes this recipe different is the way the batter is gently layered to create those classic flag stripes without needing complex piping skills. Plus, blending the cream cheese frosting just right gives it a silky texture that spreads effortlessly — no lumps, no mess. I’ve tweaked the sugar and cocoa ratio so the red velvet flavor shines through without overpowering the frosting sweetness.
It’s the kind of cake that makes you close your eyes after the first bite and smile quietly, knowing you nailed it. If you’ve ever shied away from layered cakes because they seem intimidating, this recipe is your friendly invitation to give it a try. And hey, once you’ve mastered this, you might also enjoy the perfect strawberry shortcake flag cake for a fruity twist on a similar concept.
What Ingredients You Will Need
This perfect red velvet flag cake with cream cheese frosting uses straightforward, wholesome ingredients that work together to deliver bold flavor and moist, tender texture. Most are easily found in your pantry or local grocery.
- For the red velvet cake layers:
- All-purpose flour, 2 ½ cups (312 g) – I prefer Gold Medal for consistent results
- Cocoa powder, 1 ½ tablespoons (15 g) – use unsweetened Dutch-processed for deeper flavor
- Baking soda, 1 teaspoon (5 g)
- Salt, ½ teaspoon (2.5 g)
- Unsalted butter, ½ cup (115 g), softened – room temperature for easy mixing
- Granulated sugar, 1 ¾ cups (350 g)
- Large eggs, 2, room temperature
- Buttermilk, 1 cup (240 ml) – if you don’t have buttermilk, mix 1 tablespoon lemon juice with milk and let sit 5 minutes
- Vanilla extract, 1 teaspoon (5 ml)
- Distilled white vinegar, 1 teaspoon (5 ml) – helps with the cake’s tender crumb
- Red food coloring, 2 tablespoons (30 ml) – the secret to that iconic red velvet hue
- For the cream cheese frosting:
- Cream cheese, 8 oz (227 g), softened – Philadelphia brand works well for smooth texture
- Unsalted butter, ½ cup (115 g), softened
- Powdered sugar, 4 cups (480 g), sifted
- Vanilla extract, 1 teaspoon (5 ml)
- Pinch of salt – balances the sweetness
Feel free to swap the all-purpose flour with a gluten-free blend if needed, but results may vary slightly. For a dairy-free frosting, use vegan cream cheese and butter alternatives, and consider checking out my creamy blueberry lemon icebox pie recipe for more dairy-free dessert inspiration.
Equipment Needed
To make this perfect red velvet flag cake with cream cheese frosting, you’ll need some basic kitchen gear, nothing too fancy:
- Two 9-inch (23 cm) round cake pans – non-stick or lined with parchment paper for easy release
- Mixing bowls – one large for dry ingredients, another for wet
- Electric mixer or stand mixer – makes whipping the frosting and batter easier, but a sturdy hand whisk works in a pinch
- Measuring cups and spoons – precise measurements are key here
- Rubber spatula – for folding batter and scraping bowls clean
- Offset spatula or butter knife – perfect for frosting the cake smoothly
- Cooling rack – essential to cool the cake layers completely before frosting
If you don’t own two cake pans, you can bake the layers one at a time, but be ready to wait a bit longer. And if you want to get fancy, a piping bag with a round tip can help create cleaner edges on the frosting, but I usually keep it casual with a spatula. I once tried an immersion blender for the frosting and learned quickly it’s a no-go; it makes the frosting too runny.
Preparation Method
- Preheat and prep: Set your oven to 350°F (175°C). Grease the two 9-inch cake pans with butter or non-stick spray, then line the bottoms with parchment paper for an easy release. This step saves you from a cake crumble disaster later.
- Mix dry ingredients: In a large bowl, whisk together 2 ½ cups (312 g) all-purpose flour, 1 ½ tablespoons (15 g) cocoa powder, 1 teaspoon (5 g) baking soda, and ½ teaspoon (2.5 g) salt until evenly combined.
- Cream butter and sugar: In another bowl, beat ½ cup (115 g) softened unsalted butter with 1 ¾ cups (350 g) granulated sugar until light and fluffy—about 3-4 minutes. This step is crucial for a tender crumb.
- Add eggs: Beat in 2 large eggs, one at a time, mixing well after each addition. If the mixture looks a bit curdled, don’t worry—that’s normal.
- Combine wet ingredients: Stir together 1 cup (240 ml) buttermilk, 1 teaspoon (5 ml) vanilla extract, 1 teaspoon (5 ml) distilled white vinegar, and 2 tablespoons (30 ml) red food coloring in a separate bowl.
- Alternate adding dry and wet: Add the dry ingredients to the butter mixture in three parts, alternating with the wet ingredients, beginning and ending with the dry. Mix gently after each addition to avoid overmixing, which can make the cake tough.
- Divide and bake: Pour the batter evenly into the prepared pans, smoothing the tops. Bake for 25-30 minutes or until a toothpick inserted in the center comes out clean. Keep an eye on them around the 25-minute mark to avoid drying out.
- Cool the layers: Let the cakes cool in the pans for 10 minutes, then invert onto a cooling rack to cool completely. Frosting warm cake? Big no-no.
- Prepare frosting: Beat 8 oz (227 g) softened cream cheese and ½ cup (115 g) softened unsalted butter until creamy and smooth. Gradually add 4 cups (480 g) powdered sugar and beat until fluffy. Mix in 1 teaspoon (5 ml) vanilla extract and a pinch of salt.
- Assemble the flag cake: Slice each cake layer horizontally to create 4 thin layers total. On a serving plate, arrange the red velvet layers with frosting between each. Use the frosting to create the white stripes and fill in the “flag” pattern on top. Get creative with the design—it doesn’t have to be perfect to look impressive.
Pro tip: If your frosting feels too thick to spread easily, add a teaspoon of milk to loosen it slightly. And if you want to keep those layers even, use a serrated knife and take your time slicing. I once rushed and ended up with uneven layers that threw off my entire flag design.
Cooking Tips & Techniques
Crafting a perfect red velvet flag cake with cream cheese frosting is easier when you keep a few insider tips in mind:
- Don’t skip the buttermilk: It’s what keeps the crumb tender and adds a subtle tang that balances the sweetness.
- Room temperature ingredients: Eggs, butter, and cream cheese at room temp mix better, giving you smoother batter and frosting.
- Mix frosting carefully: Over-beating can cause the frosting to become runny. Stop once it’s fluffy and spreadable.
- Layer slicing technique: Use a cake leveler or serrated knife with a gentle sawing motion. Holding the knife steady is key to even layers.
- Chill between steps: If the frosting gets too soft while assembling, pop the cake in the fridge for 15 minutes to firm it up—it makes decorating easier.
- Color control: Adding too much red food coloring can affect the cake’s texture. Stick to about 2 tablespoons and trust the flavor over the intensity of color.
- Multitasking tip: While the cakes are baking, whip up the frosting. Saves time and keeps your momentum going.
I used to rush frosting the first time, and it turned out clumpy. Lesson learned: patience is a frosting’s best friend. Also, if you want a shortcut to a festive dessert, try pairing this cake with the tangy cream cheese filling from my ultimate red velvet whoopie pies recipe—it’s a delicious nod to the same flavors.
Variations & Adaptations
This red velvet flag cake is a versatile canvas that you can tweak to suit different tastes and occasions.
- Dietary swap: Use almond flour or a gluten-free blend for a gluten-free cake. For the frosting, try coconut cream blended with vegan cream cheese for a dairy-free option.
- Seasonal twist: Add fresh raspberries or strawberries between layers for a fruity surprise, or sprinkle freeze-dried strawberries on top for an extra pop.
- Flavor variation: Mix a teaspoon of espresso powder into the batter to deepen the cocoa flavor without overpowering it.
- Decoration ideas: Instead of a flag, you can pipe rosettes or stars using the cream cheese frosting for a different festive look.
- Cooking methods: If you don’t have cake pans, try using a 9×13-inch pan and slice it into strips for a rustic flag design.
Personally, I once swapped out the red food coloring for natural beet powder in an experimental batch. The color was more muted but the earthy sweetness was surprisingly nice. If you want to explore more layered patriotic desserts, the easy patriotic poke cake is a fun alternative with a fluffy whipped cream twist.
Serving & Storage Suggestions
This cake tastes best served at room temperature, letting the cream cheese frosting soften slightly for that melt-in-your-mouth experience. It’s a showstopper centerpiece for holiday tables, family gatherings, or any occasion that calls for a bit of festive flair.
Pair it with a cup of strong coffee or a glass of cold milk to balance the richness. For a fun contrast, serve alongside fresh fruit or a light berry compote.
To store, cover the cake loosely with plastic wrap or an airtight cake dome. It keeps well in the refrigerator for up to 4 days. Before serving leftovers, let it sit out for 20-30 minutes to take the chill off and soften the frosting.
You can also freeze the cake layers (unfrosted) wrapped tightly in plastic and foil for up to 2 months. Thaw overnight in the fridge before assembling. Just be sure to frost and serve fresh for the best texture.
The flavors actually mellow and become more harmonious after a day or two, making this a great make-ahead dessert for parties. If you want a lighter option, try the cream cheese frosting from my creamy blueberry lemon icebox pie; it’s tangy and not too sweet.
Nutritional Information & Benefits
Each slice of this perfect red velvet flag cake with cream cheese frosting is roughly:
| Nutrient | Amount per slice |
|---|---|
| Calories | 350-400 kcal |
| Fat | 18-22 g |
| Carbohydrates | 45-50 g |
| Protein | 4-5 g |
The cream cheese delivers calcium and vitamin A, while the buttermilk adds probiotics that can aid digestion. Cocoa powder is a source of antioxidants, so you’re getting a little health boost along with indulgence.
For those watching sugar intake, you can reduce powdered sugar in the frosting by up to 25% without losing much of the creamy texture. Just keep in mind it will be less sweet. This recipe is naturally gluten-friendly with substitutions and can be adapted for dairy-free diets.
From a personal wellness perspective, this cake feels like a treat that doesn’t overdo it — satisfying and comforting without lingering heaviness. It’s the kind of dessert you feel good about sharing with friends and family.
Conclusion
This perfect red velvet flag cake with cream cheese frosting is truly a recipe that’s worth making over and over. It combines simplicity with a touch of festive fun, and the flavors are just right — rich, tangy, and sweet without going overboard. I love how it brings a bit of celebration to any ordinary day, turning the kitchen into a place of quiet triumph.
Feel free to tweak the layers, colors, or frosting to make it your own. Whether you’re baking it for a crowd or a cozy moment, this recipe is flexible and forgiving — a rare find in layered cakes. I’m always excited to hear how others make it their own, so please share your experiences or any creative twists you try.
So grab your mixing bowls and give it a shot — you might just find your new favorite cake. And if you enjoy baking treats with a little flair, you might appreciate the smoky-sweet balance in my BBQ chicken pizza recipe with sweet caramelized onions; it’s a savory twist that pairs well with festive dessert days.
Here’s to many delicious bites ahead!
FAQs
- Can I make this red velvet flag cake ahead of time? Yes! You can bake the layers up to 2 days in advance and store them wrapped in the fridge. Assemble and frost the day you want to serve for best texture.
- What if I don’t have buttermilk? No problem. Mix 1 tablespoon lemon juice or white vinegar with 1 cup milk, let it sit for 5 minutes, then use as a buttermilk substitute.
- How do I get the bright red color without artificial food coloring? You can try natural beet powder or juice, but expect a more muted color and slightly different flavor.
- Can I freeze the whole cake after it’s frosted? It’s best to freeze the unfrosted layers separately. Frosted cake can become soggy when thawed. Wrap layers tightly and thaw in the fridge overnight.
- What’s the best way to make smooth cream cheese frosting? Use room temperature cream cheese and butter, beat them well until creamy, then add powdered sugar gradually. Avoid over-beating after adding sugar to prevent runniness.
Pin This Recipe!
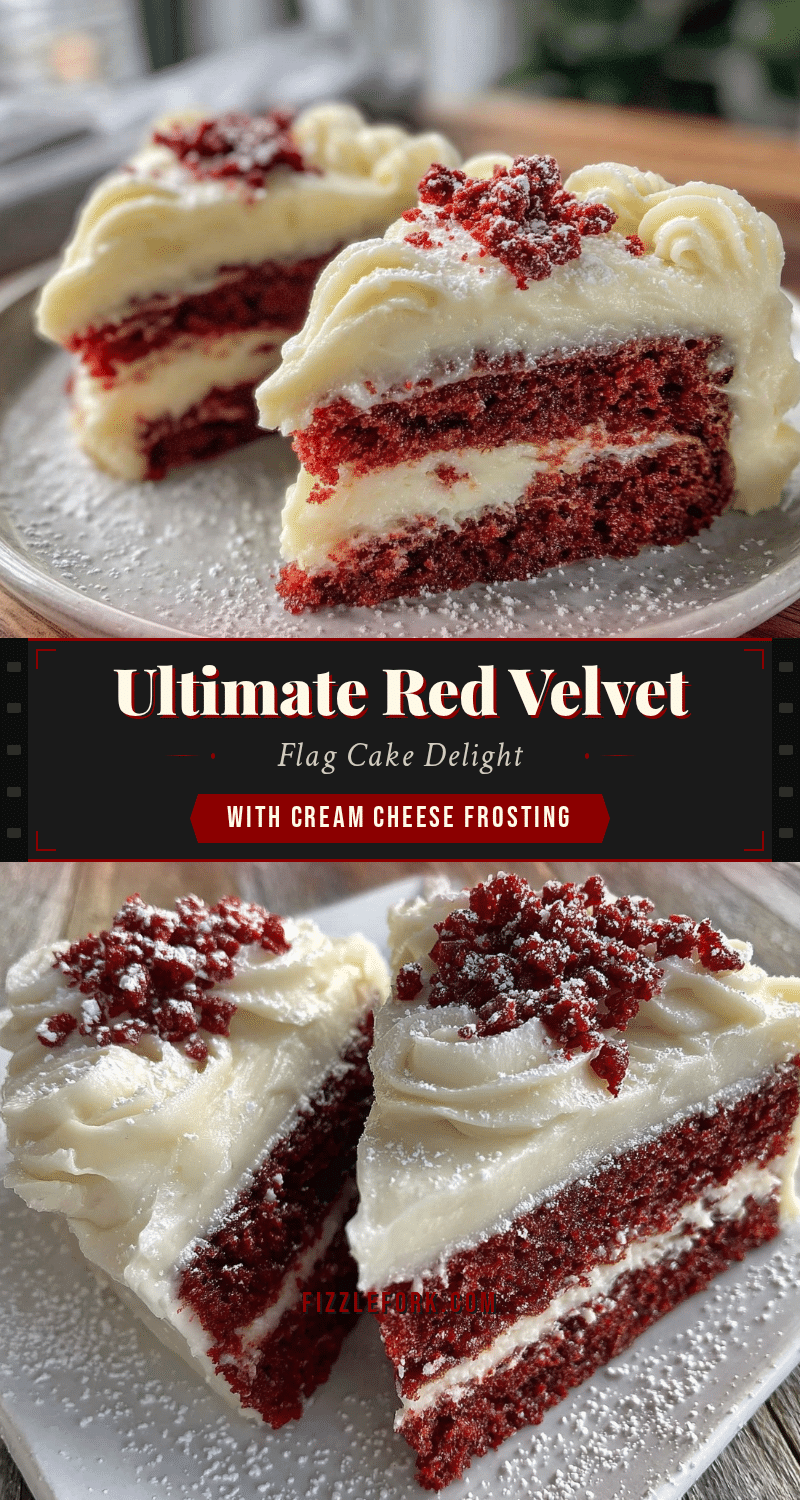
Perfect Red Velvet Flag Cake Recipe Easy Homemade Cream Cheese Frosting
A quick and easy red velvet flag cake with smooth, tangy cream cheese frosting that is perfect for celebrations and crowd-pleasing occasions.
- Prep Time: 20 minutes
- Cook Time: 30 minutes
- Total Time: 50 minutes
- Yield: 12 servings 1x
- Category: Dessert
- Cuisine: American
Ingredients
- 2 ½ cups (312 g) all-purpose flour
- 1 ½ tablespoons (15 g) unsweetened Dutch-processed cocoa powder
- 1 teaspoon (5 g) baking soda
- ½ teaspoon (2.5 g) salt
- ½ cup (115 g) unsalted butter, softened
- 1 ¾ cups (350 g) granulated sugar
- 2 large eggs, room temperature
- 1 cup (240 ml) buttermilk (or 1 cup milk + 1 tablespoon lemon juice, let sit 5 minutes)
- 1 teaspoon (5 ml) vanilla extract
- 1 teaspoon (5 ml) distilled white vinegar
- 2 tablespoons (30 ml) red food coloring
- 8 oz (227 g) cream cheese, softened
- ½ cup (115 g) unsalted butter, softened
- 4 cups (480 g) powdered sugar, sifted
- 1 teaspoon (5 ml) vanilla extract
- Pinch of salt
Instructions
- Preheat oven to 350°F (175°C). Grease two 9-inch cake pans and line bottoms with parchment paper.
- In a large bowl, whisk together flour, cocoa powder, baking soda, and salt.
- In another bowl, beat butter and sugar until light and fluffy, about 3-4 minutes.
- Beat in eggs one at a time, mixing well after each addition.
- In a separate bowl, stir together buttermilk, vanilla extract, vinegar, and red food coloring.
- Add dry ingredients to butter mixture in three parts, alternating with wet ingredients, beginning and ending with dry. Mix gently after each addition.
- Divide batter evenly between prepared pans and smooth tops.
- Bake 25-30 minutes or until a toothpick inserted in center comes out clean.
- Cool cakes in pans for 10 minutes, then invert onto cooling rack to cool completely.
- Beat cream cheese and butter until smooth. Gradually add powdered sugar and beat until fluffy. Mix in vanilla extract and salt.
- Slice each cake layer horizontally to create 4 thin layers total.
- Assemble cake by layering red velvet layers with frosting between each. Use frosting to create white stripes and fill in the flag pattern on top.
- If frosting is too thick, add a teaspoon of milk to loosen. Chill cake in fridge for 15 minutes if frosting gets too soft during assembly.
Notes
Use room temperature ingredients for best mixing results. Avoid over-beating frosting to prevent runniness. Chill cake if frosting softens during assembly. Use a serrated knife for even layers. Substitute gluten-free flour or vegan alternatives as needed.
Nutrition
- Serving Size: 1 slice
- Calories: 375
- Sugar: 35
- Sodium: 300
- Fat: 20
- Saturated Fat: 12
- Carbohydrates: 48
- Fiber: 1
- Protein: 5
Keywords: red velvet cake, flag cake, cream cheese frosting, easy cake recipe, layered cake, celebration cake, patriotic dessert


