“You really think red velvet in a sandwich cookie? Huh.” That was my roommate’s skeptical comment the first time I whipped up these Ultimate Red Velvet Whoopie Pies with Creamy Filling. Honestly, I wasn’t sure either. It started on one of those chaotic weeknights when dinner was a scramble and dessert was an afterthought. I had a box of cake mix, some cream cheese, and a craving for something fun and homemade. I figured, why not mash them up into whoopie pies?
What happened next was pure surprise. The rich, tender red velvet cakes paired with that smooth, tangy creamy filling won over even the biggest doubters in the room. The scent of cocoa and vanilla filled our small kitchen, and the soft yet slightly chewy texture made everyone pause mid-bite. I caught myself making these red velvet whoopie pies multiple times that week—each batch disappearing faster than the last. It became a little obsession, not just because they were easy, but because they nailed that comforting, nostalgic vibe in every bite.
What really stuck with me about this recipe is how it turns simple pantry staples into something that feels special but not fussy. It’s the kind of treat you can pull together when you’ve got a handful of minutes, a bit of curiosity, and a sweet tooth that just won’t quit. Plus, that creamy filling? It’s not just any frosting—it’s got that perfect balance of tang and sweetness that makes you want to savor every crumb.
These whoopie pies aren’t just dessert; they’re a little moment of joy that sneaks up on you. And I suspect once you try them, they’ll sneak into your rotation, too.
Why You’ll Love This Ultimate Red Velvet Whoopie Pies Recipe
Over the years, I’ve tested countless whoopie pie recipes, but this one stands out for good reasons. Not only is it straightforward enough for busy weeknights, but it also delivers a texture and flavor combo that feels far from ordinary. Here’s the lowdown on why these pies keep making it onto my baking list:
- Quick & Easy: You can whip up the batter and filling in under 45 minutes total, perfect for when time’s tight but you want something homemade.
- Simple Ingredients: No need for specialty stores—just pantry staples like cocoa powder, flour, sugar, and cream cheese.
- Perfect for Celebrations: Whether it’s a birthday, holiday gathering, or casual potluck, these red velvet whoopie pies bring a festive pop of color and flavor.
- Crowd-Pleaser: I’ve never met a kid or adult who didn’t ask for seconds. The creamy filling has just the right tang to keep it from being overly sweet.
- Unbelievably Delicious: The moist, tender red velvet cakes sandwich the creamy filling in a way that’s dreamy but not heavy.
What sets this recipe apart is the little tweaks—like folding the batter gently to keep it airy and blending the cream cheese filling until it’s silky smooth. I also like to add a hint of vanilla and a pinch of salt in the filling; it seems small, but it really brings the flavors together in a subtle yet satisfying way.
Honestly, these whoopie pies feel like a treat you’d find at a cozy bakery, but you get the joy of making them yourself at home without the fuss. They’re a sweet escape that feels both indulgent and comforting.
What Ingredients You Will Need for Ultimate Red Velvet Whoopie Pies
This recipe uses simple, wholesome ingredients that come together to create bold flavor and a satisfying texture without any complicated steps. Most of these are pantry staples, with a few fresh additions for that creamy filling. Here’s what you’ll want to gather before you start:
- For the Red Velvet Cake Pies:
- All-purpose flour, 2 cups (240 g) – sifted for lightness
- Cocoa powder, 2 tablespoons (unsweetened, good quality like Hershey’s)
- Baking soda, 1 teaspoon
- Salt, ½ teaspoon (balances sweetness)
- Unsalted butter, ½ cup (113 g), softened (room temp makes mixing easier)
- Granulated sugar, 1 cup (200 g)
- Egg, 1 large (room temperature)
- Buttermilk, ¾ cup (180 ml) – adds tang and moisture (or milk + 1 tbsp vinegar as substitute)
- Red food coloring, 2 tablespoons (gel food coloring works best for vibrant color)
- Vanilla extract, 1 teaspoon (pure vanilla really shines here)
- White vinegar, 1 teaspoon (reacts with baking soda for lift)
- For the Creamy Filling:
- Cream cheese, 8 ounces (226 g), softened (full fat for best texture)
- Unsalted butter, ½ cup (113 g), softened
- Powdered sugar, 2 cups (240 g), sifted (to avoid lumps)
- Vanilla extract, 1 teaspoon
- Pinch of salt (balances sweetness and enhances flavor)
For those wanting to tweak, you can swap all-purpose flour with gluten-free 1:1 baking flour blend, and use dairy-free cream cheese for a vegan-friendly version. I’ve tried almond milk as a buttermilk substitute too, which works fine but shifts flavor slightly. For the red color, I like to stick with gel food coloring—it’s more concentrated and avoids watering down the batter.
Equipment Needed
- Mixing bowls (one large for batter, one medium for filling)
- Electric mixer or stand mixer (helps get the filling ultra-smooth and the batter well combined)
- Measuring cups and spoons (for accuracy in baking)
- Rubber spatula (great for folding batter gently)
- Baking sheets lined with parchment paper or silicone mats (prevents sticking and browning)
- Cooling rack (important to cool cakes completely before assembling)
- Spoons or piping bag for filling application (piping bag makes filling look neat, but a spoon works fine)
If you don’t have a stand mixer, a hand mixer works just as well, though it might take a little more elbow grease to get the cream cheese filling perfectly fluffy. For a budget-friendly alternative to silicone mats, parchment paper is your best friend and easily disposable.
Over time, I’ve learned that keeping the cream cheese and butter at room temperature before mixing really helps the filling become silky and easy to spread, so plan ahead a bit for that.
Preparation Method for Ultimate Red Velvet Whoopie Pies
- Preheat your oven to 350°F (175°C). Line two baking sheets with parchment paper or silicone mats. This prep step makes a big difference in how evenly the pies bake.
- Mix dry ingredients: In a medium bowl, sift together 2 cups (240 g) of all-purpose flour, 2 tablespoons of cocoa powder, 1 teaspoon baking soda, and ½ teaspoon salt. Set aside. Sifting helps keep the whoopie pies tender and prevents lumps.
- Cream butter and sugar: In a large bowl, use an electric mixer to beat ½ cup (113 g) softened unsalted butter with 1 cup (200 g) granulated sugar until light and fluffy, about 2-3 minutes. This step is key for tender cakes.
- Add egg and vanilla: Beat in 1 large room-temperature egg and 1 teaspoon vanilla extract until combined.
- Combine wet and dry: Alternately add the dry ingredients and ¾ cup (180 ml) buttermilk to the butter mixture, beginning and ending with the dry ingredients. Mix gently after each addition just until combined—overmixing can toughen the cakes.
- Add color and vinegar: Stir in 2 tablespoons red gel food coloring and 1 teaspoon white vinegar. The vinegar reacts with baking soda, giving the cakes their tender crumb and lift.
- Portion the batter: Using a spoon or cookie scoop, drop rounded tablespoons of batter about 2 inches apart on the prepared baking sheets. You should get about 20-24 rounds.
- Bake: Place in oven and bake for 10-12 minutes. The tops will spring back lightly when touched. Avoid overbaking or they’ll dry out.
- Cool: Transfer the cakes to a wire rack and let cool completely. This is crucial before filling to prevent melting the creamy filling.
- Make the filling: Beat 8 ounces (226 g) softened cream cheese and ½ cup (113 g) softened unsalted butter on medium speed until smooth and creamy, about 2-3 minutes. Gradually add 2 cups (240 g) sifted powdered sugar, and 1 teaspoon vanilla extract, plus a pinch of salt. Beat until fluffy.
- Assemble whoopie pies: Spread or pipe about 2 tablespoons of the creamy filling onto the bottom side of one red velvet cake. Top with another cake to form a sandwich. Press gently to spread filling evenly.
- Chill and serve: Place assembled pies in the fridge for at least 30 minutes to let the filling set. Serve chilled or at room temperature.
One tip I learned: if your batter feels a bit thick, a splash of extra buttermilk helps loosen it without messing with the texture. Also, when filling the pies, using a piping bag avoids mess and makes your treats look bakery-worthy.
Cooking Tips & Techniques for Best Results
Whoopie pies seem simple, but there are a few tricks that make a huge difference. Over the years, I’ve had my share of too-dry cakes or filling that was too runny, so here’s what works:
- Don’t skip sifting: Sifting the dry ingredients and powdered sugar keeps your whoopie pies smooth and tender.
- Room temperature ingredients: Butter, cream cheese, eggs, and buttermilk all perform best when they’re not cold. It helps them blend evenly and results in fluffier cakes and filling.
- Gentle mixing: Overmixing the batter can lead to dense or tough cakes. Fold the flour in softly and mix just until combined.
- Watch the baking time: These cakes bake quickly. Pull them out once they spring back lightly, or a toothpick comes out with a few moist crumbs. Overbaked whoopie pies will lose their signature softness.
- Chill the filling: If your filling feels too loose, pop it in the fridge for 10-15 minutes before assembling. It firms up nicely without losing creaminess.
- Multi-task: While the cakes cool, mix the filling and clean up to save time. It’s a smooth flow that helps when you’re juggling kitchen chaos.
One personal lesson: I once used cold cream cheese and ended up with a grainy filling. Lesson learned—patience is key here. Also, if you want to experiment, adding a teaspoon of espresso powder to the batter gives a subtle, rich depth that’s surprisingly good.
Variations & Adaptations for Ultimate Red Velvet Whoopie Pies
These whoopie pies are a great canvas for all sorts of tweaks and twists. Here are some ways I’ve played around with the recipe and you might enjoy too:
- Chocolate Lovers’ Twist: Swap the cocoa powder for dark cocoa and add mini chocolate chips in the batter for extra indulgence.
- Seasonal Berry Filling: Mix fresh or frozen raspberries into the cream cheese filling for a fruity pop that pairs beautifully with red velvet.
- Vegan Version: Use plant-based butter and cream cheese alternatives, and substitute buttermilk with almond milk plus lemon juice. Timing and texture may need a small tweak but it still tastes great.
- Spiced Red Velvet: Add a pinch of cinnamon and nutmeg to the batter for warmth—perfect for cozy fall baking.
- Salted Caramel Drizzle: Top assembled whoopie pies with a light drizzle of caramel and a sprinkle of flaky sea salt for a sweet-salty surprise.
I once tried swapping the cream cheese filling for a marshmallow fluff blend—fun and nostalgic but I kept coming back to this creamy filling for its balance of richness and tang.
Serving & Storage Suggestions
Serve these whoopie pies chilled or at room temperature, depending on your preference. I like them straight from the fridge when the filling is firm and cool, but they’re equally delightful after sitting out for about 15 minutes to soften slightly.
They pair beautifully with a glass of cold milk, a cup of strong coffee, or even alongside a rich hot chocolate for dessert spreads. If you’re planning a party, these little treats add a festive flair without stealing the show from main dishes like a honey garlic glazed salmon sheet pan dinner or a creamy baked feta pasta.
For storage, place the whoopie pies in an airtight container in the refrigerator. They stay fresh for up to 5 days, and the flavors actually meld and deepen after a day or two. If you want to freeze them, wrap individually in plastic wrap and then store in a freezer bag for up to 2 months. Thaw in the fridge overnight before serving.
When reheating, I recommend bringing them to room temperature naturally rather than microwaving, to keep the texture perfect. These little pies hold up well and make excellent make-ahead treats.
Nutritional Information & Benefits
Each red velvet whoopie pie contains approximately 280-320 calories depending on size and filling amount. They have moderate fat content from the butter and cream cheese, along with sugars from the powdered sugar and granulated sugar used.
The cream cheese filling provides some protein and calcium, while the cocoa powder adds antioxidants, making these treats a little more interesting than your average cookie. They’re not a health food, but they’re a satisfying dessert that can fit into balanced eating when enjoyed in moderation.
For those with dietary needs, it’s easy to adapt this recipe to gluten-free or vegan versions without losing much flavor or texture, making it a versatile dessert option.
Conclusion
The Ultimate Red Velvet Whoopie Pies with Creamy Filling aren’t just a treat—they’re a little moment of homemade magic born from a busy night and a craving for something sweet and comforting. They’re easy enough to make on a whim but special enough to bring out when you want to impress friends or just treat yourself after a long day.
Feel free to customize the filling, swap flavors, or add your own twist. That’s the fun of baking these pies—they’re forgiving, adaptable, and always delicious. I keep coming back to this recipe because it’s reliable, crowd-pleasing, and just downright tasty.
Give it a try, and who knows? These red velvet whoopie pies might just become your next favorite sweet fix.
Frequently Asked Questions (FAQs)
Can I make the whoopie pies ahead of time?
Absolutely! You can bake the cakes and prepare the filling a day ahead. Assemble the whoopie pies and store them in the fridge for up to 5 days. They taste even better after the flavors meld.
What can I use if I don’t have buttermilk?
Mix ¾ cup (180 ml) of milk with 1 tablespoon white vinegar or lemon juice. Let it sit for 5 minutes before using. This homemade buttermilk substitute works great in the batter.
How do I prevent the filling from being too runny?
Make sure your cream cheese and butter are softened but not melted. If the filling feels too loose, chill it in the fridge for 10-15 minutes before assembling the pies.
Can I freeze these whoopie pies?
Yes! Wrap each pie individually in plastic wrap and place them in a freezer-safe bag. Freeze for up to 2 months. Thaw in the fridge overnight before serving.
Are these whoopie pies gluten-free or vegan?
The classic recipe isn’t gluten-free or vegan, but you can substitute gluten-free flour blends and plant-based cream cheese and butter to make them suitable for those diets.
Pin This Recipe!

Ultimate Red Velvet Whoopie Pies Recipe Easy Homemade Creamy Filling

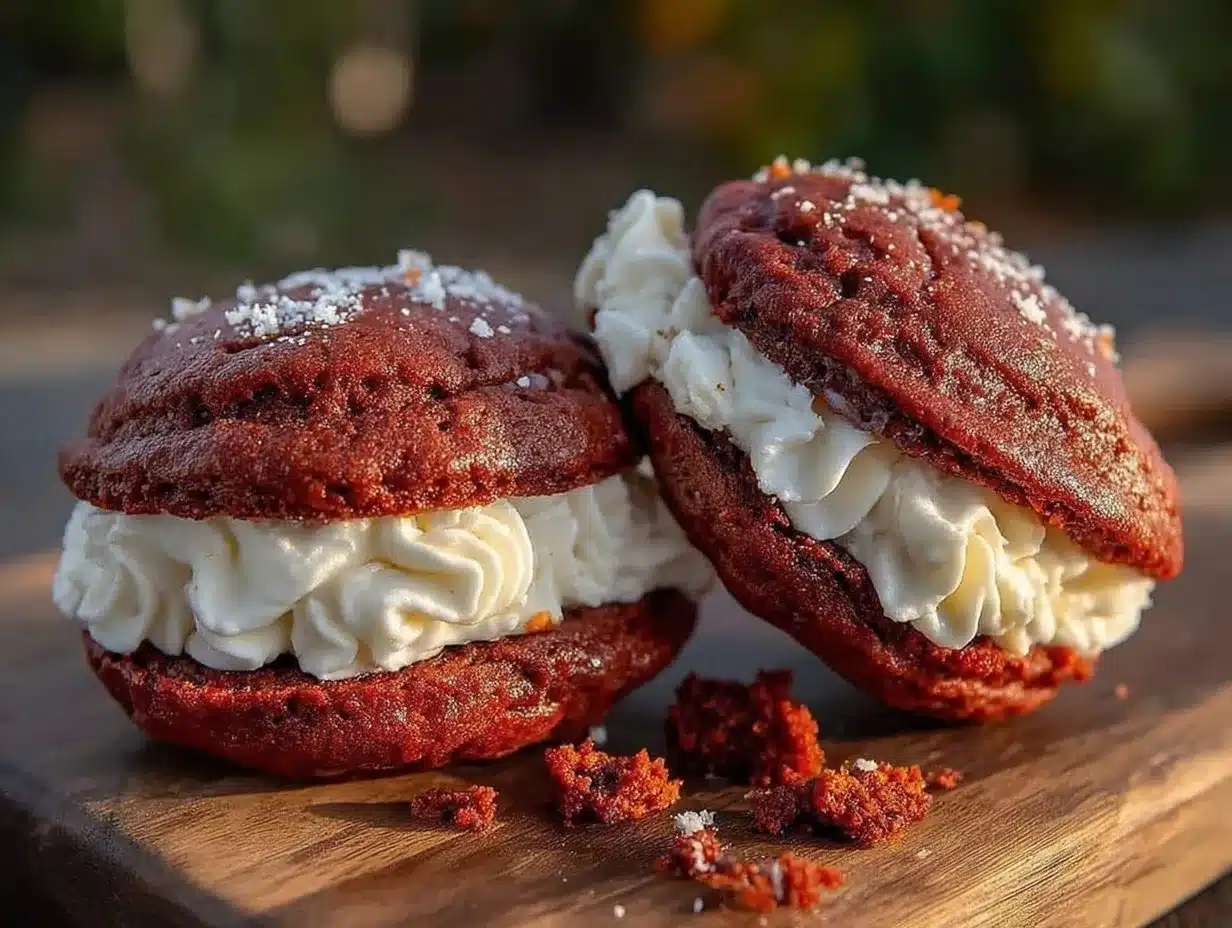
These Ultimate Red Velvet Whoopie Pies feature rich, tender red velvet cakes sandwiched with a smooth, tangy creamy filling. Easy to make with pantry staples, they deliver a nostalgic, comforting dessert perfect for any occasion.
- Prep Time: 15 minutes
- Cook Time: 12 minutes
- Total Time: 42 minutes
- Yield: 20-24 whoopie pies 1x
- Category: Dessert
- Cuisine: American
Ingredients
- 2 cups (240 g) all-purpose flour, sifted
- 2 tablespoons unsweetened cocoa powder
- 1 teaspoon baking soda
- ½ teaspoon salt
- ½ cup (113 g) unsalted butter, softened
- 1 cup (200 g) granulated sugar
- 1 large egg, room temperature
- ¾ cup (180 ml) buttermilk (or milk + 1 tbsp vinegar as substitute)
- 2 tablespoons red gel food coloring
- 1 teaspoon vanilla extract
- 1 teaspoon white vinegar
- 8 ounces (226 g) cream cheese, softened
- ½ cup (113 g) unsalted butter, softened
- 2 cups (240 g) powdered sugar, sifted
- 1 teaspoon vanilla extract
- Pinch of salt
Instructions
- Preheat oven to 350°F (175°C). Line two baking sheets with parchment paper or silicone mats.
- In a medium bowl, sift together flour, cocoa powder, baking soda, and salt. Set aside.
- In a large bowl, beat softened butter and granulated sugar with an electric mixer until light and fluffy, about 2-3 minutes.
- Beat in egg and vanilla extract until combined.
- Alternately add dry ingredients and buttermilk to the butter mixture, beginning and ending with dry ingredients. Mix gently just until combined.
- Stir in red gel food coloring and white vinegar.
- Drop rounded tablespoons of batter about 2 inches apart on prepared baking sheets, making about 20-24 rounds.
- Bake for 10-12 minutes until tops spring back lightly when touched. Avoid overbaking.
- Transfer cakes to a wire rack and cool completely.
- Beat cream cheese and softened butter on medium speed until smooth and creamy, about 2-3 minutes.
- Gradually add sifted powdered sugar, vanilla extract, and pinch of salt. Beat until fluffy.
- Spread or pipe about 2 tablespoons of filling onto the bottom side of one cake. Top with another cake and press gently to spread filling evenly.
- Chill assembled whoopie pies in the fridge for at least 30 minutes before serving.
Notes
Use room temperature ingredients for best results. Sift dry ingredients and powdered sugar to avoid lumps. Fold batter gently to keep it airy. Chill filling if too loose before assembling. Use gel food coloring for vibrant color. For vegan or gluten-free versions, substitute ingredients accordingly.
Nutrition
- Serving Size: 1 whoopie pie
- Calories: 300
- Sugar: 28
- Sodium: 220
- Fat: 16
- Saturated Fat: 9
- Carbohydrates: 38
- Fiber: 1
- Protein: 4
Keywords: red velvet, whoopie pies, creamy filling, easy dessert, homemade, cake sandwich, red velvet cake, cream cheese frosting


