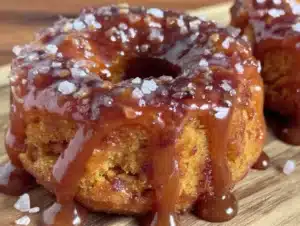
My neighbor, Carol, knocked on my door at 8:47 PM on a Tuesday holding a half-empty bag of pumpkin puree and a desperate look. Her daughter had decided, last minute, that she wanted to bring “homemade donuts” to a school bake sale the next morning. Carol is not a baker. She once set a timer for a pot of water. I had a stick of butter I’d been saving for a special occasion, and honestly, a Tuesday night crisis felt special enough. I started pulling out flour and cinnamon before she could finish her apology. The thing about pumpkin donuts is they don’t need yeast, they don’t need rising time, and they don’t need a deep fryer. They just need a little trust and a lot of brown butter. I grabbed my donut pan from the back of the cabinet—the one I always forget I own—and promised her we’d have warm, glazed donuts before her bedtime. She looked at me like I was a magician. I felt more like a woman who just really wanted an excuse to brown butter on a random Tuesday. The kitchen smelled like fall within ten minutes, and Carol’s panic melted into something like hope. That’s the thing about this recipe. It turns a stressful evening into a cozy memory, one spiced, tender bite at a time.
Why You’ll Love These Baked Pumpkin Donuts
I have tested this recipe seven times. Seven. I wanted the crumb to be soft but not cakey, the pumpkin flavor to be present but not overwhelming, and the glaze to set just right without turning into a sticky mess. These baked pumpkin donuts are the result of all that trial and error.
- No Frying Required : These are baked, not fried. You get all the satisfaction of a donut without the grease or the mess of hot oil. Your kitchen smells like pumpkin spice, not a fast food restaurant.
- Quick & Easy : From start to finish, you’re looking at about 30 minutes. Mix the batter, bake for 10 minutes, make the glaze while they cool, and you’re done. Perfect for a lazy Sunday morning or a last-minute bake sale emergency.
- Simple Ingredients : You probably have most of these in your pantry right now. Pumpkin puree, flour, sugar, eggs, butter, and spices. No weird stabilizers or hard-to-find extracts.
- Perfect for Fall Mornings : These donuts are basically an edible sweater. They pair beautifully with a hot cup of coffee or a creamy pumpkin chai latte.
- Crowd-Pleaser : I brought a batch to a brunch and watched three different people ask for the recipe before the plate was empty. Kids love them. Adults love them. Even my neighbor who “doesn’t like pumpkin” ate two.
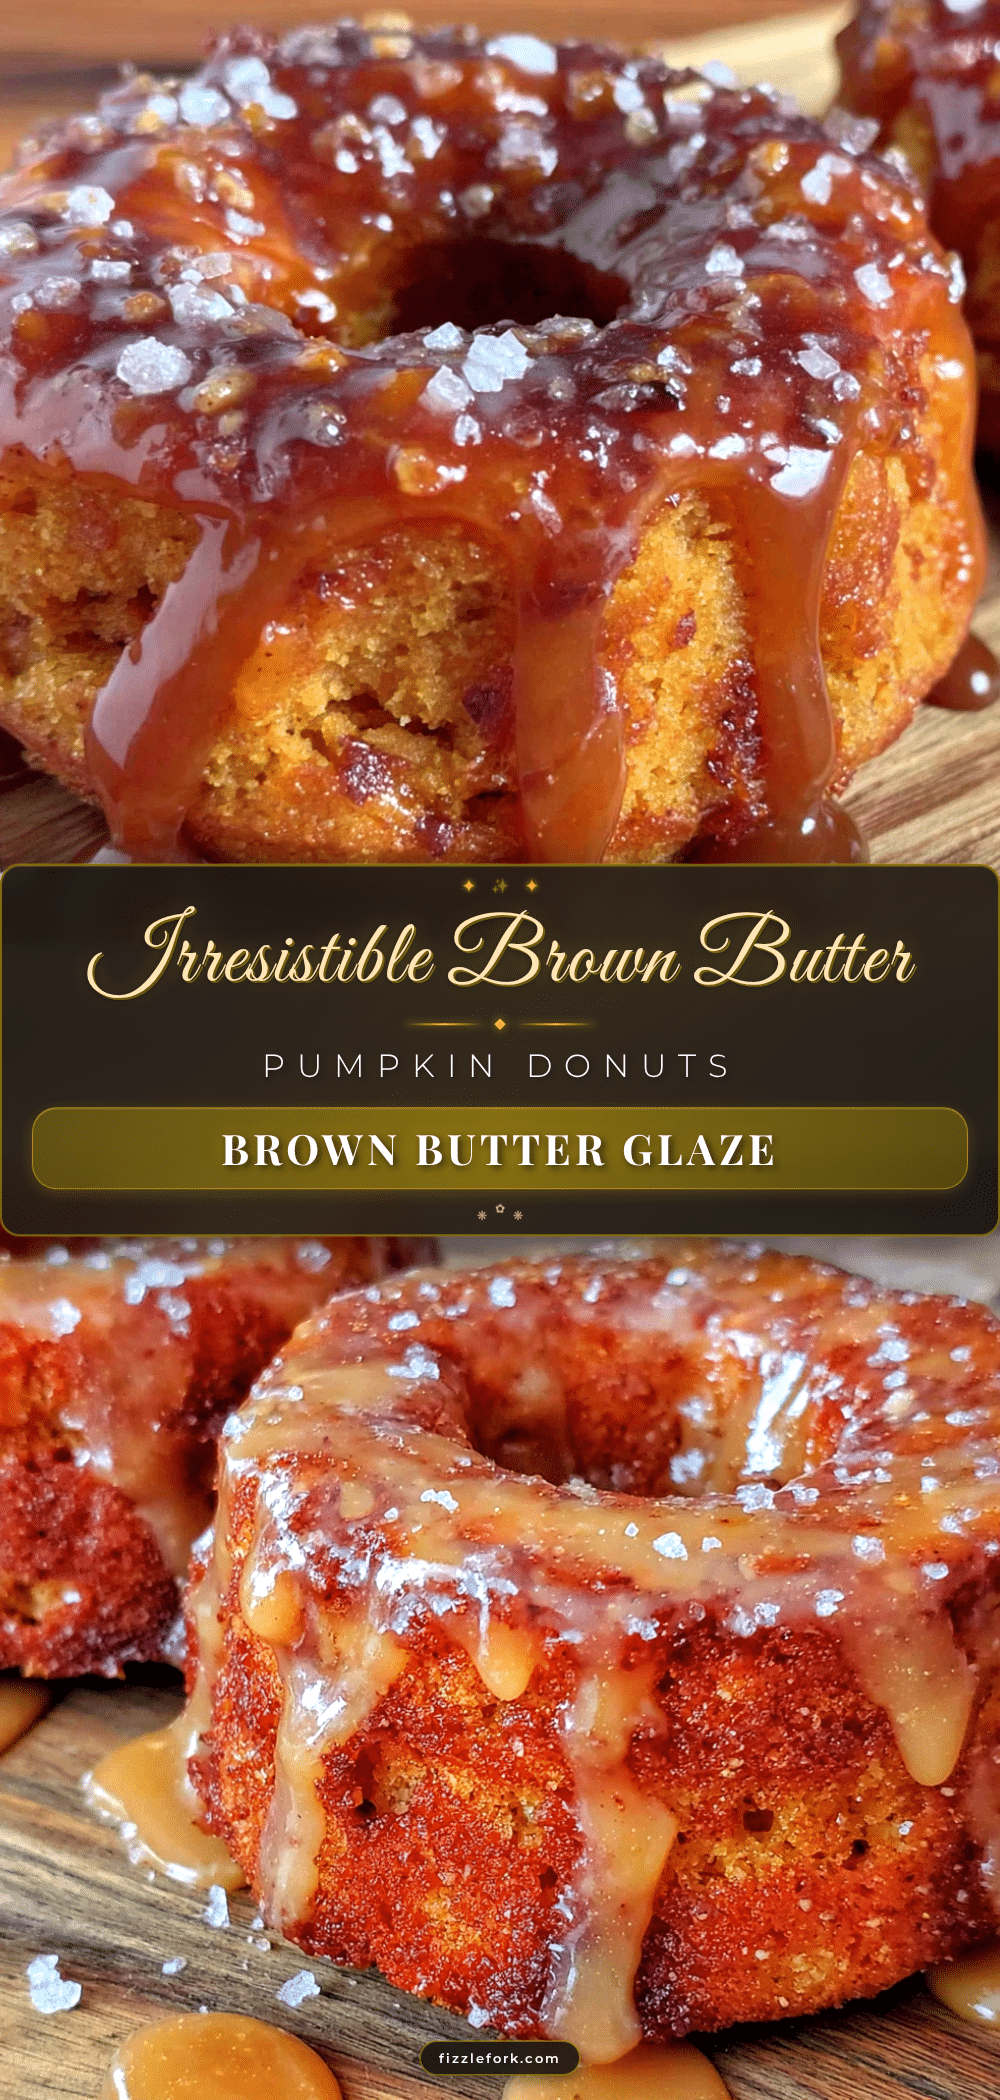
- Unbelievably Delicious : The brown butter glaze is the real star here. It adds a nutty, caramel-like depth that takes these donuts from good to “close your eyes after the first bite” good.
These aren’t just another pumpkin donut. The brown butter glaze makes them different. It’s that little extra step that feels fancy but takes almost no extra effort. It’s the kind of recipe that makes people think you spent hours in the kitchen when you really just had a good 30-minute session. And honestly, isn’t that the best kind of recipe?
What Ingredients You Will Need
This recipe uses simple, wholesome ingredients to deliver bold fall flavor and a tender, satisfying texture. Most of these are pantry staples, especially if you’ve already stocked up for pumpkin season. Let’s break down what you need and why it matters.
For the Pumpkin Donuts
- All-purpose flour (1 ¾ cups, spooned and leveled) — This gives the donuts their structure. Don’t scoop directly from the bag with your measuring cup; it packs the flour and makes the donuts dense. Spoon it in and level it off.
- Granulated sugar (¾ cup) — Adds sweetness and helps with browning. I’ve tested this with coconut sugar and it works, but the texture is slightly grainier.
- Light brown sugar (¼ cup, packed) — This adds moisture and a subtle molasses flavor that plays nicely with the pumpkin. I always use Domino or C&H for consistent results.
- Baking powder (1 ½ teaspoons) — The main leavening agent. Make sure it’s fresh. If it’s been sitting in your cabinet for a year, buy a new can.
- Baking soda (½ teaspoon) — Helps neutralize the acidity in the pumpkin and helps the donuts rise.
- Pumpkin pie spice (1 ½ teaspoons) — You can use store-bought or make your own with cinnamon, nutmeg, ginger, and cloves. I prefer McCormick for their consistent blend.
- Ground cinnamon (1 teaspoon) — Because you can never have too much cinnamon in a pumpkin recipe.
- Salt (½ teaspoon) — Balances the sweetness and enhances the spices. I use fine sea salt.
- Pumpkin puree (1 cup) — Not pumpkin pie filling. Make sure you grab the 100% pure pumpkin puree. I like Libby’s for its smooth texture and consistent moisture content. If your puree looks watery, pat it dry with a paper towel before using.
- Large eggs (2, at room temperature) — Room temperature eggs incorporate more easily into the batter, giving you a smoother, more uniform crumb.
- Melted unsalted butter (¼ cup, cooled slightly) — Adds richness and tenderness. You can substitute with melted coconut oil for a dairy-free version, but the flavor will be different.
- Vanilla extract (1 teaspoon) — Use pure vanilla extract, not imitation. It makes a difference in the depth of flavor.
- Milk (¼ cup, at room temperature) — I use whole milk for the richest texture, but 2% or a plant-based milk like oat milk works fine too.
For the Brown Butter Glaze
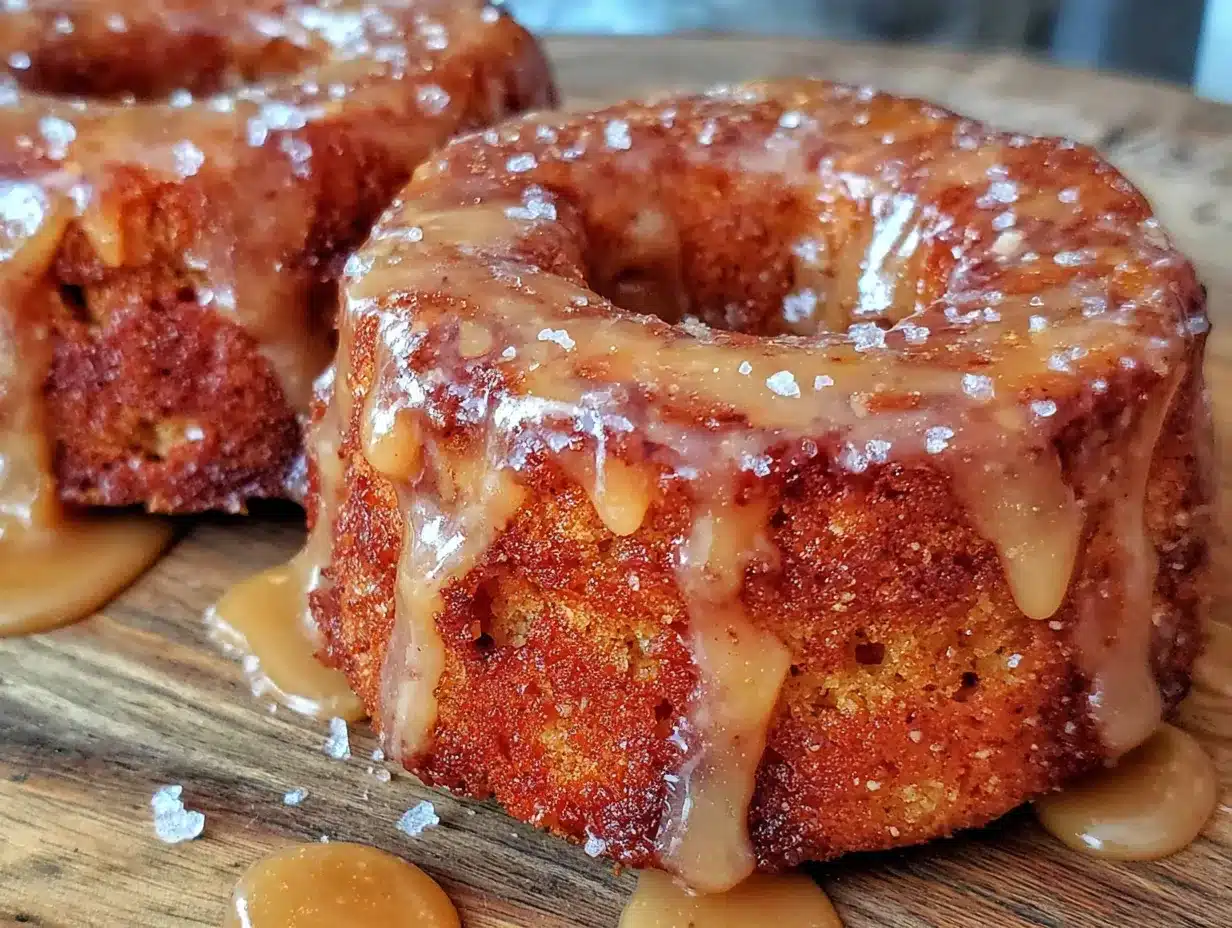
- Unsalted butter (¼ cup, one stick) — This is the star. The browning process transforms the butter into something nutty, toasty, and absolutely magical.
- Powdered sugar (1 ½ cups, sifted) — Sifting prevents lumps. I cannot stress this enough. Lumpy glaze is sad glaze.
- Vanilla extract (1 teaspoon) — Again, use the good stuff.
- Milk (2-3 tablespoons, at room temperature) — This adjusts the consistency. Start with 2 tablespoons and add more if needed.
- Pinch of salt — Balances the sweetness and enhances the nutty flavor of the brown butter.
Equipment Needed
You don’t need a professional bakery setup for these baked pumpkin donuts. The equipment list is short and most of it is probably already in your kitchen. If you don’t have a donut pan, you can still make this recipe work—just use a muffin tin and adjust the baking time slightly.
- Donut pan (standard 6-cavity pan) — I use the Wilton non-stick donut pan and it works beautifully. If you only have one pan, you’ll need to bake in batches. Let the pan cool completely between batches to ensure even baking.
- Mixing bowls (one large, one medium) — Stainless steel or glass works best. Avoid plastic as it can retain odors.
- Whisk — For combining dry ingredients and for making the glaze. A balloon whisk is ideal.
- Rubber spatula — For folding the wet ingredients into the dry without overmixing.
- Piping bag or zip-top bag — A piping bag makes filling the donut pan cavities so much cleaner. If you don’t have one, snip a corner off a zip-top bag. It works perfectly in a pinch.
- Cooling rack — Essential for letting the donuts cool evenly before glazing. If you glaze them while they’re still warm, the glaze will slide right off.
- Small saucepan — For browning the butter. Light-colored pans are actually better here because you can see the butter change color more easily.
- Parchment paper or paper towels — For lining your workspace and catching any glaze drips.
Preparation Method
Step 1: Preheat and Prepare Your Pan
Preheat your oven to 350°F (175°C). Spray your donut pan generously with non-stick cooking spray. I like using a baking spray that contains flour—it guarantees the donuts will release without sticking. Don’t skip this step. A stuck donut is a sad, broken donut.
Step 2: Mix the Dry Ingredients
In a large mixing bowl, whisk together the all-purpose flour, granulated sugar, light brown sugar, baking powder, baking soda, pumpkin pie spice, ground cinnamon, and salt. Whisk for about 20 seconds to aerate the mixture and ensure everything is evenly distributed. Set aside.
Step 3: Combine the Wet Ingredients
In a medium bowl, whisk together the pumpkin puree, room temperature eggs, melted unsalted butter, vanilla extract, and milk. Whisk until the mixture is smooth and fully combined. It should look like a thick, velvety orange liquid. If your pumpkin puree was watery, you might notice some separation. Just whisk it back together.
Step 4: Combine Wet and Dry
Pour the wet ingredients into the bowl of dry ingredients. Use a rubber spatula to fold everything together gently. Do NOT overmix. Stir just until you see the last streaks of flour disappear. Overmixing develops gluten and makes the donuts tough. A few small lumps are totally fine—they’ll bake out.
Step 5: Fill the Donut Pan
Transfer the batter to your piping bag or zip-top bag. Snip off the tip and pipe the batter into the prepared donut pan cavities, filling each one about ⅔ full. If you overfill them, the donuts will rise and lose their hole. If you underfill them, they’ll look flat. Aim for that sweet spot. Tap the pan gently on the counter to release any air bubbles.
Step 6: Bake
Bake for 10-12 minutes, or until the donuts are set and spring back lightly when touched. A toothpick inserted into the thickest part should come out clean or with a few moist crumbs. Every oven runs a little differently, so start checking at 9 minutes. My oven takes exactly 11 minutes.
Step 7: Cool the Donuts
Let the donuts cool in the pan for 3-4 minutes. Then, carefully turn them out onto a cooling rack. If they stick, run a thin knife or offset spatula around the edges to loosen them. Let the donuts cool completely before glazing. This is important. Warm donuts will turn your beautiful brown butter glaze into a puddle.
Step 8: Make the Brown Butter Glaze
While the donuts are cooling, make the glaze. Place the unsalted butter in a small saucepan over medium heat. Let it melt completely, then continue cooking, swirling the pan occasionally. The butter will foam, then the foam will subside, and you’ll see little brown specks forming at the bottom. This is the milk solids toasting. Once the butter turns a golden-amber color and smells nutty and toasty, remove it from the heat immediately. This takes about 4-5 minutes. Pour the brown butter into a heat-safe bowl and let it cool for 2 minutes.
Step 9: Finish the Glaze
Add the sifted powdered sugar, vanilla extract, and a pinch of salt to the bowl with the brown butter. Whisk until smooth. Add the milk, one tablespoon at a time, whisking after each addition, until the glaze reaches a thick but pourable consistency. It should coat the back of a spoon but still drip off slowly.
Step 10: Glaze the Donuts
Once the donuts are completely cool, dip the top of each donut into the glaze. Let the excess drip off for a few seconds, then place the donut back on the cooling rack, glazed side up. The glaze will set in about 10-15 minutes. If you want extra glaze, you can double-dip them after the first layer sets.
Cooking Tips & Techniques
I’ve made these baked pumpkin donuts enough times to learn a few things the hard way. Here are my best tips to ensure your donuts turn out perfect every time.
Browned butter is easy to burn. I learned this the hard way when I walked away to answer a text and came back to blackened butter that smelled like burnt popcorn. Stay by the stove. Swirl the pan constantly. The moment it turns amber and smells nutty, pull it off the heat. It continues to cook in the hot pan, so transfer it to a cool bowl immediately.
Don’t overmix the batter. This is the number one mistake people make with baked donuts. Mix until just combined. A few lumps are your friends. Overmixing creates a dense, rubbery texture that no amount of glaze can fix.
Room temperature ingredients matter. Cold eggs and cold milk will seize the melted butter and create a lumpy batter. Take your eggs and milk out of the fridge 30 minutes before you start baking. If you forget, place the eggs in a bowl of warm water for 5 minutes and microwave the milk for 10 seconds.
Let the donuts cool completely. I know it’s tempting to glaze them while they’re still warm because you want to eat them immediately. But warm donuts + glaze = a sticky, messy situation. Patience pays off here. The glaze sets into a beautiful, crackly shell on completely cool donuts.
Use a piping bag for the batter. Spooning the batter into the donut cavities is messy and imprecise. A piping bag gives you control and keeps the batter off the center post of the pan. If you don’t have a piping bag, a zip-top bag with a corner snipped off works just as well.
Variations & Adaptations
One of the best things about this recipe is how adaptable it is. I’ve experimented with several variations, and they’ve all been delicious in their own way.
Gluten-Free Version: Substitute the all-purpose flour with a 1:1 gluten-free baking flour blend that contains xanthan gum. I’ve had great results with King Arthur Measure for Measure. The texture is slightly more delicate, so handle the donuts gently when removing them from the pan.
Dairy-Free Version: Use melted coconut oil or vegan butter instead of the melted butter in the batter. For the glaze, use a vegan butter stick and substitute the milk with oat milk or almond milk. The brown butter flavor won’t be exactly the same, but you’ll still get a nutty, delicious glaze.
Maple Glaze Variation: Replace the vanilla extract in the glaze with maple extract, and use maple syrup instead of one tablespoon of the milk. The maple and pumpkin combination is a match made in fall heaven. I made this version for a Thanksgiving brunch and it disappeared in minutes.
Spiced Cinnamon Sugar Version: Skip the glaze entirely and brush the warm donuts with melted butter, then toss them in a mixture of cinnamon and sugar. This version is less sweet but incredibly comforting. It reminds me of the churro donuts you get at a fair.
Chocolate Drizzle Version: After the brown butter glaze sets, drizzle melted dark chocolate over the top. The bitterness of the chocolate cuts through the sweetness of the glaze beautifully. I did this for a Halloween party and they looked almost too pretty to eat. Almost.
Serving & Storage Suggestions
These baked pumpkin donuts are best enjoyed the day they’re made, but they store surprisingly well if you do it right.
Serving: Serve the donuts at room temperature. They pair beautifully with a hot cup of coffee, a pumpkin chai latte, or a glass of cold milk. For a fun presentation, arrange them on a tiered stand or a wooden board with some fresh apple slices and a few cinnamon sticks.
Storage: Store unglazed donuts in an airtight container at room temperature for up to 2 days. If you’ve already glazed them, place them in a single layer in an airtight container with parchment paper between layers. Do not stack them without parchment or the glaze will stick and peel off.
Freezing: You can freeze the unglazed donuts for up to 3 months. Wrap each donut individually in plastic wrap, then place them in a freezer-safe bag. When you’re ready to enjoy them, thaw them at room temperature for about an hour, then make the glaze fresh. I do this all the time during the fall so I can have donuts ready for unexpected guests or lazy weekend mornings.
Reheating: If you want a warm donut, pop an unglazed donut in the microwave for 10-15 seconds. If the donut is already glazed, the glaze will get sticky and soft. Some people love that texture. If you prefer a set glaze, just eat them at room temperature.
Flavor Development: Honestly, these donuts taste even better the next day. The spices meld together and the pumpkin flavor deepens overnight. If you can resist eating them all on day one, you’re in for a treat on day two.
Nutritional Information & Benefits
While these donuts are definitely a treat, they do offer some nutritional benefits thanks to the pumpkin and the careful balance of ingredients.
Estimated Nutritional Values (per donut, based on 12 donuts):
- Calories: 245
- Fat: 10g
- Saturated Fat: 6g
- Carbohydrates: 36g
- Sugar: 22g
- Fiber: 1g
- Protein: 3g
Health Benefits: Pumpkin puree is packed with vitamin A, which is great for eye health and immune function. It’s also a good source of fiber, which helps with digestion and keeps you feeling full. The brown butter glaze adds a touch of indulgence, but the donuts themselves are baked, not fried, which means they have significantly less fat than traditional fried donuts.
Dietary Considerations: This recipe can easily be made gluten-free and dairy-free with the substitutions mentioned above. It contains eggs, wheat, and dairy in its standard form. If you’re watching your sugar intake, you can reduce the granulated sugar to ½ cup and use a sugar-free powdered sugar alternative in the glaze.
Conclusion
These baked pumpkin donuts with brown butter glaze are everything I want in a fall recipe. They’re quick enough for a weekday morning, special enough for a holiday brunch, and forgiving enough for a beginner baker. The pumpkin keeps them tender, the spices make them cozy, and that brown butter glaze? It’s the kind of detail that makes people think you really know what you’re doing in the kitchen.
I love this recipe because it reminds me of that Tuesday night with Carol. It turned a stressful moment into a shared, warm memory. That’s what good food does. It connects us. It makes life a little sweeter, even when things don’t go according to plan.
I’d love to hear how these turn out for you. Did you try the maple glaze variation? Did you double the batch for a crowd? Drop a comment below and let me know. And if you’re looking for more cozy fall recipes, be sure to check out our pumpkin chocolate chip sourdough bread or our one-bowl pumpkin banana bread. Happy baking, friends!
Frequently Asked Questions
Can I make these donuts without a donut pan?
Yes, absolutely. You can use a standard 12-cup muffin tin instead. Grease the pan well, fill each cavity about ⅔ full, and bake for 15-18 minutes. You’ll get muffin tops instead of donuts, but they taste exactly the same. You can also use a mini muffin pan for bite-sized treats—just reduce the baking time to 8-10 minutes.
Can I use fresh pumpkin instead of canned?
You can, but you need to be careful. Fresh pumpkin puree has a higher water content than canned. After you make your puree, place it in a fine-mesh strainer lined with cheesecloth and let it drain for at least an hour. You want it to be as thick as canned pumpkin puree. If you skip this step, your donuts will be gummy and dense.
Why did my donuts stick to the pan?
This usually happens for one of three reasons: the pan wasn’t greased well enough, the donuts were left in the pan too long after baking, or the pan is old and has lost its non-stick coating. I recommend using a baking spray that contains flour, and turning the donuts out of the pan after 3-4 minutes of cooling. If your pan is scratched or worn, consider replacing it.
Can I make the glaze ahead of time?
You can, but it’s better to make it fresh. The brown butter flavor is most vibrant immediately after you make it. If you do make it ahead, store it in an airtight container in the refrigerator for up to 3 days. When you’re ready to use it, let it come to room temperature and whisk in a splash of milk to restore the consistency.
How do I know when the brown butter is done?
Watch for three signs: color, smell, and sound. The butter will turn from yellow to a golden-amber color. It will smell nutty and toasty, like toasted hazelnuts. You’ll also hear the sizzling and popping subside. Once you see those brown specks forming at the bottom of the pan, remove it from the heat immediately. It happens fast, so don’t walk away.
Pin This Recipe!
Baked Pumpkin Donuts with Brown Butter Glaze
These baked pumpkin donuts are soft, tender, and topped with a nutty brown butter glaze. Ready in 30 minutes, they’re the perfect easy fall treat for breakfast, brunch, or a last-minute bake sale.
- Prep Time: 15 minutes
- Cook Time: 12 minutes
- Total Time: 30 minutes
- Yield: 12 donuts 1x
- Category: Dessert
- Cuisine: American
Ingredients
- 1 ¾ cups all-purpose flour, spooned and leveled
- ¾ cup granulated sugar
- ¼ cup light brown sugar, packed
- 1 ½ teaspoons baking powder
- ½ teaspoon baking soda
- 1 ½ teaspoons pumpkin pie spice
- 1 teaspoon ground cinnamon
- ½ teaspoon fine sea salt
- 1 cup pumpkin puree (not pumpkin pie filling)
- 2 large eggs, at room temperature
- ¼ cup unsalted butter, melted and cooled slightly
- 1 teaspoon pure vanilla extract
- ¼ cup milk, at room temperature
- ¼ cup unsalted butter (for glaze)
- 1 ½ cups powdered sugar, sifted
- 1 teaspoon pure vanilla extract (for glaze)
- 2–3 tablespoons milk, at room temperature (for glaze)
- Pinch of salt (for glaze)
Instructions
- Preheat oven to 350°F (175°C). Spray a standard 6-cavity donut pan generously with non-stick baking spray.
- In a large bowl, whisk together flour, granulated sugar, brown sugar, baking powder, baking soda, pumpkin pie spice, cinnamon, and salt for about 20 seconds.
- In a medium bowl, whisk together pumpkin puree, eggs, melted butter, vanilla extract, and milk until smooth.
- Pour wet ingredients into dry ingredients. Fold gently with a rubber spatula until just combined; do not overmix. A few lumps are fine.
- Transfer batter to a piping bag or zip-top bag with a corner snipped off. Pipe batter into prepared donut pan cavities, filling each about ⅔ full. Tap pan gently on counter to release air bubbles.
- Bake for 10-12 minutes, until donuts are set and spring back when touched. A toothpick inserted into thickest part should come out clean or with a few moist crumbs.
- Let donuts cool in pan for 3-4 minutes, then turn out onto a cooling rack. Cool completely before glazing.
- While donuts cool, make the glaze: In a small saucepan over medium heat, melt the ¼ cup butter. Continue cooking, swirling occasionally, until butter turns golden-amber and smells nutty, about 4-5 minutes. Remove from heat immediately and pour into a heat-safe bowl. Let cool for 2 minutes.
- Add sifted powdered sugar, vanilla extract, and a pinch of salt to the brown butter. Whisk until smooth. Add milk 1 tablespoon at a time, whisking after each, until glaze is thick but pourable.
- Dip tops of completely cooled donuts into glaze. Let excess drip off, then place glazed side up on cooling rack. Glaze will set in 10-15 minutes.
Notes
Don’t overmix the batter; a few lumps are fine. Let donuts cool completely before glazing to prevent glaze from sliding off. Brown butter can burn quickly—stay by the stove and remove from heat as soon as it turns amber and smells nutty. For best results, use room temperature ingredients.
Nutrition
- Serving Size: 1 donut
- Calories: 245
- Sugar: 22
- Sodium: 220
- Fat: 10
- Saturated Fat: 6
- Carbohydrates: 36
- Fiber: 1
- Protein: 3
Keywords: baked pumpkin donuts, brown butter glaze, fall donuts, easy pumpkin recipe, baked donuts, pumpkin spice donuts