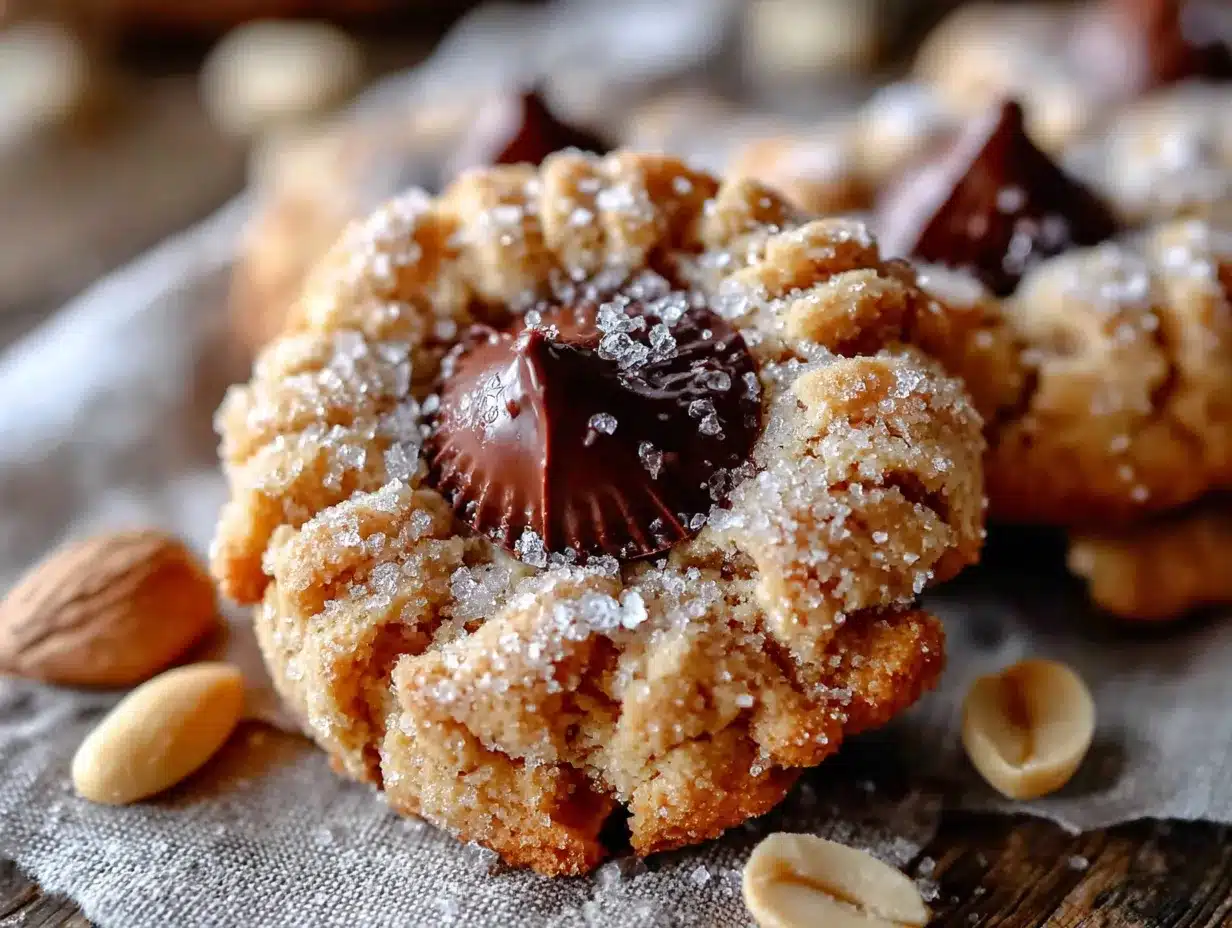
Let me tell you, these aren’t your average peanut butter cookies. They are the softest, most tender version I have ever made, and that little chocolate kiss on top just seals the deal. Honestly, they are the cookie that disappears first at every party I bring them to.
- Perfectly Soft: The texture is what dreams are made of. They stay soft for days, which is a total game-changer for a peanut butter cookie.
- Simple Ingredients: You probably have everything in your pantry right now. No fancy stuff, just real, honest baking ingredients.
- Ideal for Hosting: These are the ultimate crowd-pleaser. They look impressive with that shiny chocolate kiss, but they are secretly one of the easiest cookies to make in bulk.
- Kid-Approved & Adult-Loved: That classic peanut butter and chocolate combo? It never fails. It makes everyone happy.
- Make-Ahead Magic: You can prep the dough ahead of time, which is a lifesaver when you are trying to get a whole meal on the table for guests.
What makes this recipe different from the rest is the technique. We are using a little trick with the butter and sugar to guarantee that soft, almost melt-in-your-mouth texture. It is not just another peanut butter blossom cookie—it is the one you will come back to year after year. It is that feeling of biting into a warm cookie, the chocolate just starting to melt, and knowing you nailed it.
What Ingredients You Will Need
This recipe uses simple, wholesome ingredients to deliver that big, bold flavor and satisfying soft texture without any fuss. Most of these are pantry staples, which makes this perfect for a last-minute baking session before your friends come over.
- For the Cookie Dough:
- Unsalted butter, softened: 1 cup (2 sticks). I always use unsalted so I can control the salt level. Let it sit out for a good hour to get really soft.
- Creamy peanut butter: 1 cup. I prefer Skippy or Jif for baking—the natural, oily kinds can sometimes make the cookies spread too much.
- Granulated sugar: 1 cup for the dough, plus extra for rolling.
- Light brown sugar, packed: 1/2 cup. This adds a touch of moisture and chewiness.
- Large eggs: 2, at room temperature. This helps them mix in evenly.
- Whole milk: 2 tablespoons. This is the secret to that soft texture!
- Vanilla extract: 1 teaspoon. Pure is best, but imitation works in a pinch.
- All-purpose flour: 2 and 1/2 cups. Spoon and level it into your cup—don’t scoop directly from the bag or you will get too much.
- Baking soda: 1 teaspoon. This gives them a little lift.
- Baking powder: 1/2 teaspoon. For extra tenderness.
- Salt: 1/2 teaspoon. It balances the sweetness and brings out the peanut butter flavor.
- For the Topping:
- Chocolate kisses: about 48, unwrapped. Hershey’s are the classic choice, but you can use any brand. You want them cold so they don’t get too melty when you press them in.
- Extra granulated sugar: 1/4 cup, for rolling the dough balls.
If you are out of milk, you can swap in any non-dairy milk like almond or oat milk. It works just fine. And for the peanut butter, do not use the homemade or natural stuff that separates—it changes the texture completely. Stick with the processed stuff for this one, I promise it is worth it.
Equipment Needed
You do not need a ton of fancy equipment for this recipe, which is part of its charm. Here is what you will need to get the job done:
- Electric mixer: A stand mixer with a paddle attachment is my go-to, but a hand mixer works perfectly too. You just need something to cream the butter and sugar until it is light and fluffy.
- Large mixing bowls: You will need one for the wet ingredients and one for the dry ingredients.
- Baking sheets: Two or three standard half-sheet pans. I like the ones with a light finish because they brown the cookies more evenly.
- Parchment paper or silicone baking mats: These are non-negotiable for me. They prevent sticking and make cleanup a breeze. Plus, they help the cookies bake evenly.
- Cookie scoop: A 1.5-tablespoon scoop makes uniform cookies that bake at the same rate. If you do not have one, just use a spoon and your hands.
- Cooling rack: A wire rack is essential for letting the cookies cool properly so the chocolate sets.
- Small bowl: For the extra sugar you will roll the dough balls in.
If you are on a budget, skip the fancy mixer and just use a wooden spoon. Your arm will get a workout, but the cookies will still turn out amazing. I have done it that way plenty of times!
Preparation Method
Alright, let’s get to the fun part. This is where the magic happens. Follow these steps, and you will have a tray of gorgeous, soft peanut butter blossom cookies that will make you the star of the party.
- Preheat and Prep: First, preheat your oven to 375°F (190°C). Line your baking sheets with parchment paper or silicone mats. Get your chocolate kisses unwrapped and set them aside in the fridge to stay cold.
- Cream the Butter and Sugars: In your large mixing bowl, beat the softened butter, granulated sugar, and brown sugar together on medium speed until it is light and fluffy. This takes about 2-3 minutes. You want it to look pale and airy. Scrape down the sides of the bowl with a spatula.
- Add the Wet Ingredients: Beat in the peanut butter until it is smooth and combined. Then, add the eggs one at a time, beating well after each addition. Mix in the milk and vanilla extract. The dough will look a little glossy at this point.
- Combine the Dry Ingredients: In a separate bowl, whisk together the flour, baking soda, baking powder, and salt. This ensures the leavening agents are evenly distributed so your cookies rise properly.
- Mix the Dough: Gradually add the dry ingredients to the wet mixture, mixing on low speed. Mix just until the flour disappears. Do not overmix! Overmixing will make the cookies tough. The dough will be thick and a little sticky—that is perfect.
- Chill the Dough (Important!): Cover the bowl with plastic wrap and chill the dough in the refrigerator for at least 1 hour. This step is crucial. Chilling the dough prevents the cookies from spreading too much in the oven. If you skip this, you will get flat, sad cookies. I promise, it is worth the wait.
- Shape and Roll: Once the dough is chilled, use your cookie scoop to portion out 1.5-tablespoon-sized balls. Roll each ball between your palms until it is smooth. Then, roll each ball in the extra granulated sugar until it is completely coated. Place them on the prepared baking sheets, spacing them about 2 inches apart.
- Bake: Bake for 10-12 minutes, or until the edges are just set and lightly golden. The centers will still look a little puffy and soft. Do not overbake! They will continue to set on the hot pan.
- Add the Kisses: This step requires a little speed. As soon as the cookies come out of the oven, immediately press a chocolate kiss into the center of each cookie. Press it down gently until the cookie cracks around the edges. If the kiss is too warm, it will melt into a puddle, so keep them cold until the last second.
- Cool Completely: Let the cookies cool on the baking sheet for about 5 minutes. The chocolate will soften a bit. Then, carefully transfer them to a wire cooling rack to cool completely. The chocolate will firm up as they cool.
One time, I got distracted by a phone call and left the cookies in the oven for 14 minutes. They were still good, but they were a little crispier than I like. So, set a timer! Your nose will also tell you when they are done—that toasty peanut butter smell is unmistakable.
Cooking Tips & Techniques
I have made these cookies more times than I can count, and I have learned a few things the hard way. Here are my best tips to make sure you get perfect results every single time.
Room Temperature Ingredients Matter: I cannot stress this enough. Your butter and eggs need to be at room temperature. Cold butter will not cream properly, and your dough will be lumpy. If you forget to take your eggs out, place them in a bowl of warm water for 5 minutes. For the butter, cut it into cubes and let it sit for 15 minutes.
Do Not Skip the Chill: I know it is tempting to skip the chilling step when you are in a hurry, but it is the single most important thing you can do for these cookies. Chilled dough spreads less, which means thicker, softer cookies. Plus, it gives the flavors time to meld together. If you are really short on time, you can chill the scooped dough balls on a tray in the freezer for 15-20 minutes.
The Sugar Roll: Rolling the dough balls in sugar is not just for looks. That sugar coating creates a slightly crisp, sparkly exterior that contrasts beautifully with the soft, tender inside. It also helps the cookies hold their shape.
Pressing the Kisses: I ruined a whole batch once by pressing the kisses in while the cookies were too cool. The cookies had set, and the kiss just sat on top without sticking. You have to do it immediately, straight out of the oven. And if the chocolate starts to look too shiny and melty, pop the whole tray in the fridge for 5 minutes to set the chocolate.
Consistency is Key: Use that cookie scoop! It ensures all your cookies are the same size, so they bake evenly. Nobody wants a tray with some burnt and some underdone.
Variations & Adaptations
These cookies are a beautiful blank canvas. Once you master the base recipe, you can play around with it to make it your own. Here are a few of my favorite variations.
- Chocolate Lover’s Twist: Swap the peanut butter for Nutella or a chocolate-hazelnut spread. The dough will be a little different, but the result is a double-chocolate dream. Use milk chocolate kisses for an extra hit of chocolate.
- Gluten-Free Option: I have made these with a 1:1 gluten-free baking flour blend (like Bob’s Red Mill) and they turned out fantastic. Just make sure the blend contains xanthan gum. The texture might be slightly more crumbly, but the flavor is spot on.
- Holiday Sparkle: For Christmas, roll the dough balls in red and green sanding sugar instead of plain granulated sugar. You can also use candy cane kisses for a festive touch. For Halloween, use orange sugar and pumpkin spice kisses.
- Nut-Free Version: If you are baking for someone with a nut allergy, you can use sunflower seed butter (like SunButter). The cookies will turn a little green from a natural reaction with the baking soda, but they taste delicious! Just be sure to use a brand that is safe for allergies.
- Stuffed Blossoms: This is my personal favorite. Take a small piece of a peanut butter cup or a Rolo candy and wrap the dough around it before rolling it in sugar. Then, press the kiss on top as usual. You get a surprise gooey center!
Serving & Storage Suggestions
These cookies are best served at room temperature, but there is something magical about them when they are just barely warm and the chocolate is still a little soft. If you are hosting a party, you can bake them a day ahead and store them in an airtight container.
How to Serve: Arrange them on a beautiful platter or a tiered cookie stand. They look stunning with a glass of cold milk, a cup of hot coffee, or even a scoop of vanilla ice cream on the side. For a dessert table, they pair beautifully with soft sugar cookies and classic brownies. The contrast of textures is wonderful.
Storing: Store the cooled cookies in an airtight container at room temperature for up to 5 days. I like to place a piece of bread in the container with them—it absorbs excess moisture and keeps the cookies incredibly soft. Just replace the bread every day or two.
Freezing: These cookies freeze like a dream. You can freeze the baked cookies for up to 3 months. Layer them between sheets of parchment paper in a freezer-safe container. Thaw them at room temperature for about an hour. You can also freeze the unbaked dough balls. Scoop them, roll them in sugar, and freeze them on a tray. Once frozen, pop them into a freezer bag. You can bake them straight from frozen, just add 1-2 minutes to the baking time.
Reheating: If you want that just-baked warmth, pop a cookie in the microwave for about 10 seconds. It makes the chocolate gooey again. Honestly, it is dangerous how good they are this way.
Nutritional Information & Benefits
I am not a nutritionist, but I can tell you what is in these cookies. While they are a treat, they do have some redeeming qualities. Peanut butter provides protein and healthy fats, which can help keep you feeling satisfied. Plus, dark chocolate kisses (if you choose to swap them) are packed with antioxidants.
Here is the estimated nutritional breakdown per cookie (based on 48 cookies):
- Calories: 145
- Fat: 8g
- Saturated Fat: 3.5g
- Carbohydrates: 17g
- Sugar: 11g
- Protein: 3g
- Sodium: 85mg
Obviously, these are not a health food, but they are a wonderful homemade treat made with real ingredients. They are free of high-fructose corn syrup and artificial preservatives, which is more than you can say for a store-bought cookie. Enjoy them in moderation, and share them with the people you love!
Conclusion
These Best Soft Peanut Butter Blossom Cookies with Chocolate Kisses are more than just a recipe—they are a little piece of baking joy. They are the cookie that makes people stop and say, “Wow, did you make these?” They are soft, they are tender, and that chocolate kiss on top is the perfect finishing touch.
I hope you give these a try for your next gathering. Do not be afraid to make them your own—add a sprinkle of sea salt on top, swap the chocolate for a caramel kiss, or double the batch because they will disappear fast. I promise you, they will become a new favorite in your baking rotation.
I would love to hear how they turn out! Drop a comment below and let me know if you tried any fun variations. And if you snap a picture, tag me on social media—I absolutely love seeing your creations. Happy baking, friend!
Frequently Asked Questions
Why did my cookies spread too much?
The most common reason is that the dough was not chilled long enough. Make sure you chill it for at least 1 hour. Also, check that your butter was not too soft or melted when you started. Using room temperature butter is key, not melted butter.
Can I use natural peanut butter?
I really do not recommend it. Natural peanut butters that are oily and need to be stirred can cause the cookies to spread and become greasy. Stick with a processed brand like Jif or Skippy for the best texture.
How do I keep the chocolate kisses from melting?
Keep the kisses in the refrigerator until the very last second. When you press them into the hot cookies, they will soften, but they should not melt into a puddle. If they start to look too shiny, put the whole tray in the fridge for 5 minutes to set them.
Can I make the dough ahead of time?
Absolutely! You can make the dough up to 3 days in advance and keep it covered in the fridge. You can also freeze the scooped dough balls for up to 3 months. Just bake them straight from frozen, adding a minute or two to the baking time.
How do I get perfectly round cookies?
When the cookies come out of the oven, use a round cookie cutter or a spatula to gently scoot the edges of the cookies into a perfect circle. Do this while they are still hot and soft. It is a little trick I learned from a bakery owner, and it makes them look so professional.
Pin This Recipe!
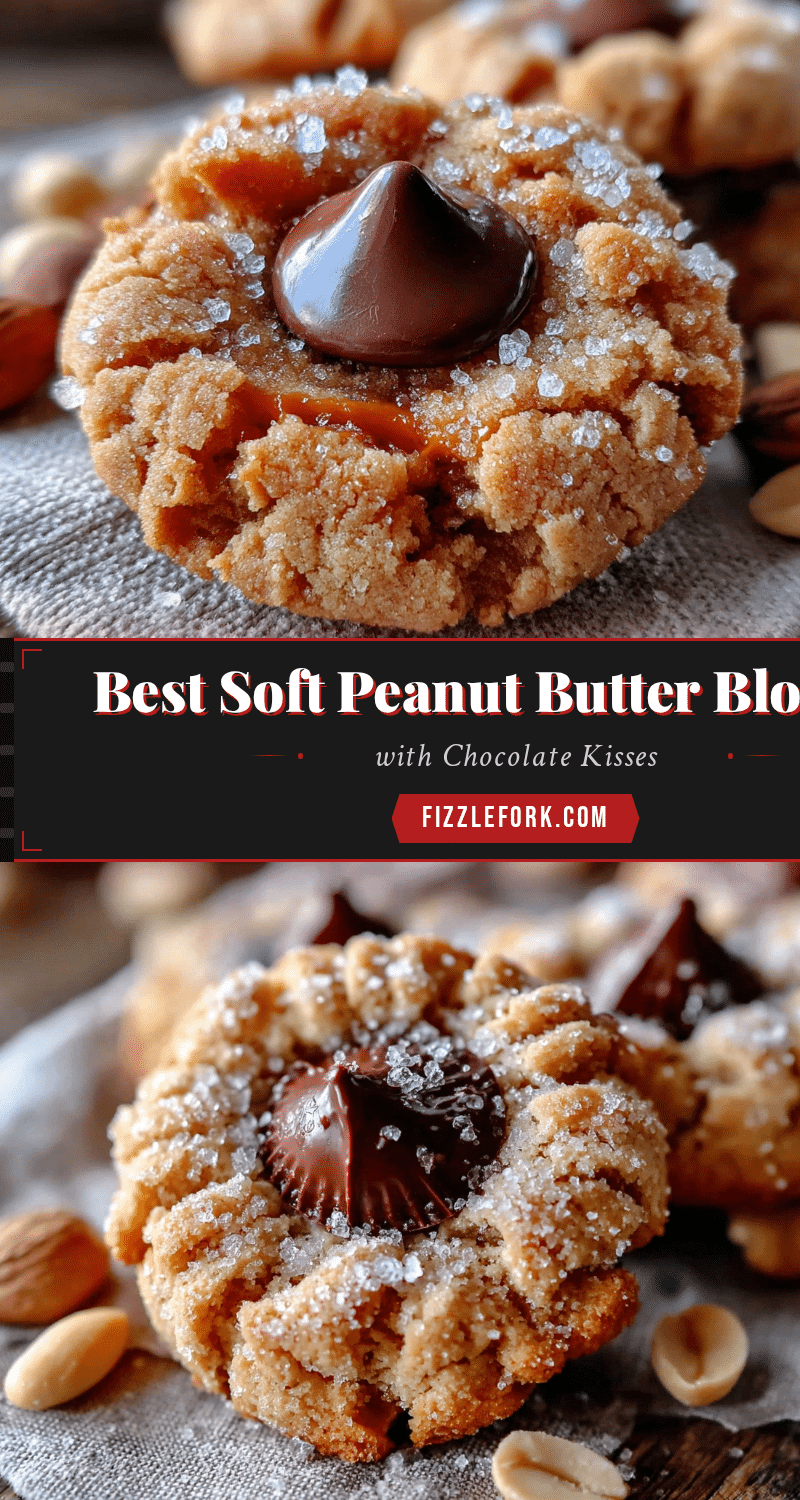
Best Soft Peanut Butter Blossom Cookies with Chocolate Kisses

These are the softest, most tender peanut butter blossom cookies you’ll ever make. A classic chocolate kiss on top seals the deal, making them the ultimate crowd-pleaser for any party or gathering.
- Prep Time: 20 minutes
- Cook Time: 12 minutes
- Total Time: 1 hour 32 minutes (includes 1 hour chilling)
- Yield: 48 cookies 1x
- Category: Dessert
- Cuisine: American
Ingredients
- 1 cup (2 sticks) unsalted butter, softened
- 1 cup creamy peanut butter (e.g., Skippy or Jif)
- 1 cup granulated sugar (for dough)
- 1/2 cup light brown sugar, packed
- 2 large eggs, at room temperature
- 2 tablespoons whole milk
- 1 teaspoon vanilla extract
- 2 and 1/2 cups all-purpose flour, spooned and leveled
- 1 teaspoon baking soda
- 1/2 teaspoon baking powder
- 1/2 teaspoon salt
- About 48 chocolate kisses (e.g., Hershey’s), cold
- 1/4 cup extra granulated sugar (for rolling)
Instructions
- Preheat oven to 375°F (190°C). Line baking sheets with parchment paper or silicone mats. Keep chocolate kisses in the refrigerator until ready to use.
- In a large mixing bowl, beat softened butter, granulated sugar, and brown sugar together on medium speed until light and fluffy, about 2-3 minutes. Scrape down sides of bowl.
- Beat in peanut butter until smooth. Add eggs one at a time, beating well after each addition. Mix in milk and vanilla extract until combined.
- In a separate bowl, whisk together flour, baking soda, baking powder, and salt.
- Gradually add dry ingredients to wet mixture, mixing on low speed just until flour disappears. Do not overmix. Dough will be thick and slightly sticky.
- Cover bowl with plastic wrap and chill dough in refrigerator for at least 1 hour.
- Using a 1.5-tablespoon cookie scoop, portion dough into balls. Roll each ball between palms until smooth, then roll in extra granulated sugar to coat completely. Place on prepared baking sheets, spacing 2 inches apart.
- Bake for 10-12 minutes, until edges are set and lightly golden. Centers will still look puffy and soft.
- Immediately after removing from oven, press a cold chocolate kiss into the center of each cookie, pressing gently until cookie cracks around edges.
- Let cookies cool on baking sheet for 5 minutes, then transfer to a wire rack to cool completely. Chocolate will firm up as they cool.
Notes
Chilling the dough is crucial to prevent spreading. Keep chocolate kisses cold until pressing into cookies. For best results, use processed peanut butter (not natural). Cookies stay soft for up to 5 days in an airtight container at room temperature. Can be frozen for up to 3 months.
Nutrition
- Serving Size: 1 cookie
- Calories: 145
- Sugar: 11
- Sodium: 85
- Fat: 8
- Saturated Fat: 3.5
- Carbohydrates: 17
- Protein: 3
Keywords: peanut butter blossom cookies, soft peanut butter cookies, chocolate kiss cookies, holiday cookies, easy cookie recipe