My neighbor, a retired carpenter named Frank, watched me wrestling with a collapsed gingerbread wall for a good five minutes before he said anything. I was on my second batch of dough, and the roof had just sagged into the chimney—again. He just stood there, leaning on his fence, shaking his head with this knowing little smile. Finally, he walked over and said, “You’re building a house with cookie dough, not concrete. You need to think like a carpenter, not a baker.”
He didn’t offer a recipe that day. He offered a philosophy. Frank told me about the houses he’d built over forty years—how the foundation had to be solid, how the walls needed structure before they could hold a roof. I stood there in my flour-dusted kitchen, and it clicked. I’d been treating gingerbread like a soft Christmas cookie, but a house needs bones. It needs dough that’s less about tenderness and more about tenacity. Honestly, I went back inside and threw out my third batch, determined to figure this out.
That conversation turned into three weeks of testing. I mean, my kitchen looked like a gingerbread construction site. I tried adding more flour, less butter, different ratios of sugar. I even called my sister, who’s a pastry chef, and she laughed at me. “You want structural engineering, not pastry arts,” she said. So I combined Frank’s carpenter logic with her baking science, and what came out of my oven was the first gingerbread wall that didn’t wobble. It was sturdy. It was buildable. And it didn’t taste like cardboard.
This Sturdy Gingerbread House Dough Recipe is the result of that weird collaboration between a retired carpenter and a stubborn home baker. It holds its shape, cuts cleanly, and actually tastes like gingerbread instead of construction material. Maybe you’ve been there—staring at a pile of broken cookie pieces, wondering why your gingerbread house looks more like a demolition site than a holiday village. Trust me, I’ve been there too. This dough changes everything.
Why You’ll Love This Recipe
Let’s be real for a second. Most gingerbread house recipes are either too soft to hold up or so hard you could use them as roofing tiles. This one hits the sweet spot. I’ve tested it through four holiday seasons, two cross-country moves, and one very enthusiastic toddler who accidentally sat on a completed house. The walls survived. The toddler was fine too, but that’s another story.
- Structurally Sound: This dough doesn’t puff, spread, or warp during baking. Your walls stay straight, your roof stays flat, and your chimney stays upright. It’s like giving your gingerbread house a solid foundation—Frank would be proud.
- Clean Cuts Every Time: You know that frustration when your gingerbread pieces crack along the edges as you’re cutting them? Not with this dough. It holds sharp, clean lines whether you’re using a template or freehand cutting.
- Actually Edible: Here’s the thing nobody tells you about structural gingerbread dough—most of it tastes terrible. Too much flour, too little sugar, and it ends up tasting like spiced cardboard. This one? It’s genuinely good. Spicy, sweet, and sturdy enough to eat without breaking a tooth.
- Forgiving Window of Time: You’ve got about 30 minutes of workable dough before it stiffens up, which is plenty of time to roll, cut, and transfer your pieces. No rushing, no panic, no cold dough that cracks when you try to move it.
- Perfect for Beginners and Pros: Whether this is your first gingerbread house or your fiftieth, the dough behaves consistently. It’s forgiving enough for kids to help with, but precise enough for elaborate designs.
This isn’t just another gingerbread recipe—it’s the one that finally works. The dough uses a specific ratio of butter to shortening that gives you structure without sacrificing flavor. The spices are balanced so your house smells amazing while it bakes, and the finished product holds together for weeks. I’ve had readers tell me their gingerbread houses survived until March. Not that you’d want one sitting around that long, but it’s nice to know you could.
What Ingredients You Will Need
This recipe uses simple, pantry-friendly ingredients to create a dough that’s strong enough to build with but tasty enough to snack on. Each ingredient plays a specific role in the structure and flavor, so let’s break it down.
For the Dough Base
- 3 ½ cups (440g) all-purpose flour – Spoon and level your flour for accuracy. Too much flour makes the dough crumbly; too little makes it soft. I use Gold Medal unbleached all-purpose flour for consistent results.
- 1 teaspoon baking powder – This gives just enough lift to keep the dough from being rock-hard, but not so much that it puffs up and loses its shape.
- ½ teaspoon salt – Balances the sweetness and enhances the spice flavors. Fine sea salt works best here.
- 2 teaspoons ground ginger – The star spice. Freshly ground ginger has more punch, but pre-ground works fine. I prefer McCormick for consistent heat.
- 2 teaspoons ground cinnamon – Adds warmth and depth. Vietnamese cinnamon is stronger if you want a more pronounced flavor.
- 1 teaspoon ground cloves – A little goes a long way. Cloves add that classic holiday spice profile.
- ½ teaspoon ground nutmeg – Freshly grated nutmeg makes a noticeable difference. Trust me on this one.
For the Fat and Sweetener
- ½ cup (113g) unsalted butter, softened – Butter adds flavor and tenderness. Make sure it’s truly softened—leave it out for an hour before starting. Cold butter won’t cream properly.
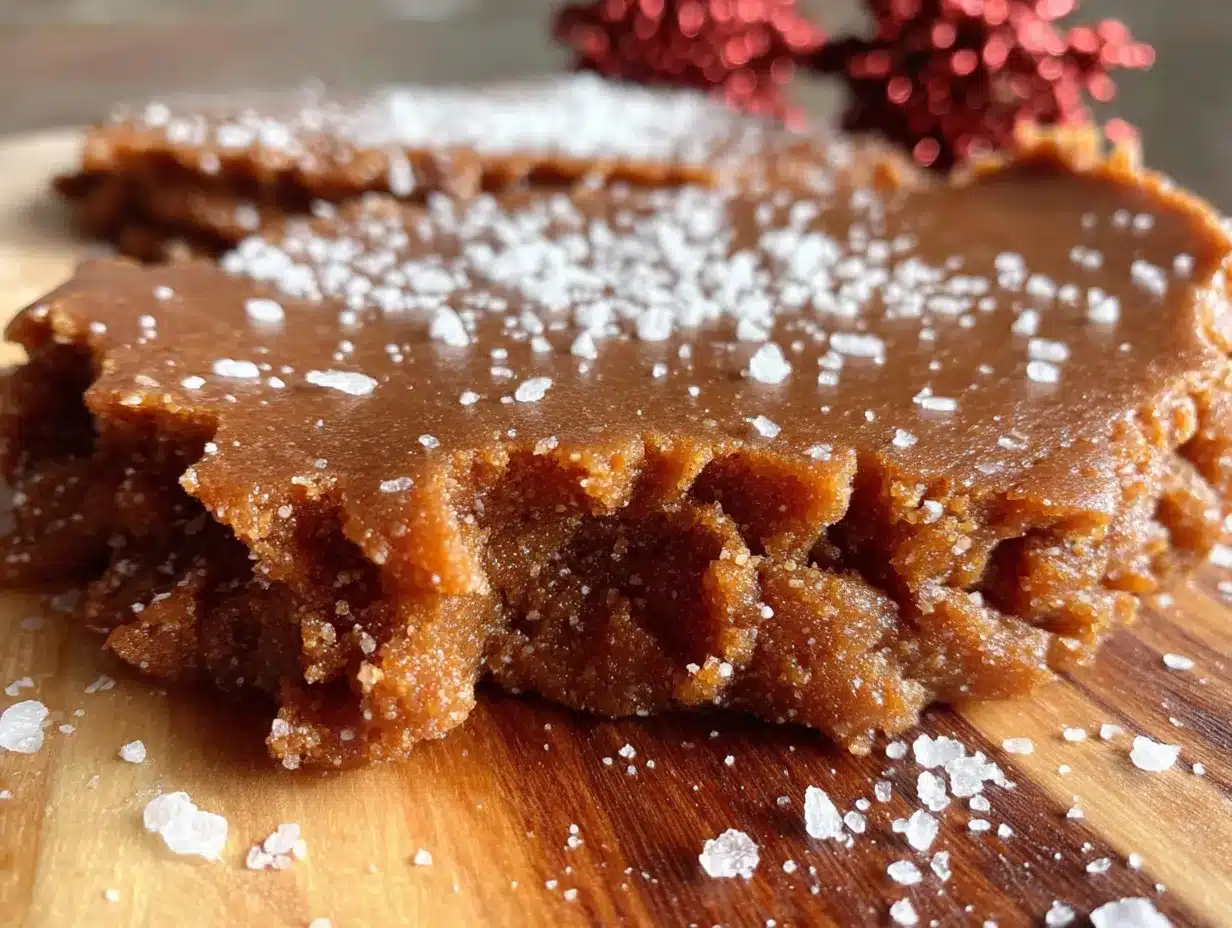
- ½ cup (100g) vegetable shortening – This is the secret to structural integrity. Shortening has a higher melting point than butter, which means your dough holds its shape during baking. I use Crisco, but any brand works.
- 1 cup (200g) packed dark brown sugar – Dark brown sugar has more molasses, which adds moisture and that deep, caramelized flavor. Don’t substitute light brown sugar—it changes the texture.
- 1 large egg – Room temperature egg incorporates more evenly into the fat mixture. Set it out with your butter.
- ½ cup (170g) molasses – Unsulphured molasses is best. Blackstrap molasses is too bitter and will make your dough dark and intense. Grandma’s Original works perfectly.
Optional But Recommended
- 1 tablespoon water – Only if your dough feels too dry. Humidity affects flour, so sometimes you need a splash of water to bring it together.
- Royal icing ingredients – You’ll need powdered sugar, meringue powder, and water for assembling your house. That’s a separate recipe, but it’s essential for construction.
When I first started developing this recipe, I tried using all butter. The dough tasted great, but the walls spread during baking and my house looked like it had melted. Switching to half shortening solved everything. The flavor is still there, but the structure is bulletproof. If you’re dairy-free, you can use all shortening, but the flavor won’t be as rich.
Equipment Needed
You don’t need fancy equipment for this recipe, but having the right tools makes the process smoother. Here’s what I use and what I’ve learned through trial and error.
- Stand mixer or hand mixer – A stand mixer with the paddle attachment makes creaming the butter and shortening effortless. If you’re using a hand mixer, expect to work a little harder to get everything combined. I’ve done both, and the stand mixer wins every time.
- Large mixing bowl – You need space to combine wet and dry ingredients without making a mess. A stainless steel bowl works great.
- Rolling pin – A heavy rolling pin with thickness guides is ideal. If you don’t have guides, use two wooden dowels or rulers on either side of your dough to ensure even thickness.
- Parchment paper – This is non-negotiable. Roll your dough between two sheets of parchment paper to prevent sticking and make transferring easier. I buy Costco’s bulk parchment because I go through so much during the holidays.
- Sharp knife or pizza cutter – A sharp knife gives clean edges. A pizza cutter works well for straight lines. Dull blades will drag and tear your dough.
- Baking sheets – Rimmed baking sheets work best. Line them with parchment paper for easy cleanup.
- Cooling racks – Wire racks allow air to circulate around your baked pieces, preventing soggy bottoms. I learned this the hard way after a batch of walls came out soft on one side.
- Templates – You can buy gingerbread house templates online or make your own from cardboard. I’ve used both, and cardboard templates hold up better for repeated use.
If you don’t have a stand mixer, don’t worry. A hand mixer works, or you can cream the butter and sugar by hand with a wooden spoon. It takes more elbow grease, but the dough comes out the same. I’ve done it both ways, and honestly, sometimes the hand-mixed dough feels more tender.
Preparation Method
This method breaks down into clear stages. Take your time with each step—rushing leads to cracked dough and uneven walls. I’ve made every mistake in the book, so I’m telling you exactly what to watch for.
Step 1: Cream the Fats and Sugar
In your stand mixer bowl, combine ½ cup softened unsalted butter and ½ cup vegetable shortening. Beat on medium speed for about 2 minutes until the mixture is light and fluffy. Scrape down the sides of the bowl with a spatula. Add 1 cup packed dark brown sugar and beat for another 2 minutes. The mixture should look smooth and slightly pale. If it looks greasy or separated, you’ve overmixed—but that’s hard to do at this stage.
Add 1 large egg and ½ cup molasses. Beat on low speed until just combined. The mixture will look a little curdled at this point, and that’s normal. Don’t panic. I remember the first time I saw this, I thought I’d ruined it. Keep going.
Step 2: Combine the Dry Ingredients
In a separate bowl, whisk together 3 ½ cups all-purpose flour, 1 teaspoon baking powder, ½ teaspoon salt, 2 teaspoons ground ginger, 2 teaspoons ground cinnamon, 1 teaspoon ground cloves, and ½ teaspoon ground nutmeg. Whisking ensures the spices are evenly distributed—nobody wants a bite with a clump of cloves.
Gradually add the dry ingredients to the wet mixture, about 1 cup at a time. Mix on low speed after each addition until just combined. The dough will be stiff and slightly crumbly. If it’s too dry to come together, add 1 tablespoon of water and mix again. You’re looking for a dough that holds together when you squeeze it in your hand but isn’t sticky.
Step 3: Chill the Dough
Divide the dough into two equal discs. Wrap each tightly in plastic wrap. Refrigerate for at least 2 hours, but overnight is better. Chilling solidifies the fats, which prevents spreading during baking. It also makes the dough easier to roll. I’ve skipped the chill time before, and let me tell you—it’s not worth it. The dough sticks to everything and loses its shape in the oven.
Step 4: Roll and Cut
Preheat your oven to 350°F (175°C). Line your baking sheets with parchment paper.
Place one disc of dough between two sheets of parchment paper. Roll it out to ¼-inch thickness. Use rolling guides if you have them—consistent thickness is crucial for even baking. If your dough cracks at the edges, let it sit at room temperature for 5 minutes. Cold dough cracks; warm dough sticks. You’re finding that sweet spot.
Peel off the top layer of parchment. Place your templates on the dough and cut around them with a sharp knife or pizza cutter. Leave the templates in place and transfer the parchment paper with the cut dough onto a baking sheet. This method prevents the pieces from stretching or warping as you move them.
Bake for 12-15 minutes, depending on the size of your pieces. Smaller pieces bake faster. The edges should be lightly browned and the centers should feel firm to the touch. If they’re still soft in the middle, give them 2 more minutes.
Step 5: Cool Completely
Let the baked pieces cool on the baking sheet for 5 minutes. Then transfer them to a wire rack to cool completely. Do not skip this step. Warm gingerbread is fragile and will crack if you try to move it too soon. I’ve lost more than a few walls this way.
Once completely cool, store the pieces in an airtight container at room temperature until you’re ready to assemble. They’ll keep for up to a week, but I usually assemble within a day or two.
Cooking Tips & Techniques
After years of making gingerbread houses, I’ve collected a few tricks that save time and prevent disaster. Some I learned from professional bakers, most I learned from my own mistakes.
Roll between parchment, not flour. Flour makes the dough dry and tough. Parchment paper prevents sticking without changing the dough’s texture. Plus, cleanup is a breeze. I learned this after a particularly disastrous session where my dough absorbed so much flour it turned into crumbs.
Cut windows before baking. If your design includes windows, cut them out before the dough goes in the oven. Use a small sharp knife or a cookie cutter. The edges will be clean and sharp. Cutting windows after baking is a recipe for cracked walls—trust me, I’ve tried.
Bake on the same day you roll. Rolled dough that sits in the refrigerator overnight can develop a skin that makes it crack during baking. If you need to prep ahead, keep the dough in a disc and roll it fresh. I’ve tested this side by side, and the fresh-rolled dough wins every time.
Test a small piece first. Before committing to a full batch, bake a small test piece. Check for spreading, puffing, and color. Adjust your oven temperature or baking time if needed. Every oven runs differently, and this test saves you from a batch of unusable pieces.
Use a serrated knife for adjustments. If your baked pieces need trimming, use a serrated knife with a gentle sawing motion. A straight blade will chip and crack the edges. I keep a bread knife specifically for this purpose.
Variations & Adaptations
This dough is versatile, and I’ve experimented with several variations over the years. Some worked beautifully, others were learning experiences. Here are my favorites.
Gluten-Free Version
Substitute the all-purpose flour with a 1:1 gluten-free baking flour blend that contains xanthan gum. I’ve used Bob’s Red Mill 1-to-1 Baking Flour with good results. The dough will be slightly more fragile, so handle it gently. Chill it for an extra 30 minutes before rolling. The flavor is almost identical, but the texture is a bit more crumbly. Still buildable, just handle with care.
Spice Variations
For a warmer, more complex flavor, add ½ teaspoon cardamom or allspice to the spice mix. I tried a cardamom-gingerbread house one year, and it smelled incredible. The flavor was subtle but noticeable. You can also increase the ginger to 3 teaspoons for a spicier kick. My sister loves it this way, but I find it a bit much.
Chocolate Gingerbread
Replace ¼ cup of the flour with ¼ cup unsweetened cocoa powder. Reduce the ginger to 1 teaspoon and add 1 teaspoon espresso powder. The result is a dark, rich dough that looks stunning against white royal icing. I made a chocolate gingerbread castle one year, and it was the most photographed thing on my table.
Vegan Adaptation
Use all shortening instead of butter, and replace the egg with a flax egg (1 tablespoon ground flaxseed mixed with 3 tablespoons water, let sit for 5 minutes). The dough will be slightly less rich, but it still holds together well. I’ve tested this for a vegan friend’s holiday party, and nobody noticed the difference.
Serving & Storage Suggestions
Gingerbread houses are meant to be seen and admired, but they’re also meant to be eaten—eventually. Here’s how to handle both.
Display your house on a sturdy cake board or serving platter. Use a dab of royal icing to secure the base to the board. Keep it away from direct sunlight and heat sources, which can cause the gingerbread to soften and sag. I once left a house near a radiator, and the walls started leaning within a day. Lesson learned.
Store unassembled pieces in an airtight container at room temperature for up to a week. Layer them between sheets of parchment paper to prevent sticking. If you’re planning ahead, you can bake the pieces up to two weeks in advance and freeze them. Wrap each piece individually in plastic wrap, then place them in a freezer bag. Thaw at room temperature before assembling.
Assembled houses can be stored at room temperature for up to two weeks. After that, the gingerbread starts to absorb moisture from the air and soften. If you want your house to last longer, display it in a cool, dry place. I’ve had houses last until March in a cool basement, but they’re usually gone long before that.
To eat your house, break it into pieces and enjoy. The gingerbread softens slightly after a few days, making it easier to bite. Some people prefer it fresh and crisp; others like it chewy. I’m in the chewy camp, so I usually wait a few days before breaking into the walls.
Nutritional Information & Benefits
Let’s be honest—gingerbread houses aren’t health food. They’re a holiday tradition, and they’re meant to be enjoyed in moderation. But there are a few bright spots in this recipe worth mentioning.
Estimated nutrition per serving (1 wall piece, about 2 ounces): Calories: 180, Fat: 8g, Saturated Fat: 4g, Carbohydrates: 26g, Fiber: 1g, Sugar: 14g, Protein: 2g, Sodium: 95mg.
Ginger is known for its anti-inflammatory properties and can help with digestion. It’s also what gives gingerbread its signature warmth. Molasses contains iron, calcium, and magnesium—more than refined sugar. It’s also what gives the dough its deep color and rich flavor. Cinnamon has antioxidant properties and can help regulate blood sugar levels.
If you’re watching your sugar intake, you can reduce the brown sugar to ¾ cup, but the dough will be less tender. I’ve tried it, and the texture suffers. For a lower-fat option, use all shortening instead of butter, but the flavor won’t be as rich. This is one of those recipes where the full-fat, full-sugar version is worth it.
This recipe contains gluten, dairy, and eggs. For allergen-friendly options, see the variations section above.
Conclusion
This Sturdy Gingerbread House Dough Recipe is the result of conversations with a carpenter, late-night testing sessions, and a whole lot of failed walls. It’s the recipe I wish I’d had when I started making gingerbread houses years ago. It’s forgiving enough for beginners, precise enough for experienced bakers, and tasty enough that nobody will complain about eating the scraps.
What I love most about this dough is how it brings people together. Frank still comes over to see my gingerbread houses every year. He walks around them, inspecting the corners and the rooflines, and he always nods with approval. “Good bones,” he says. And that’s the highest compliment a retired carpenter can give a baker.
I’d love to see what you create with this recipe. Leave a comment below with your gingerbread house photos, your decorating tips, or your own stories of kitchen triumphs and disasters. Share this recipe with a friend who needs a little structural support in their holiday baking. And remember—if your first house collapses, you’re in good company. Just try again. That’s what Frank would tell you.
Frequently Asked Questions
Why did my gingerbread dough crack when I rolled it out?
Cold dough cracks easily. Let it sit at room temperature for 5-10 minutes before rolling. If it’s still cracking, your dough might be too dry. Add 1 tablespoon of water and knead it in gently.
Can I use this dough for cookies instead of a house?
Absolutely. Roll it to ¼-inch thickness, cut into shapes, and bake for 10-12 minutes. The cookies will be crisp and sturdy—perfect for decorating or dunking in hot cocoa.
How long does the baked gingerbread last?
Unassembled pieces stored in an airtight container last up to a week at room temperature. Assembled houses last about two weeks before they start to soften. You can freeze unassembled pieces for up to two months.
My gingerbread puffed up during baking. What went wrong?
Your dough was likely too warm when it went into the oven. Make sure it’s thoroughly chilled before baking. Also, check your baking powder—old baking powder can cause uneven rising.
Can I use this recipe for a large gingerbread structure?
Yes, but you’ll need to adjust your baking time for larger pieces. Thicker pieces need more time in the oven. Keep an eye on the edges—they should be lightly browned and the centers should feel firm.
Pin This Recipe!
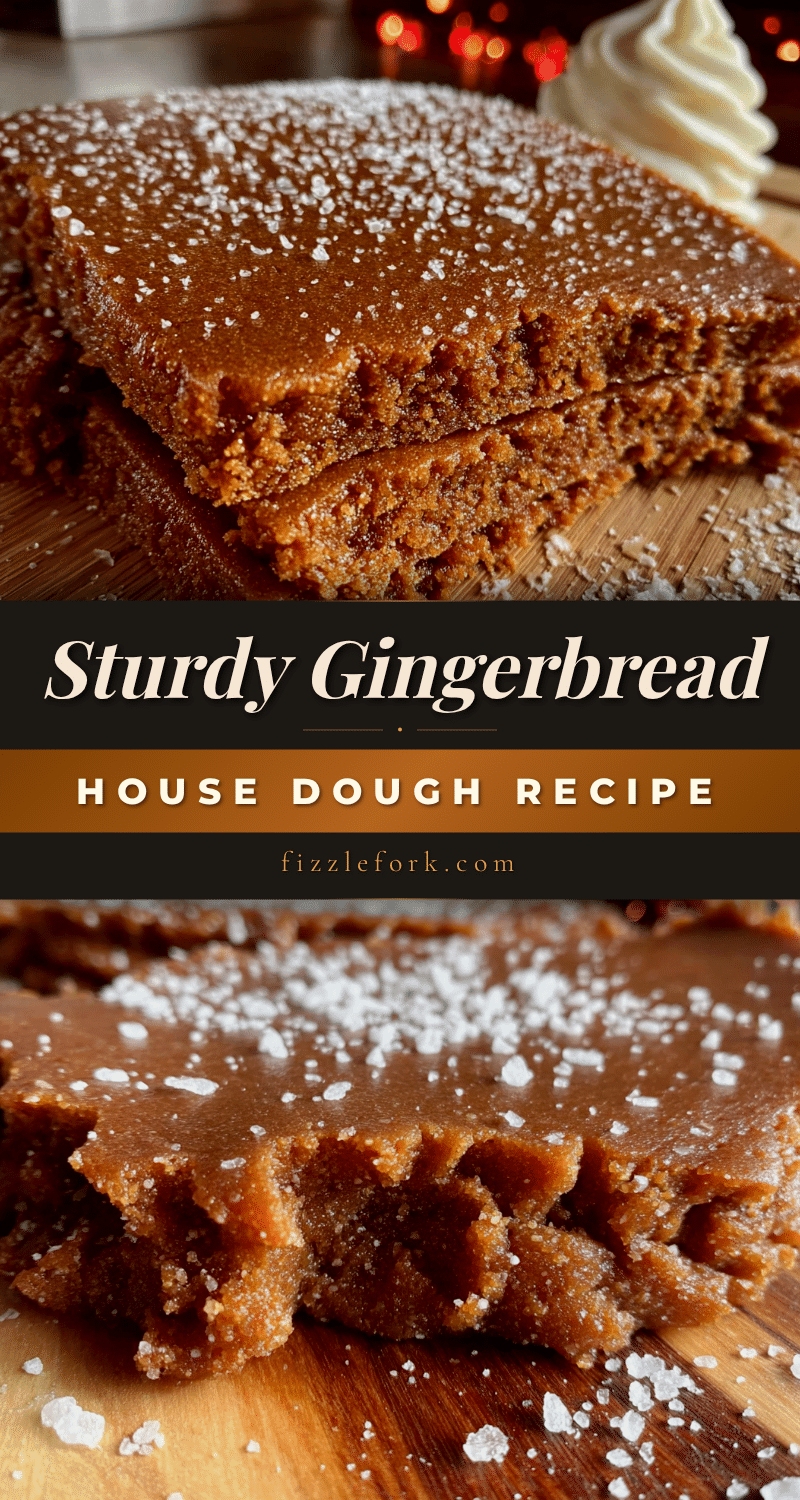
Best Sturdy Gingerbread House Dough Recipe – Buildable & Strong
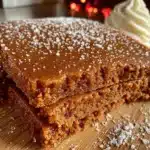
This sturdy gingerbread house dough holds its shape, cuts cleanly, and actually tastes like gingerbread instead of construction material. It’s the result of a collaboration between a retired carpenter and a stubborn home baker, tested through four holiday seasons.
- Prep Time: 30 minutes
- Cook Time: 15 minutes
- Total Time: 2 hours 45 minutes (includes 2 hours chilling)
- Yield: 1 gingerbread house (serves 8-10) 1x
- Category: Dessert
- Cuisine: American
Ingredients
- 3 ½ cups (440g) all-purpose flour
- 1 teaspoon baking powder
- ½ teaspoon salt
- 2 teaspoons ground ginger
- 2 teaspoons ground cinnamon
- 1 teaspoon ground cloves
- ½ teaspoon ground nutmeg
- ½ cup (113g) unsalted butter, softened
- ½ cup (100g) vegetable shortening
- 1 cup (200g) packed dark brown sugar
- 1 large egg
- ½ cup (170g) molasses
- 1 tablespoon water (optional, if dough is too dry)
Instructions
- In a stand mixer bowl, combine ½ cup softened unsalted butter and ½ cup vegetable shortening. Beat on medium speed for about 2 minutes until light and fluffy. Scrape down the sides. Add 1 cup packed dark brown sugar and beat for another 2 minutes until smooth and slightly pale.
- Add 1 large egg and ½ cup molasses. Beat on low speed until just combined. The mixture may look slightly curdled; that’s normal.
- In a separate bowl, whisk together 3 ½ cups all-purpose flour, 1 teaspoon baking powder, ½ teaspoon salt, 2 teaspoons ground ginger, 2 teaspoons ground cinnamon, 1 teaspoon ground cloves, and ½ teaspoon ground nutmeg.
- Gradually add the dry ingredients to the wet mixture, about 1 cup at a time, mixing on low speed after each addition until just combined. The dough will be stiff and slightly crumbly. If too dry, add 1 tablespoon of water and mix again.
- Divide the dough into two equal discs. Wrap each tightly in plastic wrap. Refrigerate for at least 2 hours, preferably overnight.
- Preheat oven to 350°F (175°C). Line baking sheets with parchment paper.
- Place one disc of dough between two sheets of parchment paper. Roll to ¼-inch thickness. If dough cracks at edges, let it sit at room temperature for 5 minutes.
- Peel off top parchment layer. Place templates on dough and cut around them with a sharp knife or pizza cutter. Leave templates in place and transfer parchment with cut dough onto a baking sheet.
- Bake for 12-15 minutes, depending on piece size. Edges should be lightly browned and centers firm.
- Let baked pieces cool on baking sheet for 5 minutes, then transfer to a wire rack to cool completely.
- Store completely cooled pieces in an airtight container at room temperature until ready to assemble.
Notes
Chilling the dough is crucial to prevent spreading. Roll between parchment paper instead of using flour to avoid drying out the dough. Cut windows before baking for clean edges. Test a small piece first to adjust oven temperature if needed.
Nutrition
- Serving Size: 1 wall piece (about
- Calories: 180
- Sugar: 14
- Sodium: 95
- Fat: 8
- Saturated Fat: 4
- Carbohydrates: 26
- Fiber: 1
- Protein: 2
Keywords: gingerbread house, sturdy gingerbread dough, buildable gingerbread, holiday baking, Christmas gingerbread