It was 11:47 PM on a very ordinary Wednesday in late October, and I had a sudden, almost violent need for pumpkin pie. Not the kind from the grocery store with the sad, soggy bottom crust. I needed the real thing—deep, spiced custard and a crust that shatters into buttery shards. The problem? I had exactly zero shortening, no pre-made crust dough, and my rolling pin had been commandeered by my kid for a playdough project. I did have a stick of frozen butter, a bag of flour that was definitely not bread flour, and a very specific, slightly unhinged idea that had been rattling around my brain for weeks: what if I used a box grater on the frozen butter instead of a pastry cutter? It felt like a cooking hack that would either be brilliant or a complete disaster. Honestly, at that hour, I was too tired to care which. I just needed that pie.
So, there I was, grating frozen butter into a bowl of flour like a woman possessed, the only light coming from the hood over the stove. The kitchen was quiet, save for the rhythmic scraping sound. My fingers were numb, but the idea felt right. I added ice water by the tablespoon, my hands working the shaggy dough together, and I swear it felt different—more layered, more promising. I didn’t even chill it the full hour the recipes always demand. I gave it 20 minutes and rolled it out. The edges cracked a bit, but I just pressed them back together. It was imperfect, and it was mine. That pie—the one born from a late-night craving and a weird kitchen experiment—was the best I’ve ever made. The crust was impossibly flaky, and the filling was that perfect, wobbly, spiced custard. Maybe you’ve been there, staring into your fridge at 11 PM, knowing you can make something magical out of what you have. That’s the spirit of this recipe.
Why You’ll Love This Recipe
This isn’t just another pumpkin pie recipe you’ll find online. This is the one I’ve tested eight times over two Thanksgivings and a handful of random Tuesdays. It’s the version that finally made my mother-in-law ask for the recipe, which is the highest compliment a home baker can get. Here is why this particular pie is the one you need to make:
- Unbelievably Flaky Crust: The secret is grating frozen butter. It creates tiny, cold pockets of fat that steam in the oven, creating hundreds of delicate, flaky layers. It’s a game-changer, and I promise you won’t go back to the pastry cutter.
- Perfectly Spiced Filling: No bland, one-note pumpkin custard here. We’re using a careful balance of cinnamon, ginger, nutmeg, and a tiny pinch of cloves. It’s warm, aromatic, and tastes like autumn in a spoon.
- Simple, Honest Ingredients: You don’t need fancy bakery supplies. Just butter, flour, pumpkin puree, eggs, cream, and spices. Things you probably already have in your pantry.
- Make-Ahead Friendly: You can prep the dough days in advance and the filling a day ahead. This pie is a lifesaver for holiday stress, letting you assemble and bake on the day with zero fuss.
- Crowd-Pleasing Classic: It’s the dessert that disappears first at every gathering. It’s familiar enough to be comforting, but the incredible crust makes it feel special. It’s the kind of pie that makes people close their eyes after the first bite.
This recipe is more than just instructions. It’s the confidence to know that you can create something truly spectacular from scratch. It’s comfort food at its finest—a little bit of work for a whole lot of soul-soothing reward. You’ll feel like a pastry pro, even if you’ve never made a pie crust from scratch in your life.
What Ingredients You Will Need
This recipe uses simple, honest ingredients to build a pie with deep, complex flavor. The magic is in the technique, not a long list of exotic items. Here is everything you need, broken down by the crust and the filling.
For the Flaky Butter Crust
- 1 ¼ cups (160g) all-purpose flour (I prefer King Arthur Flour for its consistent protein content, which gives a sturdy but tender crust)
- ½ teaspoon salt (fine sea salt is best; it dissolves evenly into the flour)
- 1 teaspoon granulated sugar (just a touch helps with browning and adds a whisper of sweetness)
- ½ cup (1 stick / 113g) unsalted butter, frozen solid (This is non-negotiable for the flakiest crust. European-style butter like Plugrà has a higher fat content, which makes it even more tender)
- 3-5 tablespoons ice water (as cold as you can get it; add an ice cube to your water glass)
For the Classic Pumpkin Filling
- 1 (15-ounce / 425g) can pumpkin puree (Not pumpkin pie filling! Look for 100% pure pumpkin. Libby’s is my go-to for its consistent, thick texture and deep color)
- ¾ cup (150g) packed light brown sugar (Adds moisture and a deeper, molasses-like sweetness than white sugar alone)
- 2 large eggs (room temperature is best for a smooth, emulsified filling. If you forget, place them in a bowl of warm water for 5 minutes)
- 1 cup (240ml) heavy cream (For the richest, silkiest texture. You can substitute half-and-half for a slightly lighter filling, but it won’t be as luxurious)
- 2 teaspoons ground cinnamon
- 1 teaspoon ground ginger
- ½ teaspoon ground nutmeg (freshly grated is amazing if you have it, but pre-ground works perfectly)
- ¼ teaspoon ground cloves (a little goes a long way; it’s a powerful spice)
- ½ teaspoon salt (essential to balance the sweetness and brighten all the spices)
- 1 teaspoon vanilla extract (pure, not imitation, for the best flavor)
Ingredient Tip: For the best flavor, bloom your spices. In a small, dry skillet over medium heat, toast the cinnamon, ginger, nutmeg, and cloves for about 30-60 seconds until fragrant. Let them cool before adding them to the filling. It takes two minutes and makes a world of difference.
Equipment Needed
You don’t need a professional pastry kitchen for this, but having the right tools makes the job much easier. Here is what I use every time I make this pie.
- 9-inch Pie Plate: A standard glass or ceramic pie plate works great. I love my deep-dish Emile Henry pie dish because it heats evenly and gives a beautiful golden-brown crust. Avoid metal pans, as they can conduct heat too quickly and burn the crust.
- Box Grater: This is my secret weapon for the flaky crust. A standard four-sided box grater is perfect for grating the frozen butter.
- Large Mixing Bowls: You’ll need one for the crust and one for the filling. Stainless steel is great because it stays cold.
- Pastry Blender or Two Forks: If you don’t use the grater method, you’ll need this to cut cold butter into the flour. I haven’t touched mine since I started grating.
- Rolling Pin: A standard wooden rolling pin is fine. If you don’t have one, a clean wine bottle works in a pinch!
- Plastic Wrap: Essential for chilling the dough.
- Whisk: For combining the filling ingredients smoothly.
- Parchment Paper & Pie Weights: For blind baking the crust. Dried beans or rice work perfectly as a cheap alternative to pie weights.
- Cooling Rack: A wire rack is crucial for letting the pie cool evenly so the bottom doesn’t get soggy.
Budget-Friendly Tip: Don’t have a box grater? You can still make this crust by cutting the frozen butter into small cubes (about ¼-inch) with a sharp knife. It’s a little more work, but the result is almost as good.
Preparation Method
Let’s make some pie. Take your time with the crust—it’s the part that needs the most care. The filling is wonderfully forgiving. I’ve broken it down into clear steps so you can follow along easily.
Step 1: Make the Flaky Crust Dough
- In a large bowl, whisk together the flour, salt, and sugar.
- Take your frozen stick of butter. Using the large holes of a box grater, grate the entire stick directly into the flour mixture. Toss the grated butter shreds with the flour using a fork to coat them. Work quickly so the butter stays cold.
- Drizzle 3 tablespoons of the ice water over the flour-butter mixture. Using a fork, stir and press the mixture together. It will look shaggy and dry. Squeeze a small piece of dough in your hand. If it holds together, it’s ready. If it crumbles, add the remaining water, one tablespoon at a time, until it just comes together. Don’t overwork it.
- Turn the shaggy dough out onto a sheet of plastic wrap. Using the edges of the plastic wrap, press the dough into a 5-inch disc. It will feel rough and have visible butter chunks—that’s a good thing. Wrap tightly and refrigerate for at least 1 hour, or up to 3 days.
Step 2: Blind Bake the Crust (This is Key!)
- Preheat your oven to 375°F (190°C). Place a rack in the lower third of the oven.
- On a lightly floured surface, roll the chilled dough into a 12-inch circle, about ⅛-inch thick. Don’t worry if the edges crack a little—just press them back together. Gently transfer the dough to your pie plate, pressing it into the bottom and up the sides. Trim the overhang to about ½-inch, then tuck it under itself and crimp the edges with your fingers or a fork.
- Place the crust in the freezer for 15 minutes. This is crucial to prevent shrinkage.
- Line the frozen crust with a sheet of parchment paper, pressing it into the edges. Fill with pie weights or dried beans. Bake for 15 minutes.
- Carefully remove the parchment and weights. Prick the bottom of the crust all over with a fork (this is called docking). Return the crust to the oven and bake for another 10-12 minutes, until the bottom looks dry and is just starting to turn a light golden color.
- Remove from the oven and let it cool slightly on a wire rack while you make the filling. Leave the oven on, but reduce the temperature to 350°F (175°C).
Step 3: Make the Pumpkin Filling
- In a large bowl, whisk together the pumpkin puree and brown sugar until smooth.
- Add the eggs one at a time, whisking well after each addition until fully incorporated.
- Pour in the heavy cream and vanilla extract, and whisk until the mixture is completely smooth and glossy.
- Add the cinnamon, ginger, nutmeg, cloves, and salt. Whisk vigorously for a full minute to ensure the spices are evenly distributed and the filling is aerated. This helps create a lighter texture.
Step 4: Bake the Pie
- Place the blind-baked crust on a baking sheet (this catches any drips and helps the bottom cook evenly).
- Pour the filling into the warm crust. It will fill it right to the brim—that’s perfect.
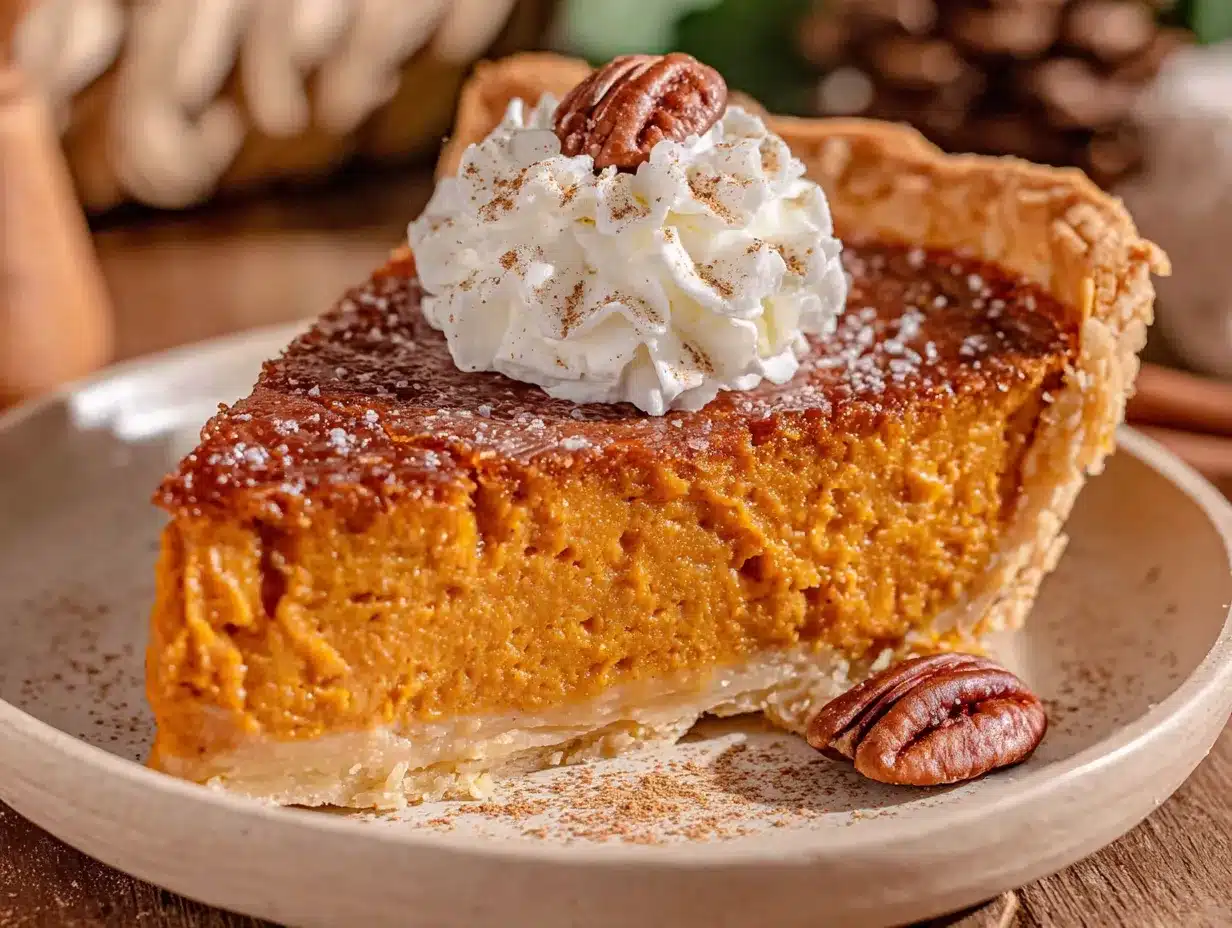
- Carefully transfer the baking sheet to the lower rack of the oven. Bake for 50-60 minutes. The pie is done when the edges are set and puffed, but the center still has a slight jiggle—like a firm Jell-O. A knife inserted 1-inch from the edge should come out clean, but the very center will still be a bit wobbly.
- Place the pie on a wire rack and let it cool completely, at least 2 hours. The filling will continue to set as it cools. Do not cut into it while it’s warm, or it will be a soupy mess.
Cooking Tips & Techniques
Over the years, I’ve made every mistake in the book with pumpkin pie. I’ve had a soggy bottom, a cracked top, and a filling that tasted like nothing but sweet squash. Here’s what I learned so you don’t have to repeat my failures.
- The Cold Butter is Everything: I cannot stress this enough. Your butter must be frozen solid. If it starts to soften while you’re grating it, pop the whole bowl back in the freezer for 5 minutes. Those cold butter shards are what create the steam pockets for the flaky layers.
- Don’t Overwork the Dough: The more you handle the dough, the tougher it gets. You want to see streaks of butter. When you press the dough into a disc, it should look a little like a Jackson Pollock painting. That’s good.
- Blind Bake is Not Optional: I used to skip this step, thinking it was fussy and unnecessary. Every single one of those pies had a soggy, undercooked bottom crust. Blind baking gives the crust a head start, ensuring it stays crisp and flaky under the heavy, wet filling.
- The Jiggle Test: Don’t rely solely on a timer. The center of the pie should have a slight, gentle wobble when you gently shake the pan. It will look underdone, but it will set perfectly as it cools. Overbaking is the number one cause of a cracked, grainy filling.
- Let it Cool Completely: I know it’s torture, but you must let the pie cool for at least 2 hours. The custard needs this time to set up properly. If you cut into it early, you’ll have a delicious puddle of pumpkin soup on your plate.
Variations & Adaptations
This classic recipe is a fantastic base for getting creative. Here are a few ways I’ve adapted it over the years to suit different moods and diets.
- Spiced Maple Pumpkin Pie: Replace the brown sugar with ¾ cup of pure maple syrup. It adds a beautiful, woodsy sweetness. Just note that the filling will be slightly softer and may need an extra 5-10 minutes in the oven.
- Gluten-Free Version: Swap the all-purpose flour for a high-quality 1:1 gluten-free baking flour blend (I like Bob’s Red Mill). The crust will be a bit more delicate to work with, but the flavor is fantastic. You may need to add an extra tablespoon of ice water.
- Chocolate-Pumpkin Swirl: Melt 4 ounces of semi-sweet chocolate and let it cool slightly. Pour the pumpkin filling into the crust, then drizzle the melted chocolate on top. Use a knife to gently swirl it into the filling to create a marbled effect. It’s a showstopper.
- Pumpkin Pie with Gingersnap Crust: For a super quick version, skip the homemade crust. Crush 2 cups of gingersnap cookies and mix with 5 tablespoons of melted butter. Press into the pie plate and blind bake for 10 minutes. The spicy ginger flavor is a perfect match for the pumpkin.
Serving & Storage Suggestions
This pie is a star on its own, but the right accompaniments can make it truly unforgettable. Here is how I like to serve and store it.
Serving Tips: Serve the pie at room temperature or slightly warm. A slice of this pie with a generous dollop of lightly sweetened, softly whipped cream is the classic pairing for a reason. The cool, airy cream cuts through the rich, spiced custard beautifully. For an extra special touch, add a scoop of vanilla bean ice cream or a drizzle of salted caramel sauce.
Storage Instructions: This pie keeps beautifully. Once completely cool, cover it loosely with plastic wrap or aluminum foil and store it in the refrigerator for up to 4 days. The flavors actually meld and deepen overnight, making it even better the next day. I honestly think day-old pumpkin pie is the best pumpkin pie.
Reheating: I prefer this pie cold or at room temperature. If you want a warm slice, place individual slices on a baking sheet and warm in a 300°F (150°C) oven for 10 minutes. Do not microwave it—it will ruin the texture of the crust and make the filling weep.
Freezing: You can freeze the fully baked and cooled pie for up to 3 months. Wrap it tightly in a layer of plastic wrap, then a layer of foil. Thaw overnight in the refrigerator before serving. You can also freeze the unbaked pie dough disc for up to 3 months.
Nutritional Information & Benefits
Let’s be real—this is a dessert, not a health food. But it’s made with real, whole ingredients, and there are some surprising benefits hiding in that slice. Here is an estimate per slice (based on 8 slices).
- Calories: Approximately 380-420
- Fat: 24g
- Carbohydrates: 42g
- Protein: 6g
- Fiber: 3g
- Sugar: 24g
Health Highlights: Pumpkin is packed with vitamin A (beta-carotene), which is fantastic for your eyes and immune system. It’s also a good source of fiber. The spices—cinnamon, ginger, and nutmeg—are known for their anti-inflammatory properties. The eggs and cream provide protein and calcium. So while it’s a treat, it’s a treat that gives you a little something back. It’s comfort you can feel a tiny bit good about.
Conclusion
This classic homemade pumpkin pie with its impossibly flaky butter crust is more than just a recipe. It’s a skill. It’s the feeling of pride you get when you pull a beautiful, homemade pie out of the oven. It’s the warmth of sharing something you made with your own hands with the people you love. That late-night craving that started it all? It turned into my go-to pie, the one I make for every holiday and every quiet, cozy Sunday.
I really hope you give this a try. Don’t be afraid of the crust—it’s more forgiving than you think. And remember, your pie doesn’t have to be perfect. A slightly cracked edge or a wobbly center is just a sign that it was made with love. Make it your own. Serve it with extra cream. Share it with someone who needs a little comfort.
I’d love to hear how it turns out for you! Drop a comment below and let me know if you tried the grating trick, or what variation you came up with. Happy baking, friend.
Frequently Asked Questions
Can I use a store-bought crust to save time?
Absolutely. While the homemade flaky butter crust is the star of this recipe, a high-quality store-bought crust will still give you a delicious pie. Just be sure to blind bake it according to the package directions before adding the filling.
Why did my pumpkin pie crack on top?
Cracks usually happen from overbaking. The custard gets too hot and the proteins tighten up, causing the surface to split. Make sure you pull the pie out when the center still has a slight jiggle. Letting it cool slowly on a wire rack also helps prevent cracking.
Can I make this pie dairy-free?
Yes! For a dairy-free crust, substitute the butter with a high-quality vegan butter stick (like Miyoko’s), frozen and grated. For the filling, replace the heavy cream with full-fat canned coconut milk. The flavor will be slightly different but still delicious.
How do I prevent a soggy bottom crust?
Blind baking is your best defense. Also, make sure to dock the crust with a fork before the second bake, and pour the filling into the crust while it’s still warm from the oven. This helps the bottom start cooking immediately.
Can I use fresh pumpkin instead of canned?
You can, but I don’t recommend it. Fresh pumpkin has a much higher water content than canned puree, which can make your filling watery and thin. If you want to use fresh, you need to roast it, puree it, and then strain it through cheesecloth for several hours to remove the excess moisture. Canned pumpkin is consistent, convenient, and makes a superior pie.
Pin This Recipe!
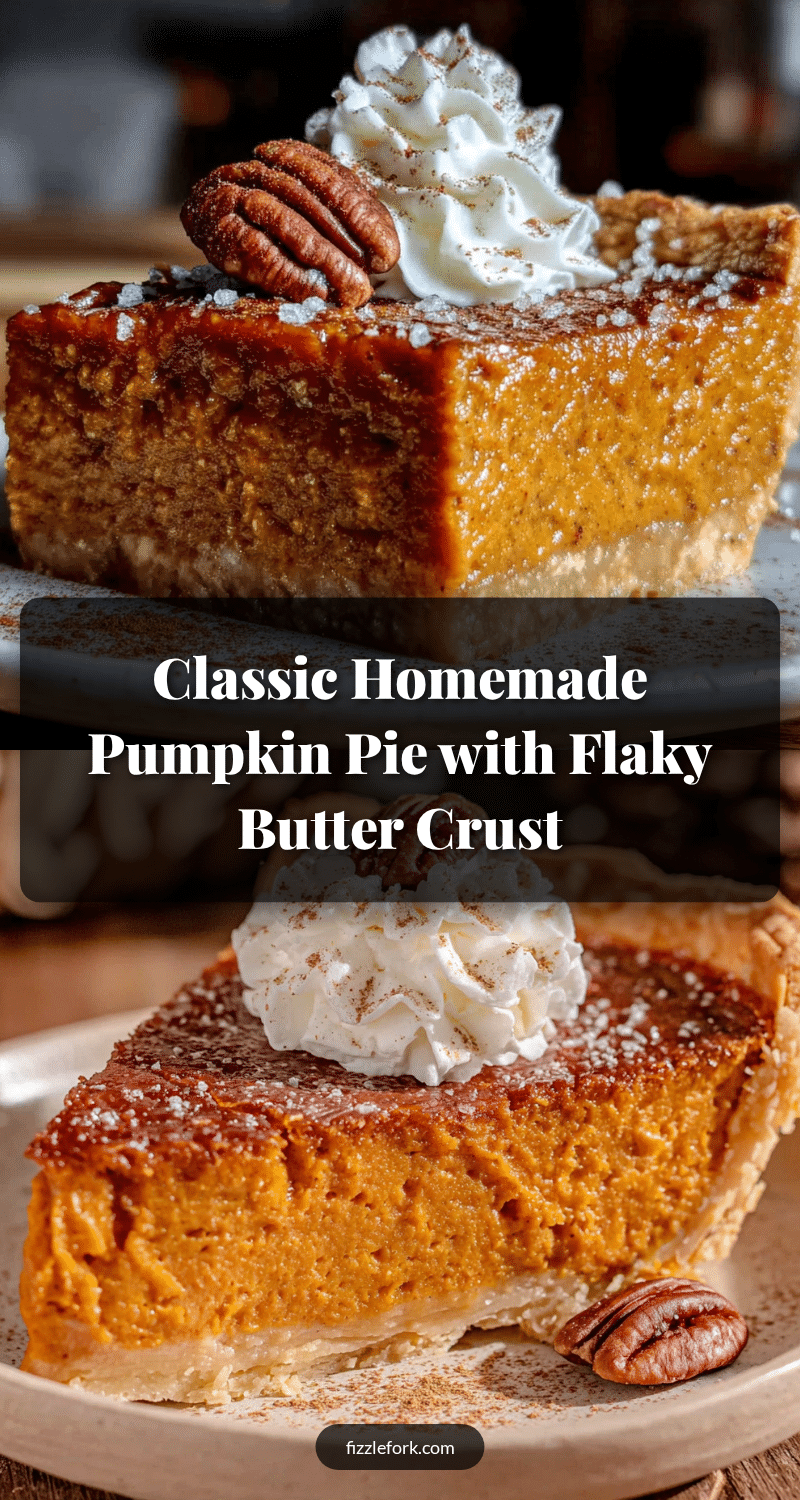
Classic Homemade Pumpkin Pie with Easy Flaky Crust
This classic pumpkin pie features an impossibly flaky butter crust made by grating frozen butter, filled with a perfectly spiced, silky pumpkin custard. It’s the ultimate comfort dessert that will make you feel like a pastry pro.
- Prep Time: 30 minutes
- Cook Time: 1 hour 10 minutes
- Total Time: 4 hours 40 minutes (includes chilling and cooling)
- Yield: 8 servings 1x
- Category: Dessert
- Cuisine: American
Ingredients
- 1 ¼ cups (160g) all-purpose flour
- ½ teaspoon fine sea salt
- 1 teaspoon granulated sugar
- ½ cup (1 stick / 113g) unsalted butter, frozen solid
- 3–5 tablespoons ice water
- 1 (15-ounce / 425g) can pumpkin puree (100% pure pumpkin)
- ¾ cup (150g) packed light brown sugar
- 2 large eggs, room temperature
- 1 cup (240ml) heavy cream
- 2 teaspoons ground cinnamon
- 1 teaspoon ground ginger
- ½ teaspoon ground nutmeg
- ¼ teaspoon ground cloves
- ½ teaspoon salt
- 1 teaspoon vanilla extract
Instructions
- Make the crust: In a large bowl, whisk together flour, salt, and sugar. Grate frozen butter directly into the flour mixture using the large holes of a box grater. Toss with a fork to coat. Drizzle 3 tablespoons ice water over mixture and stir with a fork until shaggy. Squeeze a small piece; if it holds together, it’s ready. If not, add more water 1 tablespoon at a time. Turn dough onto plastic wrap, press into a 5-inch disc, wrap tightly, and refrigerate for at least 1 hour or up to 3 days.
- Blind bake the crust: Preheat oven to 375°F (190°C). Roll chilled dough on a floured surface into a 12-inch circle, ⅛-inch thick. Transfer to a 9-inch pie plate, trim overhang to ½-inch, tuck under, and crimp edges. Freeze for 15 minutes. Line with parchment paper and fill with pie weights or dried beans. Bake for 15 minutes. Remove parchment and weights, prick bottom with a fork, and bake for another 10-12 minutes until dry and lightly golden. Cool slightly on a wire rack. Reduce oven temperatu…
- Make the filling: In a large bowl, whisk together pumpkin puree and brown sugar until smooth. Add eggs one at a time, whisking well after each. Pour in heavy cream and vanilla extract, whisk until smooth and glossy. Add cinnamon, ginger, nutmeg, cloves, and salt. Whisk vigorously for 1 minute to aerate.
- Bake the pie: Place blind-baked crust on a baking sheet. Pour filling into warm crust. Bake on lower rack for 50-60 minutes, until edges are set and center has a slight jiggle. Cool completely on a wire rack for at least 2 hours before slicing.
Notes
For the flakiest crust, ensure butter is frozen solid. Blind baking is essential to prevent a soggy bottom. The center should have a slight jiggle when done; it will set as it cools. Let pie cool completely for at least 2 hours before cutting. For best flavor, bloom spices in a dry skillet for 30-60 seconds before adding to filling.
Nutrition
- Serving Size: 1 slice
- Calories: 400
- Sugar: 24
- Sodium: 380
- Fat: 24
- Saturated Fat: 14
- Carbohydrates: 42
- Fiber: 3
- Protein: 6
Keywords: pumpkin pie, homemade pie, flaky crust, Thanksgiving dessert, fall baking, pumpkin dessert, butter crust