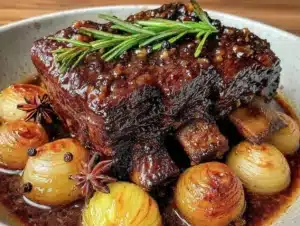
Rosa wasn’t trying to impress anyone. I’d stopped by to borrow her garden shears—mine had vanished into the void of my garage—and the smell hit me before I even got to her back door. It was nutty, warm, and somehow both savory and sweet, like autumn had been distilled into a single scent. She was standing at her stove, wearing an old sweater with a hole in the elbow, casually shaking a pan like she was making toast.
“What is that?” I asked, probably sounding a little too desperate.
“Oh, just some squash,” she said, not even looking up. “My husband doesn’t really like vegetables, so I kinda have to trick him.” She shrugged, then tossed a few sage leaves into the foaming butter. The sizzle was immediate, and the smell went from wonderful to absolutely ridiculous. I stood there, holding my borrowed shears, completely frozen by what was happening in that pan.
Honestly, I think I forgot why I’d even come over. I just watched her finish the dish—splashing the brown butter over the roasted squash, topping it with those crispy sage leaves like they were the most obvious finishing touch in the world. She didn’t plate it fancy. She didn’t take a photo. She just scooped some onto a plate and handed me a fork, saying, “Here, tell me if it needs more salt.”
It did not need more salt. Let me tell you, that first bite stopped me mid-conversation. The squash was caramelized and tender, the brown butter was nutty and rich, and those sage leaves shattered like glass. I mean, really. I couldn’t believe something this good came out of a “trick my husband into eating vegetables” experiment. Maybe you’ve been there—stumbling onto a recipe so simple and perfect that you feel like you’ve discovered a secret.
I asked for the recipe, obviously. Rosa laughed and said, “There’s no recipe. It’s just squash, butter, and sage. You figure it out.” And she wasn’t being rude—she genuinely thought it was that simple. But of course, the magic is in the details. So I went home, bought about six honeynut squashes, and spent the next week figuring it out. This cozy brown butter honeynut squash with crispy sage is the result of that obsession. It’s the kind of dish that makes you close your eyes after the first bite, and it’s exactly what you want to be eating right now, this season, when the air gets crisp and the farmers’ markets are overflowing with winter squash.
Why You’ll Love This Recipe
I’ve tested this recipe more times than I care to admit. I’ve burned the butter. I’ve undercooked the squash. I’ve forgotten the sage entirely (don’t do that). But after all those trials, I can tell you with total confidence that this version is the one. Here’s why it works:
- Quick & Easy : This comes together in about 35 minutes, start to finish. Perfect for a busy weeknight when you want something that feels special without spending hours in the kitchen.
- Simple Ingredients : You only need four main ingredients—honeynut squash, butter, fresh sage, and salt. That’s it. No fancy grocery trips required.
- Perfect for Fall Gatherings : Whether it’s Thanksgiving, a cozy Sunday dinner, or just a Tuesday that needs a little extra warmth, this dish fits right in. It’s elegant enough for company but easy enough for a regular night.
- Crowd-Pleaser : I’ve served this to people who “don’t like squash” and watched them go back for seconds. The brown butter and crispy sage do something magical—they turn a humble vegetable into the star of the meal.
- Unbelievably Delicious : The texture combo is next-level. You get the creamy, caramelized squash against the crunchy, paper-thin sage leaves, all tied together with that nutty, toasty brown butter. It’s comfort food reimagined—healthier, faster, but with the same soul-soothing satisfaction.
What makes this recipe different from the rest? It’s the technique of browning the butter just right—watching it go from yellow to golden to that deep amber color, then immediately adding the sage so it crisps up in the hot fat. That’s the secret. It’s not just another roasted squash recipe. It’s your new favorite way to eat vegetables, period.
What Ingredients You Will Need
This recipe uses simple, wholesome ingredients to deliver bold flavor and satisfying texture without the fuss. Most of these are fall pantry staples, and you might already have them on hand.
- Honeynut squash (2 medium) : These little guys are smaller than butternut squash and have a sweeter, more concentrated flavor. They’re also the perfect size for individual servings. Look for ones that feel heavy for their size with firm, unblemished skin. If you can’t find honeynut, you can substitute butternut squash—just cut it into smaller pieces and adjust the cooking time slightly.
- Unsalted butter (4 tablespoons, or 1/2 stick) : This is where the magic happens. I recommend using a good-quality unsalted butter like Kerrygold or Plugrà. The butter needs to be unsalted so you can control the seasoning. As it browns, it develops those nutty, toasty notes that make this dish unforgettable.
- Fresh sage leaves (12-15 leaves) : Fresh sage is non-negotiable here. Dried sage won’t crisp up the same way, and you’ll miss out on that beautiful texture contrast. Look for sage leaves that are vibrant green and not wilted. I like to pick the larger leaves because they’re easier to handle and look prettier on the plate.
- Kosher salt (1 teaspoon, plus more for finishing) : I use Diamond Crystal kosher salt for its clean flavor and easy-to-pinch texture. If you’re using a finer salt, like table salt, reduce the amount by half. You’ll also want a little flaky sea salt, like Maldon, for finishing—it adds that nice crunch and burst of saltiness.
- Black pepper (1/4 teaspoon, freshly ground) : Freshly ground pepper makes a difference here. It adds a subtle warmth that complements the nutty brown butter and sweet squash.
- Olive oil (1 tablespoon) : Just a little to coat the squash before roasting. It helps the squash caramelize without drying out. Use a good-quality extra-virgin olive oil if you have it.
- Maple syrup (1 tablespoon, optional) : This is totally optional, but if your squash isn’t as sweet as you’d like, a light drizzle of maple syrup before roasting can enhance the natural sweetness. I only add this if the squash is on the less-sweet side, which can happen early in the season.
That’s it. Seriously. You can make this dish with just these ingredients, and the result is something that tastes like it took way more effort than it actually did. I love recipes like that—ones that feel like a secret weapon in your cooking arsenal.
Equipment Needed
You don’t need a lot of fancy tools for this recipe, which is part of its charm. Here’s what you’ll need:
- Baking sheet (half-sheet pan) : A rimmed baking sheet is ideal for roasting the squash. The rim catches any juices that might release during cooking. I use my trusty Nordic Ware half-sheet pan for everything—it’s sturdy, heats evenly, and has never warped on me.
- Parchment paper : Lining the baking sheet makes cleanup a breeze and prevents the squash from sticking. You can also use a silicone baking mat if you prefer.
- Medium skillet or frying pan : You’ll need this for browning the butter and crisping the sage. A light-colored skillet is actually helpful here because it lets you see the butter change color as it browns. If you only have dark non-stick pans, just be extra careful not to burn the butter.
- Sharp chef’s knife : Honeynut squash are small but dense. A sharp knife makes cutting them in half much safer and easier. I use my 8-inch Wüsthof chef’s knife for this.
- Cutting board : A sturdy cutting board that won’t slip around while you’re cutting the squash. I put a damp paper towel under mine to keep it in place.
- Measuring spoons : For measuring the butter, oil, and salt.
- Pastry brush (optional) : If you want to brush the olive oil onto the squash instead of drizzling it, a pastry brush works great. But honestly, your hands work just fine too.
- Small bowl : For mixing the olive oil and maple syrup if you’re using it.
If you don’t have a pastry brush, don’t worry. I’ve made this recipe dozens of times, and I often just use my fingers to rub the oil onto the squash. It’s not fancy, but it works.
Preparation Method

Let’s get cooking. This recipe moves fast, so I recommend reading through all the steps before you start. Trust me—I learned the hard way that brown butter waits for no one.
- Preheat your oven to 400°F (200°C). Position a rack in the middle of the oven. Line a baking sheet with parchment paper and set it aside.
- Prepare the squash. Wash the honeynut squash well and pat them dry. Using a sharp chef’s knife, carefully cut each squash in half lengthwise. Scoop out the seeds and stringy pulp with a spoon. (You can save the seeds and roast them later if you want—they’re delicious!) Place the squash halves cut-side up on the prepared baking sheet.
- Season the squash. Drizzle or brush the cut sides of the squash with the olive oil. If you’re using maple syrup, mix it with the oil first, then brush it on. Sprinkle the squash with 1/2 teaspoon of kosher salt and a pinch of black pepper. Flip the squash halves over so they’re cut-side down on the baking sheet. This helps them caramelize beautifully.
- Roast the squash. Place the baking sheet in the preheated oven and roast for 25-30 minutes, or until the squash is tender when pierced with a fork. The skin should be slightly wrinkled and the flesh should be deep orange and soft. The exact time will depend on the size of your squash—smaller ones might be done closer to 20 minutes, while larger ones might need 35. Start checking at 20 minutes.
- While the squash roasts, make the brown butter. About 5 minutes before the squash is done, place the butter in a medium skillet over medium heat. Let it melt completely, then continue cooking, swirling the pan occasionally. The butter will start to foam and bubble. After a few minutes, the foam will subside and you’ll see golden brown specks forming at the bottom of the pan. This is the milk solids toasting—and it’s exactly what you want. The butter will smell nutty and amazing. This whole process takes about 3-4 minutes from when the butter melts.
- Crisp the sage. As soon as the butter reaches that deep golden color, immediately add the fresh sage leaves to the pan. They’ll sizzle and curl up almost instantly. Let them cook for about 10-15 seconds, then use tongs or a fork to transfer them to a paper towel-lined plate. They’ll crisp up further as they cool. Don’t leave them in the butter too long, or they’ll burn and turn bitter.
- Finish the brown butter. Remove the skillet from the heat. The brown butter should be a beautiful amber color with dark specks. Stir in the remaining 1/2 teaspoon of kosher salt and a pinch of black pepper. If you want a little extra warmth, you can add a pinch of cayenne or cinnamon here—both work surprisingly well.
- Assemble the dish. Once the squash is done roasting, carefully flip the halves over so they’re cut-side up. Drizzle the warm brown butter generously over each squash half. Let it soak in for a minute—the squash will absorb some of that nutty goodness.
- Garnish and serve. Top each squash half with a few crispy sage leaves. Sprinkle with a pinch of flaky sea salt if you have it. Serve immediately while everything is warm and the sage is still crunchy.
A quick note: Don’t skip the step where you let the squash rest with the brown butter for a minute. I know it’s tempting to dig in right away, but that resting time lets the flavors meld. The squash soaks up the butter like a sponge, and the result is so much better.
Cooking Tips & Techniques
This recipe is simple, but there are a few tricks I’ve picked up along the way. Let me save you from my own mistakes.
Watch the butter like a hawk. Brown butter can go from perfect to burnt in about 15 seconds. The moment you see those golden brown specks form and smell that nutty aroma, pull the pan off the heat. I’ve burned my fair share of butter, and let me tell you, there’s no coming back from burnt butter. It tastes bitter and sad. If you’re nervous, you can use a light-colored skillet so you can actually see the color change.
Dry your sage leaves thoroughly. Wet sage leaves will sputter and steam instead of crisping up. Pat them dry with a paper towel before adding them to the butter. Also, make sure the butter is hot enough when you add the sage. If it’s not sizzling immediately, the sage will absorb the butter and get soggy instead of crispy.
Don’t overcrowd the pan. If you’re making a double batch, brown the butter in batches. Adding too many sage leaves at once will lower the temperature of the butter, and they won’t crisp properly. Work in small batches for the best results.
Choose the right squash. Honeynut squash are ideal because they’re sweeter and creamier than butternut squash. But if you can’t find them, look for small butternut squash or even delicata squash. Delicata has edible skin, so you don’t even have to peel it—just halve, seed, and roast. The cooking time will vary, so keep an eye on it.
Multitask like a pro. Start browning the butter when the squash has about 5 minutes left in the oven. That way, everything finishes at the same time, and you can serve the dish piping hot. I’ve made the mistake of letting the squash sit while I fumbled with the butter, and it’s just not the same. Timing is everything here.
Save the browned butter solids. When you pour the brown butter over the squash, make sure you scrape out all those dark specks from the bottom of the pan. Those toasted milk solids are packed with flavor—they’re the whole point of browning butter. Don’t leave them behind!
Variations & Adaptations
This recipe is a great starting point, but don’t be afraid to make it your own. Here are some variations I’ve tried and loved:
Maple-Cinnamon Version : Add 1 tablespoon of maple syrup and 1/2 teaspoon of cinnamon to the brown butter after you remove it from the heat. Stir well, then drizzle over the squash. The sweetness of the maple and the warmth of the cinnamon pair beautifully with the nutty brown butter. I made this for a Friendsgiving dinner, and it was the first dish to disappear.
Spicy Brown Butter : Add a pinch of red pepper flakes or a small dried chili to the butter as it browns. The heat cuts through the richness and adds a lovely kick. I like to use Aleppo pepper for a fruity, mild heat, but regular red pepper flakes work too. Just be careful not to add too much—you want warmth, not a fire alarm.
Herb Variations : While crispy sage is classic, you can experiment with other herbs. Thyme and rosemary both work beautifully. Add a few sprigs to the butter as it browns, then remove them before drizzling. You can also sprinkle fresh thyme leaves over the finished dish for a pop of color and flavor.
Nutty Crunch : Toast some chopped pecans or walnuts in the brown butter along with the sage. The nuts add a wonderful crunch and extra nuttiness that complements the squash perfectly. I’ve done this for holiday dinners, and it always gets compliments. Just be careful not to burn the nuts—they toast quickly.
Dairy-Free Option : You can substitute the butter with a high-quality vegan butter or coconut oil. The flavor won’t be exactly the same, but it’s still delicious. If using coconut oil, add a pinch of nutritional yeast to mimic some of that savory, nutty depth. I tested this for a friend who’s dairy-free, and she said it was “dangerously good.”
Different Squash : As I mentioned, butternut or delicata squash work great. For butternut, peel it first, then cut into 1-inch cubes and roast on a baking sheet. The cubes will cook faster—about 20 minutes at 400°F. For delicata, just halve, seed, and roast as directed. The skin is tender and edible, so no peeling needed.
Serving & Storage Suggestions
This dish is best served warm, right after you’ve drizzled the brown butter and topped it with the crispy sage. The contrast between the warm, tender squash and the crunchy sage is what makes it special. But here’s how to handle leftovers and other serving scenarios.
Serving Temperature : Serve the squash warm, not piping hot. Let it rest for 2-3 minutes after adding the brown butter so the flavors can meld. If you’re serving it as part of a larger meal, it pairs beautifully with roasted chicken, pork chops, or even a simple grain bowl. I’ve also served it alongside a cozy lentil soup for a vegetarian dinner that felt totally complete.
Presentation Tips : For a dinner party, arrange the squash halves on a large platter. Drizzle the brown butter over them, then top with the crispy sage leaves. Sprinkle with flaky sea salt and a few cracks of black pepper. It’s simple but looks incredibly elegant. You can also garnish with pomegranate seeds for a pop of color—the tartness is a nice contrast to the rich butter.
Complementary Dishes : This squash goes well with almost any fall or winter meal. Try it alongside roasted turkey, creamy mashed potatoes, or a simple green salad with vinaigrette. For a heartier meal, serve it with farro or wild rice. The nuttiness of the grains echoes the brown butter beautifully.
Storage Instructions : If you have leftovers, store the squash in an airtight container in the refrigerator for up to 3 days. Keep the crispy sage separate—it will lose its crunch if stored with the squash. The sage can be stored at room temperature in an airtight container for up to 2 days.
Reheating Methods : To reheat, place the squash halves on a baking sheet and warm them in a 350°F oven for 5-7 minutes. You can also microwave them, but the texture won’t be as good. The crispy sage won’t re-crisp, so I recommend making fresh sage for leftovers. It only takes a minute, and it makes a big difference.
Flavor Development : Honestly, the flavors actually get better after a day in the fridge. The brown butter soaks into the squash, making it even more flavorful. I’ve been known to make extra just for leftovers. The texture won’t be as firm as freshly roasted squash, but the taste is still amazing.
Nutritional Information & Benefits
This dish is a great way to enjoy vegetables in a way that feels indulgent but is actually quite wholesome. Here’s a rough breakdown per serving (one squash half with butter and sage):
- Calories : Approximately 180-200 calories
- Fat : 12-14 grams (mostly from the butter)
- Carbohydrates : 18-20 grams
- Fiber : 3-4 grams
- Protein : 2-3 grams
- Vitamin A : Over 100% of the daily value (honeynut squash is packed with beta-carotene)
- Vitamin C : About 15% of the daily value
- Potassium : Good source, supporting heart health and muscle function
Health Benefits : Honeynut squash is a nutritional powerhouse. It’s rich in antioxidants, particularly beta-carotene, which supports eye health and immune function. The fiber content aids digestion and helps you feel full and satisfied. Sage has been used in traditional medicine for its anti-inflammatory properties and is known to support brain health. And while butter is high in saturated fat, using it in moderation—as we do here—adds richness and helps your body absorb the fat-soluble vitamins in the squash.
Dietary Considerations : This recipe is naturally gluten-free, vegetarian, and can be made dairy-free with the substitutions mentioned above. For a vegan version, use coconut oil or vegan butter and skip the maple syrup if you want a completely sugar-free dish. It’s also low-carb friendly, with most of the carbohydrates coming from the squash’s natural sugars and fiber.
Potential Allergens : This recipe contains dairy (butter). If you have a dairy allergy, use the vegan butter or coconut oil substitution. The recipe is nut-free as written, but some of the variations include nuts, so be mindful if you’re cooking for someone with a nut allergy.
I love that this dish feels indulgent but is actually really good for you. It’s the kind of recipe that makes you feel like you’re treating yourself while also nourishing your body. That’s my favorite kind of cooking—food that tastes like a hug but leaves you feeling energized, not sluggish.
Conclusion
This cozy brown butter honeynut squash with crispy sage is the recipe I keep coming back to every fall. It’s simple enough for a Tuesday night but special enough for Thanksgiving. It’s the dish that made my friend’s husband actually ask for seconds of a vegetable. And it’s the recipe that, honestly, made me look at winter squash in a whole new way.
I love how forgiving this recipe is. You can adjust the seasonings, swap the squash, add nuts or spices—it always turns out delicious. The key is trusting the process: roasting the squash until it’s caramelized, browning the butter until it’s nutty and golden, and crisping the sage until it shatters. That’s it. That’s the whole secret.
I really hope you try this recipe. And when you do, don’t be afraid to make it your own. Add a little maple syrup if you’re feeling sweet. Throw in some red pepper flakes if you want heat. Top it with toasted pecans for crunch. The beauty of a simple recipe is that it’s a canvas for your own creativity.
If you make this cozy brown butter honeynut squash, I’d love to hear about it. Leave a comment below and let me know how it turned out—did you add any twists? Serve it with something special? I read every comment, and your stories and ideas are what make this community so wonderful. And if you loved it, please share this recipe with a friend who needs a little fall comfort in their life. Happy cooking!
Frequently Asked Questions
Can I use butternut squash instead of honeynut?
Absolutely! Butternut squash is a great substitute. Just peel it first, cut it into 1-inch cubes, and roast on a baking sheet at 400°F for about 20 minutes. The flavor is slightly less sweet than honeynut, so you might want to add a drizzle of maple syrup. The brown butter and sage will still make it taste amazing.
How do I know when the brown butter is ready?
Watch for the butter to turn a deep golden color with dark brown specks forming at the bottom of the pan. It will also smell nutty and toasty. This usually takes about 3-4 minutes after the butter melts. The key is to pull it off the heat the moment it reaches that color—it can go from perfect to burnt in seconds.
Can I make the crispy sage ahead of time?
You can, but it’s best fresh. If you need to make it ahead, store the crispy sage leaves in an airtight container at room temperature for up to 2 days. They’ll lose some of their crunch, but they’ll still be tasty. For the best texture, I recommend making the sage right before serving.
Is this recipe suitable for meal prep?
Yes! You can roast the squash up to 3 days ahead and store it in the refrigerator. When you’re ready to serve, reheat the squash in a 350°F oven for 5-7 minutes, then make fresh brown butter and crispy sage. The flavors actually deepen overnight, so leftovers are delicious.
Can I make this recipe vegan?
Definitely! Substitute the butter with a high-quality vegan butter or coconut oil. If using coconut oil, add a pinch of nutritional yeast for a savory depth. The crispy sage can still be made in the vegan butter or oil. The flavor will be slightly different, but it’s still a wonderful dish.
Pin This Recipe!
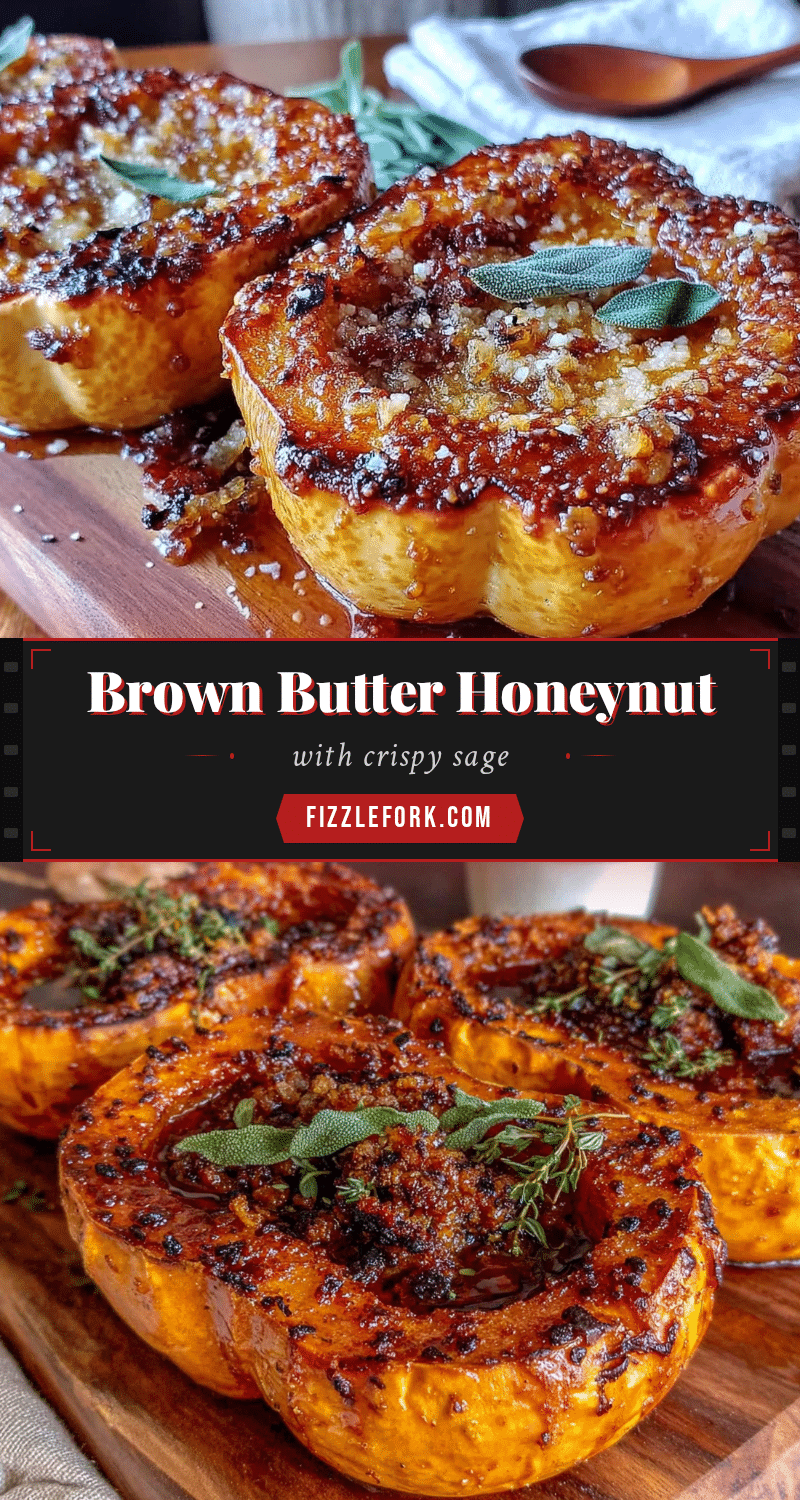
Cozy Brown Butter Honeynut Squash with Easy Crispy Sage

A simple yet elegant fall side dish featuring roasted honeynut squash drizzled with nutty brown butter and topped with crispy sage leaves. Ready in about 35 minutes with just four main ingredients.
- Prep Time: 10 minutes
- Cook Time: 25 minutes
- Total Time: 35 minutes
- Yield: 4 servings 1x
- Category: Side Dish
- Cuisine: American
Ingredients
- 2 medium honeynut squash
- 4 tablespoons unsalted butter (1/2 stick)
- 12–15 fresh sage leaves
- 1 teaspoon kosher salt, plus more for finishing
- 1/4 teaspoon freshly ground black pepper
- 1 tablespoon olive oil
- 1 tablespoon maple syrup (optional)
- Flaky sea salt (for finishing, optional)
Instructions
- Preheat oven to 400°F (200°C). Line a baking sheet with parchment paper.
- Wash and dry honeynut squash. Cut each in half lengthwise. Scoop out seeds and stringy pulp.
- Place squash halves cut-side up on the baking sheet. Drizzle or brush with olive oil (mix with maple syrup if using). Sprinkle with 1/2 teaspoon kosher salt and a pinch of black pepper. Flip cut-side down.
- Roast for 25-30 minutes, until tender when pierced with a fork. Start checking at 20 minutes.
- About 5 minutes before squash is done, melt butter in a medium skillet over medium heat. Cook, swirling occasionally, until butter turns golden brown with dark specks and smells nutty (3-4 minutes).
- Immediately add sage leaves to the butter. Cook 10-15 seconds until sizzling and curled. Transfer sage to a paper towel-lined plate.
- Remove skillet from heat. Stir in remaining 1/2 teaspoon kosher salt and a pinch of black pepper.
- When squash is done, flip halves cut-side up. Drizzle warm brown butter over each half. Let rest 1 minute.
- Top with crispy sage leaves and a sprinkle of flaky sea salt. Serve warm.
Notes
Watch the butter carefully—it can go from perfect to burnt in seconds. Dry sage leaves thoroughly before adding to butter. For best results, start browning butter when squash has about 5 minutes left in the oven. Leftover squash can be stored in an airtight container in the refrigerator for up to 3 days; keep crispy sage separate at room temperature.
Nutrition
- Serving Size: 1 squash half
- Calories: 190
- Sugar: 8
- Sodium: 290
- Fat: 13
- Saturated Fat: 8
- Carbohydrates: 19
- Fiber: 3.5
- Protein: 2.5
Keywords: brown butter, honeynut squash, crispy sage, fall recipe, roasted squash, easy side dish, vegetarian, gluten-free