The holiday cookie swap was in three days and I’d completely forgotten. Everyone else would be bringing their grandmother’s legendary shortbread, intricate French sablés, or those perfectly piped meringues that look like they belong in a bakery window. I had a carton of eggnog, a box of gingersnaps I’d bought on a whim, and a block of cream cheese that was about to expire. Honestly, I almost just brought a bottle of wine and called it a day. But then I remembered a trick my friend Chloe once used—crushing cookies for a crust instead of graham crackers. And I had that eggnog staring at me from the fridge. So, with about an hour to spare, I threw together a cheesecake. No water bath, no fussy ingredients, no fancy technique. I just mixed, pressed, poured, and baked. The panic was real, let me tell you. I was pretty sure I’d created a disaster.
When I walked into that party, I was half-hiding my dish behind a bag of chips. The shortbreads and sablés were arranged on gorgeous cake stands. My cheesecake looked… rustic. But then someone took a slice. Then another person. Then the guy who only eats keto desserts came back for thirds. By the end of the night, my pan was scraped clean and three people asked for the recipe. I stood there, slightly stunned, holding an empty spatula. It was the underdog victory I didn’t see coming. And honestly, that’s how the best recipes happen, isn’t it? When you’re not trying to impress anyone, when you’re just working with what you’ve got and hoping for the best. This cozy eggnog cheesecake with gingersnap crust became my holiday signature that night, and I haven’t stopped making it since. Maybe you’ve been there too—staring into your fridge, convinced you have nothing to work with, only to stumble onto something magical.
Why You’ll Love This Recipe
This cozy eggnog cheesecake with gingersnap crust isn’t just another holiday dessert. It’s the one that solves your biggest party problems. Let me break it down for you.
- Quick & Easy: This cheesecake comes together in about 15 minutes of active prep time. No water bath, no complicated steps. Just mix and bake. Perfect for when the holiday chaos hits and you need something impressive, fast.
- Simple Ingredients: You likely already have most of these in your kitchen. Cream cheese, eggs, sugar, vanilla. The only special items are eggnog and gingersnaps—both are everywhere during the holidays.
- Perfect for Holiday Gatherings: Whether it’s a cookie swap, a Christmas Eve dinner, or a cozy night in with friends, this cheesecake fits right in. It’s festive without being fussy.
- Crowd-Pleaser: I’ve served this to kids, grandparents, and picky in-laws. It always gets rave reviews. The combination of creamy eggnog filling and spicy gingersnap crust is just too good to resist.
- Unbelievably Delicious: The texture is silky and rich, not heavy. The eggnog flavor is warm and spiced, not artificial. And that crust? It adds the perfect crunch and a little kick of ginger.
What makes this recipe different from the rest? It’s the balance. So many eggnog desserts are either too sweet or too boozy. This one gets it just right. The eggnog flavor shines through without overwhelming, and the gingersnap crust adds a layer of warmth that plain graham crackers just can’t match. I’ve tested this recipe a dozen times, tweaking the eggnog-to-cream-cheese ratio until it was perfect. This is my best version—trust me on that.
This is the kind of dessert that makes you close your eyes after the first bite. It’s comfort food reimagined for the holidays—faster, easier, but with the same soul-soothing satisfaction. Perfect for impressing guests without the stress, or turning a simple Tuesday night into something special.
What Ingredients You Will Need
This recipe uses simple, wholesome ingredients to deliver that cozy holiday flavor. Most are pantry staples, and the few special ones are easy to find during the season.
For the Gingersnap Crust
- 2 cups (200g) gingersnap cookies, finely crushed (about 30 cookies; I prefer Anna’s or Mi-Del for the best spice blend)
- 6 tablespoons (85g) unsalted butter, melted (use salted butter in a pinch, but reduce added salt elsewhere)
- 2 tablespoons (25g) granulated sugar (optional; skip if your gingersnaps are already very sweet)
- Pinch of salt (skip if using salted butter)
For the Eggnog Cheesecake Filling
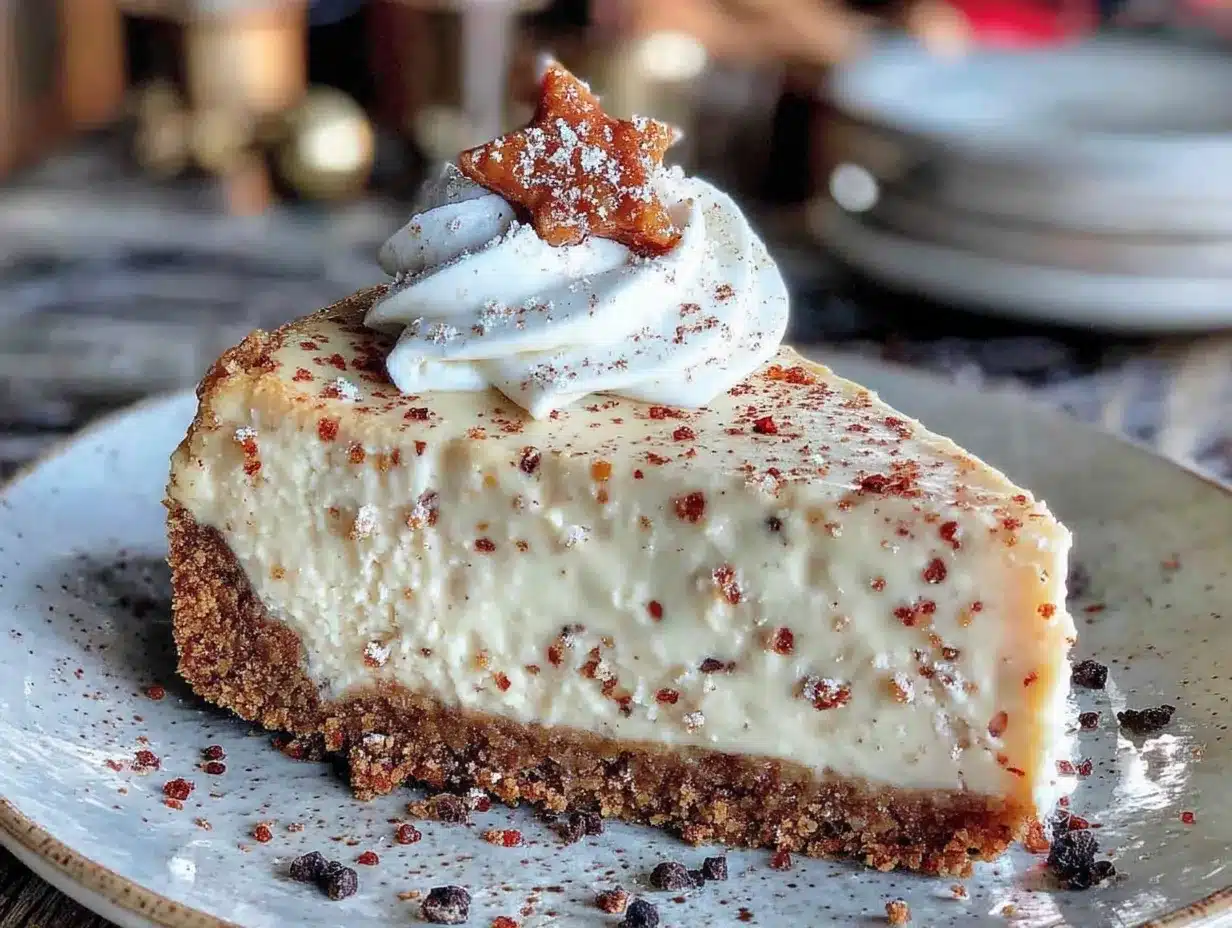
- 24 ounces (680g) cream cheese, softened to room temperature (full-fat is best for texture; Philadelphia is my go-to)
- 1 cup (200g) granulated sugar
- 3 large eggs, room temperature (this helps prevent cracks!)
- 1 ½ cups (360ml) eggnog (use a good quality brand like Hood or Organic Valley; avoid low-fat or “light” versions)
- 1 teaspoon vanilla extract
- ½ teaspoon ground nutmeg, plus more for garnish (freshly grated is amazing if you have it)
- ¼ teaspoon ground cinnamon
- Pinch of ground cloves (optional, but adds that classic holiday warmth)
- 2 tablespoons (16g) all-purpose flour (helps stabilize the filling; use cornstarch for a gluten-free option)
Ingredient Selection Tips: Look for a thick, creamy eggnog—not the watery kind. The richer the eggnog, the better the flavor. If you can find it, use a brand that lists cream and egg yolks as the first ingredients. For the gingersnaps, check the ingredient list. You want real ginger and molasses, not just artificial flavoring. I’ve tried this with gluten-free gingersnaps and it works beautifully—just make sure they’re crunchy, not soft.
Substitution Guidance: For a dairy-free version, use vegan cream cheese and a plant-based eggnog. The texture will be slightly less creamy but still delicious. If you don’t have gingersnaps, use graham crackers and add 1 teaspoon of ground ginger and ½ teaspoon of cinnamon to the crust mixture. It won’t be quite the same, but it’ll still be tasty. For a lower sugar option, reduce the sugar in the filling to ¾ cup—the eggnog adds sweetness on its own.
Equipment Needed
You don’t need a fancy kitchen to make this cheesecake. Here’s what you’ll need:
- 9-inch springform pan (essential for easy removal; if you don’t have one, use a deep-dish pie plate, but slices will be messier)
- Food processor or zip-top bag and rolling pin (for crushing the gingersnaps; I prefer the food processor for even crumbs)
- Electric hand mixer or stand mixer (a hand mixer works perfectly; a stand mixer is great if you have one)
- Large mixing bowls (one for the crust, one for the filling)
- Measuring cups and spoons
- Spatula (for scraping the bowl clean—don’t waste that filling!)
- Parchment paper (optional, but makes cleanup a breeze)
Personal Experience: I’ve made this cheesecake in a tiny apartment kitchen with a $20 hand mixer and it turned out perfect. Don’t stress about having a stand mixer. The one thing I’d recommend splurging on is a good springform pan. Cheap ones can leak, and nobody wants a puddle of butter in their oven. I’ve had my Nordic Ware pan for years and it’s never let me down. If you’re on a budget, just wrap the bottom of your pan tightly with foil to catch any drips.
Preparation Method
Let’s get baking! This cozy eggnog cheesecake with gingersnap crust comes together in a few simple steps. Take your time and enjoy the process—it’s worth it.
- Preheat and Prep: Preheat your oven to 325°F (160°C). Lightly grease your 9-inch springform pan with butter or non-stick spray. Cut a circle of parchment paper for the bottom and place it inside—this makes removing the cheesecake so much easier later.
- Make the Crust: In your food processor, pulse the gingersnap cookies until they become fine crumbs. You should have about 2 cups. If you don’t have a food processor, place the cookies in a zip-top bag and crush them with a rolling pin—it’s a great stress reliever! Transfer the crumbs to a medium bowl. Pour in the melted butter, sugar (if using), and salt. Stir with a fork until the mixture looks like wet sand and holds together when you squeeze it.
- Press the Crust: Pour the crumb mixture into your prepared pan. Use the bottom of a measuring cup or a flat glass to press it firmly and evenly into the bottom and about 1 inch up the sides. Don’t skip the sides—they help hold the filling in. Bake the crust for 10 minutes, then set it aside to cool slightly while you make the filling. Your kitchen will smell amazing right about now.
- Start the Filling: In a large bowl, beat the softened cream cheese with an electric mixer on medium speed until it’s smooth and creamy—about 2 minutes. Scrape down the sides and bottom of the bowl with your spatula. Add the sugar and beat for another 2 minutes until light and fluffy. This step is important for a silky texture, so don’t rush it.
- Add the Eggs: Add the eggs one at a time, beating on low speed after each addition just until combined. Over-beating at this stage can incorporate too much air and cause cracks. You want a smooth, uniform batter.
- Add the Wet Ingredients: Pour in the eggnog and vanilla extract. Beat on low speed until just combined. The mixture will look a bit thin—don’t worry, that’s normal. It will set beautifully as it bakes.
- Add the Spices and Flour: Sprinkle in the nutmeg, cinnamon, cloves (if using), and flour. Beat on low speed until everything is incorporated. Give the bowl one last scrape to make sure there are no lumps of cream cheese hiding at the bottom. Give the batter a final gentle stir by hand.
- Pour and Bake: Pour the filling into the cooled crust. It will fill the pan almost to the top—that’s okay. Smooth the top with your spatula. Bake at 325°F (160°C) for 50-60 minutes. The edges should be set and slightly puffed, but the center should still jiggle slightly when you gently shake the pan. A jiggly center means a creamy, not dry, cheesecake. If the top starts browning too quickly, tent it loosely with foil after 40 minutes.
- Cool Gradually: Turn off the oven and crack the door open. Let the cheesecake cool in the oven for 1 hour. This gradual cooling helps prevent cracks. Then, transfer the pan to a wire rack and let it cool completely to room temperature—about 2 more hours.
- Chill Overnight: Once cool, cover the pan with plastic wrap and refrigerate for at least 6 hours, but overnight is best. This is the hardest part, I know. But the wait is so worth it. The flavors meld together and the texture becomes perfectly creamy.
- Serve: When you’re ready to serve, run a thin knife around the edge of the pan to loosen the cheesecake. Release the springform clasp and remove the ring. Slice with a sharp knife, wiping it clean between cuts for neat slices. Garnish with a sprinkle of nutmeg and a dollop of whipped cream if you’re feeling fancy.
Personal Note: I once tried to rush the cooling process by putting the cheesecake straight in the fridge. It cracked right down the middle. Lesson learned! That gradual cooling is not just a suggestion—it’s the secret to a beautiful, crack-free top.
Cooking Tips & Techniques
After making this cozy eggnog cheesecake with gingersnap crust more times than I can count, I’ve picked up a few tricks. Let me share them so you can skip the mistakes I made.
Room Temperature is Non-Negotiable: I know, I know, you’re in a hurry. But cold cream cheese creates lumps that no amount of beating can fix. Take it out of the fridge at least 2 hours before you start. Same goes for the eggs. If you forget, place the cream cheese (still wrapped) in a bowl of warm water for 10 minutes. For the eggs, put them in a cup of warm water for 5 minutes.
Don’t Overmix: Once you add the eggs, keep your mixer on low and stop as soon as the streaks disappear. Overmixing incorporates too much air, which leads to cracks and a puffy, soufflé-like texture. We want dense and creamy, not airy.
The Jiggle Test: This is the most important skill you’ll learn. A perfectly baked cheesecake should have a slight wobble in the center—about the size of a silver dollar. If the whole thing jiggles like Jell-O, it needs more time. If it’s completely firm, it’s overbaked. Trust the jiggle, not the clock.
Water Bath Alternative: I don’t use a water bath for this recipe because it’s not necessary. But if you’re worried about cracks, place a shallow pan of hot water on the oven rack below the cheesecake. The steam creates a humid environment that helps prevent cracking.
My Biggest Failure: The first time I made this, I used low-fat cream cheese and light eggnog to “make it healthier.” The result was a sad, watery mess that never set properly. Don’t do it. The full-fat versions are essential for the right texture. Trust me, one slice is enough to satisfy—you don’t need a whole “diet” cheesecake.
Timing Strategy: I always make this cheesecake the day before I need it. It frees up oven space on the day of the party and the flavor is actually better the next day. Make the crust and filling one evening, bake it, and let it chill overnight. The next day, just garnish and serve. Stress-free hosting at its finest.
Variations & Adaptations
One of the best things about this cozy eggnog cheesecake with gingersnap crust is how adaptable it is. Here are some ways to make it your own.
Boozy Eggnog Cheesecake: Add 2 tablespoons of dark rum or bourbon to the filling along with the eggnog. The alcohol bakes off, leaving behind a warm, deep flavor. I tried this version last Christmas and it was a hit with the adults. Just don’t use too much, or it might affect the set.
Gluten-Free Version: Use gluten-free gingersnap cookies for the crust. I’ve tested this with Pamela’s brand and it works perfectly. Also substitute the 2 tablespoons of flour with cornstarch or a gluten-free all-purpose blend. Nobody will know the difference.
Pumpkin-Eggnog Swirl: Before pouring the filling into the crust, reserve 1 cup of the batter. Mix it with ½ cup of pumpkin puree and an extra ½ teaspoon of pumpkin pie spice. Pour the plain filling into the crust, then dollop the pumpkin mixture on top. Use a knife to create swirls. It’s like two holiday desserts in one!
Mini Cheesecakes: Line a muffin tin with paper liners. Press the crust mixture into the bottom of each cup (about 1 tablespoon per cup). Fill with the eggnog batter almost to the top. Bake at 325°F (160°C) for 18-22 minutes. These are perfect for parties or gift-giving. Just reduce the chilling time to 3 hours.
Spiced Caramel Topping: Drizzle the finished cheesecake with a homemade caramel sauce spiced with cinnamon and a pinch of cayenne. The sweet-spicy combination is incredible. I once brought this version to a friend’s dinner party and she still texts me about it.
Dairy-Free Adaptation: Use vegan cream cheese (Miyoko’s is my favorite) and a plant-based eggnog like So Delicious. Add 1 tablespoon of melted coconut oil to the filling to help it set. The texture will be slightly softer, but the flavor is still spot-on.
Serving & Storage Suggestions
This cheesecake is delicious on its own, but a few simple additions can make it even more special.
Serving Temperature: I prefer this cheesecake served cold, straight from the fridge. The texture is firm and creamy, and the flavors are clean and bright. If you prefer a softer texture, let it sit at room temperature for 15-20 minutes before slicing.
Presentation Ideas: A simple dusting of nutmeg on top is classic. For a more festive look, add a dollop of whipped cream, a few sugared cranberries, or a sprig of fresh mint. You can also drizzle it with a little caramel sauce or sprinkle crushed gingersnaps around the edges of the plate.
What to Serve With It: This cheesecake pairs beautifully with a cup of strong coffee or a spiced chai latte. For a dessert spread, serve it alongside a plate of gingerbread cookies or a bowl of poached pears. A glass of cold eggnog or a dark stout beer also works surprisingly well.
Storage Instructions: Store leftover cheesecake in the refrigerator, tightly covered, for up to 5 days. The flavor actually improves after a day or two as the spices meld together. To freeze, wrap individual slices tightly in plastic wrap, then place them in a freezer-safe bag. They’ll keep for up to 3 months. Thaw in the refrigerator overnight before serving.
Reheating: This cheesecake is meant to be served cold, so no reheating needed. If you’ve frozen it, just let it thaw in the fridge. The texture will be exactly as good as fresh.
Flavor Development: I’ve noticed that the spices become more pronounced after the cheesecake has chilled for a full 24 hours. The nutmeg and ginger deepen, and the eggnog flavor becomes more rounded. So if you can wait, it’s worth it. But I won’t judge you if you sneak a slice after 6 hours—I’ve done it plenty of times.
Nutritional Information & Benefits
Let’s be real—this is a holiday indulgence, not a health food. But knowing what’s in your food is always a good thing.
Estimated Nutritional Values (per slice, based on 12 servings):
| Nutrient | Amount |
|---|---|
| Calories | 380 |
| Total Fat | 24g |
| Saturated Fat | 14g |
| Cholesterol | 115mg |
| Sodium | 310mg |
| Total Carbohydrates | 36g |
| Sugars | 26g |
| Protein | 8g |
| Calcium | 120mg |
Health Highlights: The cream cheese and eggnog provide a good amount of calcium, which is important for bone health. The eggs add high-quality protein and essential vitamins like B12 and D. The ginger in the crust has anti-inflammatory properties and can help with digestion—especially useful after a heavy holiday meal. The nutmeg contains compounds that may help improve mood and reduce anxiety. So while this isn’t a salad, it does have some redeeming qualities!
Dietary Considerations: This recipe contains gluten (from the gingersnap crust and flour), dairy, and eggs. For a gluten-free option, use gluten-free cookies and cornstarch. For a dairy-free version, use vegan alternatives as noted in the variations section. It is not suitable for a vegan diet in its original form.
My Perspective: I believe in balance. The holidays are a time for joy, connection, and yes, delicious food. One slice of this cheesecake won’t derail your wellness goals. Enjoy it mindfully, savor every bite, and don’t feel guilty. That’s what the season is about.
Conclusion
This cozy eggnog cheesecake with gingersnap crust is more than just a recipe—it’s a little piece of holiday magic. It started as a panic-induced experiment and became my most-requested dessert. That’s the kind of recipe you hold onto. It’s simple enough for a beginner, impressive enough for a party, and delicious enough to make you forget all about those fancy French sablés.
I hope you give it a try. Don’t be afraid to make it your own—add a swirl, try a different crust, or double the spices. The best recipes are the ones that evolve with you. And when you take that first bite, that creamy, spiced, perfectly sweet bite, I hope you feel the same cozy warmth I do every time I make it.
Have you tried this recipe? I’d love to hear about it! Drop a comment below and let me know how it turned out, or share your own twist on it. Tag me in your photos on social media—I’m always looking for inspiration. Until next time, happy baking, and may your holidays be filled with good food and even better company.
Frequently Asked Questions
Can I use low-fat cream cheese or eggnog?
I really don’t recommend it. Low-fat versions have a higher water content, which can make the cheesecake watery and prevent it from setting properly. For the best texture and flavor, stick with full-fat ingredients.
Why did my cheesecake crack?
Cracks usually happen from overbaking or sudden temperature changes. Make sure you’re not baking it too long—remember the jiggle test. Also, let it cool gradually in the oven with the door cracked open before moving it to the fridge. If it does crack, don’t worry! A dollop of whipped cream or a dusting of nutmeg covers it perfectly.
Can I make this cheesecake ahead of time?
Absolutely! In fact, I recommend it. Make the cheesecake a day or two in advance and keep it refrigerated. The flavor gets better as it sits. Just add any garnishes right before serving.
Can I use a different type of cookie for the crust?
Yes! While gingersnaps give that classic holiday spice, you can use graham crackers, shortbread cookies, or even vanilla wafers. Just add extra spices like ginger, cinnamon, and nutmeg to get that festive flavor. If using a sweeter cookie, you can reduce or skip the added sugar.
How do I get clean slices?
Use a sharp, thin-bladed knife. Run it under hot water and dry it off before each cut. Wipe the blade clean between slices. For the neatest results, chill the cheesecake for a full 8 hours or overnight before slicing.
Pin This Recipe!
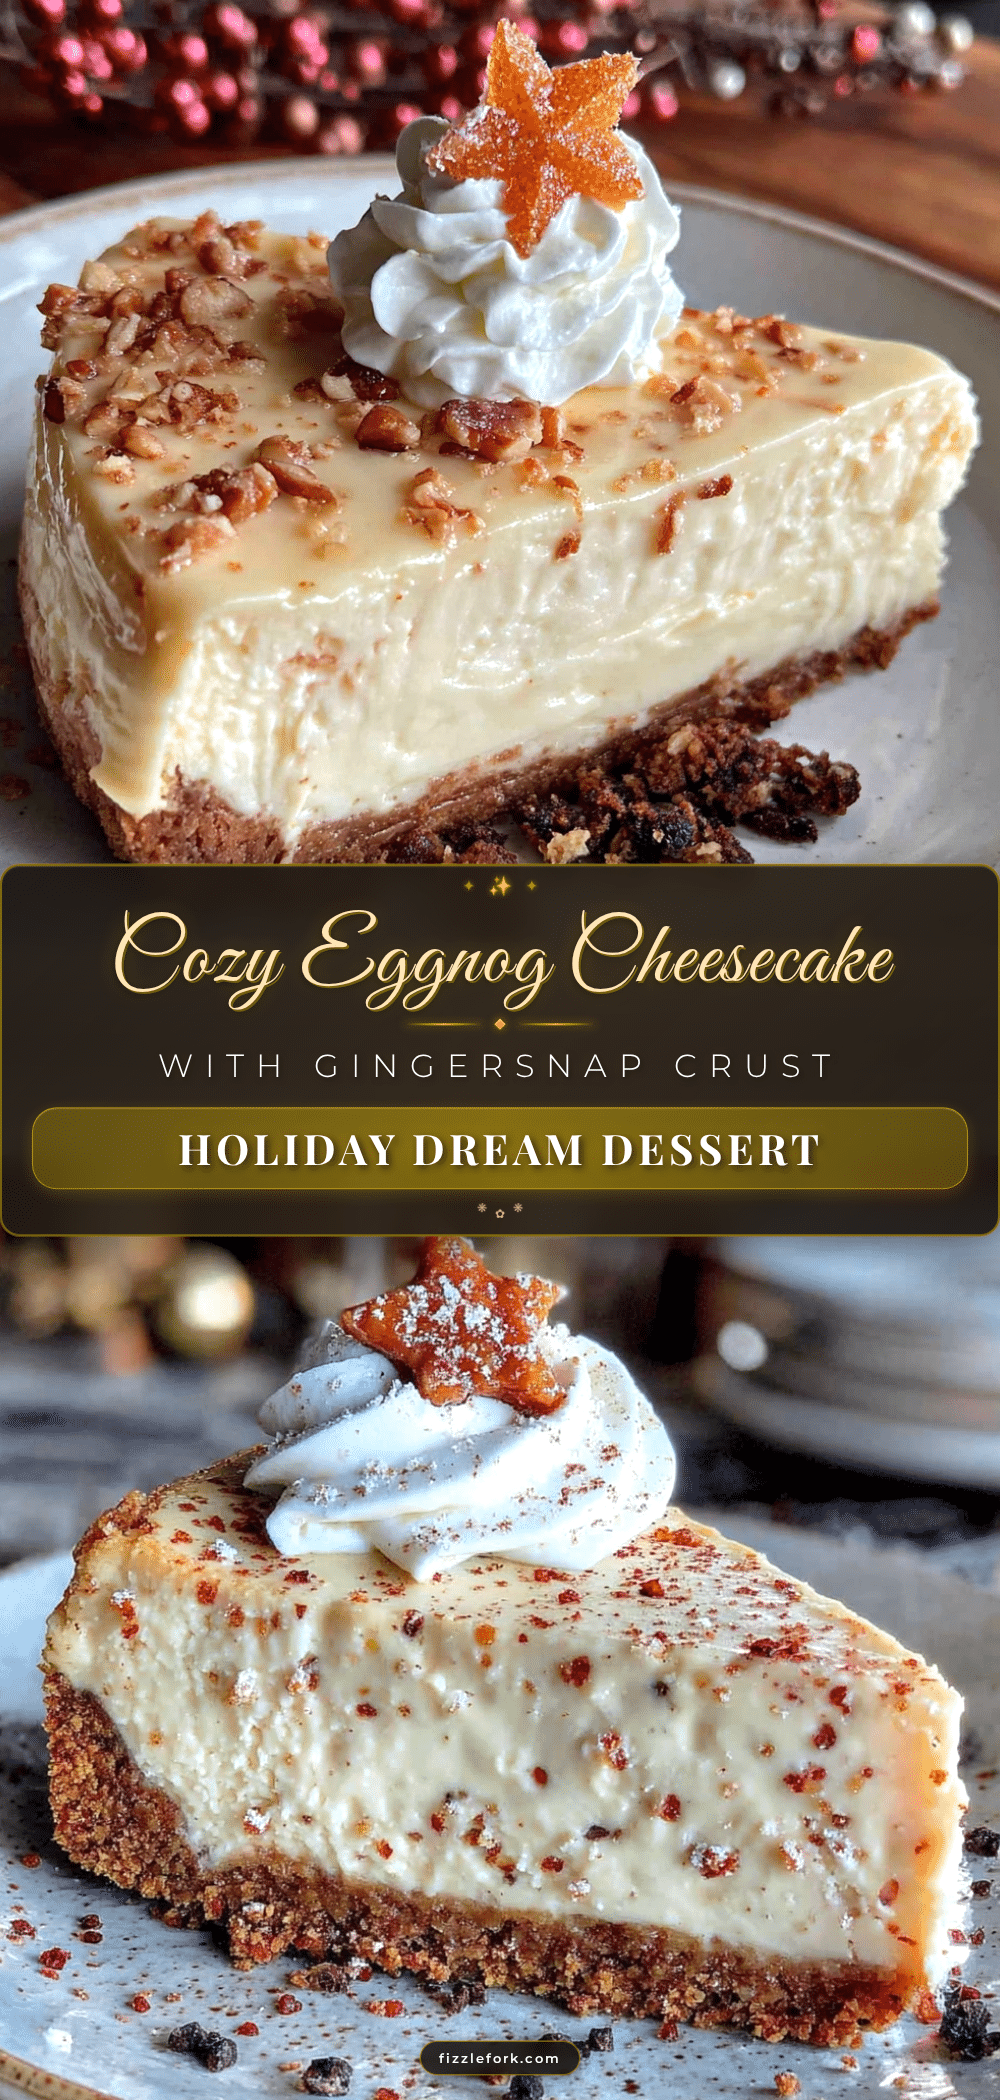
Cozy Eggnog Cheesecake with Gingersnap Crust: Easy Holiday Recipe
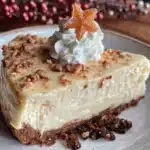
This cozy eggnog cheesecake with gingersnap crust is a quick and easy holiday dessert that comes together in about 15 minutes of active prep time. No water bath, no fussy ingredients—just a creamy, spiced filling and a crunchy, gingery crust that will impress any crowd.
- Prep Time: 15 minutes
- Cook Time: 50-60 minutes
- Total Time: 1 hour 15 minutes (plus cooling and chilling)
- Yield: 12 servings 1x
- Category: Dessert
- Cuisine: American
Ingredients
- 2 cups (200g) gingersnap cookies, finely crushed (about 30 cookies)
- 6 tablespoons (85g) unsalted butter, melted
- 2 tablespoons (25g) granulated sugar (optional)
- Pinch of salt (skip if using salted butter)
- 24 ounces (680g) cream cheese, softened to room temperature
- 1 cup (200g) granulated sugar
- 3 large eggs, room temperature
- 1 ½ cups (360ml) eggnog
- 1 teaspoon vanilla extract
- ½ teaspoon ground nutmeg, plus more for garnish
- ¼ teaspoon ground cinnamon
- Pinch of ground cloves (optional)
- 2 tablespoons (16g) all-purpose flour
Instructions
- Preheat your oven to 325°F (160°C). Lightly grease a 9-inch springform pan and line the bottom with parchment paper.
- In a food processor, pulse the gingersnap cookies until fine crumbs. Transfer to a bowl, add melted butter, sugar (if using), and salt. Stir until the mixture resembles wet sand.
- Press the crumb mixture firmly into the bottom and about 1 inch up the sides of the prepared pan. Bake for 10 minutes, then set aside to cool slightly.
- In a large bowl, beat the softened cream cheese with an electric mixer on medium speed until smooth, about 2 minutes. Add sugar and beat for another 2 minutes until light and fluffy.
- Add eggs one at a time, beating on low speed after each addition just until combined.
- Pour in the eggnog and vanilla extract. Beat on low speed until just combined.
- Sprinkle in the nutmeg, cinnamon, cloves (if using), and flour. Beat on low speed until incorporated. Scrape down the bowl and give a final gentle stir by hand.
- Pour the filling into the cooled crust. Smooth the top with a spatula. Bake at 325°F (160°C) for 50-60 minutes, until edges are set and center jiggles slightly. Tent with foil after 40 minutes if browning too quickly.
- Turn off the oven and crack the door open. Let the cheesecake cool in the oven for 1 hour. Then transfer to a wire rack and cool completely to room temperature, about 2 hours.
- Cover the pan with plastic wrap and refrigerate for at least 6 hours, preferably overnight.
- To serve, run a thin knife around the edge, release the springform clasp, and remove the ring. Slice with a sharp knife, wiping clean between cuts. Garnish with nutmeg and whipped cream if desired.
Notes
Room temperature ingredients are crucial for a smooth texture. Don’t overmix once eggs are added. Use the jiggle test to avoid overbaking. For a crack-free top, cool gradually in the oven. Full-fat cream cheese and eggnog are recommended for best results.
Nutrition
- Serving Size: 1 slice
- Calories: 380
- Sugar: 26
- Sodium: 310
- Fat: 24
- Saturated Fat: 14
- Carbohydrates: 36
- Protein: 8
Keywords: eggnog cheesecake, gingersnap crust, holiday dessert, easy cheesecake, Christmas dessert, no water bath