I was standing in the freezer aisle of our local grocery store last December when the cold air hit my face and that familiar peppermint smell—sharp, sweet, and unmistakable—wafted from a broken box of candy canes on the shelf. And just like that, I was seven years old again at my neighbor Mrs. Kowalski’s kitchen table, watching her crush candy canes with a wooden rolling pin while snow piled up outside her frosty window. She wasn’t my grandmother or even a relative, but every December she’d invite me over to “help” bake, which mostly meant I got to lick the spatula and sneak broken peppermint pieces when she wasn’t looking. She passed away five years ago, and I still haven’t found her exact recipe for those fudgy brownies with the crackly top. But honestly? I think I’ve come pretty close with these Cozy Fudgy Peppermint Brownies with Candy Cane Ganache.
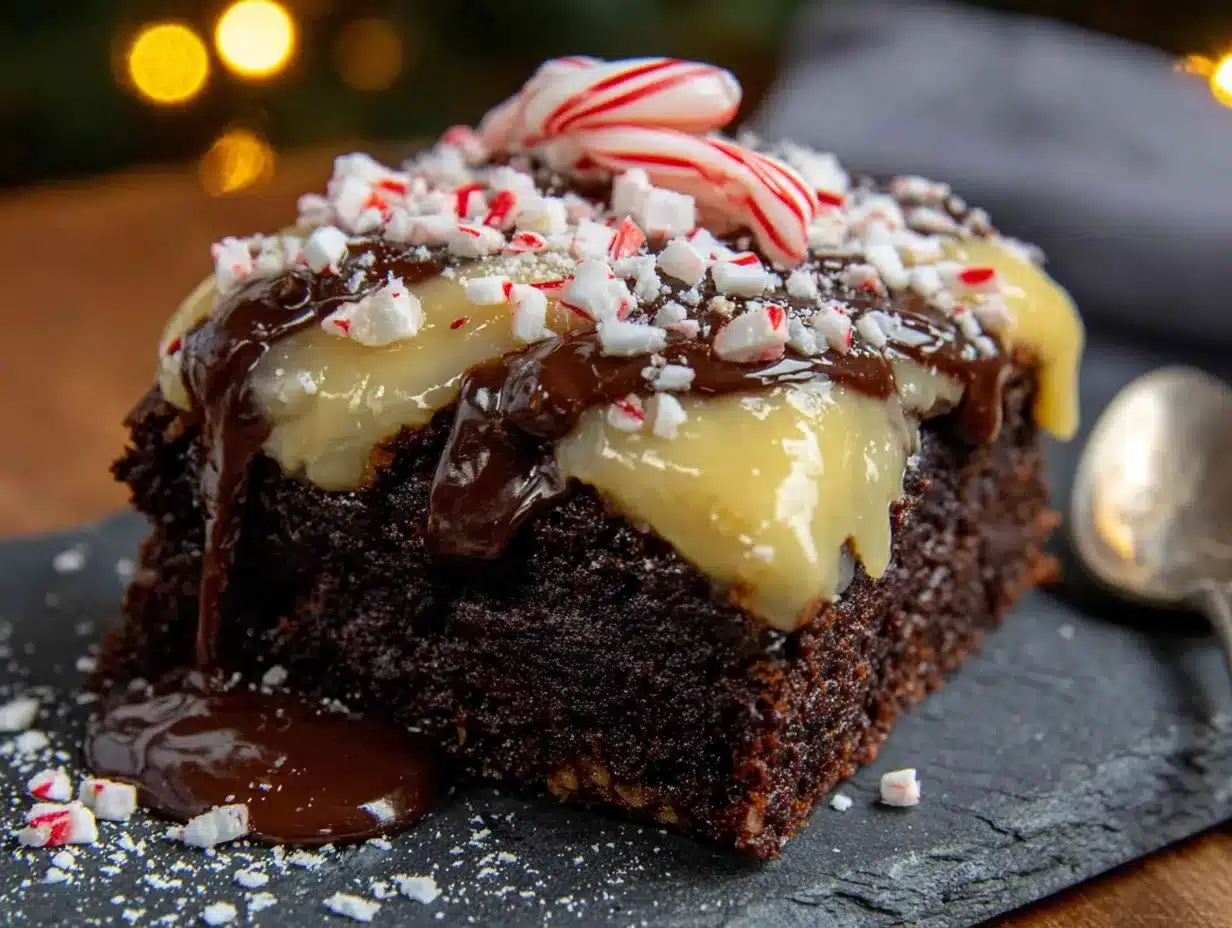
The first time I tried recreating them, I used a box mix and store-bought frosting. Let me tell you—it wasn’t the same. The ganache was too runny, the brownies were cakey instead of fudgy, and the whole thing felt like a sad imitation of a memory I couldn’t quite hold onto. Maybe you’ve been there, trying to chase a taste from childhood that keeps slipping away. So I went back to the kitchen, determined to get it right. After about four batches (and one very sticky disaster involving melted chocolate and my cat’s tail), I finally nailed it. These brownies are dense, rich, and intensely chocolatey, topped with a silky peppermint ganache that sets just enough to slice cleanly. The crushed candy canes on top add that satisfying crunch and a pop of color that makes them look like they belong on a holiday cookie platter—or honestly, just in your hand with a mug of hot cocoa.
What I love most about this recipe is how it brings that exact feeling back. Not just the taste, but the warmth of that tiny kitchen, the sound of the rolling pin against the counter, and the way Mrs. Kowalski would say “patience, kiddo” when I tried to rush the ganache. These brownies are my way of holding onto that moment, and I hope they become a cozy tradition in your home too.
Why You’ll Love This Recipe
These aren’t your average brownies. After testing this recipe multiple times with different cocoa powders, chocolate percentages, and even a disastrous attempt with peppermint extract that tasted like toothpaste (we don’t talk about that batch), I can confidently say this version is the one. Here’s why these Cozy Fudgy Peppermint Brownies will earn a permanent spot in your holiday baking rotation:
- Quick & Easy: From start to finish, these come together in about 45 minutes. The brownie batter takes 10 minutes to mix, and the ganache sets while you clean up. Perfect for those evenings when you need a last-minute dessert for a gathering or just a cozy night in.
- Simple Ingredients: No fancy grocery store trips required. You likely already have butter, sugar, eggs, flour, and cocoa powder in your pantry. The only special addition is peppermint extract and candy canes, which are easy to find during the holiday season.
- Perfect for Holiday Gatherings: These brownies are a showstopper at Christmas parties, cookie exchanges, or even as a homemade gift. Slice them into small squares and arrange on a platter—they disappear fast.
- Crowd-Pleaser: I’ve served these to kids, adults, and even my picky uncle who “doesn’t do mint desserts.” He ate three. The combination of rich chocolate and cool peppermint is universally loved.
- Unbelievably Delicious: The texture is what sets these apart. The brownies are dense and fudgy with that signature crackly top, while the ganache is smooth and creamy with just the right amount of peppermint. The crushed candy canes add a festive crunch that makes every bite interesting.
What makes this recipe different from the rest? It’s the technique. I use melted butter instead of oil for richness, and I whisk the eggs and sugar longer than you’d think necessary—this creates that beautiful crackly crust on top. The ganache uses heavy cream and semi-sweet chocolate chips for a balanced sweetness that doesn’t overpower the peppermint. And here’s the secret: I add a tiny pinch of salt to the ganache. It sounds weird, but it makes the peppermint flavor pop in a way that’s genuinely surprising.
This isn’t just another brownie recipe. It’s the kind that makes you close your eyes after the first bite. It’s comfort food reimagined for the holidays—richer, more indulgent, but with the same soul-soothing satisfaction you remember from childhood. Perfect for impressing guests without stress, or turning a quiet December evening into something magical.
What Ingredients You Will Need
This recipe uses simple, wholesome ingredients to deliver bold chocolate flavor and that perfect peppermint kick. Most of these are pantry staples, so you probably already have everything except the candy canes and peppermint extract. Let me walk you through each one and share a few tips I’ve learned along the way.
For the Brownies
- Unsalted butter, melted (1 cup / 226g): I use unsalted so I can control the salt level. Melt it gently in the microwave or on the stovetop—don’t let it boil or brown, unless you’re going for a browned butter variation (which I’ll mention later). I prefer Land O’Lakes for consistent quality.
- Granulated sugar (2 cups / 400g): This might seem like a lot, but sugar is crucial for that crackly top and fudgy texture. Don’t reduce it unless you’re using a sugar substitute (see variations).
- Large eggs (4, room temperature): Room temperature eggs incorporate more air into the batter, which helps create that shiny crust. If you forget to take them out early, place them in a bowl of warm water for 5 minutes.
- Vanilla extract (2 teaspoons): Pure vanilla extract adds depth to the chocolate. Avoid imitation vanilla if possible—it makes a difference.
- Peppermint extract (1 teaspoon): This is where the magic happens. Use pure peppermint extract, not peppermint oil (which is much stronger). I recommend Nielsen-Massey for a clean, natural flavor.
- All-purpose flour (1 cup / 120g): Spoon and level your flour—don’t scoop directly from the bag or you’ll end up with dry brownies.
- Unsweetened cocoa powder (3/4 cup / 75g): I use Dutch-process cocoa for a smoother, more intense chocolate flavor. Natural cocoa works too, but the brownies will be slightly less rich. My go-to is Guittard Dutch-process cocoa.
- Salt (1/2 teaspoon): Salt enhances the chocolate and balances the sweetness. I use fine sea salt.
- Baking powder (1/4 teaspoon): Just enough to give the brownies a little lift without making them cakey.
For the Candy Cane Ganache
- Semi-sweet chocolate chips (1 cup / 170g): I prefer Ghirardelli or Guittard for their smooth melting properties. Avoid chocolate chips with stabilizers if possible—they don’t melt as smoothly.
- Heavy cream (1/2 cup / 120ml): Heavy cream or heavy whipping cream works best. Don’t use milk or half-and-half—the ganache won’t set properly.
- Peppermint extract (1/2 teaspoon): Add this after removing the ganache from heat so the flavor doesn’t cook off.
- Pinch of salt: Trust me on this one. It makes the peppermint taste brighter.
- Crushed candy canes (1/2 cup / about 6 candy canes): For topping. Crush them in a zip-top bag with a rolling pin or use a food processor for finer pieces. I like a mix of fine dust and small chunks for texture.
Substitution Guidance
If you’re gluten-free, swap the all-purpose flour with a 1:1 gluten-free baking blend (I like King Arthur’s). For a dairy-free version, use vegan butter and full-fat coconut cream instead of heavy cream. The texture will be slightly different but still delicious. And if you can’t find candy canes, crushed peppermint candies work just as well.
Equipment Needed
You don’t need a professional bakery setup for these brownies. Most of this equipment is standard kitchen fare, but I’ll share a few tips from my own trial and error.
- 9×13-inch baking pan: This is the perfect size for fudgy brownies that aren’t too thin or too thick. Glass, ceramic, or metal all work, but metal pans conduct heat more evenly. I use a USA Pan for non-stick performance.
- Parchment paper: Line your pan with parchment paper, leaving overhang on two sides for easy lifting. This is non-negotiable unless you enjoy scraping brownie bits out of corners.
- Mixing bowls (medium and large): One for dry ingredients, one for wet ingredients. Glass or stainless steel are best.
- Whisk: A sturdy whisk is essential for combining the eggs and sugar until thick and glossy. A hand mixer works too, but I prefer whisking by hand for better control.
- Rubber spatula: For folding the dry ingredients into the wet without overmixing. A silicone spatula is my favorite—it scrapes the bowl clean.
- Small saucepan: For heating the heavy cream for the ganache. A microwave-safe bowl works too if you’re careful.
- Rolling pin or food processor: For crushing candy canes. I’ve used both, and honestly, the rolling pin method is more therapeutic (and less noisy).
- Cooling rack: Let the brownies cool completely before adding the ganache. A wire rack speeds up the process.
Budget-friendly tip: If you don’t have a 9×13 pan, you can use two 8×8 pans and adjust the baking time (check at 20 minutes). And if you’re short on mixing bowls, a large pot works in a pinch—I’ve done it more times than I’d like to admit.
Preparation Method
Let’s get baking! I’ve broken this down into clear steps with time estimates and sensory cues so you know exactly what to look for. Take your time—rushing is the enemy of fudgy brownies.
Step 1: Preheat and Prep the Pan (5 minutes)
Preheat your oven to 350°F (175°C). Line your 9×13-inch baking pan with parchment paper, leaving about 2 inches of overhang on the long sides. Lightly grease the parchment with butter or non-stick spray. This ensures your brownies lift out cleanly every time.
Step 2: Melt the Butter (2 minutes)
Place the 1 cup (226g) of unsalted butter in a microwave-safe bowl and heat in 30-second intervals until fully melted. Alternatively, melt it in a small saucepan over low heat. Let it cool slightly while you gather the other ingredients—you don’t want it hot enough to cook the eggs.
Step 3: Whisk Eggs and Sugar (5-7 minutes)
In a large mixing bowl, combine the 2 cups (400g) of granulated sugar and 4 room-temperature eggs. Whisk vigorously by hand for at least 5 minutes, or use a hand mixer on medium speed for 3 minutes. You’re looking for a thick, pale mixture that ribbons off the whisk when lifted. This step is crucial for that crackly top—don’t skip it! The mixture should look like thick pancake batter and feel slightly warm from the friction.
Step 4: Add Wet Ingredients (2 minutes)
Pour in the melted butter, 2 teaspoons of vanilla extract, and 1 teaspoon of peppermint extract. Whisk gently until just combined. The mixture will look glossy and smell amazing at this point. Resist the urge to overmix—you don’t want to deflate all that air you just whipped in.
Step 5: Combine Dry Ingredients (3 minutes)
In a separate medium bowl, whisk together 1 cup (120g) of all-purpose flour, 3/4 cup (75g) of unsweetened cocoa powder, 1/2 teaspoon of salt, and 1/4 teaspoon of baking powder. Make sure there are no lumps—cocoa powder can be stubborn. Sift it if necessary.
Step 6: Fold Dry into Wet (3 minutes)
Gradually add the dry ingredients to the wet mixture, folding gently with a rubber spatula. Stop as soon as you no longer see streaks of flour. The batter will be thick, fudgy, and slightly shiny. It should drop off the spatula in a thick ribbon. If it looks too stiff, you might have overmeasured your flour—next time, spoon and level it.
Step 7: Bake (25-30 minutes)
Pour the batter into the prepared pan and spread it evenly with the spatula. Bake at 350°F (175°C) for 25-30 minutes. Start checking at 25 minutes—insert a toothpick into the center. You want it to come out with a few moist crumbs attached, not clean. If it’s clean, you’ve overbaked them. The edges should look set and slightly pulled away from the pan, and the top should have a thin, crackly crust. Let the brownies cool in the pan on a wire rack for at least 30 minutes before adding the ganache.
Step 8: Make the Ganache (5 minutes)
While the brownies cool, make the ganache. Place 1 cup (170g) of semi-sweet chocolate chips in a medium heat-safe bowl. In a small saucepan, heat 1/2 cup (120ml) of heavy cream over medium heat until it just begins to simmer—small bubbles will form around the edges. Don’t let it boil. Pour the hot cream over the chocolate chips and let it sit for 2 minutes without stirring. Then gently whisk until smooth and glossy. Stir in 1/2 teaspoon of peppermint extract and a pinch of salt. The ganache should be thick but pourable.
Step 9: Assemble and Set (30 minutes)
Pour the ganache over the cooled brownies and spread it evenly with a spatula. Immediately sprinkle the crushed candy canes on top—if you wait, the ganache will start to set and the candy won’t stick. Refrigerate for at least 30 minutes to let the ganache firm up. For cleaner slices, refrigerate for 1 hour.
Step 10: Slice and Serve (5 minutes)
Lift the brownies out of the pan using the parchment overhang. Place on a cutting board and slice into squares with a sharp knife. Wipe the knife clean between cuts for neat edges. Serve at room temperature for the fudgiest texture.
Cooking Tips & Techniques
I’ve made these brownies more times than I can count, and I’ve learned a few things the hard way. Here are my best tips to ensure your Cozy Fudgy Peppermint Brownies turn out perfect every time.
Don’t overbake. This is the number one mistake I see. Fudgy brownies should look slightly underdone when you pull them out of the oven—they’ll continue cooking in the hot pan. If the toothpick comes out clean, they’re overbaked and will be dry. Aim for moist crumbs.
Use room temperature eggs. Cold eggs can seize the melted butter and create a lumpy batter. If you forget to set them out, place them in a bowl of warm water for 5 minutes before cracking.
Whisk the eggs and sugar thoroughly. I know it’s tempting to cut this step short, but that 5-minute whisk is what creates the crackly top. The sugar needs to dissolve into the eggs, and the mixture needs to aerate. Set a timer if you have to.
Crush candy canes strategically. I like to crush them in a zip-top bag with a rolling pin, leaving some larger pieces for visual appeal. If you use a food processor, pulse gently—you don’t want a fine powder. And crush them right before using, or they’ll absorb moisture from the air and get sticky.
Let the ganache set properly. I once rushed this step and ended up with a runny mess. The ganache needs at least 30 minutes in the fridge to firm up. For cleaner slices, refrigerate for a full hour. If you’re in a hurry, pop the pan in the freezer for 15 minutes.
Use a sharp knife for slicing. A dull knife will drag through the ganache and mess up the candy cane topping. Run the knife under hot water, wipe it dry, then slice. Repeat between cuts for perfect squares.
One mistake I’ll never make again: I once substituted peppermint oil for peppermint extract. Big mistake. Peppermint oil is about 4 times stronger, and my brownies tasted like a mouthful of toothpaste. Stick with extract for a balanced flavor.
Variations & Adaptations
One of the best things about this recipe is how easily it adapts. Here are a few variations I’ve tried and loved.
Dark Chocolate Mint Brownies
Swap the semi-sweet chocolate chips in the ganache for dark chocolate (60-70% cacao). The bitterness of the dark chocolate pairs beautifully with the cool peppermint. I’d recommend using Guittard 70% cacao baking chips for this version.
Gluten-Free Peppermint Brownies
Substitute the all-purpose flour with a 1:1 gluten-free baking blend. I’ve tested this with King Arthur’s Measure for Measure flour, and the texture is nearly identical. Make sure your cocoa powder and peppermint extract are certified gluten-free if needed.
Browned Butter Peppermint Brownies
For a nutty, deeper flavor, brown the butter before using. Melt the 1 cup of butter in a saucepan over medium heat, swirling occasionally, until it turns golden brown and smells toasty (about 5-7 minutes). Let it cool slightly before adding to the egg mixture. This adds a whole new dimension to the chocolate.
Vegan Peppermint Brownies
Use vegan butter (I like Miyoko’s) and replace the eggs with flax eggs (2 tablespoons ground flaxseed mixed with 6 tablespoons water, let sit for 5 minutes). For the ganache, use full-fat coconut cream instead of heavy cream. The texture will be slightly denser, but still delicious.
White Chocolate Peppermint Brownies
For a sweeter twist, use white chocolate chips in the ganache instead of semi-sweet. The white chocolate gives a creamy, vanilla-like base that lets the peppermint shine. Top with crushed candy canes and a drizzle of melted dark chocolate for a stunning presentation.
I personally love the browned butter version—it’s my go-to for holiday parties. The nuttiness of the browned butter makes the chocolate taste even richer, and guests always ask for the recipe.
Serving & Storage Suggestions
These brownies are incredibly versatile when it comes to serving. Here’s how to enjoy them at their best.
Serving Temperature: I prefer these at room temperature for the fudgiest texture. If you refrigerate them, let them sit out for 15-20 minutes before serving. For an extra indulgent treat, warm a brownie in the microwave for 10 seconds and top with a scoop of vanilla bean ice cream.
Presentation Ideas: Arrange the brownies on a festive platter and dust with powdered sugar for a snowy effect. You can also drizzle extra ganache over the top and add a few whole candy canes for decoration. For gift-giving, stack them in a decorative tin lined with parchment paper.
Complementary Dishes: These brownies pair beautifully with a hot drink. Serve them with peppermint hot chocolate, a spiced chai latte, or a strong cup of coffee. For a dessert board, arrange them alongside sugar cookies, gingerbread, and fresh berries.
Storage Instructions: Store the brownies in an airtight container at room temperature for up to 3 days. If your kitchen is warm, refrigerate them to prevent the ganache from softening. They actually taste better on day two—the flavors meld together beautifully.
Freezing Tips: These freeze wonderfully. Place the fully assembled brownies (without slicing) in the freezer for 1 hour until firm, then wrap tightly in plastic wrap and foil. Freeze for up to 3 months. Thaw overnight in the refrigerator and bring to room temperature before serving.
Reheating: For that just-baked taste, warm individual brownies in a 300°F (150°C) oven for 5-7 minutes. The ganache will soften slightly, and the edges will get a little crisp. Don’t microwave for more than 15 seconds, or the chocolate will melt too much.
Flavor Development: I’ve noticed the peppermint flavor becomes more pronounced after a day or two. If you’re making these for an event, bake them a day ahead and refrigerate overnight. The texture stays fudgy, and the flavors deepen.
Nutritional Information & Benefits
Let’s be real—these are an indulgent treat, and that’s okay. But here’s a breakdown of what you’re getting in each serving, along with a few health highlights.
Estimated Nutritional Values (per 2×2-inch brownie, based on 24 servings):
- Calories: 245
- Total Fat: 14g (Saturated Fat: 8g)
- Cholesterol: 55mg
- Sodium: 95mg
- Total Carbohydrates: 30g (Dietary Fiber: 2g, Sugars: 22g)
- Protein: 3g
Health Benefits of Key Ingredients:
Dark chocolate (in the ganache) is rich in antioxidants called flavonoids, which can support heart health and improve blood flow. Cocoa powder also contains magnesium and iron. Peppermint has been used for centuries to aid digestion and soothe headaches—though I’m not sure the candy cane version counts! Eggs provide high-quality protein and essential vitamins like B12 and D.
Dietary Considerations: This recipe contains gluten, dairy, and eggs. For gluten-free and vegan options, see the variations section above. These brownies are not low-carb or keto-friendly due to the sugar content, but you can experiment with a sugar substitute like monk fruit sweetener (though the texture will change).
Potential Allergens: Wheat (gluten), dairy, eggs. The candy canes may also contain traces of soy or corn depending on the brand. Always check labels if serving to someone with allergies.
My personal wellness perspective? I believe in balance. These brownies are a special treat for the holidays, not an everyday snack. I make them once or twice in December, savor every bite, and don’t feel guilty about it. Food is about joy and connection, and these brownies deliver both.
Conclusion
These Cozy Fudgy Peppermint Brownies with Candy Cane Ganache are more than just a dessert—they’re a little piece of nostalgia wrapped in chocolate and peppermint. Whether you’re recreating a childhood memory like I did, or starting a new tradition with your own family, this recipe is worth every minute you spend in the kitchen. The fudgy texture, the smooth ganache, the satisfying crunch of candy canes—it all comes together in a way that feels both special and comforting.
I’d love to hear how these turn out for you. Did you try a variation? Did your family devour them before you could get a photo? Drop a comment below and let me know—I read every single one. And if you share them on social media, tag me so I can see your beautiful creations. Honestly, there’s nothing that makes my day like seeing someone else fall in love with a recipe I’ve poured my heart into.
So go ahead, preheat that oven, crush some candy canes, and make yourself a batch. You deserve a cozy moment with a brownie in hand. Happy baking, friend.
Frequently Asked Questions
Can I use a brownie mix instead of making from scratch?
You can, but the texture won’t be as fudgy. If you’re short on time, use your favorite box mix and add 1 teaspoon of peppermint extract to the batter. Make the ganache as directed—it’ll still be delicious.
Why did my ganache turn out grainy?
Grainy ganache usually means the cream was too hot or the chocolate seized. Always heat the cream just until simmering, not boiling. If it happens, whisk in a tablespoon of warm cream or milk to smooth it out.
Can I make these brownies ahead of time?
Absolutely! These actually taste better the next day. Bake and assemble them, then refrigerate for up to 3 days. Bring to room temperature before serving. You can also freeze them for up to 3 months.
How do I get clean slices without the ganache cracking?
Use a sharp knife and run it under hot water before each cut. Wipe the blade dry between slices. For the cleanest edges, refrigerate the brownies for at least 1 hour before slicing.
Can I use regular mint extract instead of peppermint?
Mint extract is a blend of spearmint and peppermint, so it will taste different—more like a mojito than a candy cane. Stick with pure peppermint extract for that classic holiday flavor.
Pin This Recipe!

Cozy Fudgy Peppermint Brownies with Easy Candy Cane Ganache

Dense, rich, and intensely chocolatey brownies topped with a silky peppermint ganache and crushed candy canes. A nostalgic holiday treat that’s quick and easy to make.
- Prep Time: 15 minutes
- Cook Time: 30 minutes
- Total Time: 45 minutes
- Yield: 24 servings 1x
- Category: Dessert
- Cuisine: American
Ingredients
- 1 cup (226g) unsalted butter, melted
- 2 cups (400g) granulated sugar
- 4 large eggs, room temperature
- 2 teaspoons vanilla extract
- 1 teaspoon peppermint extract
- 1 cup (120g) all-purpose flour
- 3/4 cup (75g) unsweetened cocoa powder
- 1/2 teaspoon salt
- 1/4 teaspoon baking powder
- 1 cup (170g) semi-sweet chocolate chips
- 1/2 cup (120ml) heavy cream
- 1/2 teaspoon peppermint extract (for ganache)
- Pinch of salt (for ganache)
- 1/2 cup crushed candy canes (about 6 candy canes)
Instructions
- Preheat oven to 350°F (175°C). Line a 9×13-inch baking pan with parchment paper, leaving overhang on two sides. Lightly grease the parchment.
- Melt the butter in a microwave-safe bowl or small saucepan. Let cool slightly.
- In a large bowl, whisk together sugar and eggs for 5-7 minutes until thick, pale, and ribbon-like.
- Add melted butter, vanilla extract, and 1 teaspoon peppermint extract. Whisk gently until combined.
- In a separate bowl, whisk together flour, cocoa powder, salt, and baking powder.
- Fold dry ingredients into wet mixture with a rubber spatula until just combined. Batter will be thick and fudgy.
- Pour batter into prepared pan and spread evenly. Bake for 25-30 minutes, until a toothpick inserted in center comes out with moist crumbs. Cool in pan on a wire rack for at least 30 minutes.
- For the ganache: Place chocolate chips in a heat-safe bowl. Heat heavy cream in a small saucepan until simmering (small bubbles around edges). Pour over chocolate chips, let sit 2 minutes, then whisk until smooth. Stir in 1/2 teaspoon peppermint extract and a pinch of salt.
- Pour ganache over cooled brownies and spread evenly. Immediately sprinkle crushed candy canes on top. Refrigerate for at least 30 minutes (1 hour for cleaner slices).
- Lift brownies out of pan using parchment overhang. Slice into squares with a sharp knife, wiping blade clean between cuts. Serve at room temperature.
Notes
For a crackly top, whisk eggs and sugar thoroughly for at least 5 minutes. Don’t overbake; brownies should look slightly underdone when removed. Use room temperature eggs to prevent butter from seizing. Crush candy canes just before using to prevent stickiness. For cleaner slices, refrigerate assembled brownies for 1 hour before cutting.
Nutrition
- Serving Size: 1 brownie (2x2-inch
- Calories: 245
- Sugar: 22
- Sodium: 95
- Fat: 14
- Saturated Fat: 8
- Carbohydrates: 30
- Fiber: 2
- Protein: 3
Keywords: peppermint brownies, candy cane brownies, fudgy brownies, holiday brownies, chocolate peppermint brownies