I wasn’t trying to throw a party. Honestly, I’d just had one of those weeks where everything felt a little heavy, and my plan for Halloween was strictly sweatpants and a scary movie. But then my neighbor, this unassuming woman named Carol who grows the most incredible roses, texted me a photo. It wasn’t a picture of her garden. It was a picture of a wooden board, absolutely loaded with goodies, and in the center were these little cheese pumpkins. They looked like something from a cozy autumn fairy tale. She’d just made it for herself, she said, to snack on while handing out candy. The casualness of it all was what got me. She wasn’t trying to impress anyone. She was just making her Tuesday night feel a little special.
I practically ran over there. The smell of rosemary and roasted nuts hit me before I even got to her front porch. She was nonchalant about the whole thing, shooing away my compliments with a wave of her hand. “It’s just cheese and crackers,” she said. But it wasn’t. It was a mood. A whole vibe on a single cutting board. And those cheese pumpkins? They were the star of the show. I mean, who knew a little cream cheese and some chives could look so undeniably festive? I stood in her kitchen, watching her arrange everything with this effortless grace, and I knew right then I had to learn how to make it. Maybe you’ve been there—seeing a dish that just clicks, that feels like the answer to a question you didn’t even know you were asking.
This recipe is my love letter to that evening. It’s the perfect way to bring a little warmth and whimsy to your Halloween without all the stress. It’s not about perfection; it’s about creating a moment. A cozy, delicious, and visually stunning moment that says, “Hey, you deserve a treat.” And honestly, it’s so simple, you’ll be amazed you didn’t think of it yourself.
Why You’ll Love This Cozy Halloween Charcuterie Board
Let’s be real for a second. Halloween can be a lot. Between the costume planning, the candy buying, and the general chaos, sometimes you just want something that feels special without a ton of effort. This board is that thing. I’ve tested this exact combination more times than I can count, tweaking the cheese-to-cracker ratio and figuring out the most stable way to build those cute little pumpkins. This version is the one I keep coming back to, and I’m telling you, it works every single time.
- Quick & Easy: You can have this entire board assembled in under 30 minutes. No cooking, no complicated steps, just a little bit of arranging. Perfect for a last-minute gathering or a solo self-care night.
- Simple Ingredients: This is the kind of recipe where you probably already have most of the stuff in your fridge and pantry. A block of cream cheese, some sharp cheddar, a few crackers, and some nuts. No fancy grocery trips needed.
- Perfect for a Cozy Night In: Whether you’re having a few friends over for a movie marathon or just want to make your Tuesday night feel a little more festive, this board sets the perfect scene. It’s the ultimate comfort food for a cool, spooky evening.
- Crowd-Pleaser: Honestly, I’ve never seen a board disappear faster. There’s something for everyone—salty, sweet, creamy, crunchy. Kids love the cute pumpkins, and adults love the sophisticated flavor combos.
- Unbelievably Delicious: The texture and flavor combo is pure comfort food magic. The smooth, savory cheese pumpkins paired with a sharp cheddar, a crunchy cracker, and a touch of sweetness from dried fruit? It’s next-level snacking.
What makes this board different from all the other charcuterie boards out there? It’s the focus on warmth and comfort. It’s not a fussy, perfectly curated platter meant for Instagram likes (though it will definitely get them). It’s a board designed to be eaten, to be shared, to make you feel good. It’s comfort food reimagined for a spooky season—whimsical, delicious, and completely stress-free. This is the kind of board that makes you close your eyes after the first bite, the kind that turns a simple snack into a memorable moment.
What Ingredients You Will Need
This recipe uses simple, wholesome ingredients to deliver big flavor and that cozy, satisfying feeling. You’ll be surprised how a few pantry staples can come together to create something so special. The ingredients are easy to find and even easier to customize to your own taste.
Here’s what you’ll need to build your board:
- For the Cheese Pumpkins (The Star of the Show):
- 8 oz cream cheese, softened (This is the base. I personally prefer Philadelphia for its super smooth texture. It makes shaping the pumpkins a breeze.)
- 1/2 cup sharp cheddar cheese, finely shredded (Adds that classic cheesy flavor and a beautiful orange color. Pre-shredded works in a pinch, but freshly shredded melts into the cream cheese much better.)
- 1/4 cup powdered Parmesan cheese (This adds a savory, umami depth. Don’t skip it—it’s the secret to making them taste as good as they look.)
- 1/2 teaspoon garlic powder
- 1/4 teaspoon smoked paprika (For a hint of smokiness and that perfect pumpkin color.)
- Salt and black pepper to taste
- Fresh chives or small pretzel sticks (For the pumpkin stems. Chives are more elegant; pretzel sticks are more fun.)
- For the Rest of the Board (The Supporting Cast):
- 8 oz sharp cheddar cheese, sliced or cubed (I like to use a block and cut it into rustic chunks. It looks more inviting.)
- 6 oz salami or prosciutto (The salty, savory element. I recommend a good quality Genoa salami from the deli counter.)
- 1 cup mixed nuts (Roasted and salted almonds, pecans, or cashews work great. They add a wonderful crunch.)
- 1 cup crackers (I love a mix of buttery Ritz crackers and something more substantial like wheat crackers or rosemary crackers.)
- 1/2 cup dried cranberries or cherries (For a pop of sweetness and a gorgeous red color against the orange and gold.)
- 1/2 cup dark chocolate chips or a chopped dark chocolate bar (A little touch of indulgence. The bitterness of dark chocolate pairs perfectly with the cheese.)
- Fresh rosemary sprigs (For garnish. They add a beautiful, woodsy aroma and make the board look incredibly professional.)
- Apple slices or pear slices (Optional, but they add a fresh, crisp element and are perfect for scooping up the cheese spread.)
For the best flavor, I always recommend using full-fat cream cheese. The low-fat versions have a higher water content and won’t shape as nicely. Also, when you’re picking your sharp cheddar, look for one with a vibrant orange color—it makes the pumpkins look so much more festive.
Equipment Needed
You don’t need any fancy gadgets for this one. The beauty of a charcuterie board is its simplicity. Here’s what you’ll need to get started:
- A Large Cutting Board or Serving Platter: This is your canvas. A wooden board is classic and cozy, but a large slate board or even a clean baking sheet will work perfectly. The key is having enough space to spread everything out a little.
- A Mixing Bowl: For combining your cream cheese, cheddar, and spices. A medium-sized bowl is perfect.
- A Rubber Spatula: This makes mixing the cheese spread so much easier. You’ll also use it to help shape the pumpkins.
- Plastic Wrap: This is your secret weapon for shaping the cheese pumpkins. You’ll wrap the cheese mixture in it to form the balls, which keeps your hands clean and gives you a smooth surface.
- A Small Knife or Paring Knife: For cutting the cheese and fruit. A small, sharp knife gives you more control.
- Small Bowls or Ramekins: For holding the nuts, dried fruit, and chocolate. This keeps them from rolling all over the board and makes for a neater presentation.
If you don’t have a large wooden board, don’t stress. I’ve made this on a large white platter before, and it looked just as beautiful. The food is the star here, not the board itself. And if you’re looking for a budget-friendly option, a simple wooden cutting board from IKEA works like a charm.
Preparation Method
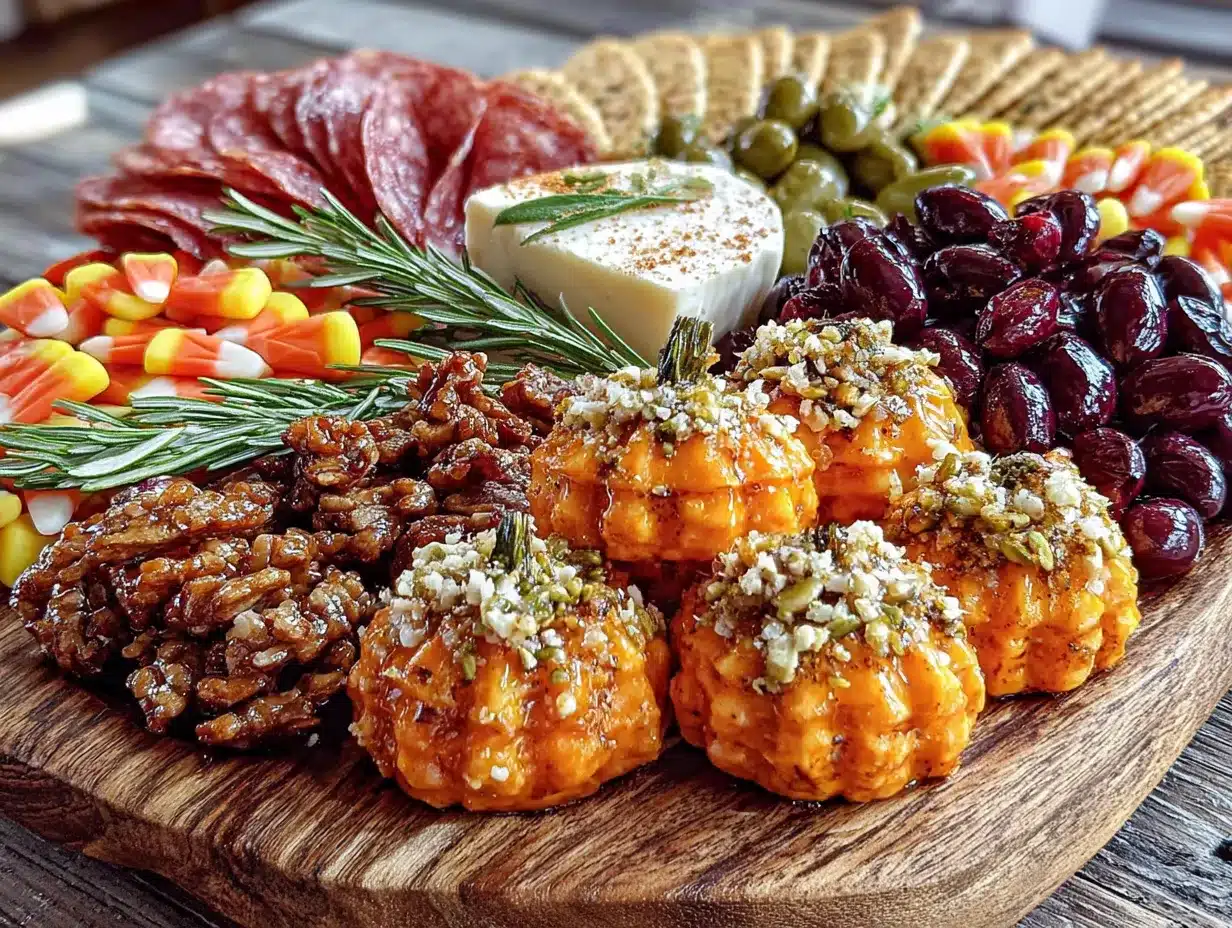
Alright, let’s get to the fun part. This is so easy, you’ll be snacking in no time. I’ve broken it down into simple, clear steps so you can follow along without any stress.
- Make the Cheese Pumpkin Spread (5 minutes): In your medium mixing bowl, combine the softened cream cheese, finely shredded sharp cheddar, Parmesan cheese, garlic powder, and smoked paprika. Use your rubber spatula to mix everything together until it’s completely smooth and well combined. Taste it and add a pinch of salt and pepper if you like. I usually add just a little black pepper for a tiny kick.
- Shape the Cheese Pumpkins (10 minutes): This is the part that looks impressive but is actually the easiest thing ever. Tear off a piece of plastic wrap, about 8 inches long. Scoop about 2 tablespoons of the cheese mixture into the center of the plastic wrap. Gather the edges of the plastic wrap and twist it to form a tight ball. Then, gently squeeze the top of the ball to create a slight point, like a pumpkin shape. Repeat this with the rest of the cheese mixture. You should get about 6 to 8 small pumpkins. Place them on a small plate and pop them in the fridge for at least 15 minutes to firm up. This step is key—it makes them much easier to handle and keeps their shape on the board.
- Prepare Your Board (5 minutes): While the pumpkins are chilling, start getting your board ready. Place your small bowls or ramekins on the board first—this helps you plan the layout. Fill them with the nuts, dried cranberries, and dark chocolate chips. Arrange them in a way that feels balanced, maybe in a triangle or a diagonal line across the board.
- Add the Meats and Cheeses (5 minutes): Now, start filling in the empty spaces. Arrange your sliced salami or prosciutto in little piles or folds around the bowls. Then, place your sharp cheddar chunks in a few different spots. Don’t be afraid to let some pieces overlap. The goal is a look that’s abundant and inviting, not perfectly organized.
- Add the Crackers and Fruit (5 minutes): Fill in the remaining gaps with your crackers. I like to arrange them in small clusters or rows. If you’re using apple or pear slices, tuck them in around the edges, as they can brown a little. This is also the time to add any other little extras you might have, like some olives or pickles.
- Place the Cheese Pumpkins (2 minutes): This is the big moment. Take your cheese pumpkins out of the fridge. Gently unwrap each one and place them directly on the board. I like to arrange them in a little cluster in the center, like they’re a tiny pumpkin patch. It creates a beautiful focal point.
- Add the Stems and Garnish (2 minutes): For the stems, gently press a small piece of fresh chive or a short pretzel stick into the top of each cheese pumpkin. Then, take your fresh rosemary sprigs and tuck them in and around the pumpkins and the rest of the board. The rosemary adds a beautiful green color and a wonderful, cozy aroma that just screams autumn.
- Final Touches (1 minute): Take a step back and look at your board. Fill in any sparse spots with a few extra crackers or nuts. The best boards look a little messy and abundant. Don’t overthink it. You’re ready to serve!
One little tip from my own kitchen: if your cheese mixture feels too sticky to shape, just pop it in the fridge for 10 minutes before you try to form the balls. It makes a world of difference.
Cooking Tips & Techniques
Over the years, I’ve made a few mistakes with these boards so you don’t have to. Here are my best tips for getting it just right.
- Don’t Skip the Chill Time: I know you’re excited, but trust me on this one. Chilling the cheese pumpkins for at least 15 minutes is non-negotiable. If you try to place them on the board while they’re still soft, they’ll lose their shape and turn into little blobs. Plus, they’re much easier to handle when they’re cold.
- Room Temperature is Your Friend: While the pumpkins need to be cold, you want the rest of your cheese to be at room temperature for the best flavor and texture. Take your block of sharp cheddar out of the fridge about 30 minutes before you start assembling. It will taste so much better.
- Use a Variety of Textures: The secret to a great charcuterie board is variety. You want something creamy (the cheese pumpkins), something crunchy (the nuts and crackers), something chewy (the dried fruit), and something salty (the meats). This keeps every bite interesting and satisfying.
- Don’t Overcrowd the Board: It can be tempting to pile everything on, but a little bit of space makes the board look more inviting and less chaotic. Leave a few small gaps between the clusters of food. It makes it easier for people to grab what they want without knocking everything over.
- Make it a Day Ahead: You can absolutely prep the cheese pumpkins a day in advance. Just keep them wrapped tightly in plastic wrap in the fridge. Then, on the day you want to serve, all you have to do is arrange everything on the board. It takes the pressure off and makes the whole experience feel effortless.
I once forgot to chill the pumpkins and ended up with a sad, flat pile of cheese on my board. We still ate it, of course, but it wasn’t nearly as cute. Learn from my mistakes!
Variations & Adaptations
This board is endlessly customizable. Here are a few of my favorite ways to switch it up.
- Make it Spooky: For a more Halloween-themed board, add some “spider webs” by drizzling a little balsamic glaze in a swirly pattern on the board. You can also use a small cookie cutter to cut your sliced cheese into bat or ghost shapes. It’s a fun touch that kids absolutely love.
- Go Sweet & Savory: If you have a sweet tooth, swap the dark chocolate for milk chocolate or white chocolate. You can also add some caramel sauce for dipping the apple slices. The combination of sweet caramel and salty cheese is divine.
- Make it Vegetarian: Simply leave out the salami and prosciutto. The board will still be incredibly satisfying. You can add more cheese, like some crumbled goat cheese or brie, to make up for the missing meat.
- Try Different Spices: Don’t be afraid to experiment with the cheese pumpkin seasoning. A pinch of cayenne pepper will give them a spicy kick. A little bit of dried rosemary or thyme will make them taste even more autumnal. I once added a teaspoon of everything bagel seasoning, and it was surprisingly delicious.
- Use Different Cheeses: While I love the classic sharp cheddar, you can use any cheese you like for the base. A smoky gouda or a spicy pepper jack would be fantastic. Just make sure it’s finely shredded so it blends smoothly into the cream cheese.
My personal favorite variation is adding a little bit of crumbled, cooked bacon to the cheese pumpkin mixture. It adds a smoky, salty crunch that takes them over the top. It’s not for everyone, but if you’re a bacon lover, give it a try.
Serving & Storage Suggestions
This board is best served at room temperature, so let it sit out for about 15 minutes before you dig in. This allows the flavors to really come alive. I love to serve it with a side of warm apple cider or a glass of dry red wine. It’s the perfect pairing for a cozy night in.
For presentation, I like to keep it simple and rustic. The wooden board does all the work. I’ll sometimes add a few small, battery-operated tea lights around the board for a warm, flickering glow. It instantly makes the whole table feel more magical.
If you have leftovers (which is rare, but it happens!), here’s what to do. The cheese pumpkins can be stored in an airtight container in the fridge for up to 3 days. The rest of the ingredients—the nuts, dried fruit, crackers, and chocolate—should be stored separately in their own airtight containers or bags. The meat and sliced cheese should also be wrapped up and stored in the fridge.
To reheat the cheese pumpkins, just let them sit at room temperature for about 10 minutes. They’re best enjoyed cold or at room temperature, so you don’t need to microwave them. The flavors actually get even better after a day in the fridge, as they have time to meld together.
Nutritional Information & Benefits
While this is definitely a treat-yourself kind of board, it does have some surprising health benefits. The cheese provides a good source of calcium and protein, which is great for keeping you full and satisfied. The nuts are packed with healthy fats, fiber, and vitamin E, and the dark chocolate is rich in antioxidants. The dried fruit offers a natural source of sweetness and fiber.
Please note that these are just estimates. The exact nutritional values will vary depending on the specific brands and quantities you use.
| Nutrient | Approximate Value (per serving, based on 1/6 of board) |
|---|---|
| Calories | 450-550 |
| Fat | 35-45g |
| Carbohydrates | 20-30g |
| Protein | 15-20g |
This board is naturally gluten-free if you choose gluten-free crackers. It’s also easy to make it vegetarian or low-carb by adjusting the ingredients. For a lower-carb option, skip the crackers and dried fruit and add more nuts and vegetables like cucumber slices or bell pepper strips.
I personally love that this board feels indulgent but is made from real, whole foods. It’s a way to treat yourself without all the processed junk.
Conclusion
So there you have it. My take on the coziest, most charming Halloween charcuterie board you’ll ever make. It’s everything I love about this time of year—warm, inviting, and full of little moments of joy. Those cheese pumpkins, with their simple charm, have become a staple in my home every October.
I really hope you give this a try. Don’t be afraid to make it your own. Swap in your favorite cheeses, add some spooky decorations, or just keep it simple and classic. The best part is that there are no rules. It’s all about creating something that makes you and the people you share it with feel good.
I’d love to hear how it turns out for you! Drop a comment below and let me know what variations you tried. Did you add something crazy like ghost-shaped cheese? I want to know all about it. And if you share a photo on Pinterest, tag me—I love seeing your beautiful boards. Until next time, happy snacking, and have a wonderfully cozy Halloween!
Frequently Asked Questions
Can I make the cheese pumpkins ahead of time?
Absolutely! In fact, I highly recommend it. You can make the cheese mixture and shape the pumpkins up to 2 days in advance. Just keep them wrapped tightly in plastic wrap in the refrigerator. When you’re ready to serve, let them sit at room temperature for about 10 minutes before placing them on the board.
What can I use instead of cream cheese?
If you’re not a fan of cream cheese, you can use a soft, spreadable goat cheese or a ricotta cheese that’s been drained overnight. The texture will be a little different, but it will still be delicious. Just make sure whatever you use is soft enough to mix and shape easily.
How do I keep the apple slices from turning brown?
This is a classic problem! The best way to prevent browning is to toss the apple slices in a little bit of lemon juice or pineapple juice. It won’t change the flavor much, and it will keep them looking fresh and pretty for hours. You can also use a “swimmer” apple variety like Granny Smith, which browns more slowly.
My cheese mixture is too sticky to shape. What should I do?
Don’t panic! This happens to me all the time, especially if the cream cheese is a little too soft. The easiest fix is to pop the bowl of cheese mixture in the fridge for 15-20 minutes. The cold will firm it up, making it much easier to handle. You can also try lightly oiling your hands or the plastic wrap with a little bit of cooking spray.
Can I add other Halloween-themed snacks to the board?
Of course! That’s the whole fun of it. You can add things like candy corn, chocolate spiders (just use a spider-shaped mold), or even little meringue ghosts. I’ve also seen people add small, pre-made caramel apples or pumpkin-shaped cookies. Get creative and have fun with it!
Pin This Recipe!
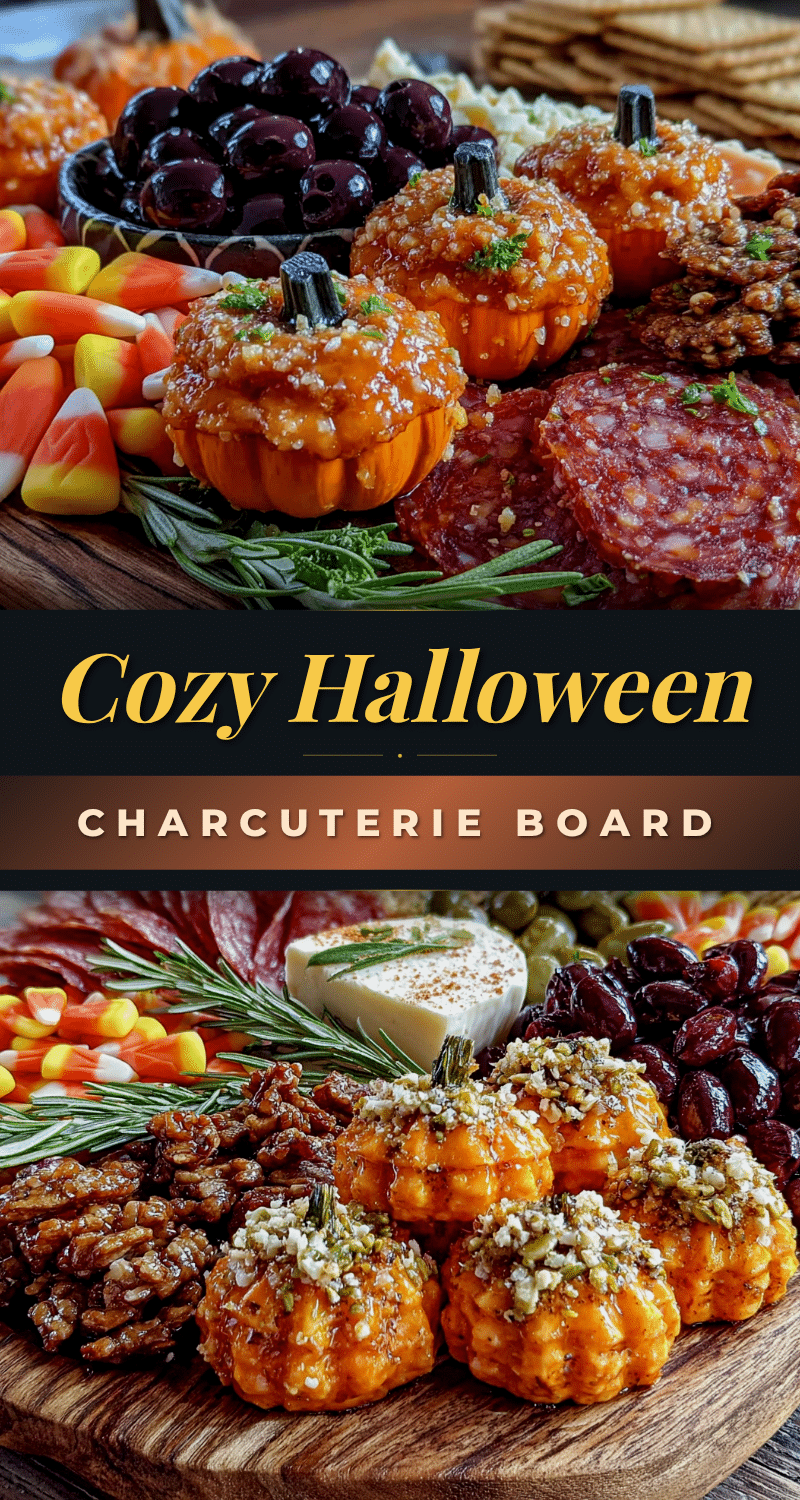
Cozy Halloween Charcuterie Board with Cheese Pumpkins

A warm and whimsical Halloween charcuterie board featuring adorable cheese pumpkins made from cream cheese, sharp cheddar, and Parmesan. Perfect for a cozy night in, this easy, no-cook board is loaded with savory meats, nuts, dried fruit, and crackers for a stress-free festive treat.
- Prep Time: 20 minutes
- Cook Time: 0 minutes
- Total Time: 20 minutes
- Yield: 6 servings 1x
- Category: Appetizer
- Cuisine: American
Ingredients
- 8 oz cream cheese, softened
- 1/2 cup sharp cheddar cheese, finely shredded
- 1/4 cup powdered Parmesan cheese
- 1/2 teaspoon garlic powder
- 1/4 teaspoon smoked paprika
- Salt and black pepper to taste
- Fresh chives or small pretzel sticks (for pumpkin stems)
- 8 oz sharp cheddar cheese, sliced or cubed
- 6 oz salami or prosciutto
- 1 cup mixed nuts (roasted and salted almonds, pecans, or cashews)
- 1 cup crackers (buttery Ritz and wheat or rosemary crackers)
- 1/2 cup dried cranberries or cherries
- 1/2 cup dark chocolate chips or chopped dark chocolate bar
- Fresh rosemary sprigs (for garnish)
- Apple slices or pear slices (optional)
Instructions
- Make the Cheese Pumpkin Spread: In a medium mixing bowl, combine softened cream cheese, finely shredded sharp cheddar, Parmesan cheese, garlic powder, and smoked paprika. Mix with a rubber spatula until smooth. Season with salt and pepper to taste.
- Shape the Cheese Pumpkins: Tear off an 8-inch piece of plastic wrap. Scoop about 2 tablespoons of the cheese mixture into the center. Gather the edges and twist to form a tight ball, then gently squeeze the top to create a slight point (pumpkin shape). Repeat to make 6-8 pumpkins. Place on a plate and refrigerate for at least 15 minutes to firm up.
- Prepare Your Board: Place small bowls or ramekins on the board. Fill with nuts, dried cranberries, and dark chocolate chips. Arrange in a balanced layout (e.g., triangle or diagonal).
- Add the Meats and Cheeses: Arrange sliced salami or prosciutto in piles or folds around the bowls. Place sharp cheddar chunks in several spots, letting some overlap for an abundant look.
- Add the Crackers and Fruit: Fill remaining gaps with crackers in small clusters or rows. Tuck apple or pear slices around the edges. Add any other extras like olives or pickles.
- Place the Cheese Pumpkins: Remove pumpkins from the fridge. Gently unwrap each and place them in a cluster in the center of the board to create a focal point.
- Add the Stems and Garnish: Press a small piece of fresh chive or a short pretzel stick into the top of each pumpkin for a stem. Tuck fresh rosemary sprigs around the pumpkins and board.
- Final Touches: Step back and fill any sparse spots with extra crackers or nuts. Serve immediately or let sit at room temperature for 15 minutes before serving.
Notes
For best results, use full-fat cream cheese. If the cheese mixture is too sticky to shape, refrigerate for 10-15 minutes before forming balls. The cheese pumpkins can be made up to 2 days in advance and stored wrapped in plastic wrap in the fridge. Let the board sit at room temperature for 15 minutes before serving for best flavor.
Nutrition
- Serving Size: 1/6 of board
- Calories: 500
- Sugar: 12
- Sodium: 600
- Fat: 40
- Saturated Fat: 18
- Carbohydrates: 25
- Fiber: 3
- Protein: 18
Keywords: Halloween charcuterie board, cheese pumpkins, easy appetizer, no-cook recipe, cozy Halloween snack, cream cheese pumpkins, fall charcuterie board


