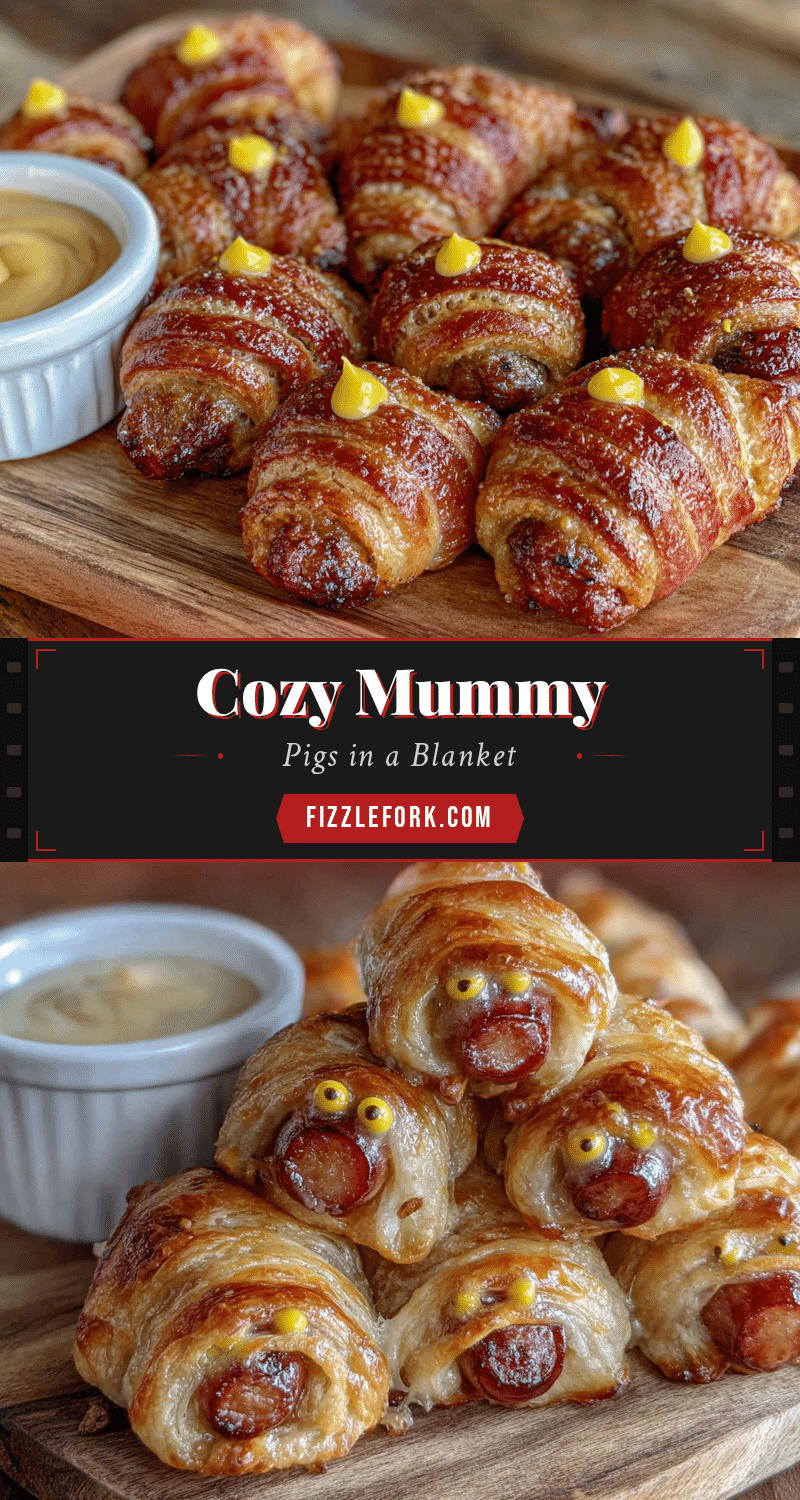
This was supposed to be a quiet, no-fuss dinner—just some pigs in a blanket with a side of roasted veggies. I had the crescent rolls thawing on the counter, the mini sausages lined up like little soldiers, and a jar of mustard ready for dipping. Then my three-year-old wandered in, clutching a roll of toilet paper and wrapped from head to toe like he’d lost a fight with a mummy costume from last Halloween. “Look, Mama, I’m a mummy!” he announced, stumbling into the kitchen table. And in that moment, I looked at the crescent rolls, I looked at him, and the idea hit me like a cartoon lightbulb. What if the pigs in a blanket became the mummies?
Honestly, I grabbed the wrong sheet pan in my excitement—the one that was still greasy from roasting chicken—and had to start over. The first batch of mummies had mustard eyes that slid right off because I didn’t press them in firmly enough. But the second batch? Those little guys stared back at me with their yellow eyes, wrapped in their flaky pastry bandages, and I knew we had something special. It was a total accident of timing and toddler antics, and it turned into a Halloween tradition before I even had time to clean up the mess.
That night, my son ate three mummies and declared them “spooky yummy.” Maybe you’ve been there—staring at a bag of mini sausages, trying to make a weeknight dinner feel like something more. Or maybe you’re looking for that one Halloween recipe that’s cute enough for a party but simple enough for a Tuesday. Either way, these cozy mummy pigs in a blanket with mustard eyes are the answer. They’re the kind of recipe that makes you feel like a kitchen genius, even when you’re not.
Why You’ll Love This Recipe
Let me tell you why these little mummies have become my most-requested Halloween recipe year after year. I’ve tested this with three different brands of crescent rolls, two types of sausages, and even a gluten-free dough that almost worked on the first try (spoiler: the second try was the winner). Here’s what makes them stand out:
- Quick & Easy : From fridge to table in under 25 minutes. Seriously, you can make these while your kids are still arguing over costumes.
- Simple Ingredients : You only need four things: crescent rolls, mini sausages, mustard, and an egg wash. No fancy grocery trips required.
- Perfect for Halloween Parties : They’re adorable on a platter, easy to grab, and somehow both spooky and cozy at the same time.
- Crowd-Pleaser : I’ve served these at parties where adults went back for thirds. The kids love them, but honestly, the grown-ups sneak them too.
- Unbelievably Delicious : The flaky, buttery dough wrapped around a juicy sausage, with that little pop of tangy mustard—it’s comfort food in costume.
What makes this recipe different from every other pigs in a blanket you’ve seen? It’s the wrapping technique. Most people just twist the dough once or twice and call it a day. But I figured out that by cutting the crescent roll dough into thin strips and wrapping them unevenly, you get that authentic mummy look—some bandages tight, some loose, with little gaps where the “skin” peeks through. And the mustard eyes? They’re not just decorative. The tangy mustard cuts through the richness of the sausage and dough, making each bite perfectly balanced.
This recipe isn’t just good—it’s the kind that makes you close your eyes after the first bite. It’s Halloween food that doesn’t sacrifice taste for cuteness. And honestly, isn’t that what we all really want?
What Ingredients You Will Need
This recipe uses simple, everyday ingredients to create something that looks way more complicated than it actually is. Most of these are probably already in your fridge or pantry, which makes this the perfect last-minute Halloween recipe.
- Crescent roll dough (one 8-ounce can, or about 8 crescent rolls) — I prefer Pillsbury for the flakiest texture, but any brand works. Look for the sheet-style crescent dough if you want to cut your own strips; it gives you more control over the mummy wrapping.
- Mini smoked sausages (one 12-ounce package, about 30 sausages) — I use Lit’l Smokies or any cocktail sausage. The key is getting the mini size so they cook through in the same time as the dough. You can also use mini hot dogs if that’s what you have.
- Yellow mustard (about 2 tablespoons) — This is for the mummy eyes. I recommend a classic yellow mustard like French’s for that bright, recognizable color. Don’t use Dijon or whole grain here—the color won’t pop the same way, and the flavor is too sharp.
- Egg wash (1 large egg beaten with 1 tablespoon of water) — This gives the dough that gorgeous golden-brown finish. If you don’t have eggs, you can use milk or cream for a lighter color, but the egg wash really makes them shine.
- Optional: Everything bagel seasoning (for sprinkling) — I love adding a pinch of this for extra texture and flavor. The sesame seeds and garlic bits look like little mummy dust. Totally optional but highly recommended.
For the mustard eyes, I’ve tried a few different methods. You can pipe the mustard on after baking using a toothpick or the tip of a squeeze bottle. I’ve also tried using mustard seeds for a more natural look, but honestly, the squeeze bottle method gives you the most control and the cutest results. Just make sure the mustard is at room temperature so it flows smoothly—cold mustard gets clumpy and won’t make nice round dots.
If you’re making these for a party, double the recipe. Trust me on this. I once made a single batch for a Halloween gathering and they were gone in ten minutes. People were standing around the empty platter looking disappointed. Learn from my mistake.
Equipment Needed
You don’t need any fancy kitchen gadgets for this recipe, which is part of its charm. Here’s what you’ll need:
- Baking sheet (one standard half-sheet pan works perfectly) — I recommend lining it with parchment paper for easy cleanup. Silicone baking mats work great too, but they don’t give quite the same crispy bottom on the dough.
- Sharp knife or pizza cutter — You’ll be cutting the crescent roll dough into thin strips. A pizza cutter makes this job much easier and gives you cleaner edges than a knife.
- Pastry brush — For applying the egg wash. If you don’t have one, you can use a paper towel or even your fingers in a pinch. I’ve done it both ways, and the pastry brush gives the most even coverage.
- Small bowl — For beating the egg wash and for the mustard if you’re piping it.
- Toothpick or small squeeze bottle — For applying the mustard eyes. I’ve used both, and the squeeze bottle gives you more control, but a toothpick works perfectly fine if that’s what you have.
- Cooling rack (optional but helpful) — Letting the mummies cool on a rack prevents the bottoms from getting soggy. If you don’t have one, just transfer them to a plate after a few minutes on the baking sheet.
I bought a cheap pizza cutter from the dollar store years ago, and honestly, it works better than the expensive one I got as a wedding gift. Sometimes the simple tools are the best. Just make sure whatever you use is sharp—dull blades will drag through the dough and mess up your mummy strips.
Preparation Method
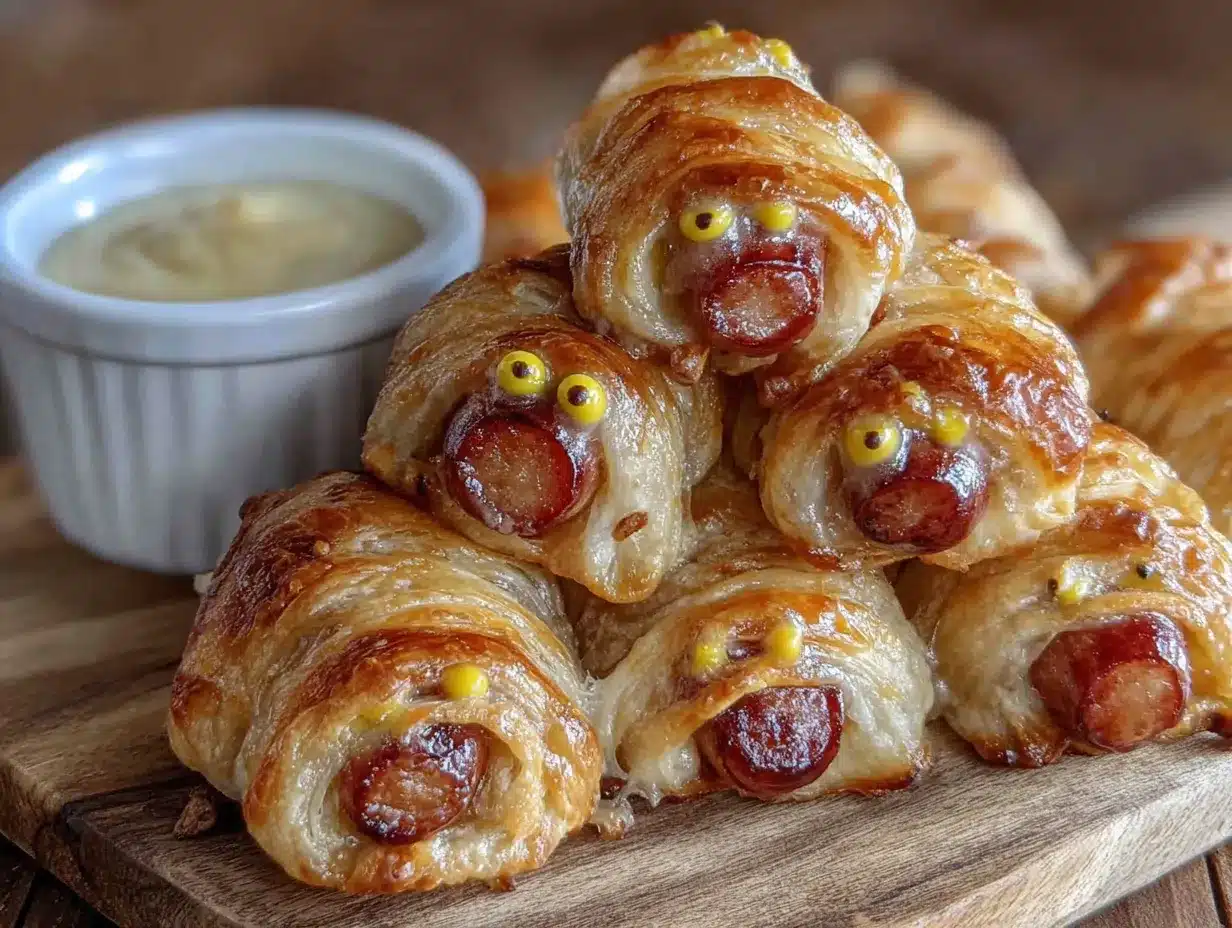
Preheat your oven to 375°F (190°C). Line a baking sheet with parchment paper and set it aside. This is one of those recipes where having everything prepped before you start makes the whole process so much smoother.
- Prepare the dough: Open the can of crescent roll dough and unroll it onto a clean cutting board. If you’re using the perforated crescent rolls, press the seams together gently with your fingers to create one large rectangle. If you’re using the sheet-style dough, you’re already ahead of the game. Using a sharp knife or pizza cutter, cut the dough into thin strips about 1/4-inch wide. Don’t worry if they’re not perfectly uniform—mummies are supposed to look a little messy.
- Wrap the sausages: Take one mini sausage and place it at the end of a dough strip. Wrap the strip around the sausage, leaving small gaps so some of the sausage shows through—this is what makes them look like mummies with “skin” peeking through the bandages. Press the end of the dough strip gently to seal it. Repeat with all the sausages. You should get about 3-4 sausages per crescent roll, depending on how wide you cut your strips.
- Arrange on the baking sheet: Place the wrapped sausages on the prepared baking sheet, spacing them about 1 inch apart. They won’t spread much, but you want a little room for air circulation so the dough gets crispy all around. I usually fit about 15 mummies on one standard baking sheet.
- Apply the egg wash: In a small bowl, beat the egg with 1 tablespoon of water until well combined. Using a pastry brush, lightly brush the egg wash over each mummy. Don’t soak them—just a light coating will give them that beautiful golden color. If you’re using everything bagel seasoning, sprinkle it on now while the egg wash is still wet so it sticks.
- Bake: Place the baking sheet in the preheated oven and bake for 10-12 minutes, or until the dough is golden brown and puffed. The sausages should be heated through and slightly sizzling. Keep an eye on them after the 10-minute mark—ovens vary, and you don’t want burnt mummies.
- Cool slightly: Remove the baking sheet from the oven and let the mummies cool on the sheet for 2-3 minutes. This is important because the mustard eyes will slide off if the dough is too hot. Transfer them to a cooling rack or a serving platter.
- Add the mustard eyes: Once the mummies are cool enough to handle but still warm, add the mustard eyes. If you’re using a squeeze bottle, simply dot two small eyes onto each mummy. If you’re using a toothpick, dip it into the mustard and carefully dot the eyes onto each mummy. Don’t press too hard—you want the mustard to sit on top of the dough, not sink into it.
- Serve immediately: These are best served warm, when the dough is still flaky and the sausages are juicy. Arrange them on a platter with extra mustard for dipping, and watch them disappear.
One thing I learned the hard way: don’t overcrowd the baking sheet. The first time I made these, I crammed all 30 mummies onto one sheet, and the ones in the middle came out doughy and pale. Give them space to breathe, and you’ll get perfectly golden results every time.
Cooking Tips & Techniques
After making these mummies more times than I can count (and messing them up plenty along the way), I’ve picked up a few tricks that make the process easier and the results better.
Keep the dough cold. Crescent roll dough gets sticky and hard to work with when it warms up. If you’re taking your time with the wrapping, pop the dough back in the fridge for 5 minutes if it starts feeling too soft. I once left the dough on the counter while I answered the phone, and by the time I got back, it was a sticky mess that tore apart when I tried to wrap the sausages. Lesson learned: cold dough is happy dough.
Don’t wrap too tightly. If you stretch the dough strips too tight around the sausages, they’ll shrink and split during baking. Leave a little slack so the dough can puff up naturally. Think of it like wrapping a real mummy—you want the bandages to look snug but not strangling.
Use the right mustard consistency. If your mustard is too thick, it won’t come out of the squeeze bottle properly. Give it a good shake or stir before using. If it’s still too thick, you can thin it with a drop of water. On the flip side, if it’s too thin, it’ll run and make your mummies look like they’re crying. Room temperature mustard is your sweet spot.
Double-check your oven temperature. I learned this one after a batch of mummies came out pale and undercooked on the bottom. My oven was running 25 degrees cooler than the dial said. An oven thermometer is a cheap investment that pays off in perfectly baked goods every time.
Make ahead tip: You can assemble the mummies up to the egg wash step and refrigerate them for up to 4 hours before baking. Just cover the baking sheet with plastic wrap and pop them in the fridge. When you’re ready to bake, add the egg wash and bake as directed, adding 1-2 minutes to the baking time since the dough will be colder. This is a lifesaver if you’re hosting a party and want to prep ahead.
Variations & Adaptations
One of the best things about this recipe is how easily it adapts to different tastes and dietary needs. Here are some variations I’ve tried and loved:
Vegetarian Mummies: Swap the mini sausages for vegetarian cocktail sausages or even cheese sticks cut into 2-inch pieces. I’ve used mozzarella string cheese cut into thirds, and they turned out amazing—the cheese gets all melty and stretchy inside the dough. Just keep an eye on them in the oven because cheese can leak out if you overbake them.
Spicy Mummies: Use spicy jalapeño cheddar sausages instead of regular smoked sausages. The heat pairs beautifully with the cool, tangy mustard eyes. I made these for a Super Bowl party and they were the first thing to disappear from the snack table.
Gluten-Free Mummies: Use gluten-free crescent roll dough (I’ve had good luck with the brand that comes in the refrigerated section). The dough is a bit more delicate, so handle it gently and don’t overwork it. You might need to cut the strips a little wider to prevent tearing. Bake for an extra 1-2 minutes since gluten-free dough often needs a little more time to brown.
Breakfast Mummies: Use breakfast sausage links instead of cocktail sausages, and serve them with maple syrup for dipping instead of mustard. The sweet and savory combination is incredible. I made these for a Halloween morning breakfast and my kids thought they were the best thing ever.
Different Eye Colors: If you’re not a mustard fan, you can use ketchup for red eyes, sriracha for spicy red eyes, or even melted cheese piped on for yellow eyes. I’ve also used black sesame seeds for a more subtle look—just press them into the dough before baking.
My personal favorite variation is the Everything Bagel Mummies. I sprinkle everything bagel seasoning on top before baking, and the sesame seeds and garlic bits give the mummies this amazing texture and flavor. It’s become my go-to for parties because people always ask what’s on them.
Serving & Storage Suggestions
These mummies are best served warm, right out of the oven, when the dough is at its flakiest and the sausages are at their juiciest. But they’re still pretty good at room temperature, which makes them perfect for parties and potlucks.
Serving Temperature: Serve them warm or at room temperature. If you’re bringing them to a party, you can bake them at home and transport them in a covered container. They’ll stay warm for about 20-30 minutes in a covered dish. For longer events, I recommend bringing a small portable oven or warming tray to keep them at their best.
Presentation Ideas: Arrange the mummies on a large platter in a circle, with a bowl of extra mustard in the center for dipping. You can also arrange them on a bed of lettuce or spinach to look like they’re rising from a graveyard. For a Halloween party, I like to add plastic spiders or fake cobwebs around the platter for extra spooky vibes.
Complementary Dishes: These pair beautifully with a simple vegetable platter, some deviled eggs, or a warm bowl of tomato soup. For a full Halloween meal, serve them alongside a batch of creamy pumpkin soup or a spooky spinach dip in a bread bowl.
Storage Instructions: Store leftover mummies in an airtight container in the refrigerator for up to 3 days. The dough will soften slightly, but they’ll still taste great. I don’t recommend freezing these—the dough gets soggy when thawed, and the mustard eyes tend to smear.
Reheating Methods: To reheat, place the mummies on a baking sheet in a 350°F (175°C) oven for 5-7 minutes, or until warmed through. You can also use an air fryer at 350°F for 3-4 minutes for extra crispy results. Avoid the microwave—it makes the dough chewy and the mustard eyes runny.
One thing I’ve noticed is that the flavors actually get better after a day in the fridge. The mustard mellows out and blends with the sausage and dough in a really nice way. So if you have leftovers (unlikely, but possible), they make a great lunch the next day.
Nutritional Information & Benefits
Let’s be real—these are not health food. They’re a fun Halloween treat, and that’s okay. But here’s a rough breakdown of what you’re getting in each mummy, based on using standard crescent rolls and mini smoked sausages:
| Nutrient | Per Mummy (approximate) |
|---|---|
| Calories | 85-100 |
| Total Fat | 5-7g |
| Saturated Fat | 2-3g |
| Carbohydrates | 7-9g |
| Protein | 3-4g |
| Sodium | 250-300mg |
While these aren’t going to win any nutrition awards, they do have a few redeeming qualities. The sausages provide a decent amount of protein, which helps keep you full. And the mustard, believe it or not, is made from turmeric and vinegar, both of which have some anti-inflammatory properties. Plus, if you use the everything bagel seasoning, you’re getting a little bit of sesame seeds, which are a good source of healthy fats and minerals.
For dietary considerations, these are not gluten-free unless you use gluten-free dough. They contain dairy if you use the egg wash (though the egg wash is optional). The sausages typically contain soy and nitrates, so if you have sensitivities, look for nitrate-free or organic options. I’ve used organic chicken sausages before, and they work just as well.
My personal take? These are a treat, not a staple. They’re for Halloween parties, cozy movie nights, and those moments when you just want something fun and delicious. And honestly, that’s perfectly fine. Food doesn’t have to be “healthy” to be good for you in other ways—like bringing a smile to your face or making a kid’s Halloween extra special.
Conclusion
These cozy mummy pigs in a blanket with mustard eyes are proof that the best recipes often come from happy accidents. What started as a distracted mom trying to make a simple dinner turned into a Halloween tradition that my family looks forward to every year. They’re fun to make, adorable to look at, and absolutely delicious to eat—what more could you want from a recipe?
I hope you’ll give these a try, whether it’s for a Halloween party, a cozy night in, or just because you want to make something that makes people smile. Don’t be afraid to customize them to your taste—swap the sausages, change up the eyes, or add your favorite seasonings. The beauty of this recipe is that it’s forgiving and flexible, just like the best comfort food always is.
If you make these, I’d love to hear about it. Leave a comment below and tell me how they turned out, or share a photo of your mummy creations. Did your kids help wrap them? Did you try a fun variation? Did they disappear as fast as mine always do? Let me know, and happy Halloween cooking!
Frequently Asked Questions
Can I make these ahead of time for a party?
Yes! You can assemble the mummies up to 4 hours ahead, keep them covered in the refrigerator, and bake them just before serving. Add the egg wash right before baking for the best golden color.
What if I can’t find mini smoked sausages?
You can use mini hot dogs, cocktail wieners, or even cut regular hot dogs into 2-inch pieces. The cooking time stays the same as long as the pieces are roughly the same size.
Can I use something other than crescent roll dough?
Absolutely. Puff pastry works beautifully—just cut it into thin strips and wrap the same way. You can also use pizza dough rolled thin, but it won’t be as flaky. If you’re in a pinch, refrigerated biscuit dough cut into strips works too, though the texture will be denser.
How do I keep the mustard eyes from sliding off?
Let the mummies cool for 2-3 minutes after baking before adding the mustard eyes. If the dough is too hot, the mustard will melt and run. Also, make sure your mustard is at room temperature—cold mustard is too thick to pipe neatly.
Can I freeze these for later?
I don’t recommend freezing these after baking because the dough gets soggy when thawed. However, you can freeze the unbaked assembled mummies on a baking sheet, then transfer them to a freezer bag. Bake from frozen, adding 2-3 minutes to the baking time. Just don’t add the mustard eyes until after baking.
Pin This Recipe!