My neighbor Karen wasn’t trying to impress anyone that Tuesday. I’d stopped by to return her slow cooker—I’d borrowed it for a chili experiment that went sideways—and this cool, chocolatey smell hit me before I even got past her screen door. She was standing there in sweatpants, holding a spatula, looking at a pan like it was no big deal. “Oh, that?” she said when I asked. “Just something I threw together.”
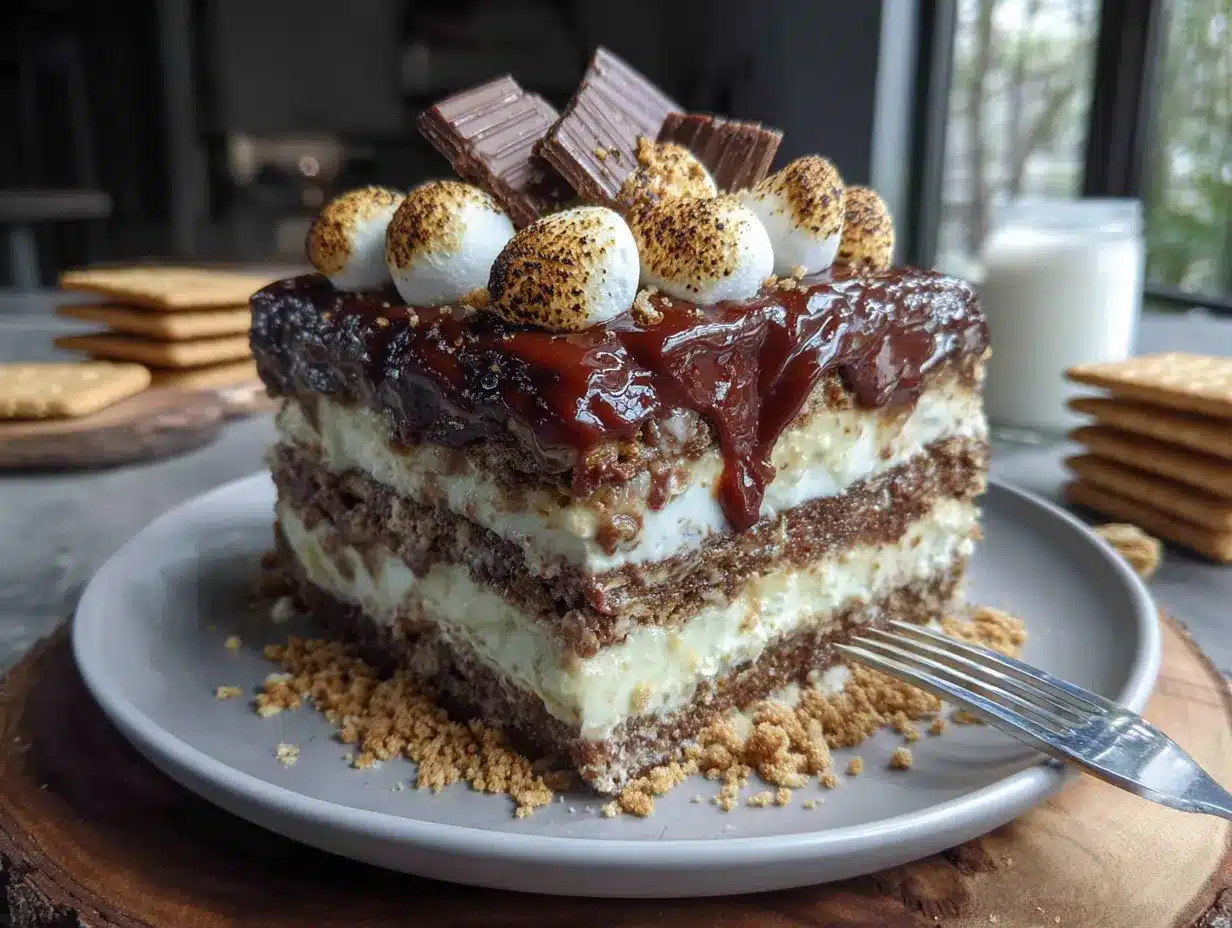
Let me tell you, “something I threw together” turned out to be the most ridiculously good dessert I’d had in months. Layers of graham crackers, chocolate pudding, marshmallows, and that unmistakable campfire taste—except there was no campfire. No oven. No stove, even. She’d made it in about ten minutes, and it was sitting in her fridge, chilling out like it owned the place. I stood there eating a slice off a paper plate, and honestly, I think I made some kind of embarrassing noise.
I asked for the recipe, and she shrugged. “It’s just an icebox cake. You know, s’mores style.” She said it like everyone knew how to do this. But I didn’t. And maybe you haven’t either. That’s okay—I’ve made this cozy no-bake s’mores icebox cake about a dozen times since that Tuesday, tweaking it here and there, figuring out what makes it work. The casualness of that moment is the whole point. This isn’t a fussy dessert. It’s the kind you make when you want something that feels like a hug but takes almost no effort. You know that feeling when you just need something sweet and comforting without a whole production? This is it.
I keep making it because it reminds me that good food doesn’t have to be complicated. Karen wasn’t showing off. She was just feeding her family on a random weeknight. And somehow, that made it taste even better.
Why You’ll Love This Recipe
I’ve tested this cozy no-bake s’mores icebox cake more times than I care to admit—through humid summers, chilly autumn evenings, and even a power outage that left me craving something cold and sweet. Each time, it delivered. Here’s why I think you’ll feel the same way:
- Quick & Easy : Comes together in about 10 minutes of active work. No baking, no fussing, no complicated techniques. Perfect for those evenings when you want dessert but don’t want to earn it.
- Simple Ingredients : You probably have most of these in your pantry right now. Graham crackers, chocolate pudding mix, milk, marshmallows, butter. No fancy grocery runs required.
- Perfect for Cozy Nights : This is the dessert equivalent of wrapping yourself in a blanket. It’s cool, creamy, and has that nostalgic campfire flavor without the smoke smell in your hair.
- Crowd-Pleaser : I’ve brought this to potlucks, family dinners, and casual get-togethers. It disappears fast. Kids love it, adults love it, and someone always asks for the recipe.
- Unbelievably Delicious : The layers soften together overnight, creating this incredible texture that’s part cake, part pudding, part dream. The chocolate, marshmallow, and graham cracker combo is comfort food at its finest.
What makes this recipe different from the rest? It’s the balance. I spent a few batches figuring out the right pudding-to-cracker ratio so the layers don’t get soggy or dry. The marshmallows melt into the pudding just enough to create that gooey, campfire-like texture. And I add a little trick—toasting some marshmallows on top—that gives you that smoky flavor without any actual fire. It’s not just another version. It’s the one I keep coming back to.
This recipe isn’t just good. It’s the kind that makes you close your eyes after the first bite. It’s comfort food reimagined—faster, easier, but with the same soul-soothing satisfaction. Perfect for impressing guests without stress, or turning a simple Tuesday night into something memorable.
What Ingredients You Will Need
This cozy no-bake s’mores icebox cake uses simple, pantry-friendly ingredients to deliver that classic campfire flavor without any heat. Most of these are staples you probably already have, which is part of the beauty.
- Graham crackers (about 2 sleeves, or 14-16 full sheets) – These form the base layers. I recommend Honey Maid for consistent texture. You’ll break them to fit your pan, and they soften beautifully overnight. For a gluten-free option, use gluten-free graham crackers—they work just as well.
- Instant chocolate pudding mix (two 3.9-ounce boxes) – This is the creamy, chocolatey heart of the cake. I use Jell-O brand because it sets up reliably, but store brands work fine too. Make sure it’s instant, not cook-and-serve—you want it to thicken quickly in the fridge.
- Cold milk (4 cups, or 960 ml) – Whole milk gives the richest, creamiest pudding, but 2% works well too. For a dairy-free version, use oat milk or almond milk—just know the pudding might be slightly softer. I’ve tested both, and oat milk is my favorite alternative.
- Marshmallows (about 3 cups, or one 10-ounce bag) – Mini marshmallows are easiest to spread evenly. You’ll use most of them between the layers, and save a handful for the topping. For a fun twist, try flavored marshmallows like vanilla bean or strawberry.
- Butter (3 tablespoons, unsalted, melted) – This is for the optional graham cracker crust bottom. It adds richness and helps the bottom layer hold together. If you’re skipping the crust, you can omit it—the cake will still be delicious, just a bit softer on the bottom.
- Chocolate bar (1 large, like a 4-ounce Hershey’s) – For shaving over the top. This adds a nice crunch and visual appeal. Dark chocolate works great if you want to balance the sweetness. I’ve used milk chocolate, dark chocolate, and even a salted caramel bar—all were wonderful.
- Vanilla extract (1 teaspoon) – A small addition that rounds out the chocolate flavor. Trust me on this one—it makes a subtle but noticeable difference.
Optional additions: a pinch of sea salt on top to cut the sweetness, or a drizzle of caramel sauce between the layers for extra decadence. I’ve done both, and they’re fantastic.
Equipment Needed
You don’t need much for this cozy no-bake s’mores icebox cake, which is part of its charm. Here’s what I use:
- 9×13-inch baking dish – This is the ideal size for layering. Glass is best because you can see the beautiful layers forming. A metal pan works too, but glass helps the cake chill evenly. I picked mine up at a thrift store for three bucks, and it’s perfect.
- Large mixing bowl – For whisking the pudding. Any medium-to-large bowl will do. I use a glass one because it’s easy to see when the pudding is smooth.
- Whisk – A wire whisk works best to get the pudding lump-free. You can use a hand mixer, but honestly, a whisk is faster and involves less cleanup.
- Spatula – For spreading the pudding and marshmallows evenly. A rubber spatula is ideal for scraping every last bit of pudding out of the bowl.
- Measuring cups and spoons – For the milk and vanilla. I use a liquid measuring cup for the milk and standard spoons for the vanilla.
- Sharp knife or bench scraper – For cutting the finished cake. A serrated knife works best to get clean slices through the graham crackers. I learned this the hard way—a dull knife just squishes everything.
- Small saucepan or microwave-safe bowl – For toasting the top marshmallows. If you have a kitchen torch, even better. I use a small saucepan to melt a bit of butter for the crust, then toast marshmallows in the microwave in 10-second bursts.
That’s it. No stand mixer, no springform pan, no special gadgets. If you have these basics, you’re ready to go.
Preparation Method
Making this cozy no-bake s’mores icebox cake is almost embarrassingly simple. Here’s how I do it, step by step, with all the little details I’ve learned along the way.
- Make the graham cracker crust (optional but recommended). Crush about 4 full sheets of graham crackers into fine crumbs. You can do this in a food processor or by putting them in a zip-top bag and smashing with a rolling pin—I’ve done both, and the bag method is oddly satisfying. Mix the crumbs with 3 tablespoons of melted butter and 1 tablespoon of sugar. Press this mixture firmly into the bottom of your 9×13-inch dish. Pop it in the fridge while you make the pudding. This step adds a nice buttery crunch, but if you’re short on time, you can skip it and just start layering graham crackers directly.
- Make the chocolate pudding. In your large mixing bowl, whisk together both boxes of instant chocolate pudding mix and 4 cups of cold milk. Whisk for about 2 minutes until it’s thick and smooth. Don’t over-whisk—you want it to set up in the fridge, not turn into a stiff mess. Add the teaspoon of vanilla extract and stir gently. Let it sit for about 5 minutes to thicken slightly. The pudding should be thick enough to hold its shape when you lift the whisk, but still pourable.
- Start layering. Take your dish out of the fridge. If you made the crust, it should be firm by now. If not, just start with a layer of graham crackers. Break the crackers to fit the bottom of the dish, covering it completely. Don’t worry about small gaps—the pudding will fill them in. I usually use about 4 to 5 full sheets per layer, broken into pieces that fit snugly.
- Add the first pudding layer. Pour about one-third of the chocolate pudding over the graham crackers. Use your spatula to spread it evenly, making sure it gets into the edges and any gaps. The layer should be about 1/2-inch thick. Don’t press down too hard—you want the crackers to stay intact for now.
- Add marshmallows. Scatter about one-third of your mini marshmallows over the pudding layer. Spread them out evenly so every bite gets some marshmallow goodness. I use my hands for this—it’s faster and lets me feel if the marshmallows are evenly distributed.
- Repeat the layers. Add another layer of graham crackers, pressing down gently so they make contact with the marshmallows and pudding. Then another third of the pudding, another third of the marshmallows. Repeat one more time: graham crackers, remaining pudding, remaining marshmallows. You should end with a final layer of graham crackers on top. I like to add a thin layer of pudding on top of that, just enough to cover the crackers, so the marshmallows on top stick nicely.
- Top with marshmallows and chocolate. Spread the remaining marshmallows over the top layer. If you want that toasted effect, pop the dish under the broiler for 1-2 minutes, watching closely so the marshmallows don’t burn. Or use a kitchen torch if you have one. I usually microwave the top marshmallows for about 15 seconds to soften them, then sprinkle with shaved chocolate. Use a vegetable peeler to shave the chocolate bar into curls—it looks fancy with almost no effort.
- Chill. Cover the dish with plastic wrap or foil and refrigerate for at least 6 hours, but overnight is best. The graham crackers need time to soften into cake-like layers. I’ve made the mistake of cutting into it after only 3 hours, and the crackers were still crunchy. Trust me—wait the full time. The texture is worth it.
- Serve. Cut into squares with a sharp knife. A serrated knife works best to get through the layers cleanly. Wipe the knife between cuts for neat slices. Serve cold, straight from the fridge. The cake will be firm but creamy, with soft, cake-like layers and pockets of gooey marshmallow.
Cooking Tips & Techniques
After making this cozy no-bake s’mores icebox cake more times than I can count, I’ve picked up a few tricks that make a real difference. Here are my best ones:
Don’t skimp on the chilling time. I know it’s tempting to dig in after a few hours, but the magic happens overnight. The graham crackers need at least 6 hours to soften properly. At the 8-hour mark, they’re perfect—soft but with a tiny bit of structure left. After 24 hours, the cake is at its peak: creamy, cohesive, and sliceable. I once served it after only 4 hours, and the layers fell apart on the plate. Learn from my mistake.
Toast the marshmallows carefully. If you’re using the broiler, keep the dish on the middle rack and watch it like a hawk. Marshmallows go from golden to black in about 30 seconds. I prefer using a kitchen torch because I can control exactly where the heat goes. If you don’t have either, just microwave the top marshmallows for 10-15 seconds—they’ll puff up and get soft, which is almost as good.
Use full-fat milk for best results. I’ve tested this with skim milk and almond milk, and the pudding just doesn’t set up as firmly. Whole milk gives you that rich, creamy texture that makes this dessert feel indulgent. If you need a dairy-free option, oat milk is the closest I’ve found to whole milk in terms of thickness.
Press the graham crackers gently. When you add each layer, press down just enough to make contact with the pudding underneath. If you press too hard, the crackers break into pieces and you lose the distinct layers. Think of it as a gentle pat, not a push.
Let it come to room temperature slightly before serving. The cake is best cold, but if it’s straight from the fridge, it can be a bit firm. Let it sit on the counter for about 10 minutes before cutting. This softens the marshmallows and makes slicing easier. I learned this when I tried to cut it straight from the fridge and the marshmallows stuck to the knife like glue.
Multitask wisely. While the pudding is setting up after whisking, crush the graham crackers for the crust or shave the chocolate bar. This saves you about 5 minutes of idle time. I usually do all my prep work before I start whisking, so everything flows smoothly.
Variations & Adaptations
One of the best things about this cozy no-bake s’mores icebox cake is how easy it is to customize. Here are some variations I’ve tried and loved:
Peanut Butter S’mores Cake. Add a layer of peanut butter between the graham crackers and pudding. Just warm about 1/2 cup of peanut butter in the microwave for 15 seconds and drizzle it over each cracker layer. The salty-sweet combo is incredible. I made this for a friend who’s obsessed with peanut butter, and she said it was the best dessert she’d had all year.
Mint Chocolate Version. Use mint chocolate pudding instead of regular chocolate, and add a layer of crushed peppermint candies between the layers. This is perfect for holiday gatherings or when you want a refreshing twist. I tried this last December, and it was a hit at our family Christmas dinner.
Vegan Adaptation. Use dairy-free graham crackers, coconut milk or oat milk for the pudding, and vegan marshmallows (Dandies brand works great). The texture will be slightly softer, but the flavor is still spot-on. I tested this for a vegan friend, and she couldn’t stop eating it.
Berry S’mores Cake. Add a layer of fresh berries—raspberries, strawberries, or blueberries—between the pudding layers. The tartness cuts through the sweetness beautifully. I’ve done this with sliced strawberries and raspberries, and both were excellent. The berries add a pop of color too.
Individual Servings. Instead of a 9×13 dish, use mason jars or small ramekins. Layer the ingredients as directed, but use smaller portions. These are perfect for picnics, potlucks, or when you want portion control. I made these for a backyard movie night, and everyone loved having their own little jar.
Gluten-Free Option. Use gluten-free graham crackers. I’ve tested this with Schär brand, and the texture is almost identical. The cake sets up just as well, and no one will notice the difference.
Feel free to mix and match these ideas. The base recipe is forgiving, so don’t be afraid to experiment. That’s half the fun.
Serving & Storage Suggestions
This cozy no-bake s’mores icebox cake is best served cold, straight from the fridge. I like to cut it into squares and serve it on a chilled plate. The contrast between the cool, creamy cake and the soft marshmallows is part of what makes it so satisfying.
Presentation tips: Before serving, add a few extra shaved chocolate curls on top and a sprinkle of sea salt if you’re feeling fancy. A dollop of whipped cream on each slice makes it extra indulgent. For a campfire vibe, serve it with a side of toasted marshmallows on skewers—guests can dip them in the cake.
Complementary dishes: This cake pairs beautifully with a hot cup of coffee or a cold glass of milk. For a full dessert spread, serve it alongside fresh fruit or a simple vanilla ice cream. The richness of the cake balances well with something light and tart.
Storage instructions: Cover the dish tightly with plastic wrap or foil and store in the refrigerator for up to 5 days. The cake actually gets better after the first day as the flavors meld together. After 3 days, the texture starts to soften slightly, but it’s still delicious.
Freezing instructions: You can freeze this cake for up to 2 months. Wrap the entire dish in plastic wrap, then a layer of foil. To serve, thaw in the refrigerator overnight. The texture will be slightly softer after freezing, but the flavor is still wonderful. I’ve frozen individual slices wrapped in plastic wrap for quick desserts—they thaw in about 30 minutes at room temperature.
Reheating tips: This is a cold dessert, so reheating isn’t necessary. But if you want that warm, gooey campfire experience, microwave individual slices for 10-15 seconds. The marshmallows will soften and the pudding will warm slightly, creating a different but equally delicious experience.
Flavor development: The flavors deepen over time. On day one, the cake is good. On day two, it’s great. By day three, the chocolate and marshmallow have fully melded, and the graham crackers are perfectly soft. I always make this a day ahead for best results.
Nutritional Information & Benefits
Let’s be real—this is a treat, not a health food. But here’s what you should know about a typical serving (about 1/12th of the cake):
- Calories: Approximately 320-350 per serving
- Fat: 12-15g (mostly from butter and milk)
- Carbohydrates: 50-55g (from graham crackers, pudding, and marshmallows)
- Protein: 5-7g (from milk)
- Sugar: 35-40g
Health benefits of key ingredients: Milk provides calcium and vitamin D for bone health. Dark chocolate (if you use it for the topping) contains antioxidants. Graham crackers offer small amounts of fiber and iron. Marshmallows… well, they’re mostly sugar, but they make us happy, and that counts for something.
Dietary considerations: This recipe can be adapted for gluten-free (use gluten-free graham crackers), dairy-free (use plant-based milk and vegan marshmallows), or vegan (same substitutions). It contains dairy and gluten in its standard form. The sugar content is moderate for a dessert, but if you’re watching your intake, you can use sugar-free pudding mix and reduce the marshmallows slightly.
Personal wellness perspective: I believe in balance. This isn’t an everyday dessert, but it’s perfect for special occasions, holidays, or those nights when you just need something comforting. The portion size is reasonable, and because it’s so satisfying, a small slice goes a long way. I’ve served this at gatherings where people took modest portions and felt completely satisfied.
Conclusion
This cozy no-bake s’mores icebox cake is the kind of dessert that reminds you why simple things are often the best. It’s quick, easy, and uses ingredients you probably already have. But more than that, it’s comforting in a way that feels like a warm hug on a cold day.
I love this recipe because it brings back that Tuesday afternoon at Karen’s house—the casualness, the unexpected delight, the feeling of discovering something wonderful by accident. Every time I make it, I think about how good food doesn’t need to be complicated. It just needs to be made with care and shared with people you love.
I encourage you to make this your own. Add your favorite toppings, try different variations, and don’t be afraid to experiment. The beauty of this cake is that it’s forgiving. You can’t really mess it up.
When you make it, I’d love to hear how it turned out. Leave a comment below and tell me about your version—what toppings you used, how you customized it, or just how much you enjoyed it. Share a photo if you’re feeling proud. And if you have questions, ask away. I’m here to help.
Go ahead, give it a try. Your taste buds will thank you. And honestly, you deserve something this good.
Frequently Asked Questions
Can I make this s’mores icebox cake ahead of time?
Absolutely! In fact, it’s better when made ahead. Prepare the cake the day before you plan to serve it, and let it chill overnight. The flavors meld together beautifully, and the texture reaches perfection after 12-24 hours in the fridge.
Can I use homemade pudding instead of instant?
You can, but the texture will be different. Instant pudding sets up firmly without cooking, which is key for this cake’s structure. Homemade pudding is softer and may not hold the layers as well. If you use homemade, expect a creamier, less sliceable result.
How do I keep the graham crackers from getting too soggy?
The key is the chilling time. If you let the cake set for at least 6 hours, the crackers soften to a cake-like texture without becoming mushy. If you leave it for more than 2 days, the crackers will continue to soften. For best results, serve within 24-48 hours.
Can I use a different type of cracker?
Yes! You can substitute graham crackers with digestive biscuits, shortbread cookies, or even chocolate wafers. Each will give a slightly different texture and flavor. Digestive biscuits are a great alternative if you’re in the UK or can’t find graham crackers.
What if I don’t have a 9×13-inch dish?
No problem. You can use two 8×8-inch dishes, a 9×9-inch dish, or even individual ramekins or mason jars. Just adjust the layering accordingly. Individual servings are great for portion control and make for a fun presentation at parties.
Pin This Recipe!
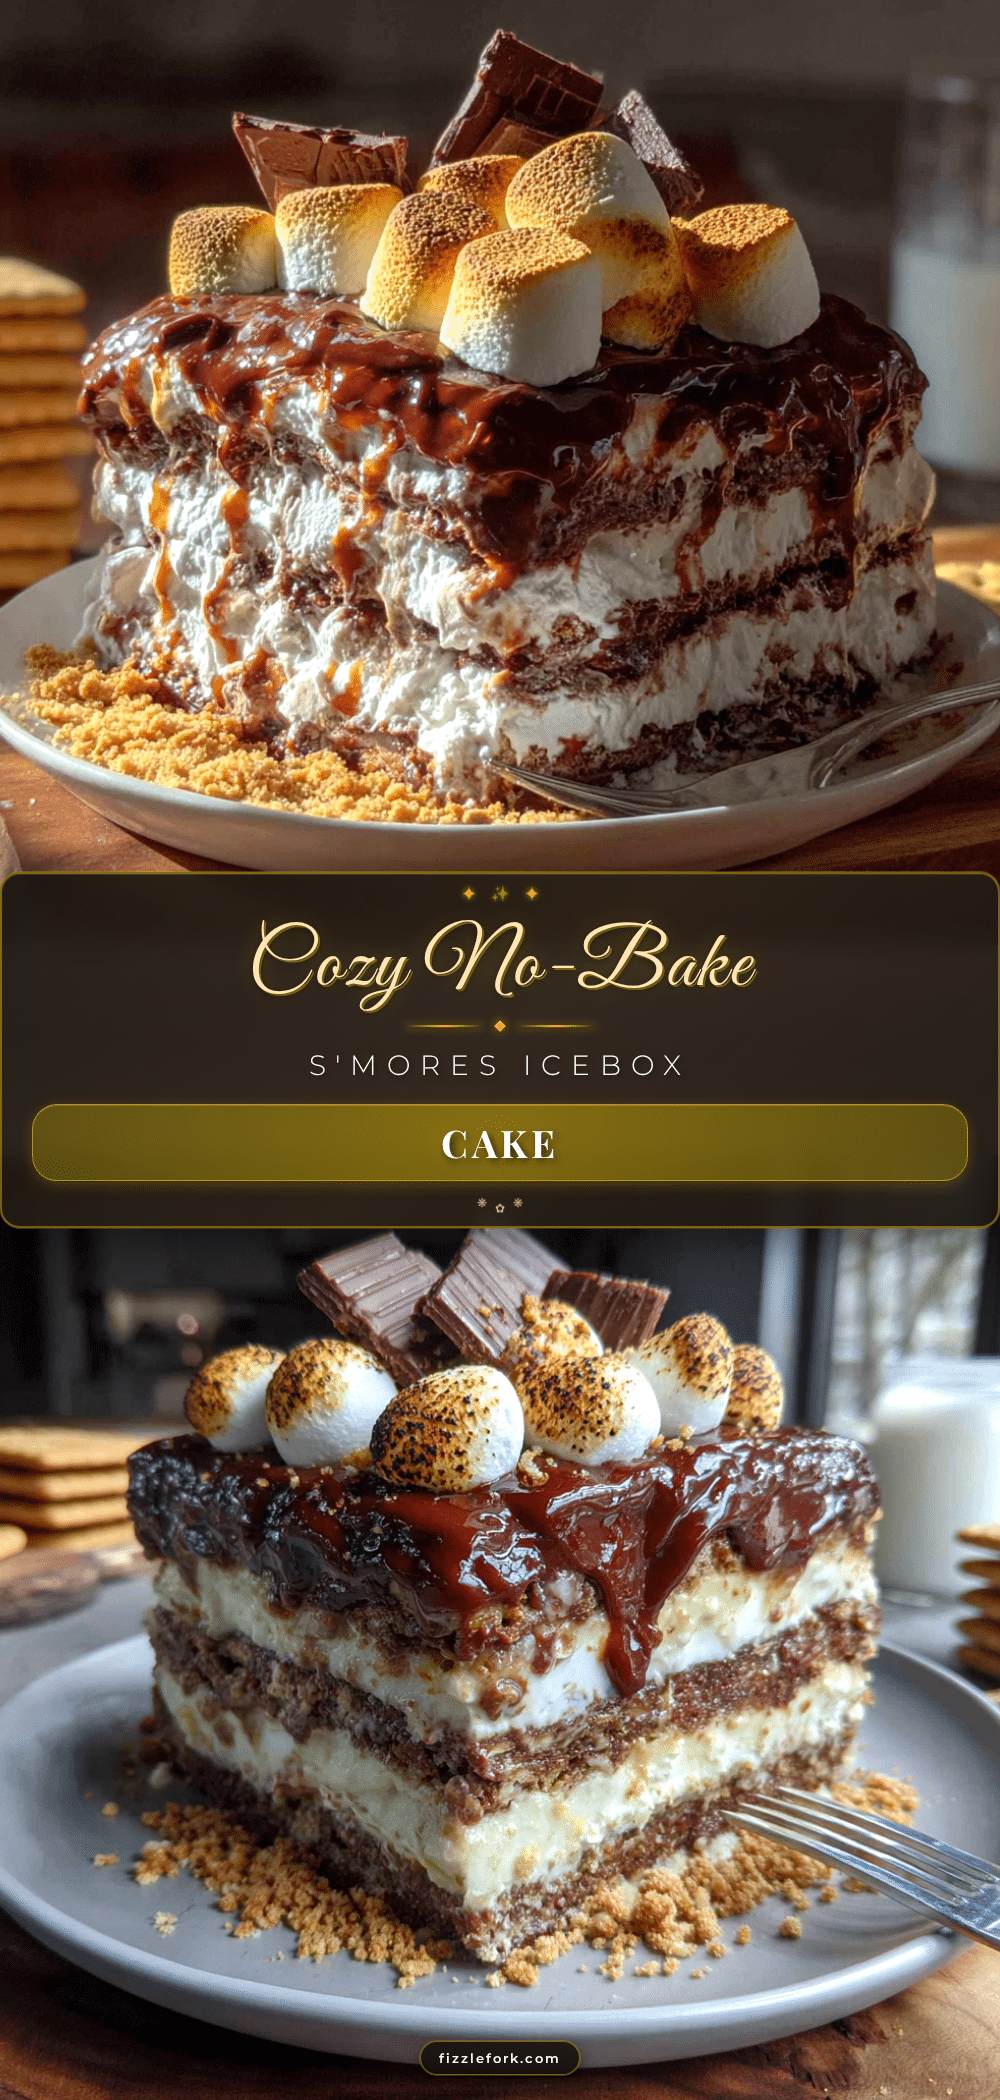
Cozy No-Bake S’mores Icebox Cake – Easy 10-Minute Dessert
This no-bake s’mores icebox cake layers graham crackers, chocolate pudding, and marshmallows for a creamy, campfire-inspired dessert that comes together in just 10 minutes. Perfect for cozy nights and crowd-pleasing gatherings.
- Prep Time: 10 minutes
- Cook Time: 0 minutes
- Total Time: 6 hours 10 minutes (includes chilling)
- Yield: 12 servings 1x
- Category: Dessert
- Cuisine: American
Ingredients
- 14–16 full sheets graham crackers (about 2 sleeves)
- 2 (3.9-ounce) boxes instant chocolate pudding mix
- 4 cups cold milk (whole milk recommended)
- 3 cups mini marshmallows (one 10-ounce bag)
- 3 tablespoons unsalted butter, melted
- 1 large chocolate bar (4 ounces), for shaving
- 1 teaspoon vanilla extract
- Optional: pinch of sea salt, caramel sauce
Instructions
- Make the graham cracker crust (optional but recommended): Crush about 4 full sheets of graham crackers into fine crumbs. Mix with 3 tablespoons melted butter and 1 tablespoon sugar. Press firmly into the bottom of a 9×13-inch dish. Refrigerate while making the pudding.
- Make the chocolate pudding: In a large mixing bowl, whisk together both boxes of instant chocolate pudding mix and 4 cups cold milk for about 2 minutes until thick and smooth. Add 1 teaspoon vanilla extract and stir gently. Let sit for 5 minutes to thicken slightly.
- Start layering: Remove dish from fridge. If using crust, it should be firm. Otherwise, start with a layer of graham crackers, breaking them to fit the bottom of the dish, covering completely.
- Add the first pudding layer: Pour about one-third of the chocolate pudding over the graham crackers. Spread evenly with a spatula to about 1/2-inch thick.
- Add marshmallows: Scatter about one-third of the mini marshmallows over the pudding layer, spreading evenly.
- Repeat the layers: Add another layer of graham crackers, pressing down gently. Add another third of the pudding, then another third of the marshmallows. Repeat one more time: graham crackers, remaining pudding, remaining marshmallows. End with a final layer of graham crackers on top. Optionally, add a thin layer of pudding on top to help the marshmallows stick.
- Top with marshmallows and chocolate: Spread remaining marshmallows over the top. For a toasted effect, broil for 1-2 minutes or use a kitchen torch. Alternatively, microwave the top marshmallows for 15 seconds to soften. Shave the chocolate bar into curls over the top.
- Chill: Cover the dish with plastic wrap or foil and refrigerate for at least 6 hours, preferably overnight, until the graham crackers soften into cake-like layers.
- Serve: Cut into squares with a sharp serrated knife, wiping the knife between cuts. Serve cold, straight from the fridge.
Notes
For best results, chill overnight. The graham crackers need at least 6 hours to soften properly. Use whole milk for richest texture. Toast marshmallows carefully under broiler or with a kitchen torch. Let cake sit at room temperature for 10 minutes before slicing for easier cutting.
Nutrition
- Serving Size: 1 slice (1/12 of cak
- Calories: 335
- Sugar: 37
- Sodium: 420
- Fat: 13.5
- Saturated Fat: 7
- Carbohydrates: 52
- Fiber: 1
- Protein: 6
Keywords: no-bake dessert, s'mores, icebox cake, chocolate pudding, graham crackers, marshmallows, easy dessert, summer dessert, potluck dessert