The power went out halfway through my banana ripening experiment. There I was, standing in my tiny apartment kitchen at 9 PM on a rainy Tuesday, holding a single banana that was finally—finally—speckled with brown spots. The kind of banana that screams “bake me.” But the oven? Dead. The lights? Flickering. My craving? Absolutely relentless.
Let me tell you, I was not about to let a little electrical failure get between me and warm banana bread. I grabbed my trusty cast iron skillet, lit the gas burner, and thought, “How hard can it be to figure this out?” Turns out, pretty hard. My first attempt came out with a texture that I can only describe as… aggressive. Dense in all the wrong ways. But that single stubborn banana? It deserved better. And honestly, so did I.
After three more tries—each one getting closer to that perfect balance of moist crumb and golden crust—I finally cracked it. This cozy one-bowl small-batch banana bread made with 1 banana is the result of that rainy-night obsession. It’s the recipe I now turn to whenever I have that single lonely banana on the counter and a craving that won’t quit. No fancy equipment, no complicated steps, just pure banana bread satisfaction. Maybe you’ve been there too—staring at one sad banana, wondering if it’s worth the effort. Trust me, it is.
Why You’ll Love This Recipe
This isn’t just another banana bread recipe floating around the internet. This is the one that actually works with a single banana, and I’ve tested it enough times to prove it. Here’s what makes it special:
- Perfectly Sized: Made for exactly one banana—no scaling down a full recipe or dealing with weird half-egg situations
- One Bowl Wonder: Everything mixes in a single bowl. Less dishes, more eating. That’s a win in my book
- Ready in Under an Hour: From craving to warm slice in about 45 minutes. Weeknight baking at its finest
- Pantry-Friendly: You probably have every ingredient sitting in your kitchen right now
- Foolproof Texture: Moist, tender, with that perfect crackly top that makes banana bread so satisfying
- Freezer-Friendly: Make it now, save slices for later. It’s like finding money in your winter coat
What really sets this recipe apart is the technique. I spent way too long figuring out how to get that bakery-style texture from just one banana. The secret? It’s in how you handle the banana and the fat. I’ll walk you through every step so you don’t have to learn the hard way like I did.
This is comfort food at its most personal—made just for you (or maybe two people who really love each other). It’s the kind of recipe that makes you feel like a genius baker, even when you’re just wearing sweatpants and listening to the rain. Perfect for those moments when you need something warm and sweet but don’t want a whole loaf staring at you for days.
What Ingredients You Will Need
This small-batch banana bread uses simple, wholesome ingredients to deliver bold flavor and satisfying texture without the fuss. Most of these are pantry staples, which makes this recipe perfect for spontaneous baking sessions.
- 1 ripe banana, mashed (about ½ cup / 120g) — The star of the show. Look for bananas with plenty of brown spots. The riper, the sweeter and more flavorful your bread will be. I’ve found that a banana that’s soft enough to mash with a fork is perfect. Don’t use a green or barely yellow banana—it won’t have enough natural sweetness or moisture
- ¼ cup (60ml) melted butter — Adds richness and that gorgeous golden crust. I prefer unsalted butter so I can control the salt level. If you only have salted butter, just reduce the added salt by a pinch. For a dairy-free version, melted coconut oil works beautifully here
- ⅓ cup (65g) granulated sugar — Just enough sweetness without overpowering the banana flavor. You can swap in coconut sugar for a deeper, more caramel-like taste, but the texture will be slightly denser
- 1 large egg — This is the tricky part with small-batch recipes. You need a whole egg for structure, even though it seems like a lot for one banana. Trust the process—it works. If you’re vegan, try a flax egg (1 tablespoon flaxseed meal + 3 tablespoons water, let sit for 5 minutes)
- ½ teaspoon vanilla extract — Enhances all the flavors. I’m partial to Nielsen-Massey vanilla, but any pure vanilla extract works. Skip the imitation stuff if you can
- ¾ cup (95g) all-purpose flour — Provides the structure. Spoon and level your flour for the most accurate measurement. Too much flour makes dense bread. For a whole wheat version, swap half the flour with whole wheat pastry flour
- ½ teaspoon baking soda — The leavening agent that makes your bread rise. Make sure it’s fresh—test it by dropping a bit in vinegar; it should fizz
- ¼ teaspoon salt — Balances the sweetness and enhances flavor. I use fine sea salt. If you’re using kosher salt, increase to ½ teaspoon
- Optional add-ins: ¼ cup (40g) chocolate chips, chopped walnuts, or dried cranberries — These are totally optional but highly recommended. Fold them in gently at the end
Equipment Needed
One of the best things about this recipe is how little equipment you need. No stand mixer, no food processor, no fancy gadgets. Just the basics.
- One medium mixing bowl — Any bowl works, but I prefer a ceramic or glass bowl. They’re heavy enough to stay put while you mix
- A fork — For mashing that banana. A potato masher works too, but a fork gives you more control over the texture
- A whisk or wooden spoon — For combining ingredients. I use a whisk for the wet ingredients and switch to a spatula for folding in the flour
- A 3×5-inch or 5×3-inch loaf pan — This is the key to the perfect size. A standard 9×5 loaf pan is too big for this recipe—your bread will be flat and sad. I found a perfect little pan at a thrift store for $2. If you don’t have a small loaf pan, you can use a 6-cup muffin tin and make 4 small muffins instead
- Parchment paper — For easy removal. Not strictly necessary if you grease the pan well, but it makes life so much easier
- Cooling rack — Lets air circulate around the bread so it doesn’t get soggy on the bottom
If you don’t have a small loaf pan, don’t let that stop you. I’ve made this in a 6-inch cast iron skillet and it turned out beautifully—just adjust the baking time by about 5 minutes. The key is to watch for that golden brown color and the toothpick test.
Preparation Method
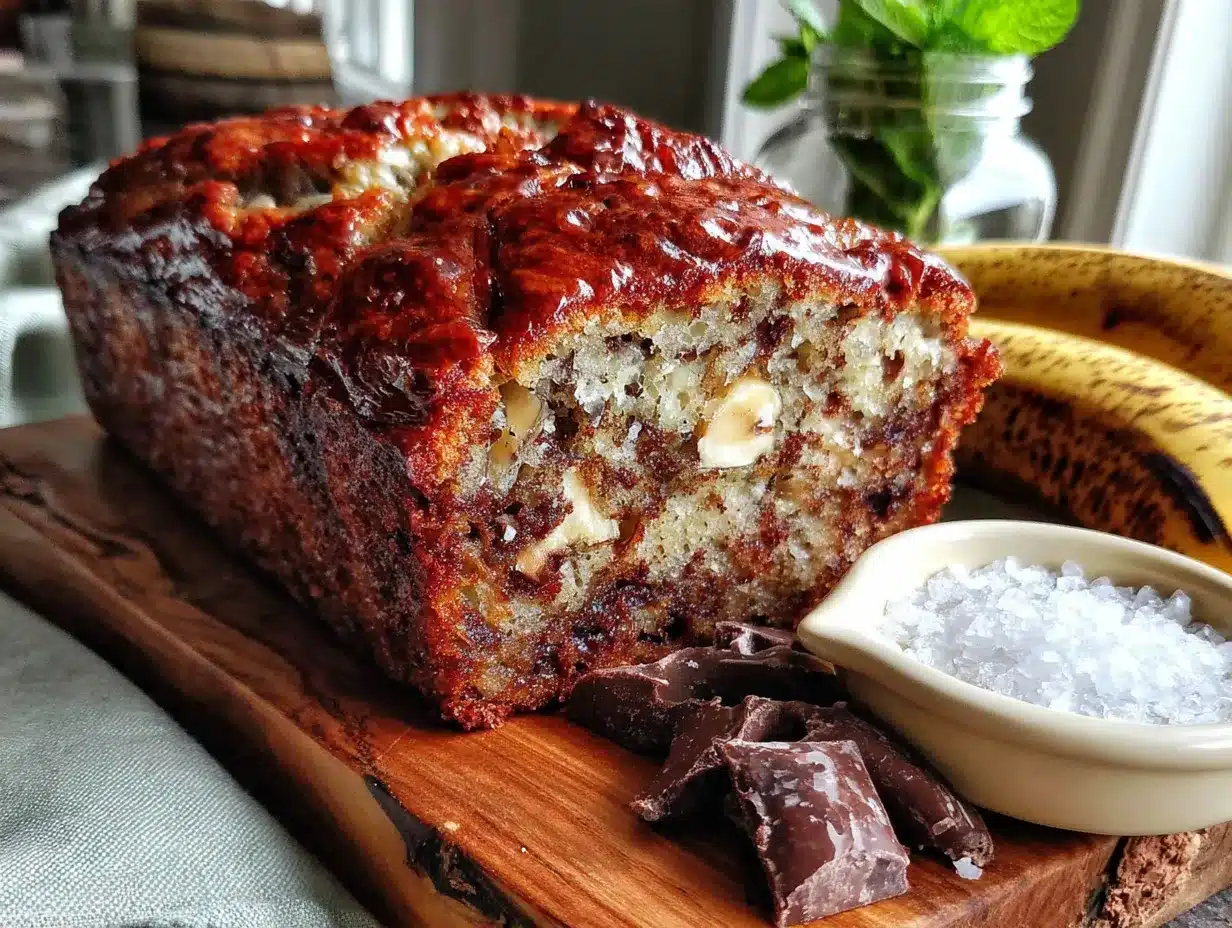
Ready to bake? Let me walk you through this step by step. I’ve included all the little details that make the difference between good banana bread and memorable banana bread.
- Preheat your oven to 350°F (175°C). Position the rack in the center of the oven. While it’s heating, line your small loaf pan with parchment paper, leaving some overhang on the long sides. This creates little handles for lifting the bread out later. If you don’t have parchment, grease the pan thoroughly with butter or non-stick spray
- Mash the banana in your mixing bowl. Peel that perfectly ripe banana and drop it into your bowl. Using a fork, mash it until it’s mostly smooth with a few small lumps remaining. I like to leave a few pea-sized chunks—they melt into little pockets of banana goodness. Don’t over-mash it into a liquid; you want some texture. This should take about 30 seconds
- Add the melted butter and sugar. Pour in the melted butter (make sure it’s not too hot—warm is fine, but not straight-out-of-the-microwave hot) and the sugar. Stir with your whisk or fork until everything is combined. The mixture will look a bit grainy from the sugar, and that’s exactly right. Take a moment to smell it—that banana-butter-sugar combo is pure comfort
- Crack in the egg and add vanilla. Add the egg and vanilla extract. Whisk vigorously for about 30 seconds until the mixture is smooth, pale, and slightly thickened. This step is important—you’re incorporating air that will help your bread rise. The batter should look like a thin pancake batter at this point. If it looks separated, keep whisking; it’ll come together
- Sift or whisk the dry ingredients together separately. In a small bowl (yes, I know I said one bowl—this is the only exception), combine the flour, baking soda, and salt. Whisk them together to distribute the baking soda evenly. This prevents bitter pockets of baking soda in your finished bread. If you’re feeling rebellious, you can skip this bowl and sift the dry ingredients directly into the wet mixture through a fine-mesh strainer
- Fold the dry ingredients into the wet. Add the flour mixture to the banana mixture. Use a rubber spatula to fold everything together gently. Here’s the most important tip I can give you: stop mixing as soon as you no longer see streaks of flour. Over-mixing develops gluten and makes your banana bread tough. A few small lumps are totally fine—they’ll bake out. This should take about 10 to 15 gentle folds
- Fold in any add-ins. If you’re using chocolate chips, nuts, or dried fruit, sprinkle them over the batter and fold them in with just 2 or 3 more strokes. Don’t overdo it. I like to reserve a few chocolate chips to sprinkle on top before baking—it makes the bread look prettier
- Pour the batter into your prepared pan. Scrape every last bit of batter into the loaf pan. Use your spatula to spread it evenly. Give the pan a gentle tap on the counter to release any air bubbles. If you’re adding those reserved chocolate chips, sprinkle them on top now
- Bake for 35 to 40 minutes. Place the pan in the preheated oven and bake until the top is golden brown and a toothpick inserted into the center comes out clean or with just a few moist crumbs. Start checking at 30 minutes if your oven runs hot. The bread should pull away slightly from the edges of the pan. Your kitchen will smell incredible at this point—that’s how you know it’s working
- Cool in the pan for 10 minutes. Set the pan on a cooling rack and let it rest. This allows the bread to set up so it doesn’t fall apart when you remove it. After 10 minutes, use the parchment paper handles to lift the bread out and transfer it to the cooling rack. Let it cool completely before slicing—about 30 more minutes. I know it’s hard to wait, but warm banana bread tends to crumble when you cut it
Cooking Tips & Techniques
After more batches of banana bread than I care to count, I’ve collected a few hard-won lessons. Let me save you some trouble.
The banana ripeness thing is real. I cannot stress this enough. A yellow banana with no spots will give you bland, dense bread. Wait until that banana looks almost too ugly to eat. The skin should be mostly brown, and the banana should be soft enough to mash with a fork. If your banana isn’t ripe enough, here’s a trick: place it on a baking sheet in a 300°F oven for 10-15 minutes until the skin turns black. Let it cool, then use it. It’s not quite as sweet as naturally ripened, but it works in a pinch.
Don’t over-mix. This is the number one mistake I see people make. They want a perfectly smooth batter, so they keep stirring. But that develops gluten, and gluten makes your banana bread tough and rubbery. Mix until the flour just disappears. A few lumps are your friends. I learned this the hard way when my first loaf came out with the texture of a hockey puck. Not my finest moment.
Room temperature ingredients matter. I know, I know—who has time to wait for eggs to come to room temperature? But here’s the thing: cold egg seizes up the melted butter, creating lumps in your batter. If you forgot to take the egg out ahead of time, place it in a bowl of warm water for 5 minutes. Problem solved.
Check your baking soda. Baking soda loses potency over time. If your bread isn’t rising properly, stale baking soda is usually the culprit. To test it, drop a tiny bit into vinegar—if it fizzes vigorously, it’s good. If nothing happens, toss it and buy fresh. Your banana bread will thank you.
Let it cool. I know the smell is intoxicating. I know you want to cut into it immediately. But if you slice into warm banana bread, it will crumble and fall apart. The texture firms up as it cools. Give it at least 30 minutes on the cooling rack. Use that time to make a cup of tea and admire your work.
Variations & Adaptations
This recipe is incredibly forgiving and adaptable. Here are some of my favorite variations:
Chocolate Chip Banana Bread: Fold in ¼ cup (40g) of semi-sweet chocolate chips. I prefer Ghirardelli, but any brand works. The chocolate melts into little pockets of gooey goodness. Sprinkle a few extra chips on top before baking for a bakery-style look.
Vegan Version: Replace the egg with a flax egg (1 tablespoon flaxseed meal mixed with 3 tablespoons water, let sit for 5 minutes until gel-like). Use melted coconut oil instead of butter. The texture will be slightly denser but still delicious. I tested this version for a friend with egg allergies and it passed the taste test with flying colors.
Gluten-Free Option: Swap the all-purpose flour with a 1:1 gluten-free baking flour blend. I’ve had good results with Bob’s Red Mill Gluten-Free 1-to-1 Baking Flour. Don’t use almond flour or coconut flour alone—they’ll change the texture completely. Add an extra tablespoon of milk or yogurt if the batter seems too thick.
Nutty Banana Bread: Fold in ¼ cup (30g) of chopped walnuts or pecans. Toast them first in a dry pan for 2-3 minutes to bring out their flavor. The crunch adds a lovely contrast to the soft bread.
Spiced Banana Bread: Add ½ teaspoon of cinnamon and ¼ teaspoon of nutmeg to the flour mixture. It gives the bread a warm, cozy flavor that’s perfect for fall. Sometimes I add a pinch of cardamom too—it’s unexpected but wonderful.
Mini Muffins: Instead of a loaf pan, divide the batter among 4 greased muffin cups. Bake at 350°F for 15-18 minutes. Perfect for portion control or lunchbox treats.
Serving & Storage Suggestions
This small-batch banana bread is best served warm, but it’s honestly delicious at any temperature. Here’s how to make the most of it:
Serving Suggestions: Slice the bread and serve it plain for breakfast with a cup of coffee. For dessert, warm a slice in the microwave for 10 seconds and top with a scoop of vanilla ice cream. My personal favorite? Toast a slice in a buttered skillet until golden on each side—the edges get slightly crispy while the inside stays soft. Spread a little salted butter on top and thank me later.
Storage: Wrap the cooled bread tightly in plastic wrap or aluminum foil and store at room temperature for up to 3 days. I’ve found that it actually gets more moist on day two as the flavors meld together. If your kitchen is very warm, store it in the refrigerator to prevent mold.
Freezing: This bread freezes beautifully. Wrap individual slices in plastic wrap, then place them in a freezer-safe bag. They’ll keep for up to 3 months. When you want a slice, just pop it in the microwave for 20-30 seconds or toast it directly from frozen. It’s like having a bakery in your freezer.
Reheating: For the best texture, reheat slices in a toaster oven or regular oven at 300°F for 5-7 minutes. The microwave works in a pinch but can make the bread slightly rubbery. If you’re reheating the whole loaf, wrap it in foil and warm it at 300°F for 10-15 minutes.
Nutritional Information & Benefits
This small-batch banana bread is a treat, but it does offer some nutritional perks. Here’s a rough breakdown per slice (assuming 6 slices per loaf):
- Calories: Approximately 200-220 per slice
- Fat: 9g (mostly from butter)
- Carbohydrates: 28g
- Protein: 3g
- Fiber: 1g
- Sugar: 14g
Bananas are a good source of potassium, vitamin B6, and vitamin C. They also provide natural sweetness, which means you can use less refined sugar than in other baked goods. The egg adds protein, and if you use whole wheat flour or add nuts, you’ll get extra fiber and healthy fats.
This recipe is vegetarian and can easily be made vegan or gluten-free with the substitutions I mentioned earlier. It contains dairy (butter) and gluten (flour) in its standard form, so keep that in mind for allergies. For a lower-sugar version, you can reduce the sugar to ¼ cup (50g) and rely on a very ripe banana for sweetness.
Conclusion
This cozy one-bowl small-batch banana bread made with 1 banana is proof that great things come in small packages. It’s the answer to that single spotted banana on your counter, the solution to a late-night craving, and the perfect way to practice baking without committing to a full loaf. I’ve made this recipe more times than I can count, and it never fails to make me smile.
What I love most about this recipe is how personal it feels. It’s not a massive loaf that you have to share or freeze half of. It’s just enough for you (and maybe one other person if you’re feeling generous). It’s baking for the sake of joy, not obligation.
I’d love to hear how yours turns out! Did you add chocolate chips? Go the nutty route? Create your own variation? Drop a comment below and let me know. And if you loved this recipe, share it with a friend who has a lonely banana on their counter. Happy baking!
Frequently Asked Questions
Can I use frozen banana for this recipe?
Absolutely! Thaw the banana completely, then drain off any excess liquid before mashing. Frozen bananas are actually great because they break down quickly and add extra moisture. Just make sure your banana is fully thawed to room temperature before mixing.
Why did my banana bread turn out dry?
This usually happens from over-baking or using too much flour. Check your oven temperature with an oven thermometer—many run hot. Also, make sure you’re measuring your flour correctly by spooning it into the measuring cup and leveling it off. Scooping directly from the bag packs in too much flour.
Can I double this recipe?
Yes! Simply double all the ingredients and bake in a standard 9×5-inch loaf pan. Increase the baking time to 50-60 minutes. Start checking at 45 minutes. You’ll get a full-sized loaf perfect for sharing.
How do I know when the banana bread is done?
Insert a toothpick or wooden skewer into the center of the bread. If it comes out clean or with just a few moist crumbs (not wet batter), it’s done. The top should be golden brown and the edges should be pulling away from the pan slightly. Your kitchen should smell amazing—that’s always a good sign!
Can I make this without an egg?
Yes, you can substitute the egg with a flax egg (1 tablespoon ground flaxseed mixed with 3 tablespoons water, let sit for 5 minutes) or ¼ cup of applesauce. The texture will be slightly denser with the flax egg and a bit more cake-like with applesauce. Both work well—I’ve tested them!
Pin This Recipe!
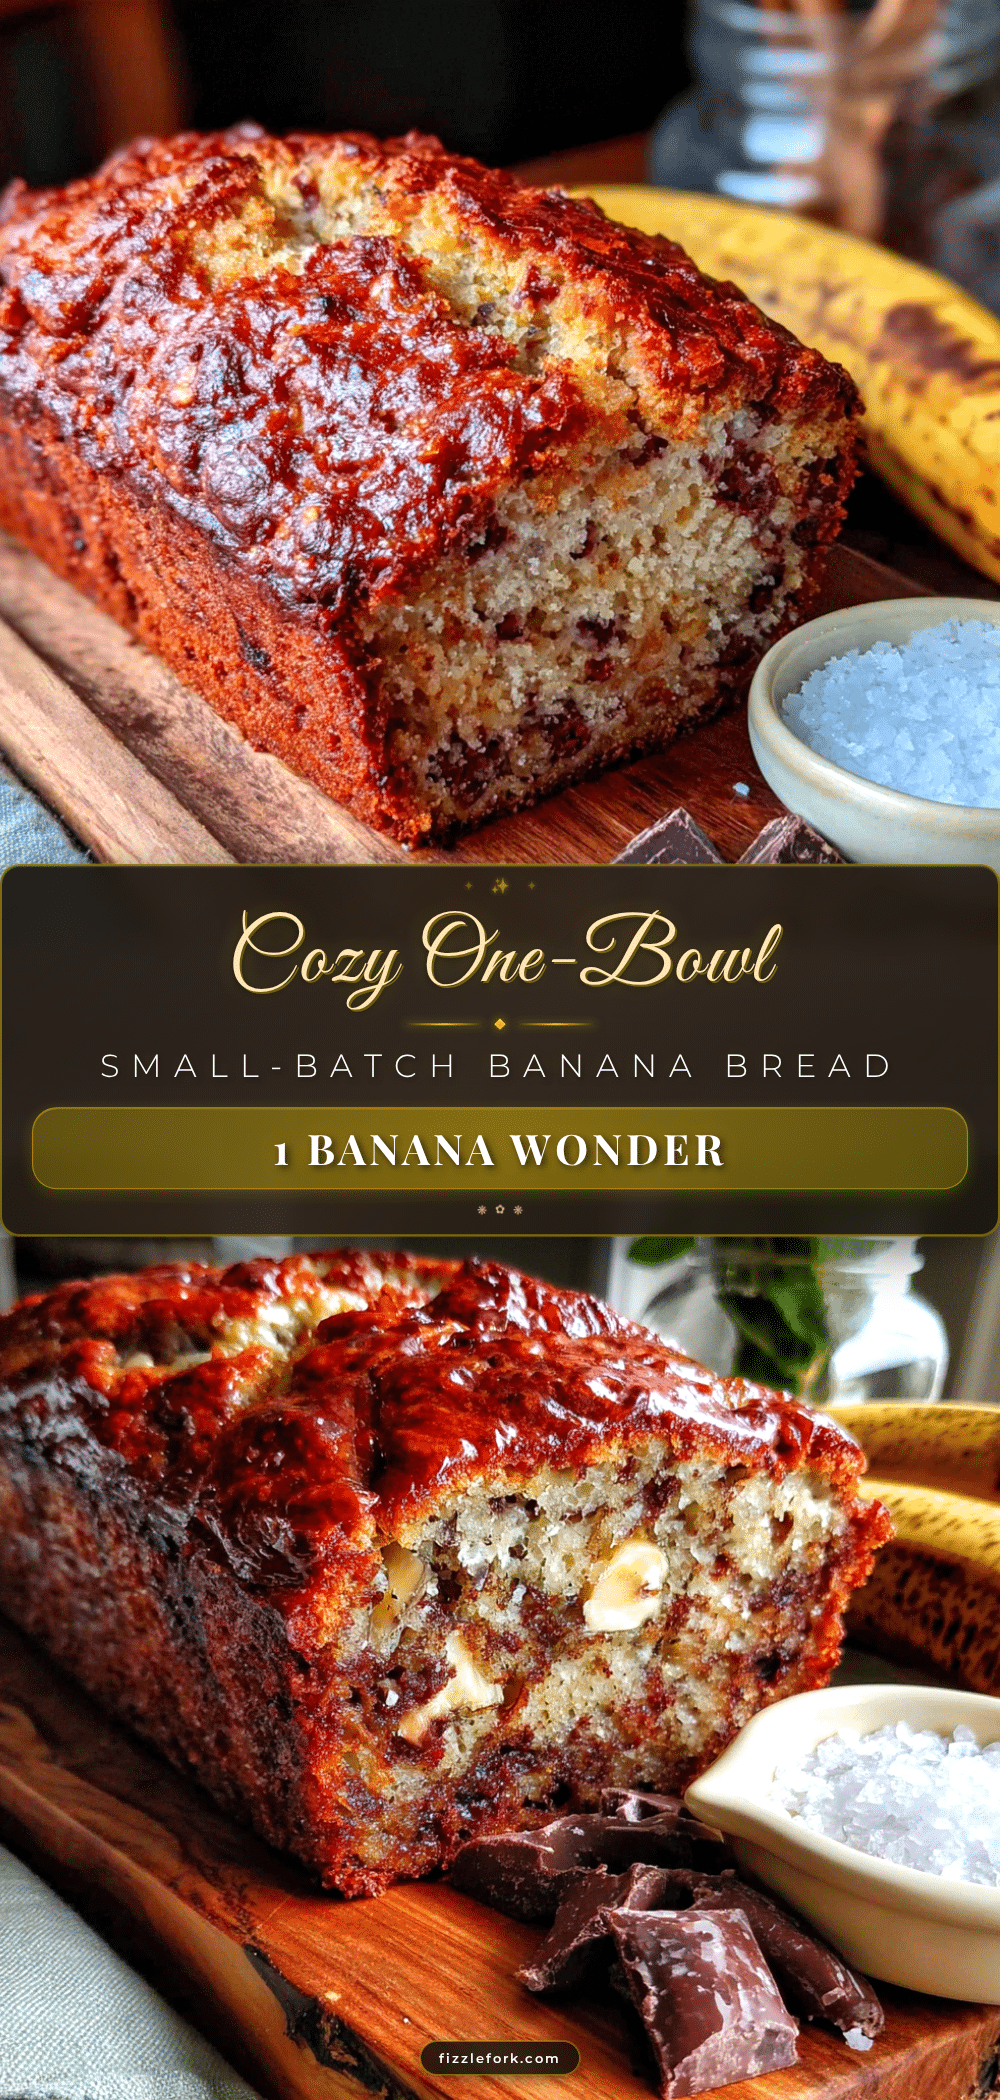
Cozy One-Bowl Small-Batch Banana Bread Made with 1 Banana
This small-batch banana bread is made with just one banana and comes together in one bowl. It’s perfectly sized, ready in under an hour, and delivers a moist, tender crumb with a crackly top.
- Prep Time: 10 minutes
- Cook Time: 35 minutes
- Total Time: 45 minutes
- Yield: 6 servings 1x
- Category: Dessert
- Cuisine: American
Ingredients
- 1 ripe banana, mashed (about ½ cup / 120g)
- ¼ cup (60ml) melted butter
- ⅓ cup (65g) granulated sugar
- 1 large egg
- ½ teaspoon vanilla extract
- ¾ cup (95g) all-purpose flour
- ½ teaspoon baking soda
- ¼ teaspoon salt
- Optional: ¼ cup (40g) chocolate chips, chopped walnuts, or dried cranberries
Instructions
- Preheat your oven to 350°F (175°C). Position the rack in the center of the oven. Line a small loaf pan (3×5-inch or 5×3-inch) with parchment paper, leaving overhang on the long sides. If you don’t have parchment, grease the pan thoroughly with butter or non-stick spray.
- Mash the banana in a medium mixing bowl with a fork until mostly smooth with a few small lumps remaining.
- Add the melted butter and sugar to the mashed banana. Stir with a whisk or fork until combined. The mixture will look slightly grainy.
- Add the egg and vanilla extract. Whisk vigorously for about 30 seconds until the mixture is smooth, pale, and slightly thickened.
- In a separate small bowl, whisk together the flour, baking soda, and salt. Alternatively, sift the dry ingredients directly into the wet mixture through a fine-mesh strainer.
- Add the flour mixture to the banana mixture. Use a rubber spatula to fold gently until just combined—stop as soon as no streaks of flour remain. Do not over-mix.
- If using add-ins, sprinkle them over the batter and fold in with 2-3 strokes. Reserve a few to sprinkle on top if desired.
- Pour the batter into the prepared pan. Spread evenly and tap the pan gently on the counter to release air bubbles. Sprinkle reserved add-ins on top.
- Bake for 35 to 40 minutes, until the top is golden brown and a toothpick inserted into the center comes out clean or with a few moist crumbs. Start checking at 30 minutes.
- Cool in the pan for 10 minutes, then use the parchment handles to lift the bread out and transfer to a cooling rack. Let cool completely before slicing (about 30 more minutes).
Notes
For best results, use a very ripe banana with brown spots. Do not over-mix the batter. Let the bread cool completely before slicing to prevent crumbling. If you don’t have a small loaf pan, you can use a 6-cup muffin tin and make 4 small muffins (bake 15-18 minutes).
Nutrition
- Serving Size: 1 slice
- Calories: 210
- Sugar: 14
- Sodium: 180
- Fat: 9
- Saturated Fat: 5
- Carbohydrates: 28
- Fiber: 1
- Protein: 3
Keywords: banana bread, small batch, one bowl, single banana, easy banana bread, small loaf, comfort food