My friend Jen asked why I couldn’t just use store-bought dried oranges for the cocktail garnish I was stressing over. I started to explain why that wouldn’t work — then stopped. Honestly, I had no good reason. I just assumed homemade was better because, well, I’m the one who cooks for a living. But Jen had a point. What was I so afraid of? I bought a bag of dried orange slices from the fancy market, brought them home, and… they were fine. Just fine. They smelled faintly of dust and had that slightly-too-perfect, uniform look that told me they’d been sitting in a warehouse for months.
That was the moment I realized I’d been overcomplicating things in a completely different direction. The real magic wasn’t in buying them — it was in making them the easy way. So I grabbed a few navel oranges, set my oven to the lowest temperature it could manage, and decided to just see what happened. No blanching, no sugar syrup, no fuss. I mean, I almost burned the first batch because I forgot to flip them, but that’s a story for later.
These cozy oven-dried orange slices are now my go-to for everything. They make any drink look like it came from a fancy cocktail bar, they turn a simple cake into a showstopper, and they fill your kitchen with the warmest, most comforting citrus scent. Maybe you’ve been there — wanting something special but not wanting to spend hours on it. These slices are that thing. Let me show you how easy it is.
Why You’ll Love This Recipe
I’ve tested this method about a dozen times now, tweaking temperatures and thicknesses until I got it exactly right. Here’s why I keep coming back to it — and why I think you will too.
- Incredibly Easy: You only need two ingredients and about ten minutes of active time. The oven does all the hard work while you go about your day.
- Simple Ingredients: Oranges. That’s it. No fancy equipment, no specialty stores, no weird additives you can’t pronounce.
- Perfect for Gifting: They look stunning in a clear jar tied with a ribbon. People genuinely think you spent hours on them.
- Long Shelf Life: Stored properly, these beauties last for months. You can make a big batch now and have garnishes ready for any occasion.
- Unbelievably Aromatic: The smell while they’re drying is pure comfort — like a warm hug on a cold day. Your whole house will smell amazing.
What makes this version different from other tutorials you might see is the low-and-slow approach. I don’t bother with blanching or soaking in sugar water. It’s just pure orange, dried gently until it’s perfectly translucent and slightly chewy. This method preserves the bright, natural flavor without making them overly sweet or candy-like. They’re elegant, versatile, and honestly, they make me feel like I have my life together even on the messiest days.
These slices are the kind of thing that turns an ordinary Tuesday into something a little more special. A cup of tea feels fancier. A glass of water feels like a spa experience. It’s comfort food for the eyes and the soul — simple, beautiful, and deeply satisfying.
What Ingredients You Will Need
This recipe uses the simplest ingredient list imaginable. The key is choosing the right oranges and treating them well.
- Oranges (2-3 large navel oranges or 4-5 smaller mandarins): Look for firm, heavy fruit with smooth, unblemished skin. Navel oranges are my go-to because they’re widely available and have a lovely balance of sweet and tart. Blood oranges give a gorgeous deep red hue, and cara cara oranges offer a delicate pinkish color. For the best results, use organic oranges since you’re eating the peel.
- Optional: Granulated sugar (1-2 tablespoons, for a sugared finish): If you want a slightly sweeter, sparkly finish, you can sprinkle a tiny bit of sugar on the slices before drying. I usually skip this unless I’m using them for a dessert garnish. It’s totally optional and not necessary for the basic method.
That’s really all you need. No oil, no salt, no complicated syrups. The oranges themselves provide all the flavor and natural sweetness. If you want to experiment, you can try using lemons, limes, or grapefruits with the same method — just adjust the thickness slightly based on the fruit’s size.
I’ve found that the best oranges for drying are the ones that are slightly past their prime for eating fresh. You know the ones — they’re still perfectly good but maybe a little soft or not as juicy as you’d like for snacking. Those are ideal because they have slightly less moisture, which means they’ll dry faster and more evenly.
Equipment Needed
You don’t need much for this recipe, which is part of its charm.
- Sharp knife or mandoline slicer: A sharp knife works perfectly fine, but a mandoline gives you incredibly even slices. If you’re using a knife, take your time and aim for slices that are all about the same thickness — around 1/4 inch or 6mm.
- Baking sheet: A standard half-sheet pan works well. No need for anything fancy.
- Parchment paper or silicone baking mat: This prevents sticking and makes cleanup a breeze. I prefer parchment paper because it’s disposable and easy to work with.
- Wire cooling rack (optional but helpful): Placing the slices on a wire rack set over the baking sheet allows air to circulate underneath, which speeds up drying time significantly.
- Paper towels: For patting the slices dry before they go into the oven.
I’ve made these with just a knife and a baking sheet more times than I can count. The mandoline is nice, but it’s not a necessity. If you’re using a mandoline, please use the guard — I speak from experience when I say that orange juice in a cut stings more than you’d think.
Preparation Method
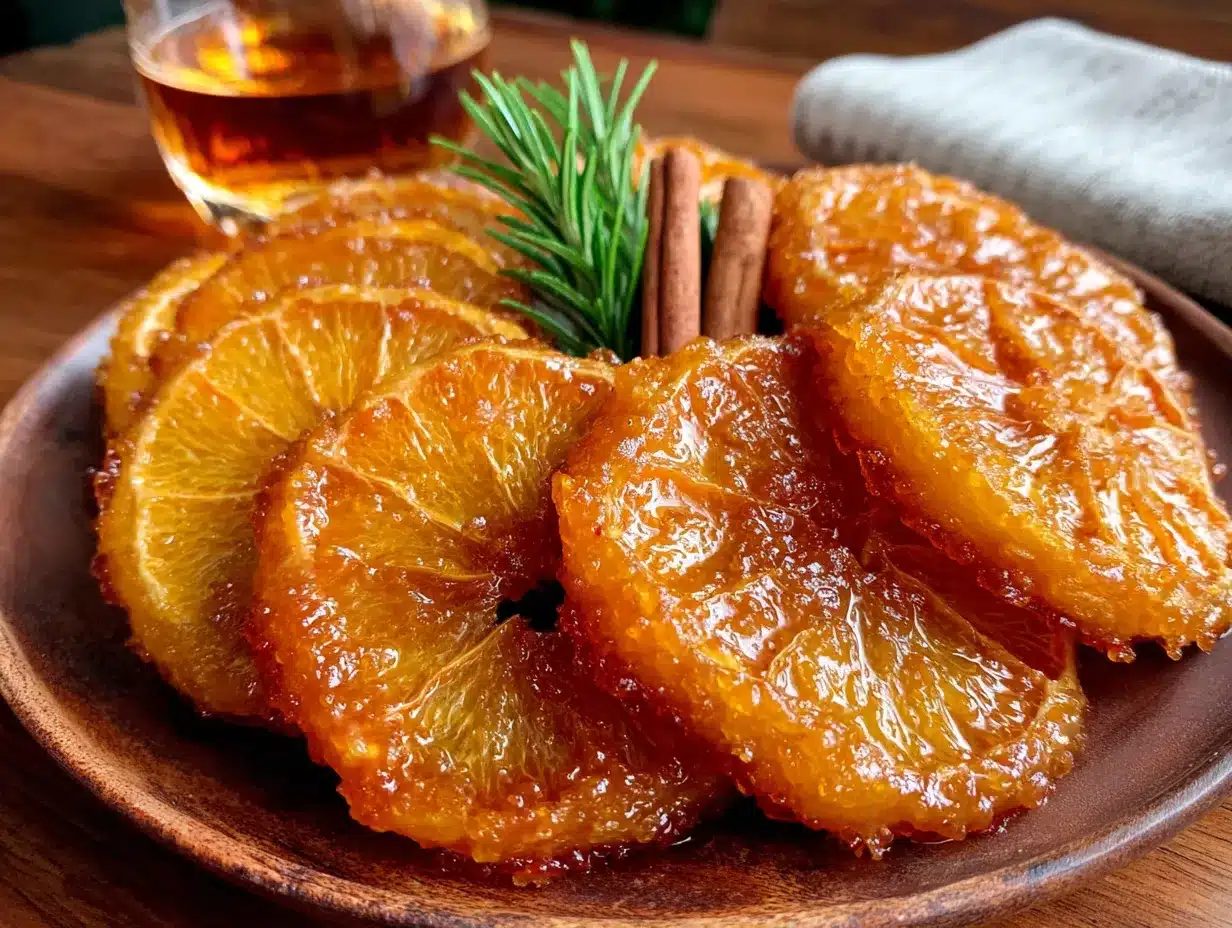
This is where the magic happens. Follow these steps, and you’ll have beautiful dried orange slices every time.
- Preheat your oven to 200°F (93°C). This is the sweet spot — low enough to dry the oranges without cooking them, but warm enough to get the job done in a few hours. If your oven runs hot, set it to 190°F (88°C). Patience is key here.
- Wash and dry the oranges thoroughly. Even if they’re organic, give them a good scrub under warm water. Dry them completely with a clean kitchen towel. Any moisture on the skin can lead to uneven drying or steaming instead of drying.
- Slice the oranges into even rounds, about 1/4 inch (6mm) thick. This is the most important step for consistent results. Too thin, and they’ll burn or become brittle. Too thick, and they’ll take forever to dry and might still be moist in the center. Take your time with this step.
- Blot the slices with paper towels. Lay the slices in a single layer on a clean kitchen towel or paper towels. Place another layer of paper towels on top and gently press to absorb excess juice. This step is crucial — too much juice means longer drying time and potential for soggy spots.
- Arrange the slices on your baking sheet. If you’re using a wire rack, place it on the baking sheet and arrange the slices in a single layer. If you’re going directly on the parchment, leave a little space between each slice for air circulation. Don’t overlap them.
- Bake for 2.5 to 4 hours, flipping the slices every hour. The exact time depends on the thickness of your slices, the water content of your oranges, and your oven’s temperament. Start checking at the 2-hour mark. You’re looking for the slices to be dry to the touch but still slightly pliable. They should feel like soft leather, not crispy chips.
- Test for doneness: Remove one slice and let it cool for a minute. It should feel dry on the surface and have no visible moisture when you press it gently. If it feels sticky or wet, give it another 30 minutes and check again.
- Cool completely on the baking sheet. Don’t skip this step! The slices continue to dry as they cool, and moving them too soon can cause them to stick or break. Leave them undisturbed for at least 30 minutes.
A quick note: if your slices are taking longer than 4 hours, your oven might not be reaching the right temperature. I’ve had this happen with an old oven that ran cool. Just be patient — they’ll get there eventually. And if the edges start browning before the centers are dry, reduce the temperature by 10-15 degrees.
Cooking Tips & Techniques
After making these countless times, I’ve picked up a few tricks that make the process smoother and the results more consistent.
Use a mandoline for perfect slices. I resisted buying a mandoline for years because I thought it was unnecessary. Then I got one as a gift, and honestly, it changed everything for this recipe. The even thickness means every slice dries at the same rate. No more pulling out half the batch while the other half stays wet.
Don’t overcrowd the pan. I made this mistake the first time I tried to double the recipe. The slices were practically touching, and the ones in the middle came out steamed instead of dried. Give them room to breathe, and if you’re making a big batch, use two baking sheets and rotate them halfway through.
Check your oven temperature with an oven thermometer. Most ovens run either hot or cold, and a difference of even 10 degrees can affect your drying time significantly. An oven thermometer is cheap and takes the guesswork out of the process.
Embrace the imperfections. Not every slice will be perfect, and that’s okay. Some might have a thin spot that browns faster. Some might curl up at the edges. The beauty of homemade is that each slice is unique. I actually love the ones with slightly uneven edges — they look more rustic and handmade.
Let them cool before storing. I once rushed to put a batch in a jar while they were still warm, and by the next morning, they had softened and become sticky. Patience, my friend. Let them cool completely, and they’ll stay beautiful for months.
Variations & Adaptations
Once you’ve mastered the basic method, the possibilities are endless. Here are some of my favorite variations.
Citrus Medley: Combine orange slices with lemon, lime, and grapefruit for a colorful mix. The different sizes and colors look stunning together in a jar or on a charcuterie board. Just adjust the thickness based on the fruit — smaller fruits like limes should be sliced slightly thinner.
Herb-Infused: Place a few sprigs of fresh rosemary or thyme on the baking sheet next to the oranges. The herbs release their oils as they dry, infusing the oranges with a subtle savory note. These are incredible in cocktails or as a garnish for roasted chicken.
Spiced Orange Slices: Before baking, lightly dust the slices with a mixture of cinnamon, cloves, and a tiny pinch of nutmeg. This turns them into a gorgeous edible decoration for holiday desserts or mulled wine. The spices toast gently in the oven and smell absolutely divine.
Sweetened Version: If you prefer a sweeter slice, dip the raw slices in a simple syrup (equal parts sugar and water, simmered until dissolved) before blotting and baking. This creates a candied texture that’s lovely on cakes or ice cream. Just be aware that the drying time will increase slightly.
I once tried a batch with blood oranges and a sprinkle of cardamom for a winter cocktail party. They turned out beautifully — deep red with warm, aromatic notes. Everyone thought I’d bought them from some fancy boutique. I didn’t correct them.
Serving & Storage Suggestions
These dried orange slices are incredibly versatile. Here’s how to use and store them.
Serving Ideas:
– Drop one into a glass of sparkling water or champagne for an instant upgrade.
– Float them in hot tea or mulled wine for a cozy winter drink.
– Use them as a garnish on cakes, tarts, or cheesecakes.
– Thread them onto a string with cinnamon sticks and star anise for a beautiful edible garland.
– Add them to a cheese board for a pop of color and a hint of citrus.
Storage Instructions:
Store the completely cooled slices in an airtight container at room temperature. A glass jar with a tight-fitting lid works perfectly. Keep them in a cool, dark place away from direct sunlight. They’ll stay beautiful for up to 6 months, though the color may fade slightly over time.
Rehydrating:
If you want to use them in cooking (like in a braise or a sauce), simply soak them in warm water for 10-15 minutes before using. They’ll plump up and release their citrus flavor beautifully.
Flavor Development:
Interestingly, the flavor of dried orange slices mellows and deepens over time. The sharp acidity fades, leaving behind a sweeter, more concentrated orange taste. I actually prefer slices that have been sitting for a week or two — they’re more aromatic and complex.
Nutritional Information & Benefits
These dried orange slices are a surprisingly healthy garnish option. Since they’re just pure fruit with no added sugar (unless you choose to add it), they retain most of the nutritional benefits of fresh oranges.
Estimated values per slice (based on 12 slices per orange):
– Calories: 15-20
– Carbohydrates: 4g
– Fiber: 1g
– Vitamin C: 15% of daily value
– No fat, no sodium, no cholesterol
Health Benefits:
Oranges are packed with vitamin C, which supports immune function and skin health. The peel contains flavonoids and antioxidants that are preserved during the drying process. The fiber content is concentrated, making these a more nutrient-dense option than many other garnishes.
Dietary Considerations:
These are naturally vegan, gluten-free, dairy-free, and nut-free. They contain no added oil or preservatives. If you skip the optional sugar, they’re also low in added sugars and suitable for most dietary plans.
I love knowing that something so beautiful is also good for me. It makes that fancy cocktail feel a little less indulgent and a little more wholesome.
Conclusion
These cozy oven-dried orange slices have become a staple in my kitchen, and I have a feeling they’ll become one in yours too. They’re proof that the simplest things are often the most rewarding. A single orange, a low oven, and a little patience — that’s all it takes to create something that feels genuinely special.
I love that I can make a batch on a lazy Sunday afternoon and have beautiful garnishes ready for weeks. I love that they make every drink and dish feel like an occasion. And I really love that they remind me of that moment when Jen asked me a simple question that turned out to be exactly right.
Now I want to hear from you. Have you tried drying citrus before? What’s your favorite way to use them? Drop a comment below and share your creations — I read every single one and I love seeing what you come up with. And if you try this recipe, tag me in your photos. There’s nothing that makes me happier than seeing these little beauties out in the world.
Go ahead, give it a try. Your kitchen is about to smell amazing.
Frequently Asked Questions
Can I use a dehydrator instead of an oven?
Absolutely! A dehydrator works wonderfully for this recipe. Set it to 135°F (57°C) and dry for 4-6 hours, checking periodically. The results are very similar, though dehydrators tend to produce slightly more evenly dried slices because of the consistent airflow.
Why are my orange slices turning brown?
A little browning is normal, especially around the edges. If they’re turning too dark, your oven might be too hot. Try reducing the temperature by 10-15 degrees. Also, make sure you’re using fresh oranges — older fruit can brown more quickly during drying.
How do I know when they’re fully dried?
The slices should feel dry to the touch and slightly leathery. They should bend without breaking but shouldn’t feel sticky or moist. If you’re unsure, let one cool completely and then test it. They continue to dry as they cool, so it’s better to pull them out a little early than to over-dry them.
Can I use these in baking?
Yes, but with a caveat. They can be used as a decorative topping on cakes or tarts, but they won’t soften much during baking. If you want to incorporate them into baked goods, rehydrate them first by soaking in warm water for 10-15 minutes, then pat dry before using.
How long will these last?
Stored properly in an airtight container at room temperature, they’ll last 4-6 months. Keep them away from direct sunlight and moisture. If they ever feel soft or sticky, they’ve absorbed moisture and should be used quickly or discarded.
Pin This Recipe!

Cozy Oven-Dried Orange Slices: Easy Garnish Guide

Learn how to make beautiful, aromatic oven-dried orange slices with just two ingredients and minimal effort. Perfect for garnishing cocktails, desserts, and more, these slices fill your kitchen with a warm citrus scent and last for months.
- Prep Time: 10 minutes
- Cook Time: 3 hours (2.5 to 4 hours)
- Total Time: 3 hours 10 minutes (2 hours 40 minutes to 4 hours 10 minutes)
- Yield: 24-36 slices (based on 12 slices per orange) 1x
- Category: Garnish
- Cuisine: American
Ingredients
- 2–3 large navel oranges (or 4–5 smaller mandarins)
- 1–2 tablespoons granulated sugar (optional, for a sugared finish)
Instructions
- Preheat your oven to 200°F (93°C). If your oven runs hot, set it to 190°F (88°C).
- Wash and dry the oranges thoroughly. Even if organic, scrub them under warm water and dry completely with a clean kitchen towel.
- Slice the oranges into even rounds, about 1/4 inch (6mm) thick. Use a sharp knife or mandoline slicer for consistent thickness.
- Blot the slices with paper towels. Lay them in a single layer on a clean kitchen towel or paper towels, place another layer on top, and gently press to absorb excess juice.
- Arrange the slices on a baking sheet lined with parchment paper or a silicone baking mat. If using a wire rack, place it on the baking sheet and arrange slices in a single layer without overlapping.
- Bake for 2.5 to 4 hours, flipping the slices every hour. Start checking at the 2-hour mark. The slices should be dry to the touch but still slightly pliable, like soft leather.
- Test for doneness: Remove one slice and let it cool for a minute. It should feel dry on the surface with no visible moisture when pressed gently. If sticky or wet, bake another 30 minutes and check again.
- Cool completely on the baking sheet for at least 30 minutes. Do not skip this step, as the slices continue to dry as they cool.
Notes
Use organic oranges since you’re eating the peel. Slightly past-prime oranges (less juicy) dry faster and more evenly. For even drying, use a mandoline for consistent thickness. If edges brown before centers are dry, reduce oven temperature by 10-15°F. Let slices cool completely before storing to prevent stickiness. Store in an airtight container at room temperature for up to 6 months.
Nutrition
- Serving Size: 1 slice
- Calories: 1520
- Sugar: 3
- Carbohydrates: 4
- Fiber: 1
Keywords: dried orange slices, oven-dried oranges, citrus garnish, homemade garnish, easy garnish, cocktail garnish, edible decoration, orange slices recipe