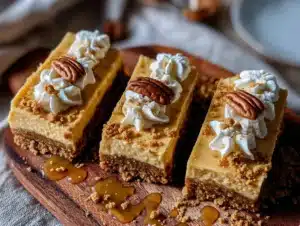
The neighborhood fall block party was in three hours and I’d completely forgotten. Everyone else would be bringing those elaborate pumpkin rolls with perfect cream cheese spirals, or those fancy caramel apple pies that looked like they belonged on a bakery shelf. I had a half-empty can of pumpkin puree in the fridge, a bag of oats that was about to expire, and honestly? I was this close to just grabbing a store-bought coffee cake and pretending I’d made it. But then I spotted the maple syrup hiding behind the milk, and this weird idea started forming. What if I just threw it all together and hoped for the best?
Let me tell you, I was scraping that baking dish together with the frantic energy of someone who’d rather face a burning pan than show up empty-handed. I mean, the oats were getting mixed with a wooden spoon that had seen better days, and I may have accidentally used the measuring cup meant for dry ingredients for the wet ones. Classic me. But here’s the thing — when I pulled those bars out of the oven, the whole kitchen smelled like a cozy autumn candle had exploded. I let them cool for maybe ten minutes before cutting them into squares (impatient, I know) and tossing them on a plate.
At the party, I watched people go back for seconds. And thirds. Someone asked me for the recipe before they even asked my name. The pumpkin roll lady? She came over and said, “These are way better — they actually taste like fall.” And I just stood there, holding my paper plate, thinking about how the best recipes are the ones you almost didn’t make. These cozy pumpkin oat breakfast bars are that for me. They’re the recipe that came out of a panic, a nearly-empty pantry, and a stubborn refusal to show up empty-handed. You know that feeling when something turns out way better than you expected? That’s these bars, every single time.
Why You’ll Love This Recipe
These pumpkin oat breakfast bars aren’t just another fall recipe you’ll pin and forget. They’re the kind of thing you’ll actually make on a Tuesday morning when the air turns crisp and you need something warm in your hands. Here’s why they work so well:
- Quick & Easy: From mixing bowl to plate in about 35 minutes. No stand mixer needed, no complicated steps. Just stir, pour, and bake.
- Simple Ingredients: You probably have most of this stuff already. Oats, pumpkin puree, maple syrup, eggs, and a few spices. No fancy trips to specialty stores.
- Perfect for Fall Mornings: These bars were made for those chilly October days when you want something that tastes like the season but doesn’t take all morning to make.
- Crowd-Pleaser: I’ve brought these to brunches, work meetings, and family gatherings. Kids love them, adults love them, and people who swear they don’t like pumpkin? They love them too.
- Unbelievably Delicious: The texture is this perfect middle ground — chewy from the oats, tender from the pumpkin, with a slight crispness on the edges. Plus that warm spice blend hits every single time.
What makes these different from every other pumpkin oat bar recipe out there? It’s the ratio. I tested this about six times before I got it right — too much pumpkin and they turn mushy, too many oats and they’re dry. These bars hold together perfectly, have just the right amount of sweetness, and don’t leave your hands sticky. Plus, they’re made with whole ingredients that actually keep you full until lunch. That’s not something most breakfast bars can say, let me tell you.
These bars are the kind of recipe that makes you feel like you’ve got your life together, even if you’re eating them over the sink at 7 AM. They’re cozy without being heavy, sweet without being cloying, and simple without being boring. Honestly, they’re the fall breakfast you didn’t know you needed.
What Ingredients You Will Need
This recipe uses simple, wholesome ingredients that work together to create something that tastes way more complicated than it is. Most of these are pantry staples, especially if you’re someone who keeps oats and pumpkin puree on hand during fall (and honestly, why wouldn’t you?).
For the Bars
- 2 cups rolled oats (old-fashioned oats work best — quick oats will make the texture too soft)
- 1 cup pumpkin puree (not pumpkin pie filling — make sure it’s 100% pure pumpkin. I like Libby’s for consistency)
- 1/3 cup maple syrup (pure maple syrup, not pancake syrup. The real stuff makes a difference here)
- 2 large eggs (room temperature if you remember — if not, it’s fine, I’ve used cold eggs and it still worked)
- 1/4 cup melted coconut oil (or melted butter if you’re not dairy-free. Both work great)
- 1 teaspoon vanilla extract (pure vanilla, not imitation — you’ll taste the difference)
- 1 1/2 teaspoons pumpkin pie spice (or make your own with cinnamon, nutmeg, ginger, and cloves)
- 1 teaspoon cinnamon (because you can never have too much cinnamon in fall recipes)
- 1/2 teaspoon baking powder (helps the bars rise just a little and keeps them from being dense)
- 1/4 teaspoon salt (don’t skip this — it balances the sweetness and brings out the pumpkin flavor)
Optional Add-Ins
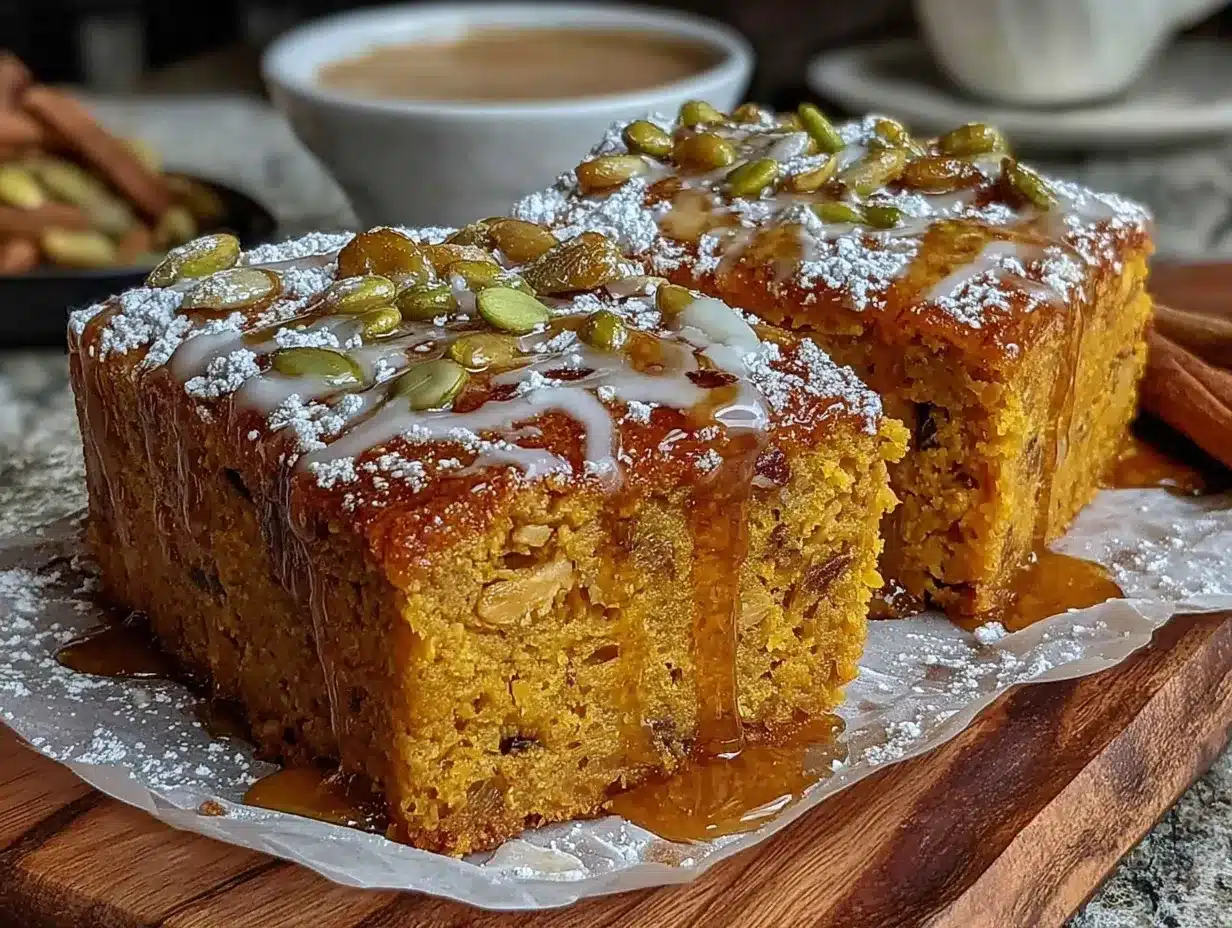
- 1/3 cup chopped pecans or walnuts (adds crunch — I prefer pecans for fall)
- 1/4 cup dried cranberries or raisins (for little bursts of sweetness)
- 2 tablespoons brown sugar (sprinkle on top before baking for a slightly crunchy crust)
- 1/4 cup chocolate chips (because pumpkin and chocolate is an underrated combo)
A few things I’ve learned about these ingredients: The pumpkin puree needs to be well-stirred before you measure it. Sometimes it separates in the can, and you’ll end up with watery pumpkin on top and thick pumpkin on the bottom. Give it a good stir in the bowl first. Also, if you’re using coconut oil, make sure it’s melted but not hot — you don’t want to scramble the eggs when you mix everything together. And for the oats, I’ve tried this with both rolled oats and quick oats, and rolled oats are definitely the winner. They hold their texture better and give the bars that satisfying chewiness.
If you’re looking for substitutions, you can use almond flour instead of oats for a grain-free version, but the texture will be different — more tender and less chewy. You can also swap the maple syrup for honey or agave, though the flavor will change slightly. And for a vegan version, use flax eggs (2 tablespoons ground flaxseed mixed with 5 tablespoons water) and maple syrup instead of honey. I’ve tested all of these, and they work, but the original version with rolled oats and maple syrup is still my favorite.
Equipment Needed
You don’t need much for these bars, which is part of why I love them. Here’s what you’ll need:
- 8×8 inch baking dish (a 9×9 works too, but the bars will be slightly thinner and might bake a few minutes faster)
- Mixing bowls (one large, one medium — nothing fancy, just what you already have)
- Whisk or fork (for mixing the wet ingredients — I usually just use a fork if the whisk is dirty)
- Rubber spatula or wooden spoon (for folding everything together)
- Parchment paper (this is key — it makes lifting the bars out so much easier. I learned this the hard way)
- Measuring cups and spoons (standard set — nothing special)
- Knife for cutting (a sharp chef’s knife works best, but a serrated knife also does the job)
If you don’t have an 8×8 dish, you can use a loaf pan and bake a little longer, or even a muffin tin for individual bars. I’ve done the muffin tin version when I wanted portion-controlled snacks, and they baked in about 18 minutes. Just line the muffin cups with paper liners and fill them about 3/4 full.
One thing I’ll say about the parchment paper — don’t skip it. I once greased the pan really well and still ended up with half the bars stuck to the bottom. Parchment paper with overhanging edges means you just lift the whole thing out and cut clean squares. It’s worth the extra 30 seconds.
Preparation Method
- Preheat your oven to 350°F (175°C). While it’s heating, line your 8×8 baking dish with parchment paper, leaving some overhang on two sides. This will be your “handle” later.
- In a large bowl, whisk together the wet ingredients. Add the pumpkin puree, maple syrup, eggs, melted coconut oil, and vanilla extract. Whisk until everything is smooth and well combined. It should look like a thick, orange-colored batter. If your coconut oil solidifies when it hits the cold pumpkin, don’t worry — just keep whisking and it’ll come together.
- In a separate medium bowl, mix the dry ingredients. Combine the rolled oats, pumpkin pie spice, cinnamon, baking powder, and salt. Give it a stir with a fork or whisk to make sure the spices are evenly distributed. Nobody wants a bite with all the cinnamon in one spot.
- Pour the dry ingredients into the wet ingredients. Use a rubber spatula or wooden spoon to fold everything together until just combined. Don’t overmix — you want the oats to be coated but not beaten into submission. A few streaks of flour are fine; they’ll disappear during baking.
- If you’re using add-ins, fold them in now. Gently stir in the pecans, dried cranberries, or chocolate chips. Reserve a few to sprinkle on top if you want them to look pretty.
- Pour the mixture into the prepared baking dish. Use your spatula to spread it evenly, pressing into the corners. The mixture will be thick and slightly sticky — that’s normal. Smooth the top as best you can.
- Bake for 22-25 minutes. The bars are done when the edges are golden brown and the center is set. A toothpick inserted in the middle should come out clean or with a few moist crumbs. Don’t overbake, or they’ll be dry. Start checking at 22 minutes if your oven runs hot.
- Let the bars cool in the pan for 10 minutes. This is important — if you try to cut them right away, they’ll fall apart. They need that time to set up. Use the parchment paper overhang to lift the entire block out of the pan and transfer to a cutting board.
- Cut into 9 squares (or 12 if you want smaller bars). A sharp knife works best — wipe it clean between cuts for neat edges. Let them cool completely on a wire rack before storing.
A few things I’ve learned from making these about twenty times: The batter will look thicker than you expect, and that’s okay. It’s not a runny batter like cake — it’s more like a thick cookie dough. Don’t be tempted to add more liquid. Also, if you want a slightly sweeter top, sprinkle a little brown sugar over the batter before baking. It creates this lovely crunchy crust that contrasts with the soft interior. And if you’re like me and always forget to set a timer, the bars are done when the kitchen smells like a pumpkin spice candle and the edges have pulled away slightly from the pan.
Cooking Tips & Techniques
After making these bars more times than I can count, I’ve picked up a few tricks that make a real difference. Here’s what I wish I’d known from the start:
Don’t overmix the batter. I know I said this already, but it’s worth repeating. Overmixing activates the gluten in the oats (yes, oats have a little gluten) and makes the bars tough. You want them chewy, not rubbery. Mix until you don’t see any more dry spots, then stop. Your spatula will thank you.
Let the bars cool completely before cutting. This is the hardest tip to follow because they smell so good coming out of the oven. But I’ve ruined multiple batches by cutting too early. The bars need time to set up, especially if you used coconut oil, which solidifies as it cools. Give them at least 30 minutes on the counter, or even an hour if you can wait. They’ll cut so much cleaner.
Toast your oats first. This is a game-changer that I stumbled on by accident. If you spread the oats on a baking sheet and toast them at 350°F for 5-7 minutes before mixing, they develop this nutty flavor that takes the bars to another level. Just watch them closely — oats burn fast. I may or may not have learned this the hard way.
Use room temperature ingredients. Cold eggs and cold pumpkin will make the coconut oil solidify into little chunks. If you forget to take them out ahead of time (which I do, constantly), just warm the pumpkin slightly in the microwave for 10 seconds and run the eggs under warm water for a minute. Problem solved.
Line your pan properly. Cut the parchment paper so it extends about 2 inches over two opposite sides of the pan. This creates handles that make lifting the bars out effortless. I used to struggle with greasing and flouring pans, and parchment paper changed my life. Seriously.
Check for doneness with your finger. The toothpick test works, but I’ve found that gently pressing the center of the bars with my finger is more reliable. If it springs back, they’re done. If your finger leaves an indent, they need a few more minutes. This method has never failed me.
Variations & Adaptations
One of the best things about this recipe is how easy it is to change up. Here are some variations I’ve tried and loved:
Gluten-Free Version: Use certified gluten-free oats. That’s literally the only change. Oats are naturally gluten-free, but they’re often processed in facilities that handle wheat, so look for the certified label if you need to be sure. The texture stays exactly the same.
Vegan Version: Replace the eggs with flax eggs (2 tablespoons ground flaxseed mixed with 5 tablespoons water, let sit for 5 minutes until gel-like). Use maple syrup instead of honey (which you’re already doing) and coconut oil instead of butter. The bars will be slightly more tender, but still delicious. I made this version for a friend’s vegan brunch and nobody knew the difference.
Protein-Packed Version: Add 1 scoop of vanilla or unflavored protein powder. You’ll need to increase the pumpkin puree by about 2 tablespoons to compensate for the extra dry ingredient. I’ve used both whey and plant-based protein powders, and both work, though plant-based powders can make the bars a bit denser. Add an extra tablespoon of maple syrup if your protein powder is unsweetened.
Apple Pumpkin Version: Finely dice one small apple (about 1/2 cup) and fold it in with the wet ingredients. The apple adds little pockets of soft, sweet fruit that complement the pumpkin perfectly. I love using Honeycrisp or Fuji apples for this. Reduce the maple syrup by 1 tablespoon since the apple adds sweetness.
Spiced Chai Version: Add 1 teaspoon of chai spice blend (or a mix of cardamom, ginger, cloves, and black pepper) along with the pumpkin pie spice. The warm, aromatic spices give the bars a chai latte vibe that’s perfect for cold mornings. I made these for a fall brunch and they were gone in 10 minutes.
Low-Sugar Version: Reduce the maple syrup to 1/4 cup and add 1/4 cup unsweetened applesauce. The applesauce adds moisture and sweetness without the sugar. You can also use a sugar-free maple syrup alternative, though the flavor won’t be quite as rich. These bars are still plenty sweet enough for my taste.
And here’s a personal variation I stumbled on last year: I added a tablespoon of bourbon to the wet ingredients. Just one tablespoon. It doesn’t make the bars boozy at all, but it adds this warm, caramel-like depth that pairs beautifully with the pumpkin and spices. My neighbor tried them and said they tasted “fancy.” I’ll take that.
Serving & Storage Suggestions
These bars are incredibly versatile when it comes to serving. Here’s how I like to enjoy them:
Serving Temperature: They’re great at room temperature, but I actually prefer them slightly warm. Pop a bar in the microwave for 10-15 seconds, and it softens up beautifully. The oats become tender, the pumpkin flavor intensifies, and it feels like you just pulled them out of the oven. In the fall, I’ll warm one up and eat it with a cup of coffee while watching the leaves change. It’s my little morning ritual.
Toppings: A drizzle of maple syrup or a dollop of Greek yogurt takes these bars to the next level. Sometimes I’ll spread a little almond butter on top for extra protein. If I’m feeling indulgent, I’ll add a scoop of vanilla ice cream and call it dessert. They’re good for breakfast, snack, or dessert — no judgment here.
Pairings: These bars go perfectly with a hot coffee, a chai latte, or a cold glass of milk. For a more substantial breakfast, serve them alongside scrambled eggs or a yogurt parfait. They’re also great for packing in lunchboxes — they hold up well and don’t get mushy.
Storage: Store the bars in an airtight container at room temperature for up to 4 days. If your kitchen is warm, you can refrigerate them, but let them come to room temperature before eating for the best texture. I usually keep them on the counter in a glass container with a tight lid.
Freezing: These bars freeze beautifully. Wrap each bar individually in plastic wrap, then place them in a freezer-safe bag or container. They’ll keep for up to 3 months. To thaw, just leave one on the counter for 30 minutes, or microwave for 20 seconds straight from the freezer. I always keep a stash in the freezer for busy mornings when I need breakfast in a hurry.
Flavor Development: Here’s something interesting — the bars actually taste better on day two. The flavors meld together overnight, and the spices become more pronounced. So if you can resist eating them all on day one, you’re in for a treat. I’ve never managed to wait that long, but I’ve heard it’s true.
Nutritional Information & Benefits
These bars are made with whole, nutrient-dense ingredients, so you can feel good about eating them for breakfast. Here’s the approximate nutritional breakdown for one bar (based on 9 servings, without add-ins):
- Calories: 185
- Protein: 5g
- Carbohydrates: 28g
- Fiber: 4g
- Sugar: 12g (from maple syrup and pumpkin)
- Fat: 7g
- Iron: 8% DV
- Vitamin A: 190% DV (from the pumpkin)
Pumpkin is packed with vitamin A, which is great for your eyes and immune system — perfect for fall when everyone’s getting colds. The oats provide complex carbohydrates that give you steady energy without the crash you’d get from sugary cereal. Plus, they’re a good source of fiber, which keeps you full and helps with digestion.
These bars are also naturally sweetened with maple syrup, which has a lower glycemic index than refined sugar. And if you use coconut oil, you’re getting healthy fats that support brain function. Honestly, for a breakfast bar, these are pretty solid nutritionally. They’re not a health food, but they’re a whole lot better than most store-bought granola bars.
One thing to note: if you’re adding chocolate chips or nuts, the calorie count will go up a bit. And if you have a nut allergy, obviously skip the pecans and walnuts. These bars are egg-free if you use the flax egg version, and they’re naturally dairy-free if you use coconut oil. Always check your ingredient labels if you’re cooking for someone with allergies.
Conclusion
These cozy pumpkin oat breakfast bars are the recipe I keep coming back to every fall. They’re simple enough for a Tuesday morning, special enough for a holiday brunch, and forgiving enough for those days when you’re multitasking and forget to set the timer. They came out of a moment of panic and a nearly-empty pantry, and now they’re one of my most-requested recipes. Funny how that works.
I hope you give these a try and make them your own. Add your favorite mix-ins, adjust the spices to your liking, or serve them with a big dollop of yogurt and a drizzle of honey. The best recipes are the ones that adapt to your life, not the other way around. And these bars? They’re the kind of recipe that fits right in.
If you make these pumpkin oat breakfast bars, I’d love to hear about it. Leave a comment below and let me know how they turned out — did you add anything special? Did you eat them all in one day? (No judgment here, I’ve been there.) And if you’re looking for more fall breakfast ideas, check out my pumpkin spice smoothie bowl or these apple cinnamon baked oatmeal cups. Happy fall baking, friends!
Frequently Asked Questions
Can I use quick oats instead of rolled oats?
You can, but the texture will be different. Quick oats are more finely processed, so they absorb liquid faster and create a softer, more uniform bar. Rolled oats give you that chewy, hearty texture that makes these bars special. If you only have quick oats, reduce the baking time by 2-3 minutes and check for doneness early.
Can I make these bars ahead of time?
Absolutely! In fact, they taste even better the next day. You can make them up to 4 days ahead and store them in an airtight container at room temperature. They also freeze beautifully for up to 3 months. Just wrap each bar individually and thaw when you’re ready.
Why did my bars turn out mushy?
Mushy bars usually mean one of two things: too much pumpkin puree or not enough baking time. Make sure you’re measuring the pumpkin accurately — spoon it into the measuring cup and level it off, don’t scoop directly from the can. Also, check that your oven is actually at 350°F. An oven thermometer is a cheap investment that saves a lot of baking headaches.
Can I add protein powder to these bars?
Yes! Add 1 scoop of vanilla or unflavored protein powder along with the dry ingredients. You’ll need to increase the pumpkin puree by about 2 tablespoons to keep the bars from being too dry. I’ve done this many times, and it works great for a post-workout snack or a more filling breakfast.
Are these bars gluten-free?
Oats are naturally gluten-free, but they’re often processed in facilities that also handle wheat. If you need to avoid gluten, look for certified gluten-free oats. Everything else in the recipe is naturally gluten-free, so that’s the only change you need to make.
Pin This Recipe!
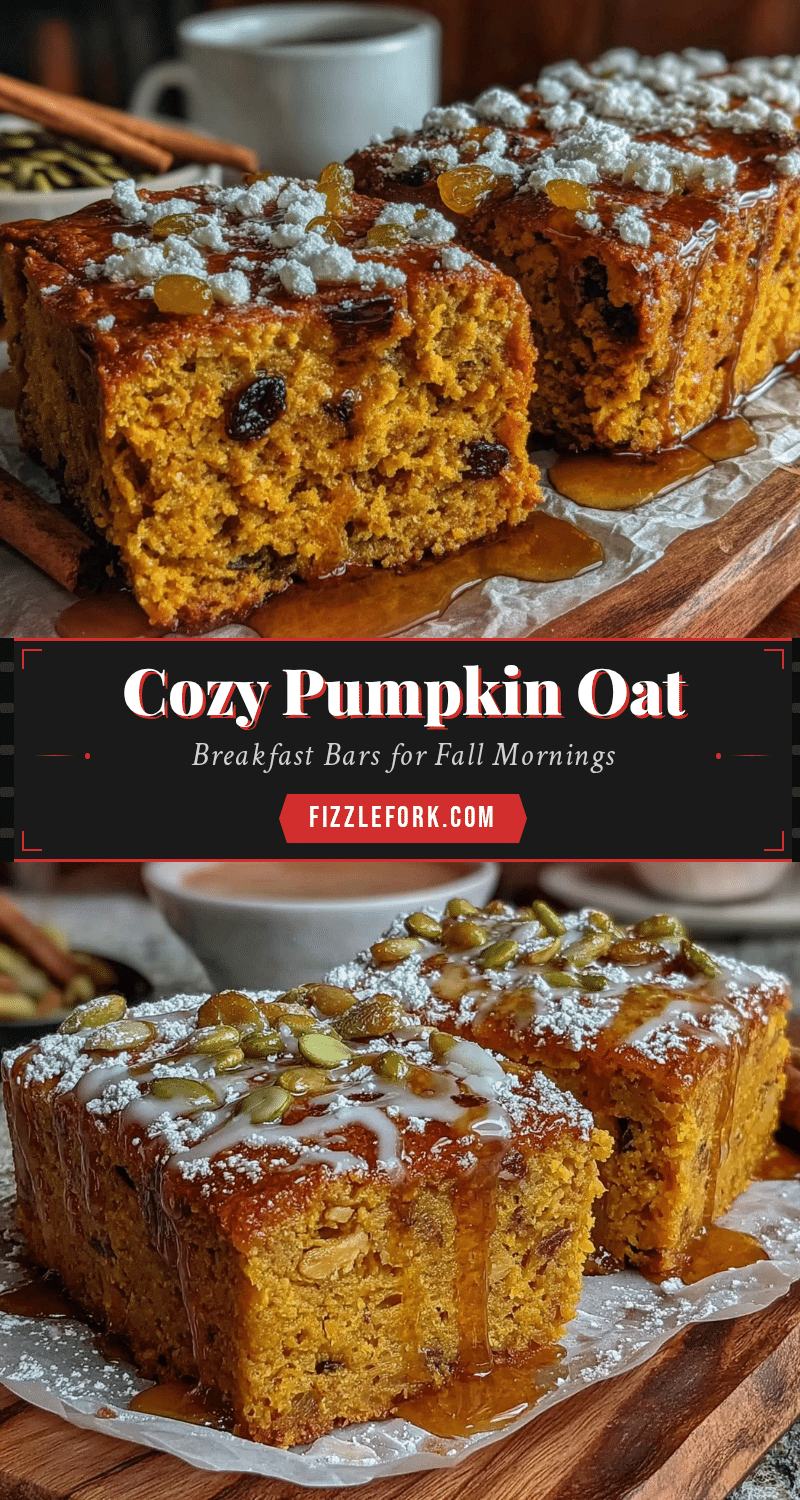
Cozy Pumpkin Oat Breakfast Bars: Easy Fall Recipe
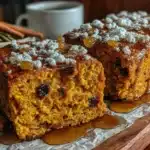
These cozy pumpkin oat breakfast bars are the perfect fall breakfast or snack, made with simple ingredients like oats, pumpkin puree, and maple syrup. They’re quick to make, crowd-pleasing, and taste even better the next day.
- Prep Time: 10 minutes
- Cook Time: 25 minutes
- Total Time: 35 minutes
- Yield: 9 servings 1x
- Category: Breakfast
- Cuisine: American
Ingredients
- 2 cups rolled oats (old-fashioned oats work best)
- 1 cup pumpkin puree (100% pure pumpkin, not pumpkin pie filling)
- 1/3 cup maple syrup (pure maple syrup)
- 2 large eggs (room temperature preferred)
- 1/4 cup melted coconut oil (or melted butter)
- 1 teaspoon vanilla extract (pure vanilla)
- 1 1/2 teaspoons pumpkin pie spice
- 1 teaspoon cinnamon
- 1/2 teaspoon baking powder
- 1/4 teaspoon salt
- 1/3 cup chopped pecans or walnuts (optional)
- 1/4 cup dried cranberries or raisins (optional)
- 2 tablespoons brown sugar (optional, for topping)
- 1/4 cup chocolate chips (optional)
Instructions
- Preheat your oven to 350°F (175°C). Line an 8×8 inch baking dish with parchment paper, leaving overhang on two sides.
- In a large bowl, whisk together the pumpkin puree, maple syrup, eggs, melted coconut oil, and vanilla extract until smooth.
- In a separate medium bowl, mix the rolled oats, pumpkin pie spice, cinnamon, baking powder, and salt.
- Pour the dry ingredients into the wet ingredients and fold together with a rubber spatula until just combined. Do not overmix.
- If using add-ins, fold them in now. Reserve a few to sprinkle on top if desired.
- Pour the mixture into the prepared baking dish and spread evenly, pressing into the corners.
- Bake for 22-25 minutes, until the edges are golden brown and the center is set. A toothpick inserted in the middle should come out clean or with a few moist crumbs.
- Let the bars cool in the pan for 10 minutes, then use the parchment paper to lift them out and transfer to a cutting board.
- Cut into 9 squares (or 12 for smaller bars). Let cool completely on a wire rack before storing.
Notes
For best results, use rolled oats (not quick oats) and let the bars cool completely before cutting. Toasting the oats first enhances flavor. The bars taste even better the next day. For a vegan version, use flax eggs (2 tbsp ground flaxseed + 5 tbsp water) and coconut oil. For gluten-free, use certified gluten-free oats.
Nutrition
- Serving Size: 1 bar
- Calories: 185
- Sugar: 12
- Sodium: 120
- Fat: 7
- Saturated Fat: 4
- Carbohydrates: 28
- Fiber: 4
- Protein: 5
Keywords: pumpkin oat bars, fall breakfast, easy pumpkin recipe, healthy breakfast bars, pumpkin oatmeal bars