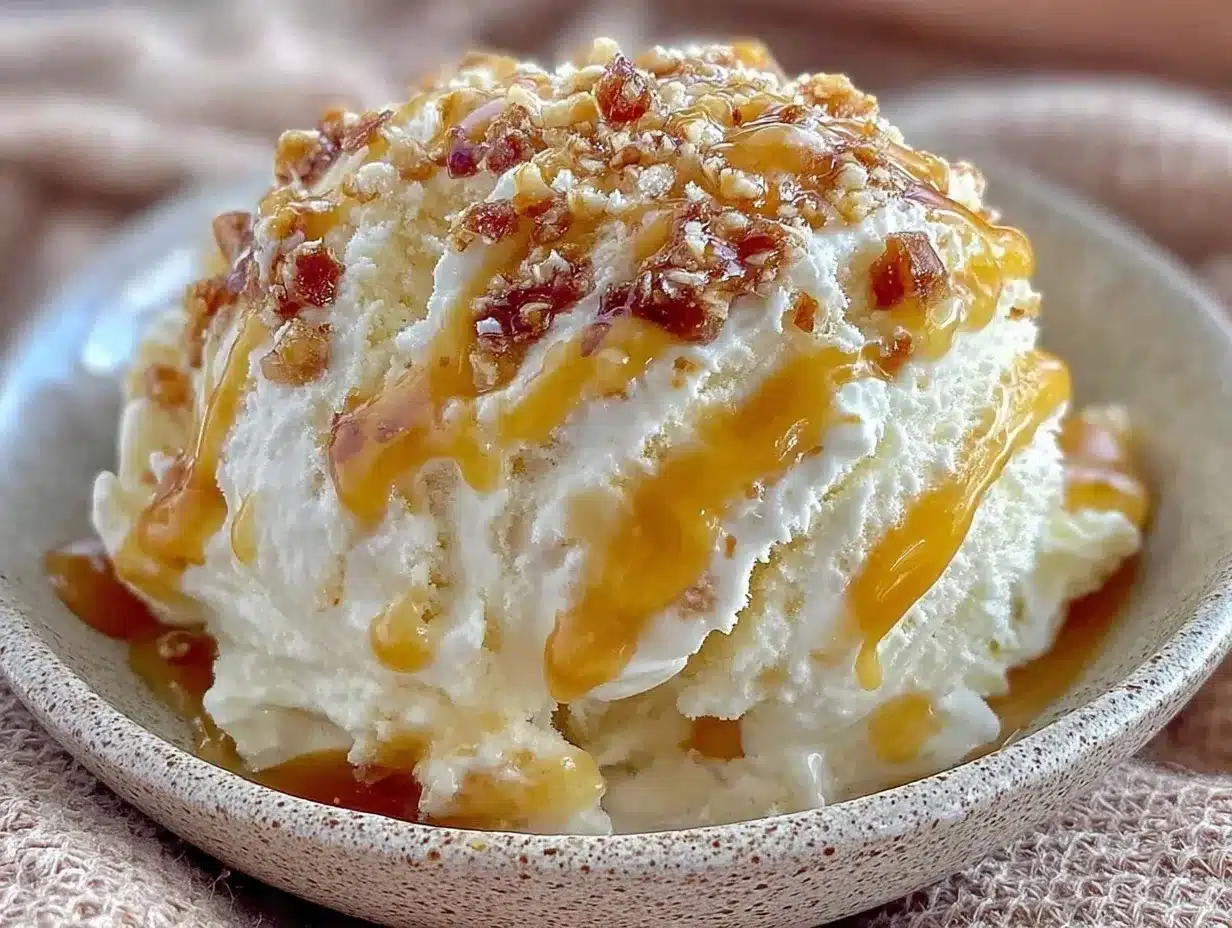
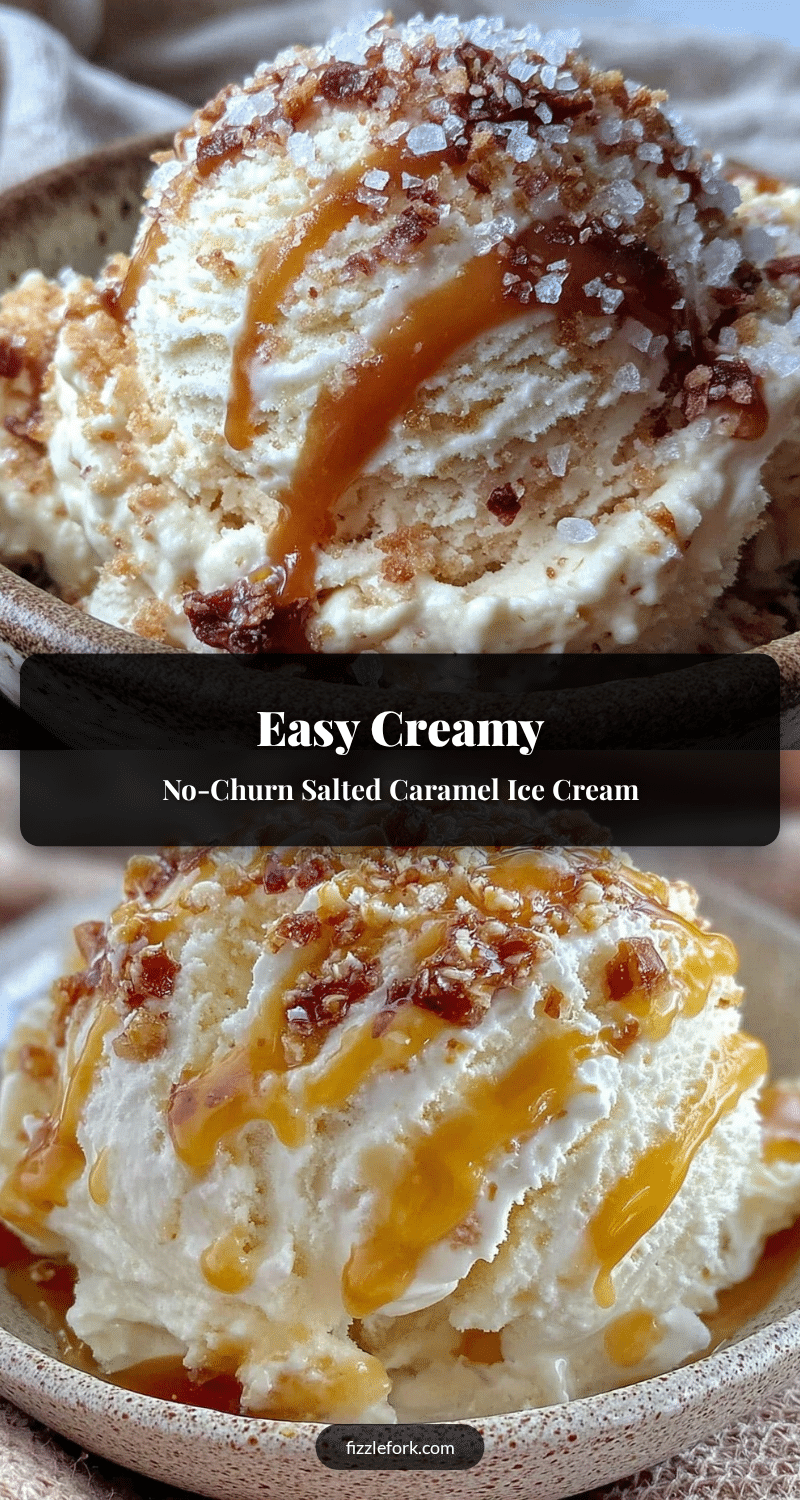
Late in the quiet haze of an early October evening, when the sun has just slipped behind the trees and the kitchen is dim except for a soft amber glow from the stove light, the only thing I want is a scoop of easy creamy no-churn salted caramel ice cream. There’s something about the gentle chill in the air that makes the buttery, sweet, and salty contrast of caramel feel like the perfect companion—not loud or flashy, but quietly satisfying, like a small ritual to close the day. The aroma of caramel slowly bubbling on the stove, the smooth texture folding through cold cream, it all feels a little like secret comfort, one I return to when everything else feels a bit too much.
This recipe became my go-to on such evenings, when I wanted a treat that didn’t demand fuss or fancy equipment—just simple ingredients and a bit of patience. The kind of ice cream that tastes homemade because it is, but without the usual churning drama. Honestly, it’s the kind of recipe that sticks because it’s honest and kind to the cook’s time and spirit. And you know, that first spoonful melting slowly, with that perfect hit of salt against the caramel sweetness, is just a small moment of quiet happiness.
It’s not just an ice cream but a little pause, a soft promise that even in the busiest weeks, you can make something comforting at home without stress or mess. That’s why this easy creamy no-churn salted caramel ice cream recipe feels like a friend in the kitchen, simple and trustworthy—always ready to soothe and satisfy.
Why You’ll Love This Recipe
Over the years, I’ve tested plenty of no-churn ice cream recipes, but this easy creamy no-churn salted caramel ice cream stands out for a few reasons that honestly make it a staple in my kitchen:
- Quick & Easy: This recipe comes together in under 15 minutes—perfect for those evenings when you want dessert but don’t want to spend hours fussing.
- Simple Ingredients: No need for fancy ice cream machines or hard-to-find items. You likely have everything in your pantry or fridge already, including sweetened condensed milk and heavy cream.
- Perfect for Any Occasion: Whether it’s a casual family dessert or a cozy night in, this salted caramel ice cream feels special but isn’t intimidating to make.
- Crowd-Pleaser: The balance of creamy sweetness with a hint of salt always gets rave reviews from everyone—kids and adults alike.
- Unbelievably Delicious Texture: The cream whips up light and smooth, while the salted caramel swirls add just the right touch of gooey indulgence.
What makes this recipe different? Well, instead of just dumping caramel into the ice cream, I gently fold in a homemade salted caramel sauce that’s cooked low and slow until it’s thick and glossy. That little step transforms the texture and flavor—creating those irresistible ribbons of caramel throughout. Plus, no churning means less mess and more time enjoying the ice cream itself.
It’s honestly the kind of recipe that makes you close your eyes with the first bite—comfort food without the guilt or hassle. If you want an easy homemade treat that feels both nostalgic and a little decadent, this is it.
What Ingredients You Will Need
This recipe calls for simple, wholesome ingredients that come together to create that perfect creamy, salty-sweet balance without any fuss. Most are pantry staples, and the salted caramel itself is surprisingly straightforward to make from scratch.
- For the Ice Cream Base:
- 1 can (14 oz / 396 g) sweetened condensed milk – adds sweetness and creaminess
- 2 cups (480 ml) heavy cream, cold – for that light, whipped texture
- 1 teaspoon pure vanilla extract – to round out the flavor
- For the Salted Caramel Sauce:
- 1 cup (200 g) granulated sugar – the star of the caramel
- 6 tablespoons (85 g) unsalted butter, cut into pieces, softened – adds richness
- 1/2 cup (120 ml) heavy cream, warmed – helps create that luscious sauce
- 1 to 1 1/2 teaspoons flaky sea salt (Maldon is my favorite) – brings out the salted caramel magic
For the salted caramel sauce, I like to use a trusted brand of unsalted butter like Kerrygold because it adds a subtle depth to the flavor. If you’re short on time or want to simplify, a good store-bought caramel sauce can work, but homemade always tastes better.
If dairy is an issue, you can swap the heavy cream for coconut cream and use a dairy-free sweetened condensed milk alternative, but the texture will be a little different. For a gluten-free diet, rest assured this recipe is naturally free from any gluten-containing ingredients.
Equipment Needed
- Large mixing bowl – for whipping the cream
- Electric mixer or hand whisk – an electric mixer makes whipping the cream easier and faster, but a sturdy hand whisk works if you have the patience.
- Medium heavy-bottomed saucepan – essential for cooking the caramel evenly without burning
- Heat-resistant spatula or wooden spoon – for stirring the caramel sauce gently
- Loaf pan or airtight container – to freeze the ice cream in
- Measuring cups and spoons – accuracy really matters here for the best texture
If you don’t have an electric mixer, a balloon whisk and a bit of elbow grease can get the job done, though it takes more time. I recommend cleaning the bowl and beaters very well and chilling them ahead for the best whipped cream results. For freezing, a metal loaf pan helps the ice cream firm up faster than plastic, but any airtight container will keep it fresh.
Preparation Method
- Make the Salted Caramel Sauce (20 minutes):
- Place the granulated sugar in a medium heavy-bottomed saucepan over medium heat.
- Stir constantly with a heat-resistant spatula or wooden spoon as the sugar melts. It will clump at first before turning a deep amber color (about 5-7 minutes). Be patient and keep stirring to avoid burning.
- Once fully melted and amber, immediately add the butter pieces. The mixture will bubble vigorously—keep stirring until the butter is fully incorporated, about 2 minutes.
- Slowly pour in the warmed heavy cream while stirring continuously. The mixture will bubble up again; stir until smooth.
- Remove from heat and stir in the sea salt. Let the sauce cool to room temperature (about 10 minutes).
- Whip the Cream (10 minutes):
- In a large mixing bowl, pour the cold heavy cream and whip with an electric mixer on medium-high speed until soft peaks form (about 3-5 minutes).
- Be careful not to overwhip; the cream should be light and fluffy but still hold shape.
- Combine Ingredients (5 minutes):
- Gently fold the sweetened condensed milk and vanilla extract into the whipped cream using a spatula. Mix just until combined—don’t deflate the cream.
- Reserve about 1/3 of the cooled salted caramel sauce for swirling on top.
- Fold the remaining caramel sauce gently into the ice cream base, creating ripples but not mixing completely.
- Freeze the Ice Cream (6+ hours):
- Pour the ice cream mixture into a loaf pan or airtight container.
- Drizzle the reserved salted caramel sauce on top and use a knife or skewer to swirl it gently through the surface for pretty ribbons.
- Cover tightly and freeze for at least 6 hours, preferably overnight, until firm.
- Serve:
- Remove from freezer 5-10 minutes before scooping to soften slightly.
- Scoop and enjoy the creamy, salty-sweet goodness.
Pro tip: If the caramel crystallizes or hardens while cooling, gently warm it in a microwave for 10-15 seconds and stir before folding it in. That smooth texture makes all the difference. Also, stirring the sugar early on during caramel making can sometimes cause clumping; just keep your heat steady and patience steady—it will come around.
Cooking Tips & Techniques
Making salted caramel sauce can be a little intimidating the first few times, but here are some tips from my experience:
- Use a heavy-bottomed pan: It helps distribute heat evenly and prevents hot spots that can burn your sugar.
- Don’t walk away: Sugar can go from melted to burnt quickly. Stir constantly and stay close.
- Warm your cream: Adding cold cream to hot sugar causes a big temperature shock and can seize the caramel. Warm cream prevents this and makes a silkier sauce.
- Whip cream just right: Whipping it too much leads to grainy texture; too little and it won’t hold up. Soft peaks are your target.
- Fold gently: This keeps the ice cream light and airy. Overmixing flattens the texture.
- Swirling caramel: For those pretty ribbons, fold the sauce in before freezing but also swirl some on top—this creates pockets of gooey caramel.
One mistake I made early on was rushing the caramel stage, which left a burnt flavor. Since then, I’ve learned that patience and slow heat are everything. Also, freezing the ice cream in a metal pan helped speed up the setting time—great hack when dessert can’t wait.
Variations & Adaptations
This easy creamy no-churn salted caramel ice cream recipe is flexible enough for a few tasty twists. Here are some ideas you can try:
- Chocolate Swirl: Add melted dark chocolate ribbons or chunks along with the salted caramel for a caramel-chocolate combo.
- Nutty Caramel: Fold in toasted pecans or walnuts for crunch and an earthy note.
- Spiced Caramel: Stir a pinch of cinnamon or smoked paprika into the caramel sauce for a subtle warmth and complexity.
- Dairy-Free Version: Use full-fat coconut cream whipped in place of heavy cream and a coconut-based sweetened condensed milk alternative. The flavor will be slightly different but still rich and satisfying.
- Fruit Twist: Add chopped roasted apples or pears swirled in with the caramel for a fall-inspired version, reminiscent of salted caramel apple crisp.
I once tried this recipe with a dash of bourbon stirred into the caramel, inspired by the smoky sweetness of my bourbon glazed beef brisket glaze. It added a subtle boozy warmth that was surprisingly delightful, especially for adult gatherings.
Serving & Storage Suggestions
This easy creamy no-churn salted caramel ice cream is best served slightly softened—let it sit out for 5 to 10 minutes after removing it from the freezer. This way, the texture is silky and scoops beautifully without becoming too hard.
Serve it on its own or with a drizzle of extra caramel sauce, or alongside a warm dessert like a slice of baked peaches with cinnamon streusel. A sprinkle of flaky sea salt on top adds a nice touch too.
You can store leftovers in an airtight container in the freezer for up to two weeks. The ice cream holds its creamy texture well, but over time the caramel ribbons might firm up a bit—warming slightly before serving helps bring back that gooey goodness.
For reheating caramel sauce leftovers, a gentle microwave burst or slow stovetop warming preserves the smooth texture without burning.
Nutritional Information & Benefits
Per serving (about 1/2 cup), this salted caramel ice cream has roughly:
| Calories | 280-320 kcal |
|---|---|
| Fat | 18-22 g |
| Sugar | 25-30 g |
| Protein | 3-4 g |
While this dessert is indulgent, the use of heavy cream and real butter offers a richer fat profile that helps with satiety, making a small serving quite satisfying. The sea salt balances the sweetness, helping curb sugar cravings without needing excess sugar.
If you’re mindful of dairy, consider coconut cream substitutions, but note that the smooth texture may vary. This recipe is naturally gluten-free and free from added thickeners or stabilizers found in commercial ice creams, so it feels like a cleaner treat.
Conclusion
This easy creamy no-churn salted caramel ice cream recipe is a quiet celebration of simple pleasures—comforting, smooth, and just the right kind of special. It’s a recipe that invites you to slow down a bit, enjoy the sweet and salty dance of caramel with cream, and feel good about making dessert at home without fuss.
Feel free to tweak the caramel’s salt level, fold in your favorite mix-ins, or try one of the variations to make it truly your own. Honestly, this one has earned a permanent spot in my recipe box because it’s both reliable and remarkably delicious.
If you give it a try, I’d love to hear how you customize it or what memories it brings back for you. There’s something quietly joyful about sharing a simple homemade treat, isn’t there?
Frequently Asked Questions
Can I use store-bought caramel sauce instead of making my own?
Yes, you can, but homemade caramel sauce has a fresher, richer flavor and better texture for swirling. If using store-bought, choose a high-quality sauce without additives.
How long can I store this no-churn ice cream?
Stored in an airtight container, it keeps well in the freezer for up to two weeks. After that, texture and flavor may start to decline.
Can I make this recipe vegan or dairy-free?
Yes. Replace heavy cream with coconut cream and swap sweetened condensed milk for a plant-based alternative. The texture will be slightly different but still tasty.
Why does my caramel sometimes harden or crystallize?
This happens if the sugar cools too quickly or if impurities cause crystallization. Slow cooking and adding butter and cream carefully helps prevent this. If it hardens, gently warm to smooth it out before using.
Do I need an ice cream maker for this recipe?
Nope! That’s the beauty of no-churn recipes—you just whip, fold, and freeze. It’s perfect if you don’t have the equipment but want creamy homemade ice cream.
Pin This Recipe!
Easy Creamy No-Churn Salted Caramel Ice Cream Recipe to Make at Home
A simple, no-churn salted caramel ice cream recipe that is creamy, sweet, and salty with homemade caramel ribbons. Perfect for a quick, fuss-free homemade dessert.
- Prep Time: 15 minutes
- Cook Time: 20 minutes
- Total Time: 6 hours 35 minutes
- Yield: 8 servings 1x
- Category: Dessert
- Cuisine: American
Ingredients
- 1 can (14 oz / 396 g) sweetened condensed milk
- 2 cups (480 ml) heavy cream, cold
- 1 teaspoon pure vanilla extract
- 1 cup (200 g) granulated sugar
- 6 tablespoons (85 g) unsalted butter, cut into pieces, softened
- 1/2 cup (120 ml) heavy cream, warmed
- 1 to 1 1/2 teaspoons flaky sea salt (Maldon preferred)
Instructions
- Make the Salted Caramel Sauce (20 minutes): Place the granulated sugar in a medium heavy-bottomed saucepan over medium heat. Stir constantly with a heat-resistant spatula or wooden spoon as the sugar melts. It will clump at first before turning a deep amber color (about 5-7 minutes). Be patient and keep stirring to avoid burning.
- Once fully melted and amber, immediately add the butter pieces. The mixture will bubble vigorously—keep stirring until the butter is fully incorporated, about 2 minutes.
- Slowly pour in the warmed heavy cream while stirring continuously. The mixture will bubble up again; stir until smooth.
- Remove from heat and stir in the sea salt. Let the sauce cool to room temperature (about 10 minutes).
- Whip the Cream (10 minutes): In a large mixing bowl, pour the cold heavy cream and whip with an electric mixer on medium-high speed until soft peaks form (about 3-5 minutes). Be careful not to overwhip; the cream should be light and fluffy but still hold shape.
- Combine Ingredients (5 minutes): Gently fold the sweetened condensed milk and vanilla extract into the whipped cream using a spatula. Mix just until combined—don’t deflate the cream.
- Reserve about 1/3 of the cooled salted caramel sauce for swirling on top.
- Fold the remaining caramel sauce gently into the ice cream base, creating ripples but not mixing completely.
- Freeze the Ice Cream (6+ hours): Pour the ice cream mixture into a loaf pan or airtight container.
- Drizzle the reserved salted caramel sauce on top and use a knife or skewer to swirl it gently through the surface for pretty ribbons.
- Cover tightly and freeze for at least 6 hours, preferably overnight, until firm.
- Serve: Remove from freezer 5-10 minutes before scooping to soften slightly. Scoop and enjoy the creamy, salty-sweet goodness.
Notes
If caramel crystallizes or hardens while cooling, gently warm it in a microwave for 10-15 seconds and stir before folding it in. Use a heavy-bottomed pan to prevent burning sugar. Whip cream to soft peaks to avoid grainy texture. Swirl caramel sauce on top before freezing for pretty ribbons. Freezing in a metal pan helps ice cream set faster.
Nutrition
- Serving Size: About 1/2 cup
- Calories: 280320
- Sugar: 2530
- Fat: 1822
- Protein: 34
Keywords: no-churn ice cream, salted caramel, easy ice cream recipe, homemade ice cream, no ice cream maker, creamy dessert, caramel sauce


