I wasn’t trying to be the fun mom that day. Honestly, I was just trying to get through a Tuesday afternoon without anyone asking for a snack for the fifth time. My neighbor, Sarah, had texted me to come grab a book she was lending me, and I trudged over with my toddler in tow, thinking I’d be in and out in two minutes. But the second I walked through her screen door, the smell hit me—a rich, chocolatey, almost pudding-like warmth that didn’t belong in her kitchen at three in the afternoon. She was standing at the counter, casually crushing Oreos in a ziplock bag with a rolling pin, while her kids sat at the table, completely silent, digging into little plastic cups with spoons. “Oh, these?” she said when I asked, not even looking up. “Just something I threw together.” She said it like it was nothing. But let me tell you, I stood there for twenty minutes watching her kids eat those Chocolate Dirt Cups with Gummy Worms, and I knew I had to get the recipe. The casualness of the whole thing—that’s what got me. She wasn’t trying to impress anyone. She was just making a Tuesday afternoon a little less boring. And honestly, maybe you’ve been there, right? Staring into your pantry, wondering what you can make that will actually get the kids to sit still for five minutes? Well, this is it.
Why You’ll Love This Recipe
Let’s be real for a second. Finding a dessert that kids actually eat and that doesn’t require a trip to three different stores is like winning the lottery. I’ve tested this recipe about a dozen times now, and I can tell you with full confidence—it works. Every. Single. Time. Here’s why you’re going to love it:
- Quick & Easy: From start to finish, you’re looking at about 20 minutes of active work. The rest is just chilling in the fridge. Perfect for those afternoons when you promised a treat and then realized you have nothing planned.
- Simple Ingredients: No fancy grocery trips. You probably have most of this stuff in your pantry right now. Instant chocolate pudding, milk, Oreos, cream cheese, whipped topping, and gummy worms. That’s it.
- Perfect for Parties: Birthdays, school events, Halloween, or just a random Wednesday—these dirt cups are the kind of dessert that makes kids feel like they’re getting away with something. And honestly, they kind of are.
- Crowd-Pleaser: I’ve served these at three different kid parties now, and the cups are always empty before the cake even gets cut. Even the adults sneak a few bites.
- Unbelievably Delicious: The creamy pudding mixed with the crunch of the Oreo “dirt” and the slight tang of the cream cheese—it’s next-level comfort food. You’ll find yourself making extra for yourself. No judgment here.
What makes this recipe different from the dozens of other dirt cup recipes out there? It’s the cream cheese. Most versions just use pudding and crushed cookies, but adding a little softened cream cheese to the pudding mix gives it this rich, almost cheesecake-like texture that makes it feel way more special than it is. It’s the kind of dessert that makes you close your eyes after the first bite. Comfort food reimagined—faster, simpler, but with the same soul-soothing satisfaction.
What Ingredients You Will Need
This recipe uses simple, everyday ingredients to create something that looks and tastes like you spent hours on it. Trust me, you probably have most of these in your kitchen right now. Here’s what you need:
For the Pudding Base
- 1 (3.9 oz) box instant chocolate pudding mix (I prefer Jell-O brand for consistent texture, but any brand works fine)
- 2 cups cold milk (whole milk gives the richest texture, but 2% works well too. For a dairy-free version, use unsweetened almond or oat milk)
- 4 oz cream cheese, softened to room temperature (this is the secret ingredient—adds richness and a slight tang that balances the sweetness)
- 1/4 cup powdered sugar (just to sweeten the cream cheese slightly. You can skip it if you want a less sweet version)
- 1 teaspoon vanilla extract (pure vanilla extract is best, but imitation works in a pinch)
For the Dirt Layer
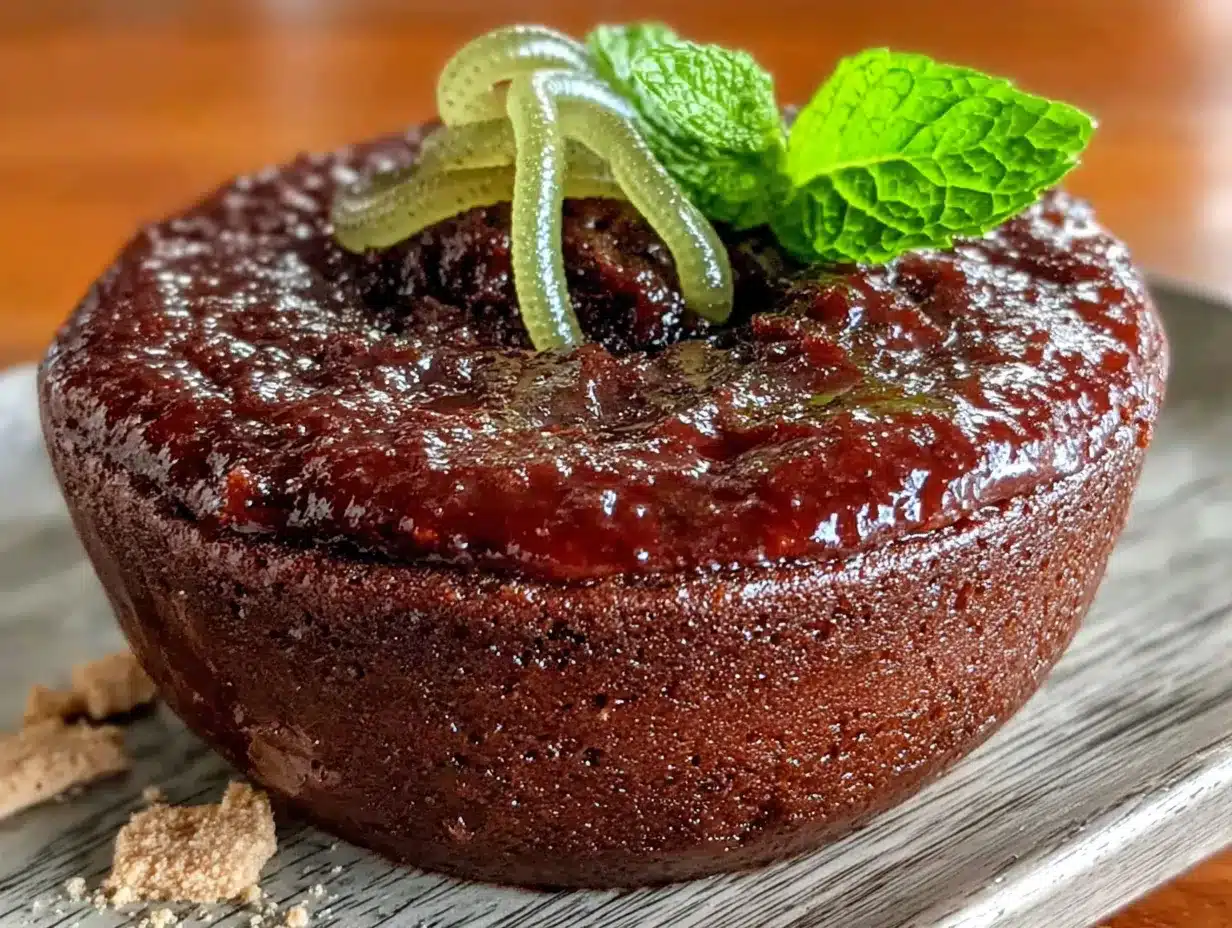
- 1 (14.3 oz) package Oreo cookies (about 36 cookies. You don’t need to remove the cream filling—crush them whole. Regular Oreos work best, but double-stuff is fine too)
- Optional: 2 tablespoons melted butter (this helps the “dirt” hold together slightly and adds richness. Totally optional but recommended)
For the Topping and Decorations
- 1 cup whipped topping, thawed (like Cool Whip. You can also use homemade whipped cream, but Cool Whip holds its shape better for layering)
- 12-15 gummy worms (the classic sour worms work great. I recommend the black-and-red ones for that realistic dirt look)
- Optional: Small gummy bugs, leaves, or flower decorations (for extra fun—kids love these)
- Optional: 1-2 tablespoons chocolate shavings (for an extra layer of “dirt” texture)
A quick note on substitutions: If you need a gluten-free version, use gluten-free chocolate sandwich cookies (like Glutino) and ensure your pudding mix is gluten-free. Most instant pudding mixes are, but always check the label. For a lower-sugar option, use sugar-free pudding mix and reduced-fat Oreos. The texture will be slightly different, but still delicious!
Equipment Needed
You don’t need anything fancy for this recipe. Here’s what you’ll need:
- 6-8 small clear plastic cups or glass jars (4-6 oz each. Clear cups let you see the layers, which is half the fun. I use the small plastic cups from the party supply store—they’re cheap and perfect for kids)
- Medium mixing bowl (for the pudding)
- Small mixing bowl (for the cream cheese mixture)
- Whisk (a hand whisk works fine, but an electric mixer makes the cream cheese mixture smoother)
- Rolling pin or food processor (for crushing Oreos. A rolling pin and a ziplock bag work perfectly—and it’s oddly satisfying)
- Spatula (for scraping every last bit of pudding into the cups)
- Measuring cups and spoons (standard set)
- Small spoon or piping bag (for layering the pudding. A spoon works fine, but a piping bag gives cleaner layers)
If you don’t have clear cups, you can use small mason jars or even paper cups. The visual effect won’t be as dramatic, but the taste is the same. For the Oreo crushing, I’ve tried both a food processor and a rolling pin. The rolling pin method gives you more control over the texture—you can leave some larger chunks for variety. Plus, it’s a great way to get kids involved (just be prepared for a few flying crumbs).
Preparation Method
Alright, let’s get to the fun part. This recipe comes together in about 20 minutes of active time, plus 1-2 hours of chilling time. Here’s how to do it:
- Crush the Oreos: Place the entire package of Oreos (cream filling and all) in a large ziplock bag. Seal it tight, then use a rolling pin to crush them into fine crumbs. You want a mix of fine “dirt” and a few slightly larger pieces for texture. If you’re using a food processor, pulse about 10-15 times until you get the desired consistency. Set the crumbs aside in a bowl. (Tip: If you want extra-rich dirt, stir in 2 tablespoons of melted butter. This makes the crumbs clump slightly, giving them a more realistic dirt texture.)
- Make the cream cheese base: In a small mixing bowl, beat the softened cream cheese with an electric mixer until smooth and creamy—about 1 minute. Add the powdered sugar and vanilla extract, and beat for another 30 seconds until fully combined. Scrape down the sides of the bowl with a spatula. (Important: Make sure your cream cheese is truly at room temperature. Cold cream cheese will leave lumps in your pudding. Leave it on the counter for about 30 minutes before starting.)
- Prepare the pudding: In a medium mixing bowl, whisk together the instant chocolate pudding mix and 2 cups of cold milk. Whisk vigorously for about 2 minutes until the pudding starts to thicken. It should be slightly thicker than heavy cream at this point. Let it sit for 3-4 minutes to set up slightly.
- Combine the pudding and cream cheese: Add the cream cheese mixture to the pudding and whisk until fully combined. The mixture should be smooth, creamy, and a rich chocolate color. If you see any white streaks, keep whisking. This is where the magic happens—the cream cheese makes the pudding incredibly rich and velvety.
- Fold in the whipped topping: Gently fold the thawed whipped topping into the pudding-cream cheese mixture using a spatula. Use a gentle folding motion—don’t stir vigorously, or you’ll deflate the mixture. Fold until just combined, with no white streaks remaining. The mixture will be light, airy, and almost mousse-like in texture.
- Layer the cups: Now for the fun part. Take your clear cups and add a layer of Oreo “dirt” to the bottom of each cup—about 2 tablespoons per cup. Press it down gently with the back of a spoon. Then, spoon or pipe the pudding mixture on top, filling each cup about two-thirds full. (Tip: If you want clean layers, use a piping bag or a ziplock bag with the corner snipped off. This gives you more control and keeps the sides of the cup clean.)
- Top with more dirt: Sprinkle another layer of Oreo crumbs on top of the pudding—about 1-2 tablespoons per cup. This should completely cover the pudding layer. Don’t be shy with the dirt—kids love a thick, crunchy top layer.
- Add the gummy worms: Here’s the best part. Gently push 2-3 gummy worms into each cup, positioning them so they look like they’re crawling out of the dirt. You can leave some partially buried and some fully visible. Get creative—this is where the kids can help.
- Chill: Refrigerate the dirt cups for at least 1-2 hours before serving. This allows the pudding to fully set and the flavors to meld together. The longer they chill, the better they taste. (Pro tip: If you’re making these for a party, you can prepare them up to 24 hours in advance. Just add the gummy worms right before serving so they don’t get too soft.)
- Serve and enjoy: When you’re ready to serve, pull the cups out of the fridge, add any optional decorations (gummy bugs, chocolate shavings), and watch the kids’ faces light up. Serve with small spoons and prepare for silence.
Cooking Tips & Techniques
I’ve made these dirt cups more times than I can count, and I’ve learned a few things along the way. Here are my best tips for getting them perfect every time:
Don’t skip the cream cheese. I know it seems like an extra step, but it’s the difference between a good dirt cup and a great one. The cream cheese adds a subtle tang that balances the sweetness of the pudding and Oreos. Without it, the dessert is just sweet—with it, it’s complex and satisfying. I once forgot to add it, and the kids noticed. They said it tasted “flat.” Kids know, man.
Crush the Oreos to the right texture. You want a mix of fine crumbs and slightly larger pieces. If you crush them too fine, they turn into dust and lose that crunchy texture. If you leave them too chunky, they don’t look like dirt. Aim for a texture similar to coarse sand. The rolling pin method gives you the most control—just crush until it looks right.
Let the pudding set properly. Instant pudding sets quickly, but it needs at least 5 minutes to reach the right consistency. Don’t rush this step. If you add the whipped topping too early, the pudding will be too thin and the layers will blend together. Wait until the pudding is thick and glossy before folding in the whipped topping.
Use cold milk. This might seem obvious, but cold milk helps the instant pudding set up faster and more evenly. If your milk is warm, the pudding will be runny and take longer to thicken. I keep my milk in the fridge until the last minute.
Make extra dirt. I always make more Oreo crumbs than I think I need. Kids love extra “dirt” on top, and you can use the leftovers for other desserts (like ice cream sundaes or yogurt parfaits). Plus, it’s fun to snack on while you’re assembling the cups.
Variations & Adaptations
This recipe is incredibly versatile. Here are some of my favorite variations:
Dairy-Free Version: Use dairy-free cream cheese (like Kite Hill or Tofutti), dairy-free milk (unsweetened almond or oat milk), and dairy-free whipped topping (like CocoWhip). The texture will be slightly different, but still delicious. I’ve tested this for a friend with dairy allergies, and her kids couldn’t tell the difference.
Gluten-Free Version: Use gluten-free chocolate sandwich cookies (like Glutino or Kinnikinnick) and ensure your pudding mix is gluten-free. Most instant pudding mixes are gluten-free, but always check the label. The gluten-free cookies are a bit crumblier, so handle them gently.
Peanut Butter Dirt Cups: Add 2 tablespoons of creamy peanut butter to the cream cheese mixture before combining with the pudding. This gives the dessert a Reese’s-like flavor that’s absolutely addictive. Just make sure no one has peanut allergies before serving.
Mint Chocolate Dirt Cups: Use mint-flavored Oreos (the green ones) and add 1/2 teaspoon of peppermint extract to the pudding mixture. The mint-chocolate combination is refreshing and perfect for spring or St. Patrick’s Day.
Halloween Dirt Cups: Use pumpkin-shaped gummy candies instead of worms, and add orange food coloring to the whipped topping before folding it in. You can also use crushed chocolate graham crackers instead of Oreos for a slightly different dirt texture.
Individual Serving Idea: For a party, serve the dirt cups in small clear plastic cups with lids. This makes them easy to transport and store. You can also use small mason jars for a more rustic look.
Serving & Storage Suggestions
These dirt cups are best served cold, straight from the fridge. I like to take them out about 5-10 minutes before serving to take the chill off slightly—this makes the pudding creamier and the gummy worms softer. Serve them with small spoons and maybe a napkin (things can get messy, but that’s part of the fun).
For presentation, arrange the cups on a tray or platter. If you’re serving them at a party, you can add a few extra gummy worms around the base of each cup for a dramatic effect. Kids love seeing the worms “crawling” out of the dirt.
Storage: These dirt cups will keep in the refrigerator for up to 3 days. Store them covered with plastic wrap or with lids if your cups have them. The Oreo crumbs will soften slightly over time, but they’ll still be delicious. I actually think they taste better on the second day—the flavors have more time to meld together.
Freezing: I don’t recommend freezing these cups. The pudding and cream cheese mixture can become grainy when thawed, and the gummy worms will become hard and chewy. If you need to make them ahead, prepare the pudding mixture and crushed Oreos separately, then assemble the cups the day you plan to serve them.
Reheating: These are meant to be served cold, but if you prefer a softer texture, let them sit at room temperature for 15-20 minutes before serving. The gummy worms will soften and become more chewy.
Nutritional Information & Benefits
Let’s be honest—these are a treat, not a health food. But that doesn’t mean they can’t have some redeeming qualities. Here’s the estimated nutritional breakdown per serving (based on 8 servings):
- Calories: 320-350
- Total Fat: 14-16g
- Saturated Fat: 7-8g
- Carbohydrates: 45-50g
- Sugar: 32-36g
- Protein: 5-6g
- Calcium: 8-10% of daily value
- Iron: 6-8% of daily value
On the positive side, the milk and cream cheese provide some calcium and protein, which is more than you’d get from a typical candy bar. The Oreos, believe it or not, contain a small amount of iron. And the gummy worms? Well, they’re mostly sugar, but they make kids happy, and that counts for something.
For a slightly healthier version, you can use sugar-free pudding mix, reduced-fat cream cheese, and light whipped topping. This cuts the calories to about 220-250 per serving and reduces the sugar content significantly. The texture will be a bit lighter, but still delicious.
Frequently Asked Questions
Can I make these dirt cups ahead of time?
Absolutely! You can assemble them up to 24 hours in advance. Just wait to add the gummy worms until right before serving so they don’t get too soft. The pudding will set perfectly, and the flavors will meld together beautifully.
Can I use homemade pudding instead of instant?
You can, but it will change the texture. Homemade pudding is thinner and won’t set as firmly as instant pudding. If you use homemade, you’ll need to cook it until it’s very thick, and you may need to add extra cornstarch. For best results, stick with instant pudding for this recipe.
How do I keep the Oreo crumbs from getting soggy?
This is a common concern, but honestly, a little sogginess is part of the experience—it mimics real dirt after rain! However, if you want crunchier crumbs, add them just before serving. You can also toast the crushed Oreos in a dry skillet for 2-3 minutes to help them stay crunchy longer.
Can I use a different type of cookie for the dirt?
Yes! Chocolate graham crackers, chocolate wafer cookies, or even crushed chocolate cereal (like Cocoa Puffs) work well. Each gives a slightly different texture and flavor. My personal favorite alternative is crushed chocolate graham crackers—they’re slightly sweeter and have a nice crunch.
How many servings does this recipe make?
This recipe makes 6-8 servings, depending on the size of your cups. If you’re using 4-oz cups, you’ll get about 8 servings. If you’re using 6-oz cups, you’ll get about 6. For a party, I recommend making extra—these go fast!
Conclusion
These Kid-Approved Chocolate Dirt Cups with Gummy Worms are more than just a dessert—they’re an experience. They’re the kind of treat that makes kids feel like they’re getting away with something, even though you’re the one in control. They’re simple enough to make on a random Tuesday, but special enough to serve at a birthday party. And honestly, they’re just fun.
I love this recipe because it reminds me that being a fun parent doesn’t have to be complicated. You don’t need fancy ingredients or elaborate techniques. Sometimes, all you need is a box of pudding, some Oreos, and a handful of gummy worms. The smiles on the kids’ faces are worth every crumb on the floor.
So go ahead—make these dirt cups. Customize them however you like. Add extra worms, try different cookies, or let the kids help with the assembly. And when you do, come back and tell me about it. I’d love to hear how they turned out, what variations you tried, and how many times the kids asked for seconds. Leave a comment below, share your photos, and spread the dirt-cup love. Happy cooking!
Pin This Recipe!
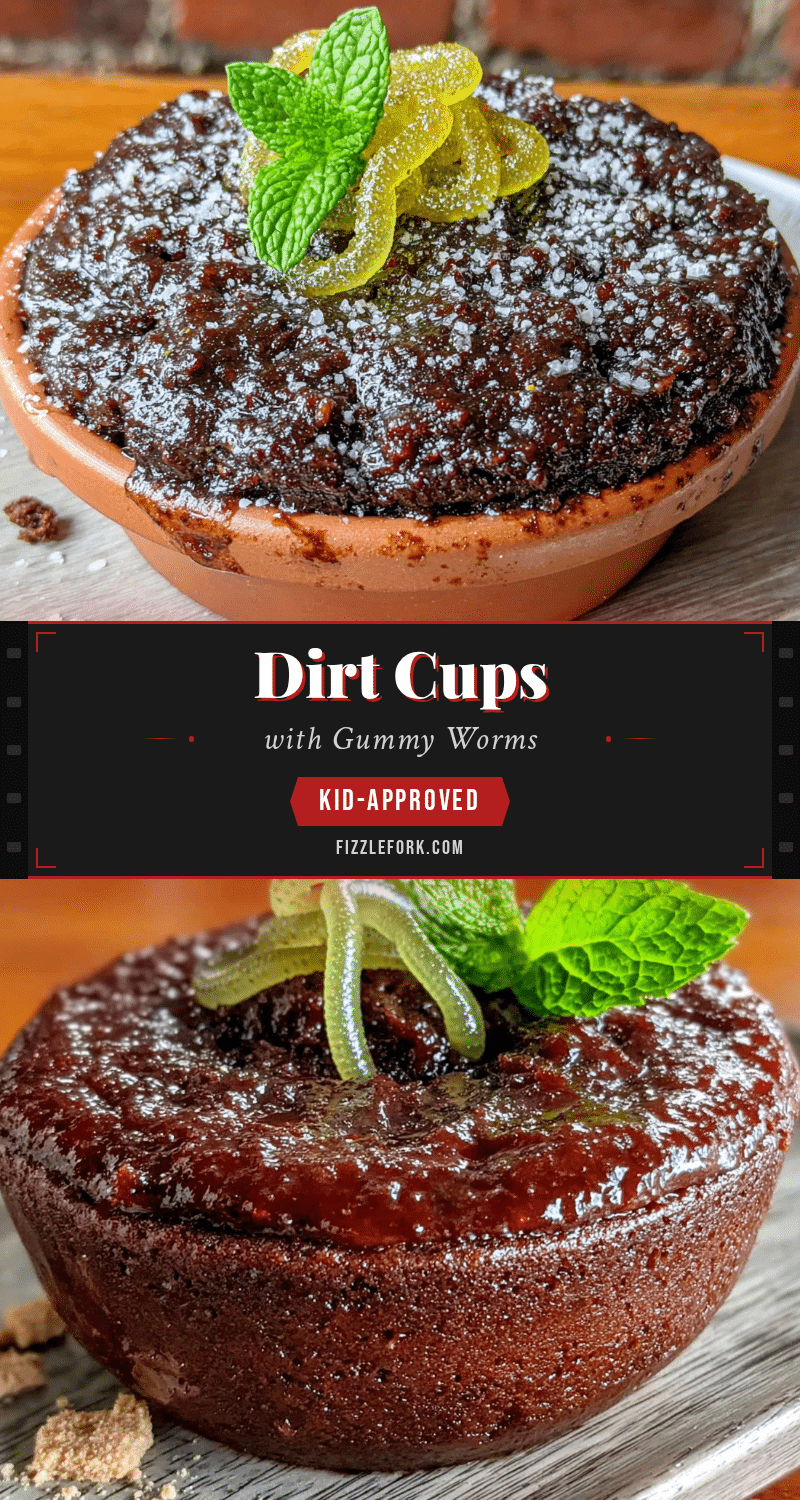
Kid-Approved Chocolate Dirt Cups with Gummy Worms: Easy Recipe
These Chocolate Dirt Cups with Gummy Worms are a quick and easy dessert that kids love. Made with instant chocolate pudding, cream cheese, Oreo crumbs, and gummy worms, they’re perfect for parties or a fun Tuesday treat.
- Prep Time: 20 minutes
- Cook Time: 0 minutes
- Total Time: 1 hour 20 minutes (including chilling)
- Yield: 8 servings 1x
- Category: Dessert
- Cuisine: American
Ingredients
- 1 (3.9 oz) box instant chocolate pudding mix
- 2 cups cold milk
- 4 oz cream cheese, softened to room temperature
- 1/4 cup powdered sugar
- 1 teaspoon vanilla extract
- 1 (14.3 oz) package Oreo cookies (about 36 cookies)
- 2 tablespoons melted butter (optional)
- 1 cup whipped topping, thawed
- 12–15 gummy worms
- Optional: small gummy bugs, leaves, or flower decorations
- Optional: 1-2 tablespoons chocolate shavings
Instructions
- Crush the Oreos: Place the entire package of Oreos in a large ziplock bag. Seal tight, then use a rolling pin to crush them into fine crumbs with some larger pieces. Set aside in a bowl. (Optional: stir in 2 tablespoons melted butter for extra-rich dirt.)
- Make the cream cheese base: In a small mixing bowl, beat the softened cream cheese with an electric mixer until smooth. Add powdered sugar and vanilla extract, beat for 30 seconds until combined. Scrape down sides.
- Prepare the pudding: In a medium mixing bowl, whisk together instant chocolate pudding mix and 2 cups cold milk for about 2 minutes until it starts to thicken. Let sit for 3-4 minutes.
- Combine the pudding and cream cheese: Add the cream cheese mixture to the pudding and whisk until fully combined and smooth.
- Fold in the whipped topping: Gently fold the thawed whipped topping into the pudding-cream cheese mixture using a spatula until just combined and no white streaks remain.
- Layer the cups: Add a layer of Oreo ‘dirt’ to the bottom of each clear cup (about 2 tablespoons per cup). Press down gently. Spoon or pipe the pudding mixture on top, filling each cup about two-thirds full.
- Top with more dirt: Sprinkle another layer of Oreo crumbs on top (about 1-2 tablespoons per cup) to completely cover the pudding.
- Add the gummy worms: Gently push 2-3 gummy worms into each cup, positioning them to look like they’re crawling out of the dirt.
- Chill: Refrigerate the dirt cups for at least 1-2 hours before serving. Can be prepared up to 24 hours in advance (add gummy worms just before serving).
- Serve and enjoy: Serve cold with small spoons. Add optional decorations if desired.
Notes
Don’t skip the cream cheese—it adds richness and balances sweetness. Crush Oreos to a coarse sand texture. Use cold milk for best pudding set. Make extra Oreo crumbs for topping. For dairy-free, use dairy-free cream cheese, milk, and whipped topping. For gluten-free, use gluten-free chocolate sandwich cookies and check pudding mix label.
Nutrition
- Serving Size: 1 cup
- Calories: 335
- Sugar: 34
- Sodium: 380
- Fat: 15
- Saturated Fat: 7.5
- Carbohydrates: 47.5
- Fiber: 1
- Protein: 5.5
Keywords: dirt cups, chocolate pudding, gummy worms, kid-friendly dessert, easy dessert, no-bake dessert, party dessert