I was halfway through unloading a box of mismatched plates at a church rummage sale when Mrs. Kowalski, the eighty-something retired home economics teacher everyone called “Grandma K,” shuffled over holding a stained index card. “You look like someone who feeds a family,” she said, and honestly, I wasn’t sure if that was a compliment or a warning. She pressed the card into my hand—it had peanut butter smudges on the corner and the words “Banana Oats” written in careful cursive. “My grandson won’t eat anything else for breakfast,” she told me. “And his mama works nights, so this one’s a lifesaver.” I thanked her, tucked the card into my pocket, and completely forgot about it until three weeks later when I found it crumpled in the washing machine.
That stained, water-damaged recipe card became the starting point for what my kids now call “the breakfast that doesn’t make them late.” I tweaked it, tested it, and messed it up twice before getting it right. The first batch was too watery. The second was so thick my youngest called it “oat pudding” and refused to touch it. But the third try? That was the one. My daughter, who usually picks at her oatmeal like she’s inspecting it for defects, actually asked for seconds. My son, who once declared breakfast “a scam,” ate his entire bowl without being reminded even once.
Maybe you’ve been there—standing in your kitchen at 7 AM, trying to get lunches packed and shoes found and someone to please just take one more bite of something healthy. That’s exactly why this recipe stuck with me. It’s the kind of breakfast that solves problems before they start. Five minutes of prep the night before, and morning you gets to pour, top, and serve. No cooking, no cleanup, no negotiations. Just a bowl of creamy, peanut buttery, naturally sweet oats that somehow make everyone happy. And that, honestly, is a small miracle worth sharing.
Why You’ll Love This Recipe
This isn’t just another overnight oats recipe. After testing this with my own picky eaters (and their equally picky friends), I can tell you exactly why it works when other breakfast ideas fall flat.
- 5-Minute Prep: No joke. You can make this while your coffee brews or while you’re hunting for matching socks. The hardest part is peeling the banana.
- Simple Ingredients: You probably have everything already—rolled oats, peanut butter, a banana, milk, and a little maple syrup. No trips to specialty stores required.
- Perfect for Busy Mornings: This is the breakfast that saves you when the bus comes in twenty minutes and nobody has eaten yet. Grab, add toppings, and go.
- Crowd-Pleaser: My kids’ friends ask for this when they sleep over. Even the ones who “don’t like oatmeal” eat it. I’m not sure how that works, but I’m not questioning it.
- Actually Filling: The combination of oats, peanut butter, and banana keeps little bellies full until lunch. No hangry kids by 10 AM.
What makes this different from every other overnight oats recipe? It’s the texture. Most recipes turn into a gloopy mess or a brick of oats. This one lands right in that sweet spot—creamy but not soupy, thick but not heavy. The trick is mashing the banana first (not just slicing it) so it blends into the oats instead of sitting on top. That one change makes everything creamier and naturally sweet, so you can use less maple syrup.
This is the recipe that makes you feel like a good parent without actually working that hard. And honestly? We all deserve that feeling.
What Ingredients You Will Need
This recipe relies on simple, wholesome ingredients that work together to create a breakfast that tastes like a treat but fuels your family like a proper meal. Most of these are pantry staples, which is exactly the point.
- Rolled Oats (old-fashioned oats): 1 cup (90g). Don’t use instant oats here—they turn to mush. Rolled oats hold their shape overnight and give you that perfect chewy texture. I prefer Bob’s Red Mill or Quaker Old Fashioned, but any brand works.
- Ripe Banana: 1 large, mashed (about ½ cup / 120g). The riper the better. Those brown-speckled bananas nobody wants to eat? They’re perfect here. They add sweetness without extra sugar and make the oats extra creamy.
- Creamy Peanut Butter: ¼ cup (64g). Natural peanut butter works, but stir it well first. If you use the kind with added sugar, you might want to reduce the maple syrup slightly. I’ve used Skippy Natural and Justin’s, and both work great.
- Milk of Choice: 1 cup (240ml). Whole milk makes it richest, but oat milk or almond milk work perfectly too. My kids don’t notice the difference when I use oat milk, which is a win for our dairy-free friends.
- Plain Greek Yogurt: ¼ cup (60g). This adds creaminess and a little protein boost. Vanilla yogurt works too—just cut back on the maple syrup. You can also skip it entirely and use an extra ¼ cup of milk.
- Maple Syrup: 1-2 tablespoons (15-30ml). Start with one and taste. If your banana is super ripe, you might not need more. Honey works as a substitute if that’s what you have.
- Chia Seeds (optional): 1 tablespoon (12g). These thicken the oats and add omega-3s. My kids don’t notice them, which is the highest compliment I can give an ingredient.
- Pinch of Salt: Just a tiny one—it balances the sweetness and makes the peanut butter flavor pop.
- Optional Toppings: Sliced banana, a drizzle of peanut butter, a sprinkle of granola, chocolate chips (my kids’ favorite), or a handful of blueberries. Let everyone customize their own bowl.
Ingredient Selection Tips: For the best texture, use a banana that’s soft enough to mash easily with a fork. If your peanut butter is super thick (like some natural brands), warm it slightly in the microwave for 10 seconds so it mixes in smoothly. And if you’re out of Greek yogurt, cottage cheese blended smooth works surprisingly well—I tested it once when I was out of yogurt, and nobody complained.
Equipment Needed
You don’t need fancy equipment for this recipe, which is part of the beauty. Here’s what you’ll need:
- Mason Jar or Airtight Container: A 16-ounce jar works perfectly for a single serving. I use wide-mouth Ball jars because they’re easy to eat from and clean. Any container with a tight lid works.
- Fork or Potato Masher: For mashing the banana. A fork works fine, but a potato masher makes it quicker and gives you a smoother consistency.
- Measuring Cups and Spoons: Standard set. You’ll need ¼ cup, 1 cup, and 1 tablespoon measurements.
- Spatula or Spoon: For stirring everything together. A small rubber spatula helps get every bit of peanut butter incorporated.
- Cutting Board and Knife: For slicing the banana for mashing and for any toppings you want to add in the morning.
Budget-Friendly Tip: Don’t run out and buy special overnight oats jars. Repurpose pasta sauce jars or pickle jars—just wash them thoroughly. I’ve been using the same four jars for two years now, and they work perfectly. If you’re making this for a crowd, a large mixing bowl with plastic wrap works too.
Preparation Method
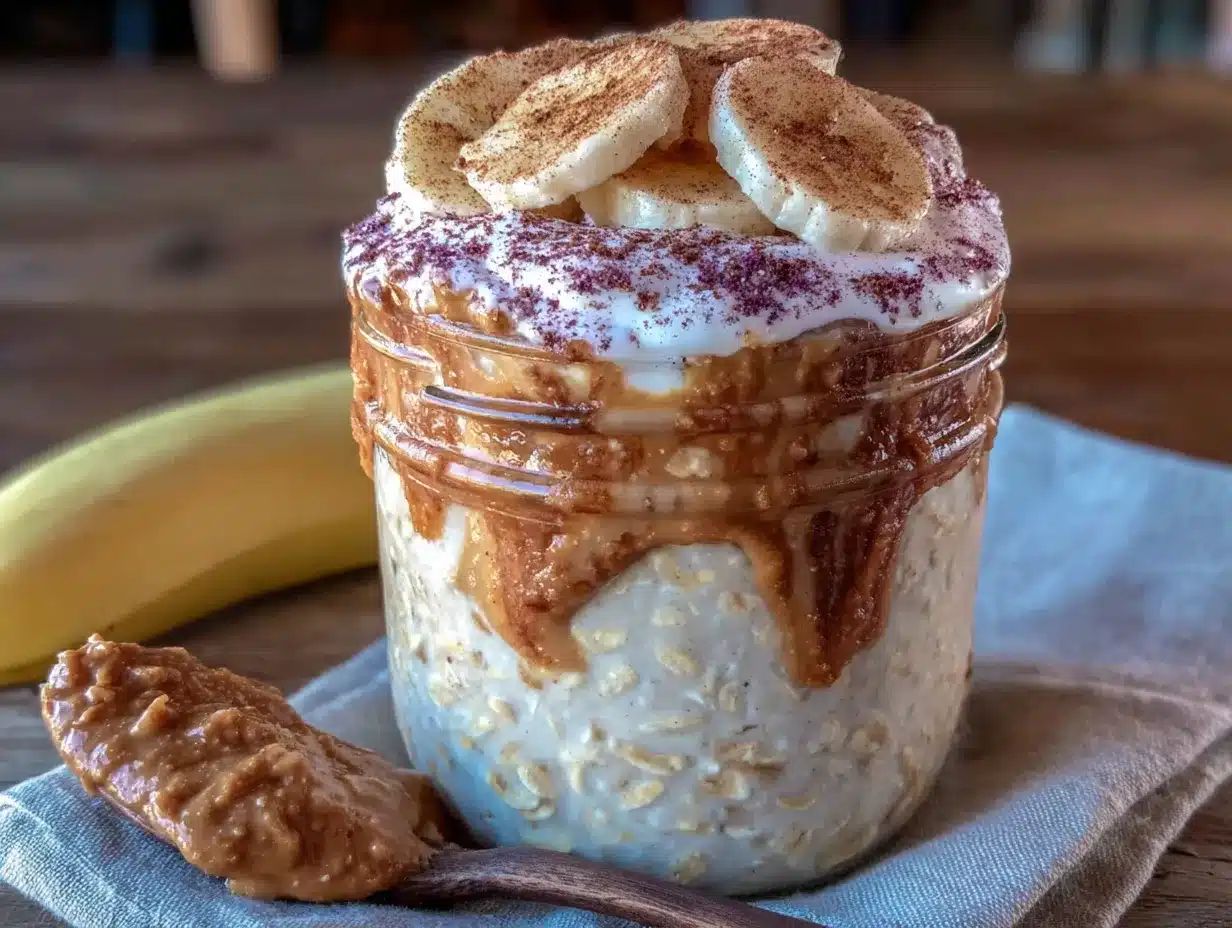
This recipe comes together in about five minutes flat. Here’s exactly how to do it, with the little tricks I learned from my failed batches.
- Mash the banana first. Peel your ripe banana and put it in the bottom of your jar or container. Mash it thoroughly with a fork until it’s mostly smooth with just a few tiny lumps. This is the step most people skip, and it makes a huge difference. If you just slice the banana, it sits on top and doesn’t blend into the oats. Mashing it means every bite gets that natural sweetness.
- Add the peanut butter and wet ingredients. Spoon in the peanut butter, pour in the milk, add the Greek yogurt, and drizzle in the maple syrup. Stir everything together with your fork or spatula until the peanut butter is fully incorporated. Don’t rush this part—peanut butter likes to hide in clumps. I usually stir for about 30 seconds, scraping the bottom and sides.
- Stir in the oats, chia seeds, and salt. Add the rolled oats, chia seeds (if using), and a tiny pinch of salt. Stir until everything is evenly combined. The mixture will look pretty liquidy at this point—that’s normal. The oats will absorb the liquid overnight.
- Seal and refrigerate. Put the lid on your jar or cover your container tightly. Place it in the refrigerator for at least 6 hours, but overnight is best (8-12 hours). I usually make these right after dinner so they’re ready for the morning rush.
- Check the texture in the morning. In the morning, take the jar out and give it a good stir. The oats should be thick and creamy. If it’s too thick for your liking, stir in a tablespoon or two of milk to loosen it up. If it’s too thin (which can happen if you used a smaller banana), add a few more oats and let it sit for 15 minutes.
- Add toppings and serve. This is the fun part. Top with sliced banana, a drizzle of extra peanut butter, a sprinkle of granola, or whatever your kids love. My daughter likes hers with strawberries and a few chocolate chips. My son goes for extra banana and a drizzle of honey. Serve cold straight from the fridge, or microwave for 30 seconds if your family prefers warm oats.
Sensory Cue: When you stir it in the morning, you should hear a satisfying squelch as the spoon moves through the thick oats. The smell should be peanut buttery and faintly sweet—like a no-bake cookie, but breakfast-appropriate. If it smells sour or off, trust your nose and start fresh.
Time-Saving Tip: Make a double batch on Sunday night. Store them in individual jars, and you’ve got breakfast sorted for the first half of the week. My record is making five jars in under ten minutes while simultaneously helping with homework.
Cooking Tips & Techniques
After making this recipe at least forty times (no exaggeration), I’ve collected some hard-won wisdom. Here’s what I wish someone had told me.
The banana matters more than you think. I once used a barely ripe banana because it was all I had, and the oats turned out bland and chalky. The sweetness in this recipe comes almost entirely from the banana, so don’t skimp. If your bananas are green, let them sit on the counter for a few days. If they’re already brown and spotty, that’s perfect—they’ll mash easily and add maximum sweetness.
Don’t over-stir in the morning. I know it’s tempting to mix everything up again, but the oats have already absorbed the liquid overnight. Over-stirring can break them down and make the texture gummy. Just a gentle stir to redistribute the toppings is all you need.
Temperature matters for picky eaters. Some kids hate cold oatmeal. If yours are in that camp, microwave the jar for 20-30 seconds (remove the metal lid first!). Stir and check the temperature before serving. My daughter prefers hers cold, but my son insists on warm—so I make his in a separate container and heat it while I’m packing lunches.
My biggest failure: I once forgot to mash the banana and just threw slices in with the oats. The next morning, the banana slices had turned brown and slimy, and my kids refused to eat it. I tried to salvage it by stirring everything together, but the texture was off. That’s when I learned: mash first, always.
Make-ahead strategy: These keep in the fridge for up to 4 days. I make a batch on Sunday and another on Wednesday. The flavor actually gets better after day two as the peanut butter and banana meld together. Just don’t add the toppings until you’re ready to serve, or they’ll get soggy.
Variations & Adaptations
One of the best things about this recipe is how easy it is to adapt. Here are some variations I’ve tested with my family.
Nut-Free Version: Swap the peanut butter for sunflower seed butter (SunButter works great) or WowButter. The texture stays the same, and the flavor is still delicious. My son’s friend has a peanut allergy, and he couldn’t tell the difference when I used SunButter.
Dairy-Free Version: Use oat milk or almond milk instead of cow’s milk, and swap the Greek yogurt for a dairy-free yogurt or just omit it entirely. I’ve made this with unsweetened vanilla almond milk and it turned out perfectly creamy.
Chocolate Peanut Butter Version: Add 1 tablespoon of cocoa powder when you’re mixing everything together. My kids call this “dessert breakfast” and it disappears fast. You might want to add an extra tablespoon of maple syrup to balance the cocoa’s bitterness.
Low-Sugar Version: Omit the maple syrup entirely if your banana is very ripe. The banana and peanut butter provide enough sweetness for most palates. My husband prefers it this way, and he’s not a health nut—he just doesn’t like sweet breakfasts.
Warm Oatmeal Version: If your family prefers hot oatmeal, you can make this stovetop instead. Combine all the ingredients in a small saucepan and cook over medium heat for 5-7 minutes, stirring frequently. It won’t be “overnight” oats anymore, but it’s still delicious and takes almost no time.
My personal favorite variation: I add a tablespoon of flaxseed meal for extra fiber and omega-3s. My kids don’t notice, and I feel slightly more virtuous about feeding them breakfast. Sometimes I also swirl in a spoonful of raspberry jam on top—it looks pretty and adds a little tartness that balances the peanut butter.
Serving & Storage Suggestions
This recipe is designed for flexibility, which is exactly what busy mornings need.
Serving Temperature: Serve cold straight from the fridge, or warm it up. My family is split down the middle—half prefer it cold, half want it warm. I’ve learned to ask the night before so I’m not guessing at 7 AM. If you’re serving it warm, microwave for 20-30 seconds and stir well before adding toppings.
Presentation Ideas: For a fun breakfast, layer the oats in a clear jar with sliced bananas and a drizzle of peanut butter on top. Kids love seeing the layers. For a more substantial meal, serve it in a bowl with a side of toast or a hard-boiled egg.
What to Serve With It: A glass of milk, a side of fresh fruit (berries go great), or a piece of whole-wheat toast with butter. If I’m feeling ambitious, I’ll make a quick smoothie to go alongside. But honestly, this is filling enough on its own.
Storage Instructions: Keep in an airtight container in the refrigerator for up to 4 days. Do not freeze—the texture gets watery and weird when thawed. I’ve tried it, and it’s not worth it.
Reheating Tips: If you’re warming up a jar that’s been in the fridge for a couple of days, you might need to add a splash of milk before microwaving. The oats continue to absorb liquid over time, so they can get thick. Just stir in a tablespoon of milk and heat for 20-30 seconds.
Flavor Development: The flavors actually get better on day two or three. The peanut butter and banana meld together, and the oats become even creamier. My kids actually prefer the second-day jars. Something about that extra time in the fridge makes everything taste more cohesive.
Nutritional Information & Benefits
Here’s the approximate nutritional breakdown for one serving (based on the recipe as written, without optional toppings):
- Calories: Approximately 420
- Protein: 16g
- Fiber: 8g
- Fat: 16g (mostly healthy fats from peanut butter and chia seeds)
- Carbohydrates: 58g
- Sugar: 22g (mostly natural from banana and maple syrup)
Health Benefits: Rolled oats are packed with soluble fiber, which helps keep kids full and supports healthy digestion. Peanut butter provides protein and healthy fats that fuel growing bodies and brains. Bananas are rich in potassium, which is important for muscle function and energy. The chia seeds (if you add them) are a great source of omega-3 fatty acids and extra fiber.
Dietary Considerations: This recipe is naturally vegetarian and can easily be made vegan by using plant-based milk and yogurt. To make it gluten-free, use certified gluten-free rolled oats. It’s also nut-free if you use sunflower seed butter instead of peanut butter.
Potential Allergens: Contains peanuts (if using peanut butter), dairy (if using milk and yogurt), and gluten (if using regular oats). Always check labels if you’re serving someone with allergies.
My Personal Take: I’m not a nutritionist, but I’m a mom who wants her kids to eat something that isn’t sugar and air for breakfast. This recipe gives me peace of mind. It’s not a health food—it’s real food that happens to be good for you. And that’s exactly what I’m looking for on a Tuesday morning.
Conclusion
This overnight peanut butter banana oats recipe came to me from an unlikely source—a retired teacher at a rummage sale—but it’s become one of the most reliable tools in my parenting toolkit. It’s the breakfast that makes mornings easier, kids happier, and me feel like I’ve got at least one thing under control.
What I love most about this recipe is how forgiving it is. You can use different milk, swap the yogurt, add chia seeds or not, and it still works. It adapts to whatever you have in your fridge and whatever your family likes. That’s the kind of recipe worth keeping around.
I’d love to hear how this works for your family. Do your kids prefer it cold or warm? Have you tried any fun toppings that were a hit? Drop a comment below and share your version. And if you make a batch and it saves you from a chaotic morning, come back and tell me about it. Those are my favorite stories to read.
Here’s to easier mornings and happy breakfast tables. You’ve got this.
Frequently Asked Questions
Can I use quick oats instead of rolled oats?
You can, but the texture will be much softer and almost mushy. Quick oats absorb liquid faster and break down more overnight. If that’s what you have, reduce the milk to ¾ cup and expect a pudding-like consistency. Some kids actually prefer it that way!
How long do these overnight oats last in the fridge?
They stay good for up to 4 days in an airtight container. The texture gets creamier over time, so day two or three might actually be your favorite. Just don’t add toppings until you’re ready to serve, or they’ll get soggy.
Can I make this without yogurt?
Absolutely. Just replace the yogurt with an extra ¼ cup of milk. The oats will be slightly less creamy, but still delicious. You can also use a dairy-free yogurt alternative if you’re avoiding dairy.
My oats turned out too thick. How do I fix them?
Stir in a tablespoon or two of milk until it reaches your desired consistency. This happens sometimes if you used a larger banana or extra chia seeds. Don’t worry—it’s an easy fix, and the flavor is still perfect.
Can I double this recipe for a crowd?
Yes! Double or triple the ingredients and mix everything in a large bowl. Then portion it into individual jars or containers. This is my Sunday meal prep strategy. I make five jars at once and we’re set for the week.
Pin This Recipe!
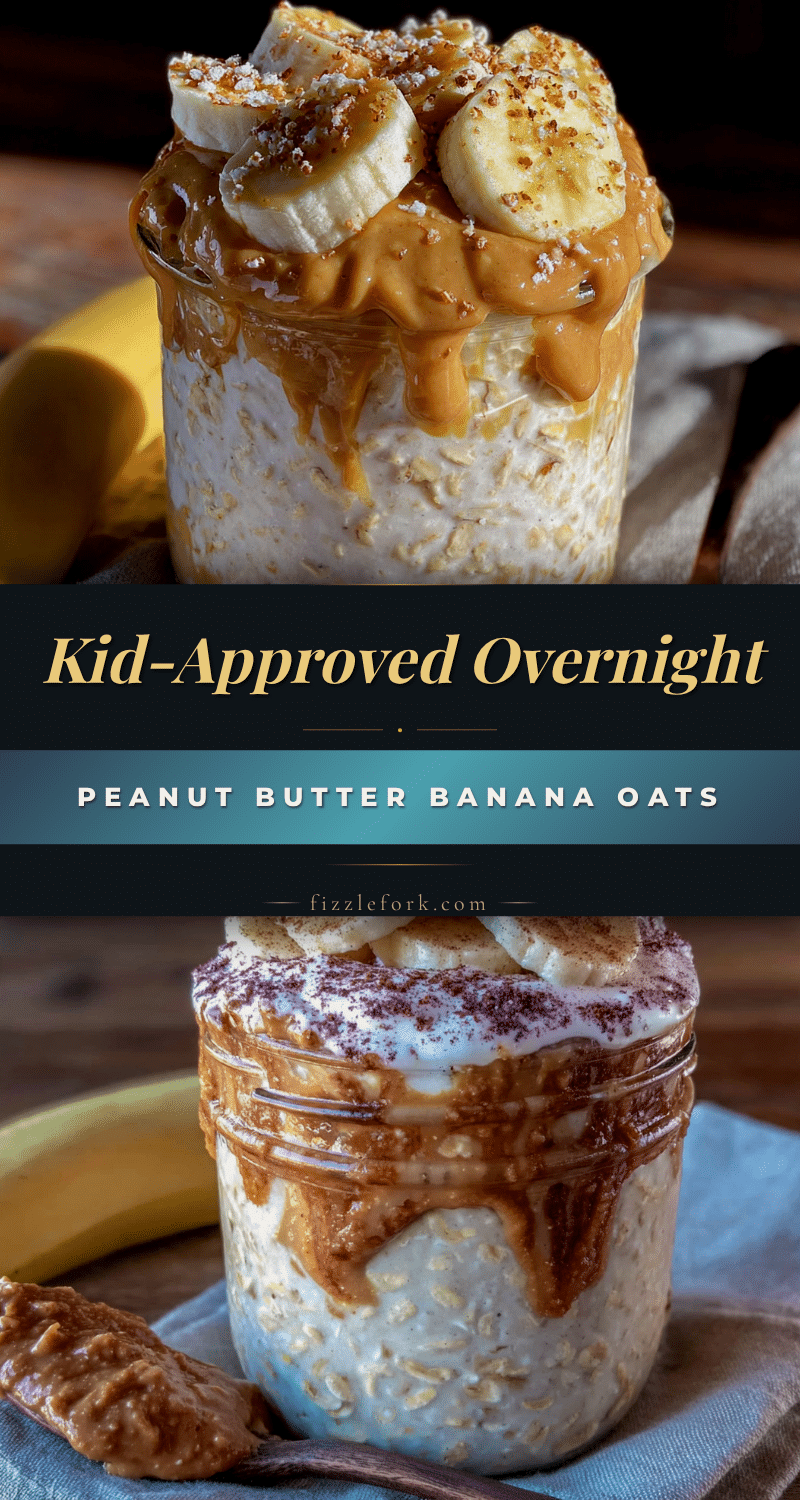
Kid-Approved Overnight Peanut Butter Banana Oats: 5-Minute Prep
A creamy, peanut buttery overnight oats recipe that comes together in just 5 minutes. Perfect for busy mornings, this kid-friendly breakfast is naturally sweetened with banana and made with simple pantry staples.
- Prep Time: 5 minutes
- Cook Time: 0 minutes
- Total Time: 6 hours 5 minutes (includes overnight refrigeration)
- Yield: 1 serving 1x
- Category: Breakfast
- Cuisine: American
Ingredients
- 1 cup (90g) rolled oats (old-fashioned oats)
- 1 large ripe banana, mashed (about 1/2 cup / 120g)
- 1/4 cup (64g) creamy peanut butter
- 1 cup (240ml) milk of choice (whole, oat, or almond)
- 1/4 cup (60g) plain Greek yogurt
- 1–2 tablespoons (15-30ml) maple syrup
- 1 tablespoon (12g) chia seeds (optional)
- Pinch of salt
- Optional toppings: sliced banana, drizzle of peanut butter, granola, chocolate chips, blueberries
Instructions
- Mash the banana first. Peel your ripe banana and put it in the bottom of your jar or container. Mash it thoroughly with a fork until it’s mostly smooth with just a few tiny lumps.
- Add the peanut butter and wet ingredients. Spoon in the peanut butter, pour in the milk, add the Greek yogurt, and drizzle in the maple syrup. Stir everything together with your fork or spatula until the peanut butter is fully incorporated.
- Stir in the oats, chia seeds, and salt. Add the rolled oats, chia seeds (if using), and a tiny pinch of salt. Stir until everything is evenly combined.
- Seal and refrigerate. Put the lid on your jar or cover your container tightly. Place it in the refrigerator for at least 6 hours, but overnight is best (8-12 hours).
- Check the texture in the morning. In the morning, take the jar out and give it a good stir. The oats should be thick and creamy. If it’s too thick, stir in a tablespoon or two of milk to loosen it up. If it’s too thin, add a few more oats and let it sit for 15 minutes.
- Add toppings and serve. Top with sliced banana, a drizzle of extra peanut butter, a sprinkle of granola, or whatever your kids love. Serve cold straight from the fridge, or microwave for 30 seconds if your family prefers warm oats.
Notes
Mash the banana first for best texture. Use a ripe banana for natural sweetness. Oats keep in the fridge for up to 4 days. For warm oats, microwave for 20-30 seconds. For nut-free version, use sunflower seed butter. For dairy-free, use plant-based milk and yogurt or omit yogurt.
Nutrition
- Serving Size: 1 jar (about 1.5 cup
- Calories: 420
- Sugar: 22
- Sodium: 200
- Fat: 16
- Saturated Fat: 3
- Carbohydrates: 58
- Fiber: 8
- Protein: 16
Keywords: overnight oats, peanut butter, banana, breakfast, kid-friendly, easy, no-cook, make-ahead