My neighbor, a woman named Clara who I only ever saw in her garden, watched me wrestling with a sticky, butter-laden dough one December afternoon. I was hunched over my counter, trying to coax a single, recognizable Christmas tree shape from a rented cookie press, and failing spectacularly. She didn’t say anything at first, just peered over the fence with a knowing smile. Then, she simply said, “You’re missing the cream cheese.” She didn’t offer a lecture or a formal lesson. She just disappeared back into her rose bushes, leaving me with that one, perfect piece of advice. That was the moment my holiday baking changed forever.
I went back inside, tossed out my stubborn, all-butter recipe, and started from scratch. I creamed together butter and a block of cream cheese, added a splash of vanilla, and worked the dough until it was soft and pliable—not greasy. The first press through the cookie gun was a revelation. The dough came out clean, held its shape, and even had this lovely, tender crumb. Honestly, I felt a little silly for all the years I had fought with a dry, crumbly dough. Clara never did give me a written recipe; she just gave me the one ingredient I was missing. And let me tell you, it made all the difference. Now, every time I make these perfect cream cheese spritz cookies for a cookie press, I think of her garden and that simple, generous exchange.
Maybe you’ve been there, too—staring at a pile of broken cookie pieces, wondering if your cookie press is just a kitchen gadget that doesn’t actually work. I get it. I’ve been there. But this recipe? It’s the one that finally worked for me. It’s the one that turns out dozens of perfect, buttery, melt-in-your-mouth cookies, every single time. It’s not just a recipe; it’s the solution to a holiday baking headache. And it all started with a neighbor who knew exactly what I needed.
Why You’ll Love This Recipe
These aren’t just any spritz cookies. The cream cheese makes them incredibly tender and gives them a subtle tang that perfectly balances the sweetness. They hold their shape beautifully in the cookie press, meaning you get crisp, defined trees, wreaths, and stars every single time. No more frustration, just beautiful cookies that look like they came from a bakery.
- Perfect for Cookie Presses: The cream cheese creates the ideal dough consistency. It’s soft enough to pipe easily but firm enough to hold its shape, so your cookie press actually works like a charm.
- Incredibly Tender Texture: The cream cheese adds a richness and tenderness that all-butter recipes just can’t match. These cookies literally melt in your mouth.
- Easy to Decorate: Because they hold their shape so well, these cookies are a dream to decorate. Whether you add sprinkles before baking or pipe on royal icing later, they provide a perfect canvas.
- Crowd-Pleasing Classic: This is the cookie everyone reaches for on the holiday platter. They’re buttery, not too sweet, and have that nostalgic, homemade taste that people love.
- Stress-Free Baking: No more wrestling with sticky dough or broken cookies. This recipe is reliable, consistent, and takes the guesswork out of using a cookie press. It’s the kind of recipe you can make while hosting a holiday party.
What makes this recipe different from the rest is the precise balance of ingredients. I’ve tested this dozens of times to ensure the dough is neither too soft nor too stiff. It’s the perfect Goldilocks consistency. It’s not just another spritz cookie recipe; it’s the best one, born from a neighbor’s simple wisdom and refined through years of holiday baking.
What Ingredients You Will Need
This recipe uses simple, pantry-friendly ingredients to create something truly special. The star of the show is, of course, the cream cheese, which works its magic to create a dough that’s a dream to work with. Here’s everything you’ll need:
- 1 cup (2 sticks) unsalted butter, softened: Make sure your butter is at room temperature. It should be soft to the touch but not melted. I always use unsalted butter to control the salt level. (I find Land O’Lakes or Kerrygold work wonderfully for their consistent fat content.)
- 3 ounces cream cheese, softened: This is the secret ingredient. It adds tenderness and a slight tang. Use full-fat, block-style cream cheese for the best results. (Philadelphia is my go-to brand for its reliable texture.)
- 1 cup granulated sugar: Standard white sugar provides the perfect sweetness and helps the cookies spread just a little.
- 1 large egg yolk, room temperature: The yolk adds richness and helps bind the dough without making it too wet. Save the egg white for another use, like a glaze or an omelet.
- 1 teaspoon vanilla extract: Pure vanilla extract is best for a deep, warm flavor. You can also use vanilla bean paste for those lovely little specks.
- 1/2 teaspoon almond extract (optional but recommended): This is my little secret. Almond extract gives spritz cookies that classic, almost marzipan-like flavor that takes them to the next level. A little goes a long way!
- 2 1/4 cups all-purpose flour: Spoon and level your flour into the measuring cup. Scooping directly from the bag can pack it down, leading to dry cookies.
- 1/2 teaspoon salt: Salt balances the sweetness and enhances the buttery flavor. I use fine sea salt.
- Food coloring (optional): For festive colors, add a few drops of gel food coloring to the dough. Gel colors are more concentrated and won’t affect the dough’s consistency as much as liquid ones.
- Sprinkles or sanding sugar (for decorating): These are for topping the cookies before baking. They add a beautiful crunch and festive sparkle.
Equipment Needed
You don’t need a lot of fancy equipment for this recipe, but a good cookie press is essential. Here’s what you’ll need to have on hand:
- Cookie Press: This is the star of the show. I use a Wilton cookie press, which I’ve found to be reliable and easy to use. If you have a different brand, the same principles apply. Just make sure it’s clean and dry before you start.
- Stand Mixer or Hand Mixer: A stand mixer with the paddle attachment makes creaming the butter and cream cheese effortless. A hand mixer works perfectly fine, too; just be prepared to cream for a few extra minutes.
- Baking Sheets: Use light-colored, ungreased baking sheets. Dark sheets can cause the cookies to brown too quickly on the bottom.
- Parchment Paper or Silicone Baking Mats: These are non-negotiable for easy cleanup and to prevent sticking. Do not grease your baking sheets, as the dough needs to grip the surface to release from the press.
- Cooling Racks: Essential for letting the cookies cool completely before storing or decorating.
- Mixing Bowls and Measuring Spoons/Cups: Standard kitchen staples.
- Rubber Spatula: For scraping down the bowl and incorporating the last bits of flour.
Preparation Method
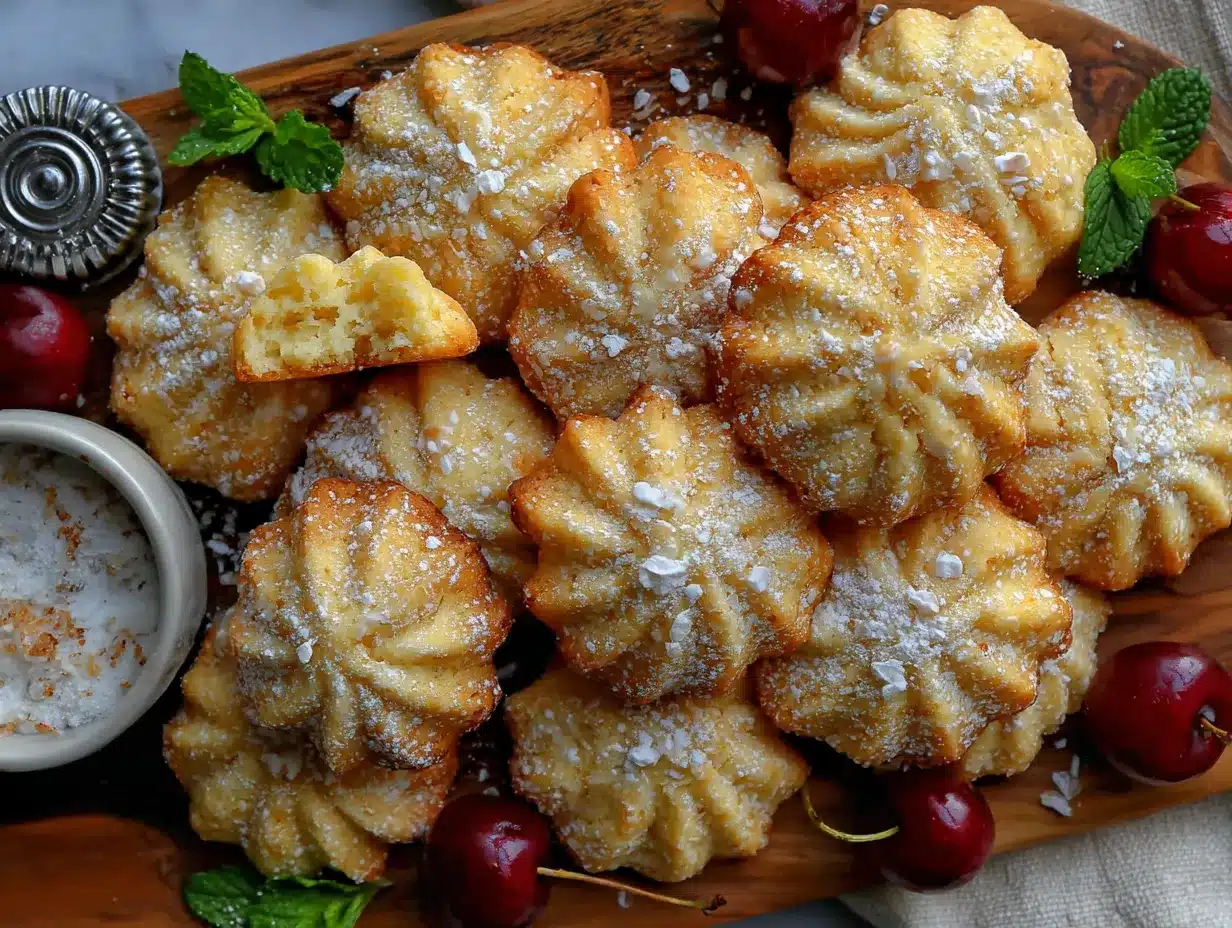
This is where the magic happens. Follow these steps carefully, and you’ll have perfect cookies every time. The key is to not overwork the dough and to keep it at the right temperature.
- Cream the Butter and Cream Cheese: In the bowl of your stand mixer fitted with the paddle attachment, beat the softened butter and cream cheese together on medium speed until light, fluffy, and completely combined. This takes about 2-3 minutes. You want a smooth, homogenous mixture with no lumps. (The mixture should look pale and airy.)
- Add Sugar and Egg Yolk: Add the granulated sugar and beat on medium speed for another 2 minutes until the mixture is light and creamy. Scrape down the sides and bottom of the bowl. Add the egg yolk, vanilla extract, and almond extract (if using). Beat on low speed until just combined.
- Combine Dry Ingredients: In a separate medium bowl, whisk together the all-purpose flour and salt. This ensures the salt is evenly distributed.
- Add Flour Mixture: With the mixer on low speed, gradually add the flour mixture to the wet ingredients. Mix until just combined. Stop the mixer as soon as you see the last streaks of flour disappear. Overmixing will develop the gluten and make the cookies tough. (The dough should be soft but not sticky. It should hold together when pinched.)
- Chill the Dough (Optional but Helpful): For the best results, wrap the dough in plastic wrap and chill it in the refrigerator for 15-20 minutes. This firms it up slightly, making it even easier to load into the cookie press. If you’re in a hurry, you can skip this step, but the dough will be a bit softer.
- Prepare the Cookie Press: While the dough chills, fit your cookie press with the desired disk. I love using the Christmas tree, wreath, and star shapes for the holidays. Make sure the press is clean and dry.
- Load the Press: Pinch off a piece of dough (about the size of a golf ball) and pack it firmly into the cookie press chamber. Avoid leaving any air pockets. Twist on the bottom ring.
- Press the Cookies: Hold the cookie press perpendicular to your ungreased, parchment-lined baking sheet. Press down firmly and evenly, then lift straight up. If the dough doesn’t release, it might be too warm or the press isn’t perpendicular. Don’t worry; just scrape the dough back into the bowl and try again.
- Decorate: Before baking, add sprinkles or sanding sugar to the cookies. You can also press a candied cherry into the center of each one for a classic look. (I love using red and green sprinkles for a festive touch.)
- Bake: Bake in a preheated 375°F (190°C) oven for 7-9 minutes, or until the edges are just lightly golden. The centers will still look pale. Do not overbake! (The cookies will firm up as they cool.)
- Cool: Let the cookies cool on the baking sheet for 2-3 minutes before transferring them to a wire rack to cool completely. They are very delicate when warm.
Cooking Tips & Techniques
Here are some hard-won lessons from my own kitchen. I’ve made every mistake in the book so you don’t have to.
- The Temperature is Everything: If your dough is too warm, it will be sticky and won’t release from the press. If it’s too cold, it will be hard to press. The 15-minute chill is your sweet spot. If you’re in a warm kitchen, chill the dough for a bit longer.
- Don’t Overfill the Press: Only fill the press about two-thirds full. Overfilling can cause the dough to ooze out the back or make it hard to press evenly.
- Press Firmly and Lift Straight Up: This is the most important technique. You need a firm, even press, and then a quick, straight lift. If you hesitate or lift at an angle, the cookie will smear.
- Scrape and Re-roll: If the dough gets too soft from the heat of your hands, just scrape it out of the press, chill it for 5 minutes, and try again. Don’t fight with it.
- Use Parchment, Not Grease: Never grease your baking sheets. The dough needs friction to release from the press. Parchment paper or a silicone mat provides the perfect non-stick surface without being slick.
Variations & Adaptations
This recipe is wonderfully versatile. Here are a few ways to make it your own.
- Chocolate Spritz Cookies: Replace 1/4 cup of the all-purpose flour with 1/4 cup of unsweetened cocoa powder. Sift it together with the flour to ensure it’s evenly distributed. The result is a rich, chocolatey cookie that’s perfect for dipping in coffee.
- Lemon Spritz Cookies: Add 1 tablespoon of fresh lemon zest and 1 teaspoon of lemon extract to the dough along with the vanilla. These are bright, tangy, and perfect for spring or summer gatherings. They pair beautifully with a cup of iced tea.
- Gluten-Free Spritz Cookies: Substitute the all-purpose flour with a high-quality 1-to-1 gluten-free baking flour blend that contains xanthan gum. I’ve had great success with Bob’s Red Mill 1-to-1 Baking Flour. The texture will be slightly more delicate, but they still hold their shape and taste wonderful.
- Spiced Spritz Cookies: Add 1 teaspoon of ground cinnamon, 1/2 teaspoon of ground ginger, and 1/4 teaspoon of ground nutmeg to the flour mixture. These are perfect for fall and winter, and they make your whole house smell amazing.
Serving & Storage Suggestions
These cookies are perfect for any occasion, but they really shine on a holiday dessert table. Here’s how to serve and store them.
- Serving: Serve them at room temperature on a beautiful platter. They’re wonderful on their own, but they also pair beautifully with a cup of hot cocoa, coffee, or a glass of cold milk. For a party, arrange them on a tiered stand with other cookies and candies.
- Storage: Store the completely cooled cookies in an airtight container at room temperature. They will stay fresh for up to 1 week. I like to layer them between sheets of wax paper to prevent them from sticking together or breaking.
- Freezing: These cookies freeze beautifully. Place the cooled, undecorated cookies in a single layer in a freezer-safe container or bag. They can be frozen for up to 3 months. Thaw them at room temperature before decorating or serving. You can also freeze the unbaked dough for up to 2 months. Just thaw it in the refrigerator overnight before using.
- Flavor Development: Honestly, these cookies taste even better the next day. The flavors meld together, and the texture becomes even more tender. So, feel free to bake them a day or two ahead of your event.
Nutritional Information & Benefits
While these are a treat, it’s good to know what’s in them. Here’s an approximate nutritional breakdown per cookie (based on a yield of 60 cookies).
| Nutrient | Amount Per Cookie |
|---|---|
| Calories | 60 |
| Total Fat | 4g |
| Saturated Fat | 2.5g |
| Cholesterol | 15mg |
| Sodium | 30mg |
| Total Carbohydrates | 7g |
| Sugars | 3g |
| Protein | 1g |
The cream cheese in this recipe adds a small amount of protein and calcium, and the butter provides fat-soluble vitamins. Of course, these are a special-occasion cookie, so enjoy them in moderation. They are a wonderful way to create memories and share joy with the people you love.
Conclusion
This recipe for perfect cream cheese spritz cookies for a cookie press is more than just a set of instructions. It’s a solution to a common baking frustration, a way to create beautiful, delicious cookies with confidence, and a story that started with a kind neighbor and a single piece of advice. The cream cheese makes all the difference, giving you a tender, flavorful dough that’s a dream to work with.
I encourage you to make these your own. Try the chocolate or lemon variations. Experiment with different sprinkles and shapes. The most important thing is to have fun and not stress over perfection. The slight imperfections are what make them homemade and special. I absolutely love how reliable this recipe is, and I hope it brings you the same joy and success it has brought me.
Have you tried this recipe? I’d love to hear about your experience! Leave a comment below and let me know how your cookies turned out. Share your photos and tag me on social media. Happy baking!
Frequently Asked Questions
Why are my spritz cookies not sticking to the baking sheet?
This is usually a temperature issue. Make sure your baking sheet is ungreased and cool to the touch. If the sheet is warm, the dough will soften immediately and won’t release from the press. Try chilling the baking sheet for a few minutes before pressing the cookies.
Can I use low-fat cream cheese?
I don’t recommend it. Low-fat or non-fat cream cheese has a higher water content, which can make the dough sticky and cause the cookies to spread too much. Stick with full-fat, block-style cream cheese for the best results.
My dough is too sticky to press. What should I do?
If your dough is too sticky, it’s likely too warm. Wrap it in plastic wrap and chill it in the refrigerator for 15-20 minutes. This will firm up the butter and cream cheese, making the dough much easier to handle.
Can I make the dough ahead of time?
Yes! You can make the dough up to 3 days in advance. Wrap it tightly in plastic wrap and store it in the refrigerator. Let it sit at room temperature for about 10-15 minutes before loading it into the cookie press so it’s soft enough to pipe.
How do I clean my cookie press?
Clean your cookie press immediately after use. The dough can be difficult to remove once it dries. Disassemble the press and wash the parts in warm, soapy water. A small brush, like a clean toothbrush, can help get into the crevices of the disks. Dry all parts thoroughly before storing.
Pin This Recipe!

Perfect Cream Cheese Spritz Cookies Recipe for Cookie Press

These cream cheese spritz cookies are incredibly tender, hold their shape beautifully in a cookie press, and have a subtle tang that perfectly balances the sweetness. They are the solution to holiday baking frustration, yielding perfect, buttery, melt-in-your-mouth cookies every time.
- Prep Time: 20 minutes
- Cook Time: 8 minutes
- Total Time: 28 minutes
- Yield: 60 cookies 1x
- Category: Dessert
- Cuisine: American
Ingredients
- 1 cup (2 sticks) unsalted butter, softened
- 3 ounces cream cheese, softened
- 1 cup granulated sugar
- 1 large egg yolk, room temperature
- 1 teaspoon vanilla extract
- 1/2 teaspoon almond extract (optional but recommended)
- 2 1/4 cups all-purpose flour
- 1/2 teaspoon salt
- Food coloring (optional)
- Sprinkles or sanding sugar (for decorating)
Instructions
- Cream the Butter and Cream Cheese: In the bowl of a stand mixer fitted with the paddle attachment, beat the softened butter and cream cheese together on medium speed until light, fluffy, and completely combined, about 2-3 minutes.
- Add Sugar and Egg Yolk: Add the granulated sugar and beat on medium speed for another 2 minutes until light and creamy. Scrape down the sides and bottom of the bowl. Add the egg yolk, vanilla extract, and almond extract (if using). Beat on low speed until just combined.
- Combine Dry Ingredients: In a separate medium bowl, whisk together the all-purpose flour and salt.
- Add Flour Mixture: With the mixer on low speed, gradually add the flour mixture to the wet ingredients. Mix until just combined. Stop the mixer as soon as the last streaks of flour disappear.
- Chill the Dough (Optional but Helpful): For best results, wrap the dough in plastic wrap and chill in the refrigerator for 15-20 minutes.
- Prepare the Cookie Press: While the dough chills, fit your cookie press with the desired disk. Make sure the press is clean and dry.
- Load the Press: Pinch off a piece of dough (about the size of a golf ball) and pack it firmly into the cookie press chamber. Avoid leaving air pockets. Twist on the bottom ring.
- Press the Cookies: Hold the cookie press perpendicular to an ungreased, parchment-lined baking sheet. Press down firmly and evenly, then lift straight up.
- Decorate: Before baking, add sprinkles or sanding sugar to the cookies.
- Bake: Bake in a preheated 375°F (190°C) oven for 7-9 minutes, or until the edges are just lightly golden. Do not overbake.
- Cool: Let the cookies cool on the baking sheet for 2-3 minutes before transferring to a wire rack to cool completely.
Notes
For best results, use full-fat, block-style cream cheese. Do not grease baking sheets; the dough needs friction to release from the press. If dough becomes too sticky, chill it for 15-20 minutes. Cookies can be stored in an airtight container at room temperature for up to 1 week, or frozen for up to 3 months.
Nutrition
- Serving Size: 1 cookie
- Calories: 60
- Sugar: 3
- Sodium: 30
- Fat: 4
- Saturated Fat: 2.5
- Carbohydrates: 7
- Protein: 1
Keywords: spritz cookies, cream cheese cookies, cookie press cookies, holiday cookies, Christmas cookies, butter cookies, easy cookie recipe