The neighborhood potluck was in three hours and I’d completely forgotten. I mean, I’d marked it on the calendar, sure, but then the week happened. You know how that goes. Everyone else would be bringing those elaborate, multi-day affairs—the kind of dishes that have a backstory involving a special trip to the farmers’ market or a secret ingredient passed down through generations. I had a package of boneless, skinless chicken thighs that was about to hit its use-by date, a half-jar of honey, and a serious case of panic.
I remember standing in front of the open fridge, the cold air hitting my face, thinking, “There is absolutely no way this ends well.” I grabbed the chicken, some soy sauce that was hiding behind the ketchup, and a few sad cloves of garlic. It felt like a culinary surrender. I wasn’t trying to win anything. I was just trying not to show up empty-handed. I threw it all in a bowl, let it marinate for maybe ten minutes while I preheated the skillet, and cooked it as fast as I could. The whole thing felt a little desperate, honestly.
So, imagine my surprise when the dish I brought—the one I was almost embarrassed to set down next to the fancy casseroles and artisan breads—got completely demolished. People were asking for the recipe. Someone actually said, “This is the best thing here.” I just stood there, holding my empty dish, feeling sheepish and a little bit like I’d cheated. That night, this Quick Sticky Honey Garlic Chicken Thighs recipe was born from necessity, and it’s been my go-to “I have no time but I need something amazing” dinner ever since. Maybe you’ve been there, staring into your fridge with nothing but a deadline and a prayer. This one’s for you.
Why You’ll Love This Recipe
This isn’t just another chicken recipe. It’s a weeknight lifesaver. I’ve tested this method more times than I can count, tweaking the sauce ratios and the cooking time until it was absolutely foolproof. It’s the kind of dish that makes you look like a hero with almost zero effort, which is exactly what a tired cook needs on a Tuesday night.
- Quick & Easy: From fridge to table in about 20 minutes. Seriously. No long marinating, no complicated steps. It’s perfect for those nights when you’re running on fumes.
- Simple Ingredients: You probably have most of these in your pantry right now. No trips to a specialty store for obscure ingredients. It’s real food, made easy.
- Perfect for Busy Weeknights: This is the definition of a weeknight hero. It’s fast, satisfying, and requires minimal cleanup. One skillet is all you need.
- Crowd-Pleaser: The sweet and savory combo is a universal hit. My kids devour it, and it’s always the first dish to disappear at gatherings.
- Unbelievably Delicious: The sauce reduces into this thick, glossy glaze that coats every bite of the juicy chicken. It’s sticky, it’s garlicky, it’s a little bit sweet, and it’s completely addictive.
What makes this version different? It’s the perfect balance. I’ve had honey garlic chicken that was way too sweet, or not garlicky enough, or the sauce was watery. This recipe nails the texture and the flavor profile. The secret is letting the sauce reduce properly in the pan, which creates that restaurant-quality sticky glaze without any cornstarch slurry. It’s comfort food that’s faster than takeout, and it just works.
What Ingredients You Will Need
This recipe relies on a handful of pantry staples to create something truly special. Each ingredient plays a key role in building that signature sticky, savory, and slightly sweet glaze. Here’s what you’ll need to grab:
- Boneless, Skinless Chicken Thighs (1.5 lbs / 680g): Thighs are the star here. They’re more forgiving than breast meat and stay incredibly juicy during the quick cooking time. If you only have chicken breasts, you can use them, but watch the cooking time closely to avoid drying them out. I recommend trimming any excess fat for a cleaner finish.
- Honey (1/3 cup / 110g): This is the backbone of the sticky glaze. Use a good quality, runny honey for the best results. I prefer a wildflower or clover honey for its balanced sweetness. The honey not only sweetens the sauce but also helps create that gorgeous caramelized coating as it reduces.
- Soy Sauce (1/4 cup / 60ml): This provides the salty, umami counterpoint to the sweet honey. I recommend using low-sodium soy sauce so you can control the salt level. For a gluten-free option, swap in tamari or coconut aminos.
- Garlic (5-6 cloves, minced): Fresh garlic is non-negotiable here. It adds a pungent, aromatic kick that infuses the entire dish. Pre-minced garlic from a jar just won’t have the same punch. Take the extra minute to mince it fresh—your taste buds will thank you.
- Rice Vinegar (1 tablespoon / 15ml): This adds a subtle tanginess that balances the sweetness of the honey. It brightens the whole dish. You can substitute with apple cider vinegar or a squeeze of fresh lemon juice in a pinch.
- Cornstarch (1 teaspoon): This is optional, but it helps thicken the sauce slightly if you want it extra sticky. Mix it with a tablespoon of water to make a slurry before adding it to the pan.
- Neutral Oil (1 tablespoon / 15ml): For searing the chicken. Use something with a high smoke point like avocado oil, grapeseed oil, or canola oil. Olive oil can burn at the high heat we need.
- Sesame Seeds & Green Onions (for garnish): These are for that final, beautiful touch. The toasted sesame seeds add a nutty crunch, and the sliced green onions provide a fresh, sharp bite that cuts through the richness.
Equipment Needed
One of the best things about this recipe is that it doesn’t require a ton of fancy equipment. Here’s what you’ll need to get the job done:
- Large Skillet or Frying Pan (12-inch / 30cm): This is your primary tool. A heavy-bottomed skillet, like cast iron or stainless steel, works best for even heat distribution and a good sear. A non-stick pan will also work, but you might not get as much browning on the chicken.
- Sharp Knife and Cutting Board: For mincing the garlic and trimming the chicken. A good chef’s knife makes this prep work quick and painless.
- Measuring Cups and Spoons: Accuracy matters, especially with the sauce ingredients. Use standard measuring cups for the honey and soy sauce.
- Small Bowl: For whisking together the sauce ingredients. You could also do this directly in the skillet, but a bowl makes it easier to combine everything smoothly.
- Tongs: Essential for flipping the chicken without piercing it and losing those precious juices. A spatula works in a pinch.
Preparation Method
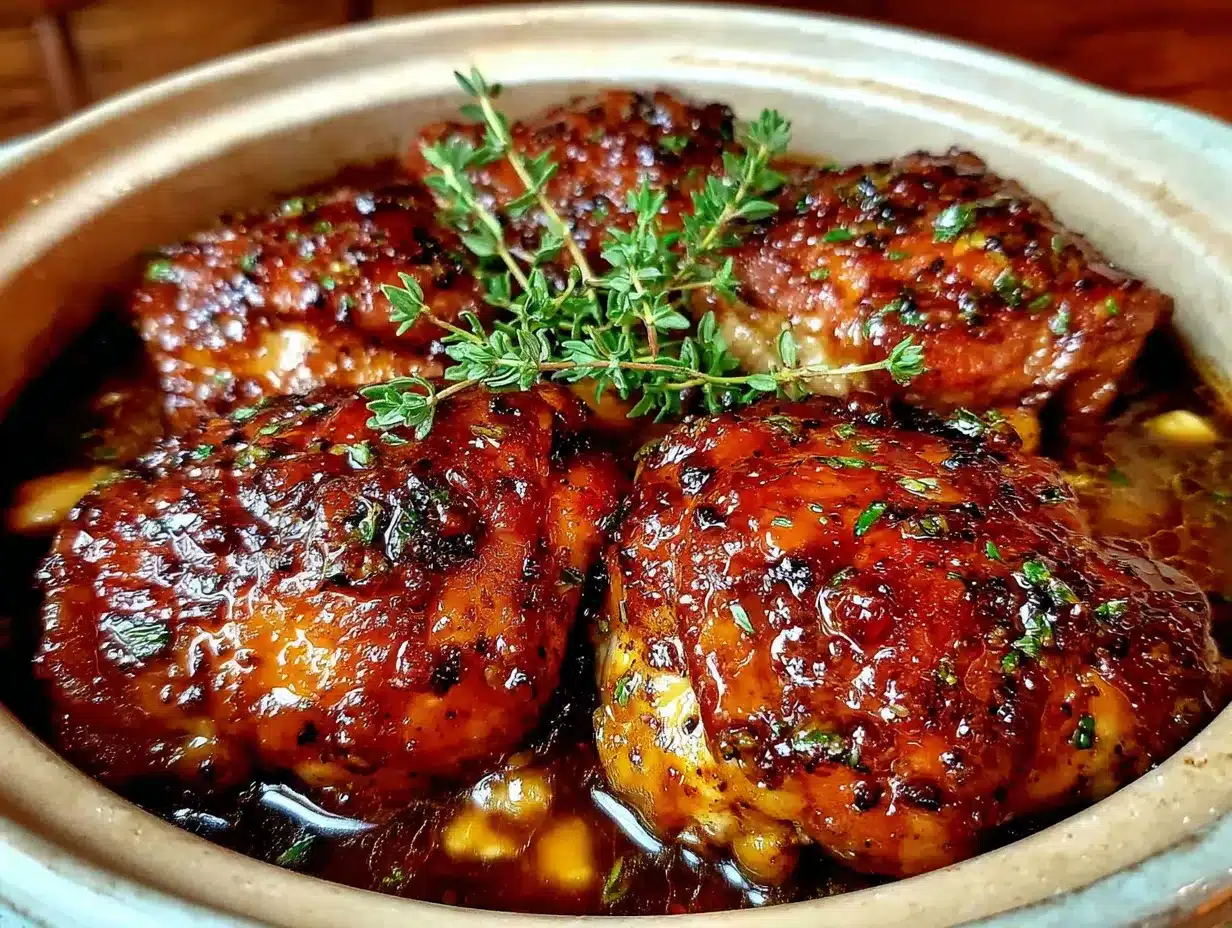
Alright, let’s get cooking! This is the fast and furious part. The whole process takes about 20 minutes, so have everything prepped and ready to go before you turn on the heat.
- Prep the Chicken (2 minutes): Pat the chicken thighs dry with a paper towel. This is a crucial step for getting a good sear. If they’re wet, they’ll steam instead of brown. Season both sides generously with salt and black pepper. Don’t be shy with the seasoning—it’s the foundation of the flavor.
- Make the Sauce (2 minutes): In a small bowl, whisk together the honey, low-sodium soy sauce, minced garlic, rice vinegar, and a pinch of red pepper flakes (if you like a little heat). Set this aside. If you’re using the cornstarch slurry, mix the cornstarch with 1 tablespoon of cold water in a separate tiny bowl.
- Sear the Chicken (8-10 minutes): Heat the large skillet over medium-high heat. Add the neutral oil and let it get shimmering hot. Carefully place the chicken thighs in the skillet in a single layer. Don’t overcrowd the pan—you might need to do this in two batches. Let them cook undisturbed for 4-5 minutes, until the bottom is golden brown and releases easily from the pan. Flip and cook for another 3-4 minutes on the other side. The chicken should be cooked through (internal temp of 165°F / 74°C) and beautifully browned.
- Glaze the Chicken (3-4 minutes): Reduce the heat to medium. Pour the sauce mixture into the skillet around the chicken. It will start to bubble immediately. Let it simmer and reduce, spooning the sauce over the chicken thighs as it thickens. This is where the magic happens. The sauce will go from watery to a thick, glossy glaze that clings to the chicken. If you’re using the cornstarch slurry, pour it in now and stir. This process takes about 2-3 minutes.
- Rest and Garnish (1 minute): Once the sauce is thick and sticky, remove the skillet from the heat. Let the chicken rest in the pan for a minute. This allows the juices to redistribute. Transfer the chicken to a serving plate, spoon any remaining glaze from the pan over the top, and sprinkle with toasted sesame seeds and sliced green onions.
Pro Tip: The sauce will continue to thicken as it cools, so don’t worry if it looks a little thin in the pan at first. Trust the process!
Cooking Tips & Techniques
I’ve made this recipe more times than I can count, and I’ve learned a few things the hard way. Here are my best tips to get it perfect every single time.
Don’t Skip the Pat-Dry. This is the most common mistake. Wet chicken will never get that beautiful golden-brown crust. It will just steam in the pan. Take the extra 30 seconds to really dry those thighs with a paper towel. It makes all the difference.
Let the Chicken Be. When you put the chicken in the hot pan, resist the urge to move it around. Let it sit and sear. It will naturally release from the pan when it’s ready. If you try to flip it too early, it will stick and tear. I learned this after ruining a few perfectly good pieces of chicken.
Adjust the Sweetness. The recipe as written has a balanced sweet-savory profile. But if you have a serious sweet tooth, you can add an extra tablespoon of honey. If you prefer it more savory, cut the honey back by a tablespoon and add an extra splash of soy sauce. This is your dinner—make it your own.
Watch the Garlic. Garlic can burn very quickly, turning bitter. That’s why we add it to the sauce rather than sautéing it alone in the pan. The liquid in the sauce protects it from direct heat, allowing it to infuse the dish with flavor without scorching.
Double the Sauce. If you’re a sauce person (and honestly, who isn’t?), consider making a double batch of the sauce mixture. You can reserve half of it to drizzle over rice or vegetables at the end. Just be sure to let it simmer in a small saucepan to thicken it up.
Variations & Adaptations
This recipe is incredibly versatile. Here are a few ways you can switch it up to keep things interesting or to fit different dietary needs.
- Spicy Honey Garlic: Add 1-2 teaspoons of sriracha or gochujang (Korean chili paste) to the sauce mixture. The heat pairs beautifully with the sweet honey and savory garlic. I love this version when I need a little extra kick on a cold night.
- Baked Version: If you prefer a hands-off approach, you can bake this. Sear the chicken in an oven-safe skillet, then pour the sauce over it and transfer the skillet to a preheated 400°F (200°C) oven. Bake for 15-20 minutes, basting halfway through, until the chicken is cooked through and the sauce is sticky.
- Gluten-Free Adaptation: Simply swap the soy sauce for tamari or coconut aminos. The rest of the ingredients are naturally gluten-free. Make sure your rice vinegar is also certified gluten-free if that’s a concern.
- Thighs to Drumsticks: This recipe works perfectly with bone-in, skin-on chicken drumsticks or thighs. Just increase the cooking time. Sear them for 6-7 minutes per side, then let them simmer in the sauce for an additional 10-15 minutes, or until they reach an internal temperature of 175°F (80°C) for the best texture.
- Vegetable Add-In: Toss in some broccoli florets, snap peas, or bell pepper strips during the last 5 minutes of cooking. They’ll soak up some of that amazing sauce and make it a one-pan meal. I do this all the time when I’m too tired to make a side dish.
Serving & Storage Suggestions
This chicken is incredibly versatile when it comes to serving. Here’s how to make the most of it, both fresh and as leftovers.
Serving: Serve the chicken hot, straight from the skillet, with the extra glaze spooned over the top. It pairs beautifully with steamed jasmine rice or fluffy white rice to soak up all that sticky sauce. For a low-carb option, serve it over cauliflower rice or a bed of sautéed greens. A simple side of steamed broccoli or a crisp cucumber salad rounds out the meal perfectly. For a complete weeknight dinner, you can also serve it alongside my garlic butter noodles for an extra comforting meal.
Storage: Leftovers are a gift. Store any leftover chicken and sauce in an airtight container in the refrigerator for up to 4 days. The flavors actually meld together and get even better overnight.
Reheating: The best way to reheat is in a skillet over medium-low heat. Add a splash of water or chicken broth to loosen the sauce, and warm the chicken through, turning occasionally. This takes about 5-7 minutes. You can also microwave it, but the chicken might lose some of its crispy edges. The flavor will still be amazing.
Freezing: This dish freezes wonderfully. Place the cooled chicken and sauce in a freezer-safe container or zip-top bag. It will keep for up to 3 months. Thaw overnight in the refrigerator before reheating.
Nutritional Information & Benefits
Here’s a rough estimate of the nutritional information per serving (based on 4 servings, using chicken thighs and the sauce as written). Please note these are estimates and can vary based on specific ingredients used.
| Nutrient | Amount Per Serving |
|---|---|
| Calories | 420-480 |
| Protein | 32-38g |
| Fat | 22-26g |
| Saturated Fat | 5-7g |
| Carbohydrates | 25-30g |
| Sugar | 22-26g |
| Sodium | 650-800mg |
Health Benefits: Chicken thighs are a great source of high-quality protein, which is essential for muscle repair and keeping you feeling full. They also provide important B vitamins like niacin and B6, which support energy metabolism. The garlic in this recipe is known for its immune-boosting properties. While the honey adds sugar, it also provides natural sweetness without refined white sugar, and a small amount can offer antioxidants. This is a balanced meal that’s satisfying and nourishing.
Dietary Considerations: This recipe is naturally dairy-free and nut-free. It can easily be made gluten-free by using tamari. It’s not suitable for a low-sugar or keto diet due to the honey, but you could experiment with a sugar-free honey substitute for a lower-carb version.
Conclusion
This Quick Sticky Honey Garlic Chicken Thighs recipe is more than just a meal—it’s a solution to the “what’s for dinner?” problem that plagues us all. It’s proof that you don’t need hours in the kitchen or a pantry full of exotic ingredients to create something truly memorable. It’s fast, it’s forgiving, and it’s absolutely delicious.
I hope you give this a try on one of those crazy weeknights when you need a win. Don’t be afraid to customize it to your taste—add more garlic, more heat, or throw in some extra veggies. That’s the beauty of a simple recipe like this. It’s a starting point for your own kitchen adventures.
I’d love to hear how it turns out for you! Did you add a twist? Did your family love it? Drop a comment below and let me know. And if you’re looking for another quick and flavorful chicken dish, you might enjoy this lemon pepper chicken thighs recipe. Happy cooking, friend! You’ve got this.
Frequently Asked Questions
Can I use chicken breasts instead of thighs?
Absolutely, but you’ll need to adjust the cooking time. Chicken breasts cook faster and can dry out easily. Sear them for 3-4 minutes per side, then reduce the heat and let them simmer in the sauce for another 5-7 minutes, or until they reach an internal temperature of 165°F (74°C). Keep a close eye on them.
How do I prevent the sauce from burning?
The key is to watch your heat. Once you add the sauce, reduce the heat to medium. The sauce contains sugar (from the honey), which can burn if the heat is too high. If you see it starting to darken too quickly, turn the heat down to medium-low. A gentle simmer is all you need.
Can I make this recipe in an air fryer?
Yes! Cook the chicken thighs in the air fryer at 375°F (190°C) for 12-15 minutes, flipping halfway through, until they are cooked through and crispy. While the chicken cooks, simmer the sauce ingredients in a small saucepan on the stove until it thickens. Toss the cooked chicken in the sauce and serve immediately.
Can I double this recipe?
Yes, but you’ll need to cook the chicken in batches to avoid overcrowding the pan. Overcrowding will cause the chicken to steam instead of sear, and you won’t get that beautiful golden crust. Sear the chicken in two batches, then return all the chicken to the pan with the sauce to finish cooking.
What can I serve with this to make it a complete meal?
Steamed jasmine rice or brown rice is the classic choice to soak up the sauce. For vegetables, steamed broccoli, green beans, or a simple Asian-style cucumber salad are all excellent options. For a low-carb meal, serve it over cauliflower rice or with a side of roasted asparagus.
Pin This Recipe!
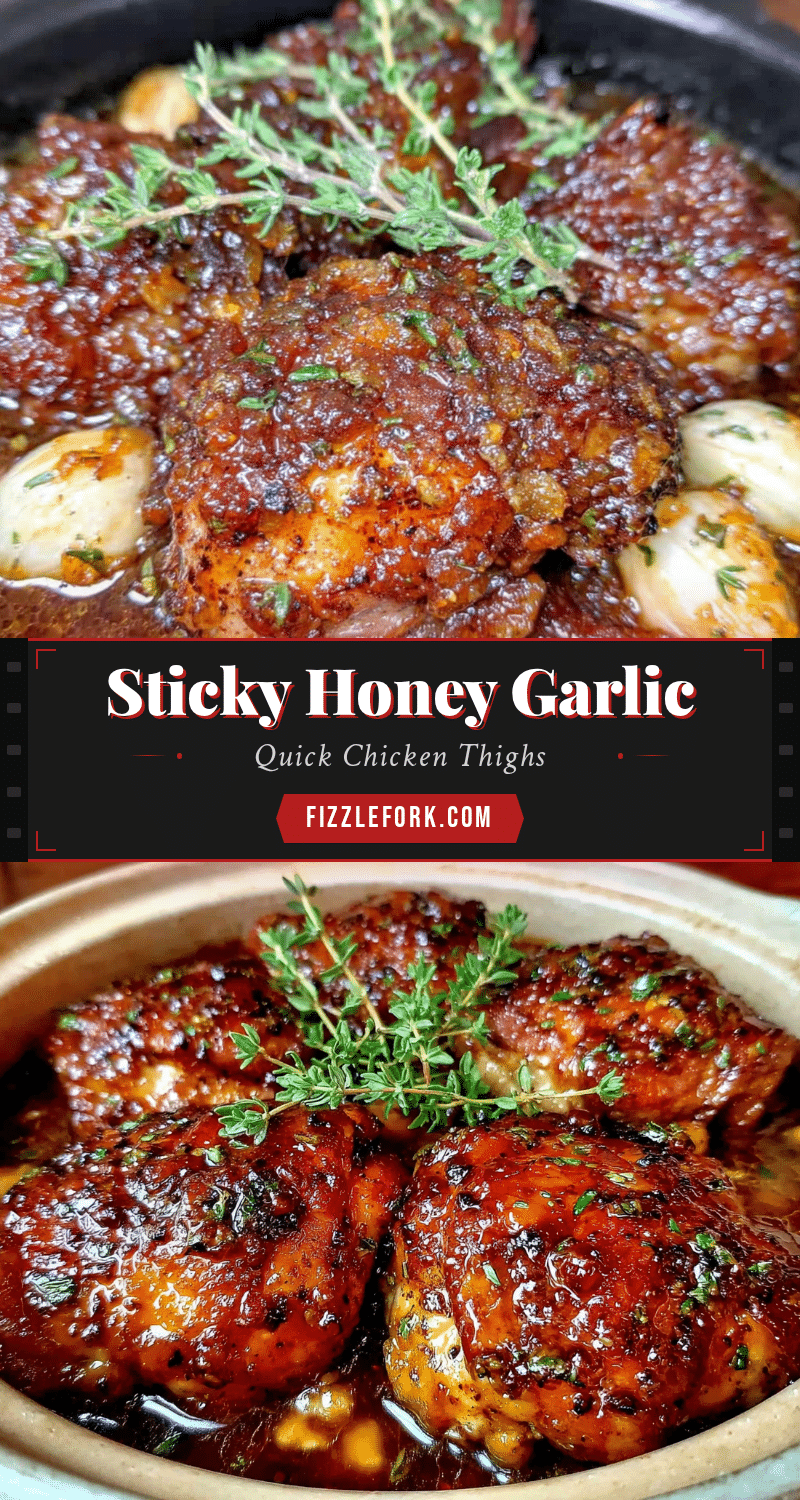
Quick Sticky Honey Garlic Chicken Thighs: Easy 20-Minute Dinner

This quick and easy honey garlic chicken thighs recipe is a weeknight lifesaver. With a perfect balance of sweet and savory, it creates a sticky, glossy glaze in just 20 minutes using simple pantry ingredients.
- Prep Time: 5 minutes
- Cook Time: 15 minutes
- Total Time: 20 minutes
- Yield: 4 servings 1x
- Category: Main Course
- Cuisine: Asian-inspired
Ingredients
- 1.5 lbs (680g) boneless, skinless chicken thighs
- 1/3 cup (110g) honey
- 1/4 cup (60ml) low-sodium soy sauce
- 5–6 cloves garlic, minced
- 1 tablespoon (15ml) rice vinegar
- 1 teaspoon cornstarch (optional, for extra thickness)
- 1 tablespoon (15ml) neutral oil (e.g., avocado, grapeseed, or canola oil)
- Salt and black pepper, to taste
- Pinch of red pepper flakes (optional, for heat)
- Sesame seeds and sliced green onions, for garnish
Instructions
- Pat the chicken thighs dry with a paper towel and season both sides generously with salt and black pepper.
- In a small bowl, whisk together the honey, low-sodium soy sauce, minced garlic, rice vinegar, and a pinch of red pepper flakes (if using). If using cornstarch, mix it with 1 tablespoon of cold water in a separate tiny bowl to make a slurry.
- Heat a large skillet over medium-high heat and add the neutral oil. Once shimmering, place the chicken thighs in a single layer (cook in batches if needed). Cook undisturbed for 4-5 minutes until golden brown, then flip and cook for another 3-4 minutes until cooked through (internal temperature of 165°F/74°C).
- Reduce heat to medium. Pour the sauce mixture into the skillet around the chicken. Let it simmer and reduce, spooning the sauce over the chicken as it thickens, about 2-3 minutes. If using the cornstarch slurry, pour it in now and stir.
- Remove the skillet from heat and let the chicken rest for 1 minute. Transfer to a serving plate, spoon remaining glaze over the top, and garnish with toasted sesame seeds and sliced green onions.
Notes
Pat the chicken dry for a good sear. Let the chicken sear undisturbed to prevent sticking. Adjust sweetness by adding more honey or soy sauce. Garlic burns easily, so add it to the sauce rather than sautéing alone. For extra sauce, double the sauce mixture and simmer separately. The sauce thickens as it cools.
Nutrition
- Serving Size: 1 serving (about 2 t
- Calories: 420480
- Sugar: 2226
- Sodium: 650800
- Fat: 2226
- Saturated Fat: 57
- Carbohydrates: 2530
- Protein: 3238
Keywords: honey garlic chicken, sticky chicken, quick dinner, weeknight meal, chicken thighs, easy recipe, 20-minute meal