The school Halloween party was in 24 hours and I’d completely forgotten. Everyone else would be bringing elaborate, Pinterest-perfect treats with fondant ghosts and hand-piped spiderwebs. I had a box of instant pudding, some Oreos, and a vague memory of something called dirt cups from my own childhood. I stood in my kitchen at 10 PM, staring at my sad little ingredients, wondering if I could just show up with a bag of candy and call it a day. But no—my kid had specifically requested something “spooky and cool.” The pressure was on, and honestly, I was panicking.
Here’s the thing about being an accidental overachiever: sometimes your best work happens when you have no time to overthink. I started layering crushed cookies and pudding in those little clear plastic cups, feeling like I was just throwing things together. I mean, it looked okay—kind of like dirt, which was the whole point. But it needed something. That’s when I spotted a bag of gummy worms hiding in the pantry, leftover from a movie night. I shoved a few into each cup, letting them wiggle out of the “dirt.” It looked ridiculous. It also looked perfect.
The next day, I walked into that party feeling like a fraud next to the elaborate caramel apples and the cake shaped like a haunted house. But you know what happened? The kids went absolutely nuts for the dirt cups. They were grabbing them before the fancy stuff was even unpacked. By the end of the night, my simple little cups were completely gone, and someone actually asked me for the recipe. I laughed and said it was “spooky easy”—which, let’s be honest, it is. And that’s why I keep making them, year after year. Because sometimes the simplest thing, made with a little last-minute panic, ends up being the star of the show.
Why You’ll Love This Recipe
Let me tell you why these Spooky Easy Graveyard Dirt Pudding Cups are about to become your go-to Halloween dessert. I’ve tested this recipe more times than I care to admit—through various pudding brands, different cookie-to-cream ratios, and even a disastrous attempt with homemade pudding that ended up too runny. Trust me, this version is the one.
- Quick & Easy: Comes together in under 20 minutes. No baking, no complicated steps, no stress. Perfect for last-minute Halloween parties or when you realize the school event is tomorrow.
- Simple Ingredients: You likely already have everything in your kitchen. Pudding mix, milk, Oreos, cream cheese, and gummy worms. That’s it. No fancy grocery trips needed.
- Perfect for Halloween: These cups are the ultimate spooky treat. They look like little graveyards, complete with “dirt” and creepy crawlers. Kids and adults alike go crazy for them.
- Crowd-Pleaser: I’ve brought these to potlucks, classroom parties, and neighborhood gatherings. They’re always the first thing to disappear. There’s something about eating “dirt” that brings out the kid in everyone.
- Unbelievably Delicious: The creamy chocolate pudding paired with the crunchy Oreo “dirt” and the tangy cream cheese layer is next-level comfort food. It’s rich, satisfying, and just the right amount of sweet.
What makes this recipe different from all the other dirt cup recipes out there? It’s the cream cheese layer. Most recipes skip this step, but blending a bit of cream cheese into the pudding mixture gives it a silky, cheesecake-like texture that takes these cups from good to unforgettable. It’s a small tweak, but it makes a world of difference. Plus, the way the flavors meld together after a few hours in the fridge is pure magic.
This recipe isn’t just good—it’s the kind that makes you close your eyes after the first bite. It’s comfort food reimagined for Halloween: spooky, fun, and with the same soul-soothing satisfaction as your favorite childhood dessert. Perfect for impressing guests without stress, or turning a simple school party into something memorable.
What Ingredients You Will Need
This recipe uses simple, everyday ingredients to deliver big flavor and spooky fun without any fuss. Most of these are pantry staples, so you can whip these up anytime the Halloween craving strikes. Here’s what you’ll need:
For the Pudding Layer
- 1 (3.9 oz) box instant chocolate pudding mix (I prefer Jell-O brand for consistent results)
- 2 cups cold whole milk (2% works too, but whole milk gives a richer texture)
- 4 oz cream cheese, softened to room temperature (this is the secret ingredient for that silky texture)
- 1/4 cup powdered sugar
- 1/2 tsp vanilla extract
For the “Dirt” Topping
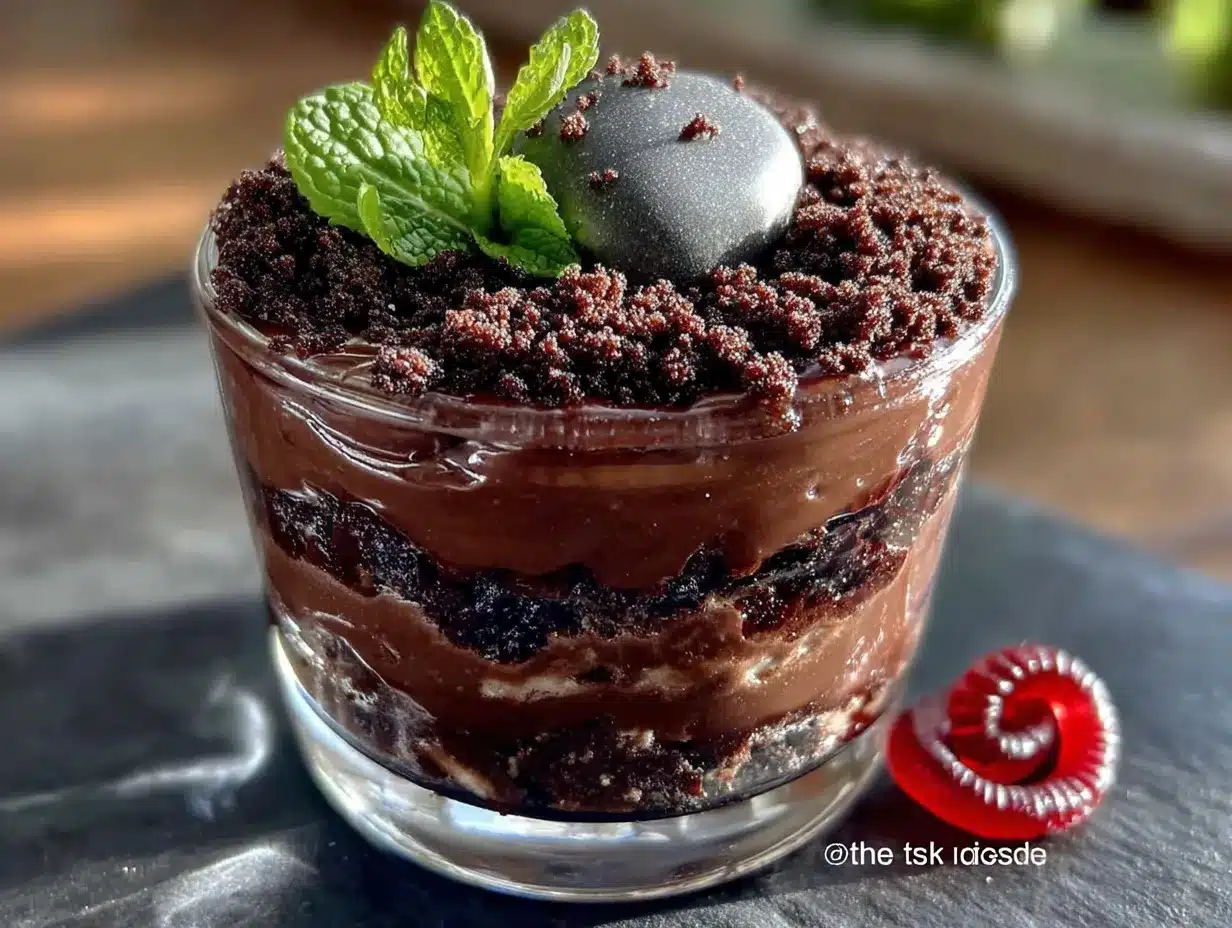
- 1 (14.3 oz) package Oreo cookies (about 36 cookies) — regular, not double-stuff (less cream filling means better “dirt” texture)
For the Graveyard Decorations
- 1 cup gummy worms (I like the sour ones for extra zing)
- Optional: 6-8 Milano cookies or rectangular shortbread cookies for tombstones
- Optional: Black decorating gel for writing on tombstones
- Optional: Candy pumpkins or candy corn for extra seasonal flair
Ingredient Selection Tips: For the best results, use full-fat cream cheese—low-fat versions can make the pudding layer grainy. I learned this the hard way when I tried to “healthify” these cups and ended up with a weird, lumpy texture. Also, make sure your milk is cold; it helps the pudding set up properly. If you’re using a different brand of pudding mix, check the package directions—some require different milk amounts.
Substitution Guidance: Need a dairy-free version? Use almond milk or oat milk (though the pudding will be slightly less thick) and dairy-free cream cheese like Kite Hill. For a gluten-free option, use gluten-free chocolate sandwich cookies—there are several good brands out there now. And if you’re not a fan of gummy worms (are you even human?), try using gummy spiders or gummy bats for a different creepy-crawly vibe.
Equipment Needed
You don’t need any fancy equipment for these Spooky Easy Graveyard Dirt Pudding Cups, which is part of their charm. Here’s what you’ll need:
- 6-8 clear plastic or glass cups (7-8 oz each): Clear cups are key here—you want to see those layers of “dirt” and pudding. I use the plastic ones from the party supply store for school events, but glass dessert cups look nicer for home.
- Electric hand mixer or stand mixer: For beating the cream cheese until smooth. You can do it by hand with a whisk, but your arm will definitely feel it. Trust me on this one.
- Large mixing bowl: For the pudding mixture.
- Medium mixing bowl: For crushing the Oreos.
- Food processor or zip-top bag and rolling pin: For crushing the Oreos into fine “dirt.” A food processor gives the most consistent texture, but a rolling pin over a bag works in a pinch—and honestly, it’s a great way to release some Halloween stress.
- Whisk: For mixing the pudding.
- Spatula: For scraping down the bowl and layering.
- Measuring cups and spoons: For accurate measurements.
Budget-Friendly Tip: Don’t have a food processor? No problem. Just put the Oreos in a large zip-top bag, squeeze out the air, and go to town with a rolling pin or even a heavy skillet. It’s not as fast, but it’s just as effective—and your kids will love helping with this part.
Preparation Method
Alright, let’s get our hands dirty—literally. Follow these steps carefully, and you’ll have the most adorable (and delicious) graveyard dessert cups at the party.
- Make the cream cheese base: In a large mixing bowl, beat the softened cream cheese with an electric hand mixer on medium speed until smooth and creamy, about 2 minutes. Add the powdered sugar and vanilla extract, and beat until well combined, scraping down the sides of the bowl as needed. (Tip: Make sure your cream cheese is truly at room temperature—cold cream cheese will leave lumps that are impossible to get out.)
- Prepare the pudding: In a separate medium bowl, whisk together the instant chocolate pudding mix and cold milk. Whisk vigorously for about 2 minutes until the pudding starts to thicken. It should be slightly thicker than heavy cream at this point. (Sensory cue: You’ll feel the mixture start to resist your whisk as it thickens.)
- Combine the layers: Gradually add the pudding mixture to the cream cheese mixture, beating on low speed until just combined. Don’t overmix—a few small lumps are fine and will disappear as the pudding sets. The mixture should be smooth, thick, and a beautiful dark chocolate color.
- Chill the pudding: Cover the bowl with plastic wrap and refrigerate for at least 15-20 minutes. This allows the pudding to set up properly, making it easier to layer. (Personal note: I once skipped this step because I was rushing, and the layers ended up muddled together. The chill time is non-negotiable!)
- Crush the Oreos: While the pudding chills, prepare your “dirt.” Place the Oreos (cream filling and all) in a food processor and pulse until you have a fine, crumbly texture. You want it to look like dark, rich potting soil. If using a zip-top bag, crush the cookies until no large pieces remain. Set aside. (Warm warning: Don’t over-process or you’ll get Oreo paste instead of dirt. Stop when it looks like coarse sand.)
- Layer the cups: Now for the fun part. Spoon about 2 tablespoons of the crushed Oreos into the bottom of each cup—this is your “base dirt.” Next, spoon or pipe about 1/4 cup of the pudding mixture on top of the Oreo layer. Use a spatula to spread it evenly. Then, add another 2 tablespoons of crushed Oreos on top of the pudding. (Visual cue: You should see three distinct layers when you look at the cup from the side.)
- Add the creepy crawlers: Gently press 2-3 gummy worms into the top Oreo layer, letting some of them “escape” over the edge of the cup. This is where the graveyard magic happens. Arrange them so it looks like they’re crawling out of the dirt.
- Chill and set: Refrigerate the cups for at least 2 hours, or up to overnight. This allows the pudding to fully set and the flavors to meld together. The longer they sit, the better they taste. (Time-saving tip: You can make these a day ahead—they actually taste better the next day!)
- Optional tombstone decorations: If you want to go full graveyard, use a black decorating gel pen to write “RIP” or spooky messages on Milano cookies, then stand one in each cup before serving. Add a few candy pumpkins around the base for a harvest touch.
Cooking Tips & Techniques
After making these Spooky Easy Graveyard Dirt Pudding Cups more times than I can count (including a few spectacular failures), I’ve picked up some tricks that make all the difference.
The Cream Cheese Secret: This is the hill I’ll die on. Most dirt cup recipes skip the cream cheese, but that’s a mistake. The cream cheese adds a tangy richness that balances the sweetness of the Oreos and pudding. Without it, these cups are just… sweet. With it, they’re sophisticated enough for adult palates but still kid-approved. Just make sure your cream cheese is truly at room temperature—I leave mine out for at least an hour before starting.
The Oreo Conundrum: Should you remove the cream filling? I’ve tried both ways, and I prefer leaving it in. The cream helps the Oreos clump slightly, creating a more realistic “dirt” texture. If you remove the filling, the crumbs are too fine and dusty. Plus, you’re wasting perfectly good cream filling. Just crush the whole cookie—it’s easier and tastes better.
The Great Gummy Worm Debate: Sour gummy worms vs. regular? I go with sour. The tanginess cuts through the richness of the pudding and cream cheese, creating a more interesting flavor profile. Plus, the bright colors of sour worms (neon green, electric blue, fiery red) look amazing against the dark chocolate “dirt.”
My Biggest Failure: The first time I made these, I was in such a hurry that I didn’t chill the pudding before layering. The result was a muddy, indistinguishable mess—more swamp than graveyard. The layers just bled into each other. That’s why step 4 (chilling the pudding) is so important. It gives the pudding a head start on setting, so it stays in its lane when you layer it.
Multitasking Strategy: While the pudding is chilling after mixing, crush your Oreos and prep your cups. This saves about 10 minutes and keeps you from standing around twiddling your thumbs. I also like to line up all my cups on a baking sheet before I start layering—it makes the assembly line process much smoother.
Variations & Adaptations
One of the best things about this recipe is how easily it adapts to different tastes, dietary needs, and occasions. Here are some of my favorite variations:
Peanut Butter Lovers’ Version
Add 1/4 cup creamy peanut butter to the cream cheese mixture before beating. The peanut butter adds a salty-savory note that pairs beautifully with the chocolate. Just be sure to use a natural peanut butter that’s well-stirred, or the oil separation can mess with the texture. I tried this for a friend’s Halloween party, and it was gone in 15 minutes.
Vegan-Friendly Adaptation
Use dairy-free cream cheese (Kite Hill or Tofutti work well), almond milk or oat milk, and a vegan chocolate pudding mix (Simply Delish makes a good one). For the Oreos, you’re in luck—original Oreos are accidentally vegan! This version is just as creamy and delicious, and my vegan friends always appreciate having a spooky treat they can actually eat.
Spooky Spiderweb Cups
Instead of gummy worms, use black licorice strings to create spiderweb patterns on top of the “dirt.” Place a chocolate spider ring or a large raisin in the center of the web. This variation is especially fun for older kids who prefer creepy over crawly.
Pumpkin Patch Version
Swap the chocolate pudding for butterscotch or vanilla pudding, and use crushed graham crackers or vanilla wafers instead of Oreos. Top with candy pumpkins and green gummy leaves. This is perfect for fall-themed parties that aren’t specifically Halloween.
Individual Trifle Jars
For a more elegant presentation, layer the ingredients in small mason jars (the 4 oz size is perfect). Add a layer of fresh raspberries or sliced strawberries between the pudding and the “dirt” for a pop of color. These make fantastic party favors—just tie a ribbon around the jar and add a tiny tag.
Serving & Storage Suggestions
These Spooky Easy Graveyard Dirt Pudding Cups are best served cold, straight from the fridge. The contrast between the chilly, creamy pudding and the crunchy Oreo “dirt” is what makes them so satisfying. I like to let them sit at room temperature for about 5 minutes before serving—just enough to take the chill off without letting the pudding get runny.
Presentation Tips: Arrange the cups on a large platter or serving tray, spacing them about 2 inches apart. Scatter a few extra gummy worms and candy pumpkins around the base of the cups for a “graveyard scene” effect. If you’re feeling extra creative, add a few plastic skeleton hands reaching up from between the cups. For a classroom party, I like to put each cup on a small paper plate with a Halloween napkin—it makes cleanup a breeze.
Complementary Pairings: These cups pair beautifully with a warm apple cider or hot chocolate. For an adult gathering, try serving them with a dark stout beer or a bourbon-spiked coffee. The richness of the dessert stands up well to bold flavors.
Storage Instructions: Store any leftover cups (if there are any!) covered in the refrigerator for up to 3 days. The pudding will continue to set, and the Oreos will soften slightly, creating a more cake-like texture. Some people actually prefer them this way. I do not recommend freezing these cups—the texture of the pudding becomes grainy and the Oreos turn to mush when thawed.
Make-Ahead Note: These cups actually taste better the next day, so feel free to make them 24 hours in advance. The flavors meld together beautifully, and the pudding sets to the perfect consistency. Just wait to add the gummy worms until right before serving—they can get a bit soggy if left in the fridge too long.
Nutritional Information & Benefits
Let’s be real—these are a treat, not a health food. But that doesn’t mean they can’t have a place in a balanced diet. Here’s the estimated nutritional breakdown for one cup (based on 8 servings):
| Nutrient | Amount per Serving |
|---|---|
| Calories | 385 |
| Total Fat | 18g |
| Saturated Fat | 9g |
| Cholesterol | 25mg |
| Sodium | 420mg |
| Total Carbohydrates | 52g |
| Dietary Fiber | 2g |
| Sugars | 38g |
| Protein | 5g |
Health Highlights: The cream cheese in this recipe provides a small amount of protein and calcium. The cocoa in the chocolate pudding contains antioxidants called flavonoids, which have been linked to heart health. And hey—gummy worms are fat-free! (I’m kidding. Mostly.)
Dietary Considerations: This recipe contains dairy (milk, cream cheese) and gluten (Oreos). For a gluten-free version, use gluten-free chocolate sandwich cookies. For a dairy-free version, use plant-based alternatives as mentioned in the variations section. This recipe is nut-free as written, making it safe for school classrooms with nut allergies—just double-check your specific brands.
Personal Wellness Perspective: I believe in balance. Life is short, and Halloween comes once a year. These cups are meant to be enjoyed as part of a celebration, not as an everyday snack. So go ahead, have one. Savor it. And then maybe go for a walk or eat a salad for dinner. That’s what I do, and I sleep just fine.
Conclusion
So there you have it—my Spooky Easy Graveyard Dirt Pudding Cups, born from a moment of panic and perfected through years of Halloween parties. These little cups are proof that you don’t need fancy equipment, expensive ingredients, or hours of prep time to create something truly memorable. Sometimes the best things in life (and in the kitchen) come from making do with what you have and adding a little creativity.
I love this recipe because it brings people together. There’s something about eating “dirt” that makes everyone—kids, adults, even the grumpy neighbor who showed up just for the candy—crack a smile. It’s a reminder that food should be fun, that perfection is overrated, and that the best memories often come from the simplest moments.
Now it’s your turn. I want to see your graveyard creations! Tag me in your photos, leave a comment below telling me how your kids reacted, or share your own twist on this recipe. Did you add something unexpected? Did your gummy worms stage a jailbreak? I want to hear about it. And if you’re looking for more Halloween fun, check out my candy corn popcorn balls or these pumpkin patch cupcakes for the full spooky spread.
Happy Halloween, and happy eating! May your dirt be dark, your worms be wiggly, and your dessert be gone before the night is over.
Frequently Asked Questions
Can I make these dirt pudding cups without cream cheese?
Yes, you can absolutely skip the cream cheese. Just prepare the instant pudding according to package directions and layer it directly with the crushed Oreos. The texture will be lighter and less rich, but still delicious. I’ve done this in a pinch when I realized I was out of cream cheese at 11 PM the night before a party.
How far in advance can I make these?
You can make these up to 24 hours in advance. In fact, they taste better the next day because the flavors have time to meld. Just wait to add the gummy worms until right before serving—they can get a bit soft and lose their “crawling out of the dirt” effect if they sit in the fridge too long.
Can I use homemade pudding instead of instant?
You can, but I don’t recommend it. Homemade pudding doesn’t set as firmly as instant pudding, which means your layers are more likely to bleed into each other. Plus, the texture of homemade pudding is softer and doesn’t hold up as well to the Oreo “dirt.” If you really want to go homemade, use a recipe with cornstarch and cook it until very thick.
How do I keep the Oreo “dirt” from getting soggy?
The key is to chill the pudding before layering (step 4 in the instructions). This gives the pudding a head start on setting, so it doesn’t soak into the Oreos as much. Also, don’t make these more than 24 hours in advance—the longer they sit, the softer the Oreos get. Some people actually prefer the softer texture, so it’s really a matter of personal preference.
Can I use different types of cookies for the “dirt”?
Absolutely! Chocolate wafer cookies, chocolate graham crackers, or even crushed brownies work well. For a fun twist, try using golden Oreos or vanilla wafers for a “sandy” look. Just keep in mind that different cookies have different textures and sweetness levels, so you may need to adjust the amount of sugar in the pudding layer accordingly.
Pin This Recipe!
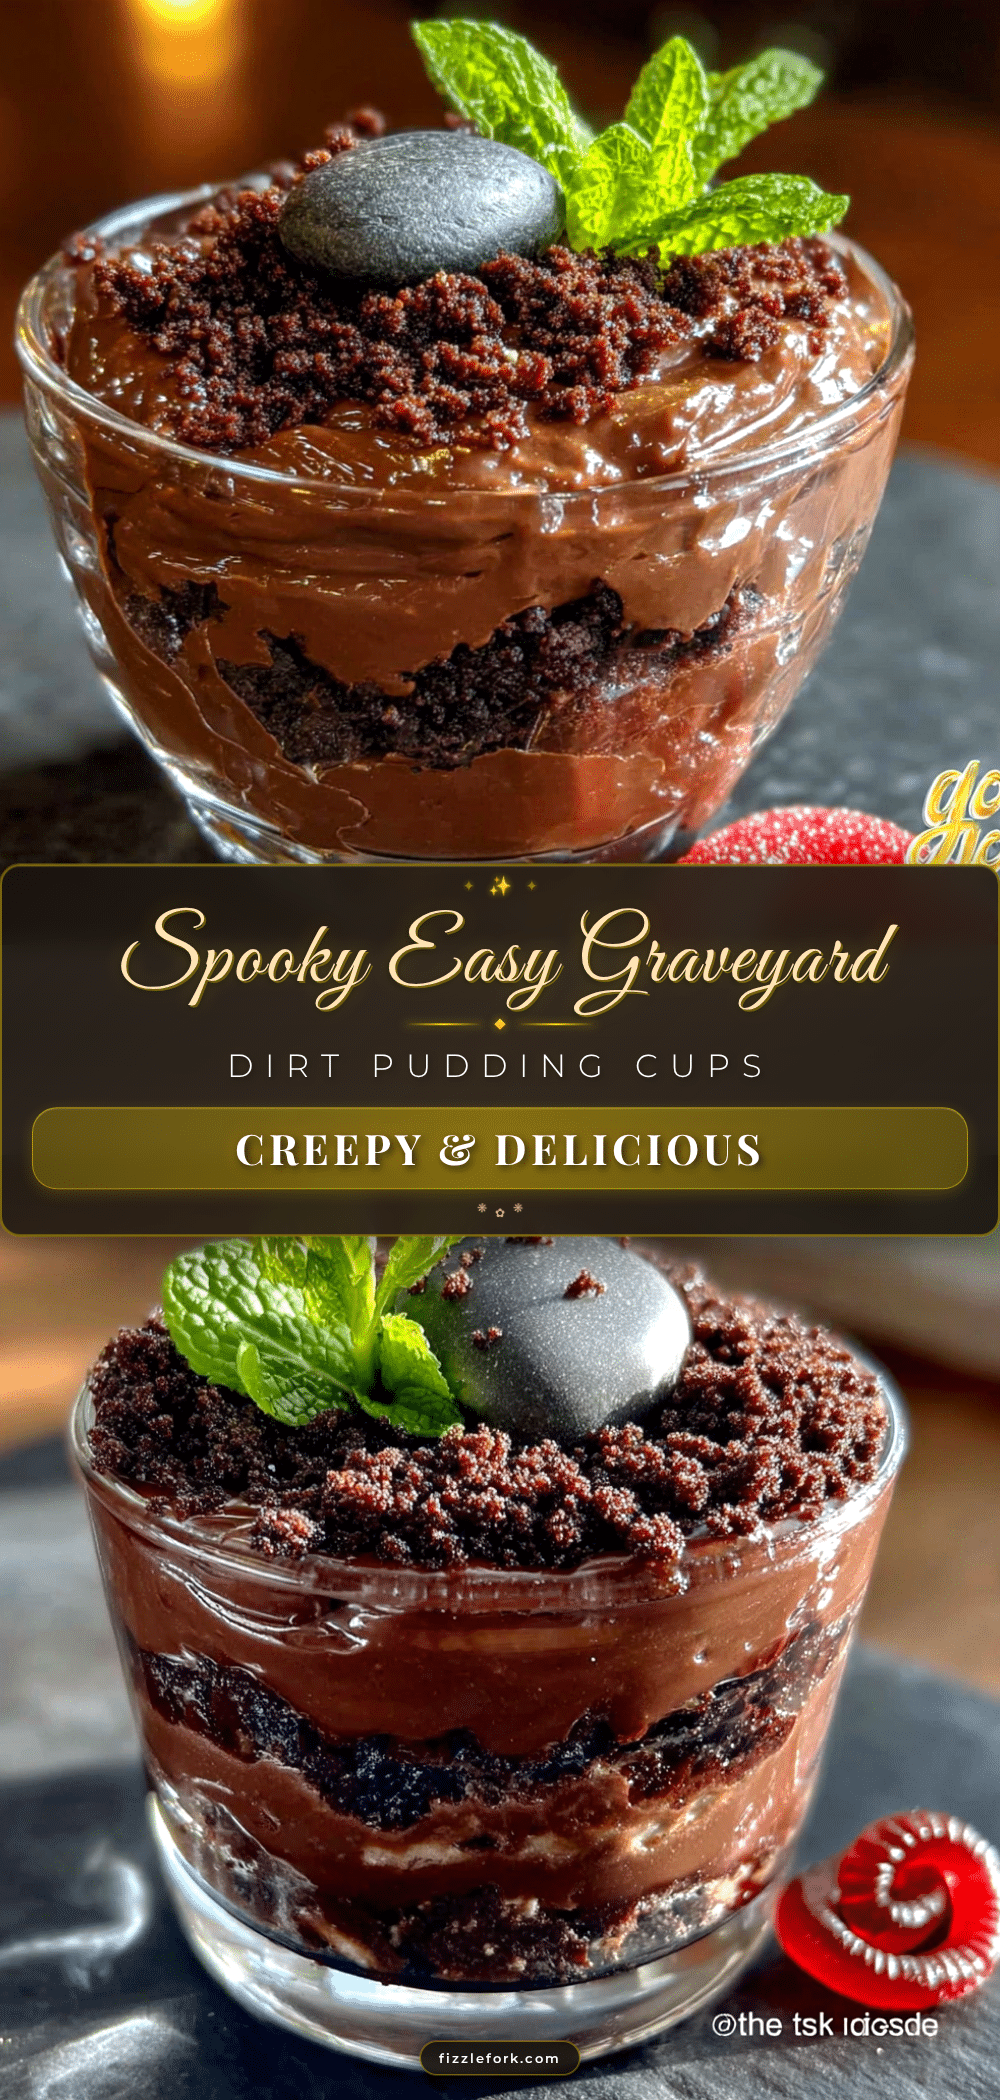
Spooky Easy Graveyard Dirt Pudding Cups: Best Halloween Dessert
These no-bake dirt pudding cups are the ultimate Halloween treat, featuring layers of creamy chocolate pudding, tangy cream cheese, and crushed Oreo ‘dirt,’ topped with gummy worms crawling out of the graveyard. Quick, easy, and always a crowd-pleaser.
- Prep Time: 20 minutes
- Cook Time: 0 minutes
- Total Time: 2 hours 20 minutes (includes chilling)
- Yield: 8 servings 1x
- Category: Dessert
- Cuisine: American
Ingredients
- 1 (3.9 oz) box instant chocolate pudding mix (Jell-O brand recommended)
- 2 cups cold whole milk (2% works, but whole milk is richer)
- 4 oz cream cheese, softened to room temperature
- 1/4 cup powdered sugar
- 1/2 tsp vanilla extract
- 1 (14.3 oz) package Oreo cookies (about 36 cookies, regular not double-stuff)
- 1 cup gummy worms (sour recommended)
- Optional: 6-8 Milano cookies or rectangular shortbread cookies for tombstones
- Optional: Black decorating gel for writing on tombstones
- Optional: Candy pumpkins or candy corn for extra flair
Instructions
- Make the cream cheese base: In a large mixing bowl, beat the softened cream cheese with an electric hand mixer on medium speed until smooth and creamy, about 2 minutes. Add the powdered sugar and vanilla extract, and beat until well combined, scraping down the sides of the bowl as needed.
- Prepare the pudding: In a separate medium bowl, whisk together the instant chocolate pudding mix and cold milk. Whisk vigorously for about 2 minutes until the pudding starts to thicken (slightly thicker than heavy cream).
- Combine the layers: Gradually add the pudding mixture to the cream cheese mixture, beating on low speed until just combined. Do not overmix; a few small lumps are fine.
- Chill the pudding: Cover the bowl with plastic wrap and refrigerate for at least 15-20 minutes to allow the pudding to set up properly.
- Crush the Oreos: Place the Oreos (cream filling and all) in a food processor and pulse until you have a fine, crumbly texture resembling dark potting soil. Alternatively, place in a zip-top bag and crush with a rolling pin. Set aside.
- Layer the cups: Spoon about 2 tablespoons of crushed Oreos into the bottom of each cup. Next, spoon or pipe about 1/4 cup of the pudding mixture on top. Add another 2 tablespoons of crushed Oreos on top of the pudding.
- Add the creepy crawlers: Gently press 2-3 gummy worms into the top Oreo layer, letting some of them ‘escape’ over the edge of the cup.
- Chill and set: Refrigerate the cups for at least 2 hours, or up to overnight, to allow the pudding to fully set and flavors to meld.
- Optional tombstone decorations: Use black decorating gel to write ‘RIP’ or spooky messages on Milano cookies, then stand one in each cup before serving. Add candy pumpkins around the base if desired.
Notes
Make sure cream cheese is at room temperature to avoid lumps. Chill the pudding before layering to keep layers distinct. For best results, make a day ahead and add gummy worms just before serving to prevent sogginess. For a dairy-free version, use almond milk and dairy-free cream cheese. For gluten-free, use gluten-free chocolate sandwich cookies.
Nutrition
- Serving Size: 1 cup
- Calories: 385
- Sugar: 38
- Sodium: 420
- Fat: 18
- Saturated Fat: 9
- Carbohydrates: 52
- Fiber: 2
- Protein: 5
Keywords: Halloween dessert, dirt cups, graveyard pudding, no-bake dessert, chocolate pudding, Oreo dirt, gummy worms, spooky treat, easy Halloween recipe