There used to be a little wine bar tucked behind a vintage shop in my neighborhood, The Cork & Cauldron, that made the most incredible Halloween grazing board I’ve ever seen. When they closed their doors two years ago—suddenly, with a handwritten sign taped to the window—I honestly felt a little lost. That board was my go-to for every October gathering. After twelve tries—some embarrassingly sad, one that collapsed mid-party—I finally cracked the code on this Ultimate Halloween Charcuterie Board. Let me tell you, the relief was real.
The original board from The Cork & Cauldron had this uncanny ability to feel both spooky and sophisticated. It wasn’t just thrown together; every element told a story. I remember standing at their bar one rainy Tuesday, watching the owner arrange black olives to look like spider bodies, and thinking, “I need to learn this magic.” My first attempt at home? A total mess. I used the wrong cheese, the crackers got soggy, and my “spider web” of brie looked more like a sad blob. But I kept at it, tweaking and tasting, because that board was too good to lose forever.
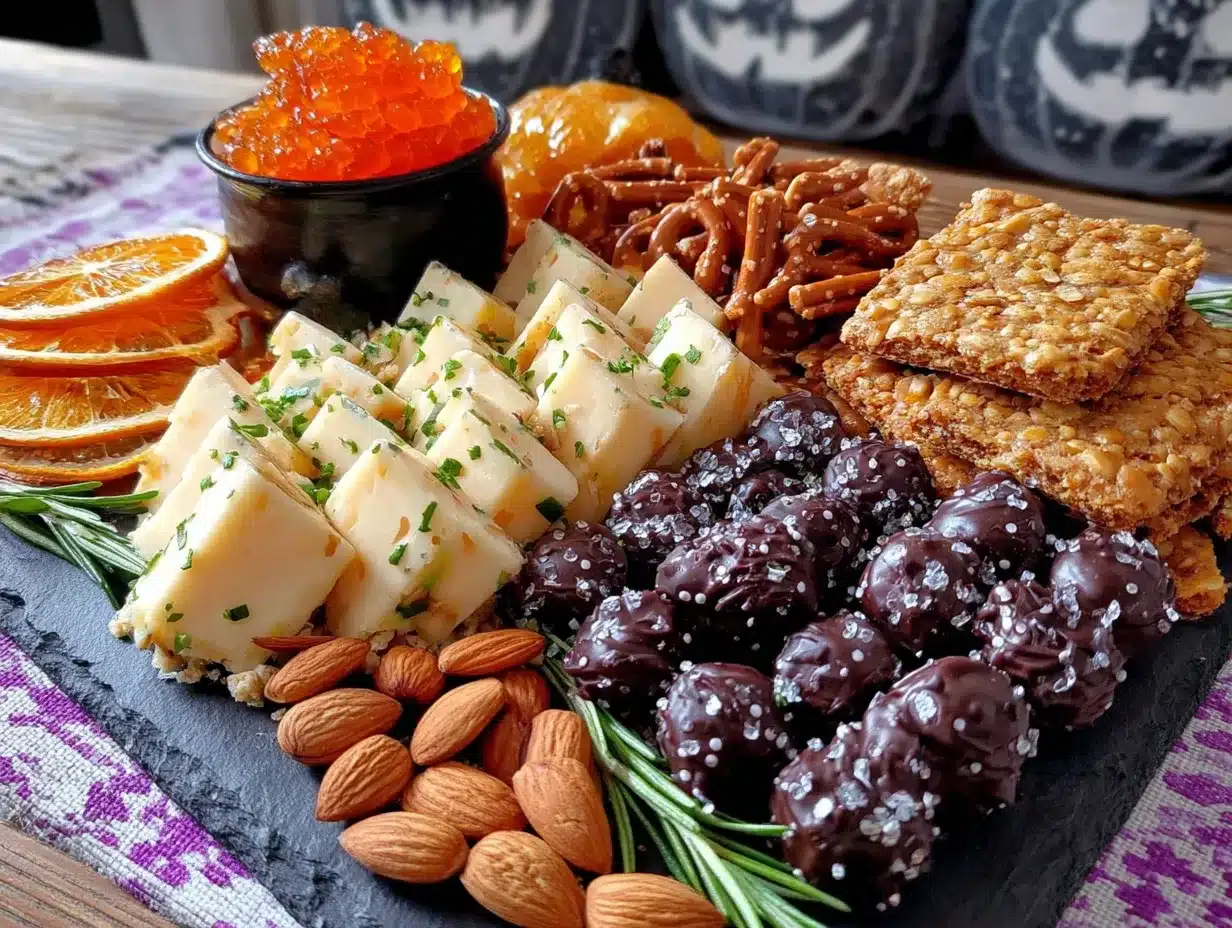
Now, I make this Ultimate Halloween Charcuterie Board for every October party I host, and honestly, it’s the first thing to disappear every single time. There’s something about the mix of savory, sweet, and spooky that just works. Maybe you’ve been there—staring at a Pinterest board full of perfect Halloween snacks, wondering how to pull it off without losing your mind. This is that board. It’s designed to impress your guests without making you spend all day in the kitchen. And the best part? You can prep almost everything the night before, so when your doorbell starts ringing, you’re actually relaxed and ready to enjoy the party.
Why You’ll Love This Recipe
This isn’t just another cheese board. This is the Ultimate Halloween Charcuterie Board that steals the entire table—and I mean that in the best way. Let me break down why this is the only Halloween appetizer you’ll ever need again.
- Totally Show-Stopping: Your guests will walk in and literally stop talking. I’ve seen it happen at three separate parties now. The visual impact of a well-arranged board with spooky touches is instant party magic.
- Surprisingly Easy to Assemble: Here’s the secret—most of the work is just arranging things beautifully. No complicated recipes, no standing over a hot stove. You’re basically a food artist for an hour, and then you’re done.
- Perfect for a Crowd: This board feeds 10-15 people easily, maybe more if you’ve got other snacks out. It’s the ultimate party food because everyone can graze at their own pace, and there’s something for every single person.
- Customizable to the Max: Don’t like blue cheese? Swap it out. Gluten-free guests coming? Add more veggie sticks and rice crackers. This board is a template, not a rigid rulebook.
- Prep-Ahead Friendly: I cannot stress this enough. You can wash and cut veggies, arrange the non-perishable items, and wrap the cheese the night before. On party day, you just pull it out of the fridge and add the final touches.
- Always Gets Rave Reviews: Every single time I’ve made this board, someone asks for the recipe. It’s become my signature Halloween contribution, and honestly, I’m a little proud of that.
What makes this board different from all the others you see online? It’s the balance. So many Halloween boards are either all cute and no flavor, or all cheese and no spooky fun. This one hits both notes perfectly. The smoky gouda brings a depth that pairs beautifully with the sweet fig jam, while the spicy salami and tangy cornichons keep things interesting. Plus, I’ve tested this exact combination at four different parties, and it’s never failed. It’s comfort food reimagined for a Halloween party—familiar enough to be comforting, but creative enough to be memorable.
What Ingredients You Will Need
This recipe uses a thoughtful mix of ingredients to create that perfect balance of flavors, textures, and spooky vibes. Most of these are easy to find at any grocery store, and I’ve included my personal favorites where it really matters.
The Cheeses (The Foundation)
- 8 oz Brie cheese wheel – This becomes your “ghost” or “mummy.” I prefer the triple-cream variety from Président for its extra creamy texture. It spreads like a dream.
- 6 oz Aged Gouda – The smoky, nutty flavor is perfect for fall. Look for one with those little crunchy crystals for extra texture.
- 6 oz Blue cheese – A crumbly, tangy option that adds a bold contrast. I love Point Reyes Original Blue for its creamy but crumbly texture.
- 8 oz Sharp white cheddar – Cut into cubes or bat shapes using a cookie cutter. The Cabot Seriously Sharp is my go-to.
The Meats (The Savory Stars)
- 8 oz Prosciutto – Drape it in ribbons for a elegant, slightly messy look. It’s salty and delicate.
- 8 oz Genoa Salami – Slice it into rounds and fold them into little “bat wings” or just stack them. Boar’s Head is reliable.
- 6 oz Soppressata – This spicy, coarse-ground salami adds a nice kick and a different texture from the Genoa.
The Spooky Touches (The Fun Part)
- 1 cup Black olives – Use these to create spider bodies. Just arrange a few on top of a smear of hummus or tapenade.
- 1 cup Green olives stuffed with pimento – These look like little eyeballs. Arrange them in small groups for maximum creepy effect.
- 1/2 cup Fig jam or blackberry preserves – The dark color is perfect for Halloween, and the sweetness balances the salty meats and cheeses. Bonne Maman Fig Jam is my favorite.
- 1/4 cup Pumpkin seeds (pepitas) – Sprinkle these around for a crunchy, seasonal touch. Toast them lightly with a pinch of smoked paprika for extra flavor.
- Black sesame seeds – A tiny sprinkle over the brie “ghost” adds a dusty, creepy effect.
The Crackers & Breads (The Vehicles)
- 1 box (8 oz) Rosemary and sea salt crackers – The herb flavor pairs beautifully with the cheeses. I love the Raincoast Crisps brand.
- 1 box (8 oz) Water crackers – Neutral and crisp, perfect for the stronger cheeses and spreads.
- 1 baguette – Slice it thin and toast lightly, or leave it fresh for a softer option.
- 1 cup Pretzel sticks – These are great for dipping and add a nice salty crunch.
The Fruits & Vegetables (The Fresh Element)
- 1 cup Red grapes – Small clusters look beautiful and add a burst of sweetness.
- 1 cup Dried apricots – Their deep orange color is perfect for fall, and they’re chewy and sweet.
- 1 cup Dried figs – Halved or quartered, they add a sophisticated touch.
- 1/2 cup Cherry tomatoes – Their red color pops against the darker elements. Cut some in half to look like little pumpkin faces.
- 1/2 cup Baby carrots – Their orange color is very Halloween-appropriate. You can even cut a few into tiny jack-o’-lantern faces.
The Extras (For Dipping and Spreading)
- 1/2 cup Hummus – A smooth, neutral base for spreading. I like the classic roasted red pepper flavor.
- 1/4 cup Honey – Drizzle this over the brie or blue cheese for a sweet-savory combo. Local honey is always best.
- 1/4 cup Cornichons – These tiny, tangy pickles cut through the richness of the cheese and meat perfectly.
- Fresh rosemary sprigs – Use these as decoration. They look like little trees and smell amazing.
Equipment Needed
You don’t need anything fancy to pull off this Ultimate Halloween Charcuterie Board, but a few key tools make the process much smoother.
- A large wooden cutting board or serving platter – The bigger, the better. A 16×20 inch board is ideal for feeding a crowd. If you don’t have a wooden board, a large baking sheet lined with parchment paper works perfectly.
- Small bowls or ramekins – You’ll need 3-4 of these for the jam, honey, hummus, and olives. I like using mismatched ceramic ones for a rustic look.
- Cheese knives – At least two different ones: a soft cheese knife for the brie and a hard cheese knife for the cheddar and gouda.
- Small cookie cutters – A bat, pumpkin, or ghost shape is perfect for cutting cheese or fruits. I found a set of three on Amazon for under ten dollars.
- Tongs – For the meats and olives, so guests can serve themselves without touching everything.
- Paring knife – For cutting the cheese and fruits into shapes.
- Measuring cups and spoons – Not strictly necessary, but helpful if you’re following the quantities exactly.
Pro tip: If you’re using a new wooden board, season it with food-grade mineral oil the day before. It’ll look richer and resist stains from the olives and jam. And honestly, a well-seasoned board just makes everything look more intentional.
Preparation Method
Alright, let’s build this board. I’ve broken it down into clear steps, and I’ll share the little tricks I learned from my twelve failed attempts.
- Prep Your Cheeses (20 minutes before you start)
Take all your cheeses out of the refrigerator about 20 minutes before you start arranging. Cheese tastes so much better at room temperature. While they’re warming up, cut your sharp cheddar into 1-inch cubes, or use your bat-shaped cookie cutter to make fun shapes. For the brie, leave it whole—you’ll transform it later. Crumble the blue cheese into a small bowl. Slice the gouda into thin triangles. - Create Your Spooky Brie “Ghost” (5 minutes)
Place the whole brie wheel in the center of your board. Using a small knife, very gently score two small “eyes” and a “mouth” into the top rind. Don’t cut all the way through—just enough to create an outline. Then, using the tip of the knife, carefully peel away the top layer of rind inside those shapes. You’ll reveal the creamy interior, which looks like a ghost’s face. It’s a little tricky the first time, but honestly, even if it’s messy, it just looks more haunting. Sprinkle a tiny pinch of black sesame seeds over the top for a “dusty” effect. - Place Your Bowls (2 minutes)
Position your small bowls in different areas of the board. Fill one with the fig jam, one with honey, one with hummus, and one with the black olives. This creates natural “anchor points” that break up the board visually. - Arrange the Meats (5 minutes)
Start placing your meats around the bowls. Drape the prosciutto in loose, wavy ribbons. Fold the Genoa salami slices into quarters or roll them into little cones. Arrange the soppressata in a small pile. Don’t be too neat about it—a slightly messy, organic look is more inviting. - Add the Cheeses (3 minutes)
Place your brie “ghost” in a prominent spot. Arrange the cheddar cubes or bat shapes near it. Put the gouda triangles in a small fan pattern. Scatter the crumbled blue cheese in a few small piles around the board. This creates little pockets of flavor for guests to discover. - Fill in with Crackers and Bread (3 minutes)
Start adding your crackers in small clusters. Don’t line them up in rows—that looks too formal. Instead, create little “cracker islands” in different sections. Fan out the baguette slices in one area. Tuck the pretzel sticks into empty spaces. - Add the Fruits and Vegetables (5 minutes)
Scatter the red grape clusters in a few spots. Tuck the dried apricots and figs near the cheeses. Place the cherry tomatoes and baby carrots in small groups. If you’re feeling extra creative, use a tiny knife to carve a simple jack-o’-lantern face into a few of the baby carrots. - The Spooky Details (5 minutes)
Now for the fun part. Take a few black olives and arrange them on top of the hummus bowl to look like a spider. Use a small dab of hummus to “glue” them in place if needed. Arrange the green olives in a cluster to look like eyeballs. Drizzle a little honey over the brie and blue cheese. Sprinkle the pumpkin seeds and fresh rosemary sprigs around the board for color and texture. - Final Touches and Serve (2 minutes)
Step back and look at your board. Are there any empty patches? Fill them with extra crackers or a few more grapes. Add the cornichons in a small pile. Make sure the cheese knives and tongs are within reach. And there you have it—your Ultimate Halloween Charcuterie Board is ready to impress.
Sensory cue: When you’re done, the board should look abundant but not cluttered. You should see a beautiful mix of colors—the white of the brie, the deep reds and oranges of the fruits, the rich browns and reds of the meats, and the green of the rosemary. And the smell? A little bit of everything—creamy cheese, salty meat, sweet jam, and fresh herbs.
Cooking Tips & Techniques
After making this board more times than I can count, I’ve learned a few things the hard way. Here are the tips that will save you from my mistakes.
Don’t overthink the arrangement. I used to stress about making everything look perfect, and honestly, the best boards I’ve made were the ones where I just relaxed and placed things intuitively. Start with your largest items (the bowls and the brie), then fill in around them. Think of it like a puzzle, not a painting.
Balance your flavors and textures. You want a mix of soft and hard cheeses, mild and strong meats, sweet and savory accompaniments. If everything is rich and heavy, your guests will get tired quickly. That’s why the cornichons and fresh grapes are so important—they cut through the richness and refresh the palate.
Prep everything before you start arranging. I cannot tell you how many times I’ve been halfway through building a board and realized I forgot to take the cheese out of the fridge or I ran out of a certain cracker. Have everything washed, cut, and ready to go before you place a single item on the board.
Use the “rule of thirds” for visual appeal. Don’t put all the crackers on one side and all the meat on the other. Instead, create three distinct “zones” on your board, each with a mix of everything. This makes the board look more interesting and encourages guests to explore different flavor combinations.
One of my biggest failures? I once made a board where I put all the strong-smelling blue cheese next to the delicate brie. The brie absorbed some of that pungent flavor, and it was all anyone could taste. Now I always separate strong cheeses with a neutral element like crackers or grapes.
Timing is everything. If you’re serving this at a party, assemble the board about 30 minutes before guests arrive. This gives the cheese time to come to room temperature (which is when it tastes best) but keeps everything fresh. If you’re prepping the night before, arrange everything except the fresh fruits and herbs, cover it tightly with plastic wrap, and refrigerate. Add the fresh elements about 20 minutes before serving.
Variations & Adaptations
One of the best things about this Ultimate Halloween Charcuterie Board is how easy it is to customize. Here are some variations I’ve tried and loved.
Vegetarian Version: Skip the meats entirely and double up on the cheeses and vegetables. Add some marinated artichoke hearts, roasted red peppers, and stuffed grape leaves for extra flavor. I’ve made this version for a friend who’s vegetarian, and she said it was the best board she’d ever had.
Gluten-Free Adaptation: Replace the crackers and baguette with gluten-free crackers, rice cakes, and vegetable sticks like cucumber rounds and bell pepper strips. Make sure your pretzels are gluten-free too—there are some great options out there now.
Sweet Tooth Twist: For a dessert-style Halloween board, swap the meats and cheeses for chocolate-covered pretzels, candy corn, ghost-shaped marshmallows, and pumpkin spice cookies. Add some fresh apple slices and caramel dip for a fall touch. I tried this for a kids’ Halloween party, and it was a massive hit.
Spicy Upgrade: If you like heat, add some pepper jack cheese, spicy salami, and a bowl of sriracha-honey dip. Sprinkle some red pepper flakes over the hummus. This version is perfect for a grown-up Halloween gathering.
Nut-Free Option: Simply omit the pumpkin seeds and any nuts you might have added. Replace them with extra seeds like sunflower seeds or just more crackers. Always check labels on your crackers and jams to make sure they’re processed in a nut-free facility if you’re serving someone with a severe allergy.
My personal favorite variation? I once made a “Midnight Snack” version with all black and purple foods—blackberries, purple grapes, black olives, dark chocolate, and a wheel of brie dyed with a tiny bit of activated charcoal (just for color, it doesn’t affect the taste). It looked incredibly spooky and elegant at the same time.
Serving & Storage Suggestions
This board is designed to be served at room temperature, so take it out of the fridge about 30 minutes before your guests arrive. The flavors are much more pronounced when the cheese isn’t cold.
Presentation tips: Place the board in the center of your table or on a sideboard where guests can gather around it. I like to put it on a slightly elevated surface, like a cake stand or a small riser, so it becomes a focal point. Add some battery-operated tea lights in small glass jars around the board for a warm, spooky glow.
What to serve alongside: This board is hearty enough to be a meal on its own, but if you’re serving it as an appetizer, it pairs beautifully with a crisp white wine like Sauvignon Blanc or a light red like Pinot Noir. For non-alcoholic options, sparkling apple cider or a pumpkin spice latte are perfect fall choices. If you’re making it a full dinner, follow it up with a warm bowl of pumpkin soup or a hearty chili.
Storage instructions: If you have leftovers (which honestly, rarely happens), store the components separately. Cheeses should be wrapped in wax paper or cheese paper and stored in the refrigerator. Meats should be wrapped tightly in plastic wrap. Crackers and bread should be stored in an airtight container at room temperature. Fresh fruits and vegetables will last a day or two in the fridge.
Reheating tips: This is a cold board, so there’s nothing to reheat. But if you want to serve the brie warm (which is delicious), you can pop the whole wheel in a 350°F oven for 10 minutes before adding it to the board. Just be careful—it will be very soft and might lose its ghost face shape.
How flavors develop over time: Honestly, this board tastes best the day it’s made. The crackers stay crisp, the fruits are fresh, and everything is at its peak. If you must make it ahead, the flavors will still be good the next day, but the textures won’t be as perfect. The cheese will be fine, but the crackers might be a little soft.
Nutritional Information & Benefits
While this Ultimate Halloween Charcuterie Board is definitely a treat, it does have some surprising nutritional benefits. Here’s a rough breakdown per serving (assuming 12 servings from the full board).
- Calories: Approximately 350-400 per serving
- Protein: 15-20 grams
- Fat: 25-30 grams (mostly from cheese and meats)
- Carbohydrates: 20-25 grams
- Fiber: 3-5 grams
Health benefits of key ingredients: Cheese is a great source of calcium and protein, which are essential for bone health and muscle repair. Nuts and seeds (like the pumpkin seeds) provide healthy fats and vitamin E. Grapes and dried fruits offer antioxidants and natural sweetness without refined sugar. Olives are rich in monounsaturated fats, which are good for heart health.
Dietary considerations: This board can be adapted for various diets. It’s naturally low-carb if you skip the crackers and bread. For a keto-friendly version, focus on the cheeses, meats, and olives. For a dairy-free version, use vegan cheeses and skip the honey (use agave instead).
Potential allergens: This recipe contains dairy (cheese), gluten (crackers and bread), and tree nuts (if you add any). Be sure to label any allergens clearly if you’re serving a crowd.
My personal perspective? This board is about celebration, not daily nutrition. It’s the kind of food you make for a special occasion, and that’s perfectly fine. Enjoy it, savor it, and don’t stress about the calories. Life is too short to count calories at a Halloween party.
Conclusion
This Ultimate Halloween Charcuterie Board is more than just a recipe—it’s a centerpiece, a conversation starter, and a way to bring people together. After all those failed attempts at recreating The Cork & Cauldron’s magic, I can honestly say this version is even better. It’s designed to be forgiving, customizable, and most importantly, absolutely delicious.
I love this board because it lets me be creative without being stressed. I can spend an hour arranging everything beautifully, and then I get to sit back and watch my friends and family enjoy it. There’s something deeply satisfying about seeing someone’s face light up when they discover the brie “ghost” or the olive “spider.” It’s a little bit of Halloween magic that I get to share.
Now it’s your turn. Take this template and make it your own. Swap in your favorite cheeses, add your family’s secret dip, or go wild with the spooky decorations. The best version of this board is the one that makes you happy. And when you make it, I’d love to hear about it. Drop a comment below and tell me what spooky touches you added, or tag me in your photos on social media. Happy Halloween, and happy grazing!
Frequently Asked Questions
How far in advance can I make this Halloween charcuterie board?
You can prep most of the components the night before. Wash and cut your fruits and vegetables, arrange the non-perishable items on the board, and wrap the cheeses. Add the fresh herbs and any delicate items about 20 minutes before serving. The board itself should be assembled no more than 2-3 hours before your guests arrive for the best texture and freshness.
What if I don’t have a large wooden board?
No problem at all. A large baking sheet, a clean pizza pan, or even a few smaller cutting boards arranged together work perfectly. You can also use a large platter or a piece of parchment paper laid directly on your table. The key is having enough surface area to spread everything out so guests can easily reach everything.
Can I make this board dairy-free or vegan?
Absolutely. Use vegan cheeses (there are some amazing options now, especially cashew-based brie alternatives), skip the honey (use agave or maple syrup instead), and load up on vegetables, fruits, and nuts. For the meats, use marinated mushrooms or roasted vegetables for a similar savory, umami flavor. I’ve made a vegan version for a friend, and it was a hit.
How do I keep the crackers from getting soggy?
The trick is to keep the crackers away from any moist ingredients like the jam, hummus, or fresh fruits. Place them in their own little “islands” on the board, and don’t put them directly under the cheese. If you’re making the board far in advance, you can even add the crackers just before serving. And always use sturdy crackers—thin, delicate ones will break and get soft quickly.
What are the best drinks to pair with this Halloween charcuterie board?
For a Halloween party, I love serving a crisp Sauvignon Blanc or a light Pinot Noir. The acidity in the wine cuts through the richness of the cheese and meat beautifully. For non-alcoholic options, sparkling apple cider or a pumpkin spice latte are perfect fall choices. If you’re feeling extra festive, a dark and stormy cocktail (rum, ginger beer, and lime) or a blackberry mojito would be incredible.
Pin This Recipe!
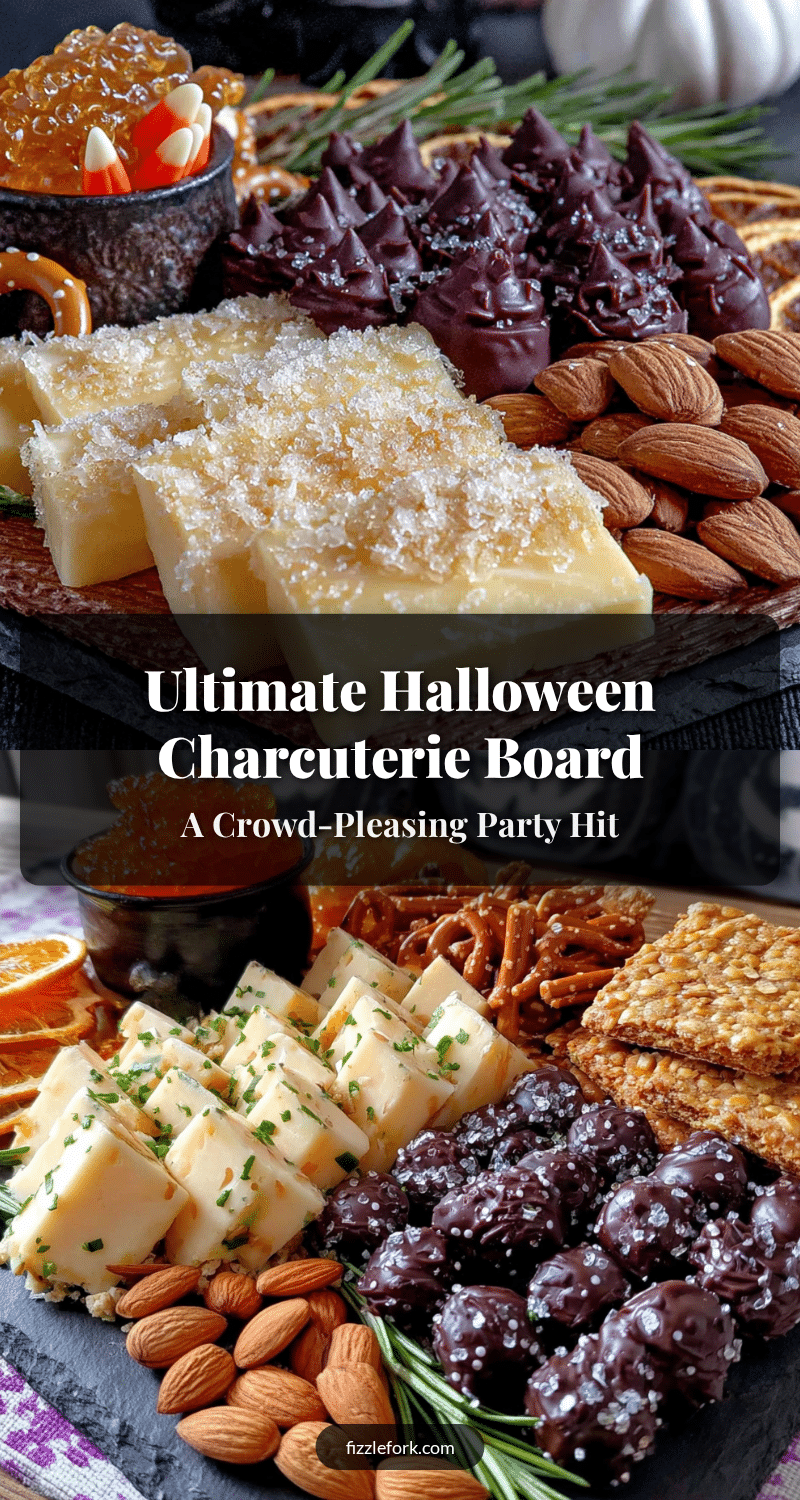
Ultimate Halloween Charcuterie Board: Easy Crowd-Pleasing Party Hit
A spooky and sophisticated Halloween grazing board featuring a perfect balance of savory, sweet, and spooky elements. Easy to assemble and perfect for parties, this board is designed to impress guests without spending all day in the kitchen.
- Prep Time: 20 minutes
- Cook Time: 0 minutes
- Total Time: 20 minutes
- Yield: 12 servings 1x
- Category: Appetizer
- Cuisine: American
Ingredients
- 8 oz Brie cheese wheel
- 6 oz Aged Gouda
- 6 oz Blue cheese
- 8 oz Sharp white cheddar
- 8 oz Prosciutto
- 8 oz Genoa Salami
- 6 oz Soppressata
- 1 cup Black olives
- 1 cup Green olives stuffed with pimento
- 1/2 cup Fig jam or blackberry preserves
- 1/4 cup Pumpkin seeds (pepitas)
- Black sesame seeds
- 1 box (8 oz) Rosemary and sea salt crackers
- 1 box (8 oz) Water crackers
- 1 baguette
- 1 cup Pretzel sticks
- 1 cup Red grapes
- 1 cup Dried apricots
- 1 cup Dried figs
- 1/2 cup Cherry tomatoes
- 1/2 cup Baby carrots
- 1/2 cup Hummus
- 1/4 cup Honey
- 1/4 cup Cornichons
- Fresh rosemary sprigs
Instructions
- Prep Your Cheeses (20 minutes before you start): Take all your cheeses out of the refrigerator about 20 minutes before you start arranging. Cut sharp cheddar into 1-inch cubes or use a bat-shaped cookie cutter. Leave brie whole. Crumble blue cheese into a small bowl. Slice gouda into thin triangles.
- Create Your Spooky Brie ‘Ghost’ (5 minutes): Place the whole brie wheel in the center of your board. Using a small knife, score two small ‘eyes’ and a ‘mouth’ into the top rind. Carefully peel away the top layer of rind inside those shapes to reveal the creamy interior. Sprinkle a tiny pinch of black sesame seeds over the top.
- Place Your Bowls (2 minutes): Position small bowls in different areas of the board. Fill one with fig jam, one with honey, one with hummus, and one with black olives.
- Arrange the Meats (5 minutes): Drape prosciutto in loose, wavy ribbons. Fold Genoa salami slices into quarters or roll into cones. Arrange soppressata in a small pile.
- Add the Cheeses (3 minutes): Place brie ‘ghost’ in a prominent spot. Arrange cheddar cubes or bat shapes near it. Fan out gouda triangles. Scatter crumbled blue cheese in small piles.
- Fill in with Crackers and Bread (3 minutes): Add crackers in small clusters. Fan out baguette slices in one area. Tuck pretzel sticks into empty spaces.
- Add the Fruits and Vegetables (5 minutes): Scatter red grape clusters in a few spots. Tuck dried apricots and figs near cheeses. Place cherry tomatoes and baby carrots in small groups. Optionally carve jack-o’-lantern faces into baby carrots.
- The Spooky Details (5 minutes): Arrange black olives on top of hummus bowl to look like a spider. Arrange green olives in a cluster to look like eyeballs. Drizzle honey over brie and blue cheese. Sprinkle pumpkin seeds and fresh rosemary sprigs around the board.
- Final Touches and Serve (2 minutes): Step back and look at your board. Fill empty patches with extra crackers or grapes. Add cornichons in a small pile. Ensure cheese knives and tongs are within reach.
Notes
Prep most components the night before. Wash and cut fruits/vegetables, arrange non-perishable items, and wrap cheeses. Add fresh herbs and delicate items about 20 minutes before serving. Assemble board no more than 2-3 hours before guests arrive for best texture and freshness. Keep crackers away from moist ingredients to prevent sogginess.
Nutrition
- Serving Size: 1 serving (1/12 of b
- Calories: 375
- Sugar: 12
- Sodium: 800
- Fat: 28
- Saturated Fat: 12
- Carbohydrates: 22
- Fiber: 4
- Protein: 18
Keywords: Halloween charcuterie board, Halloween appetizer, spooky cheese board, party platter, grazing board, Halloween party food