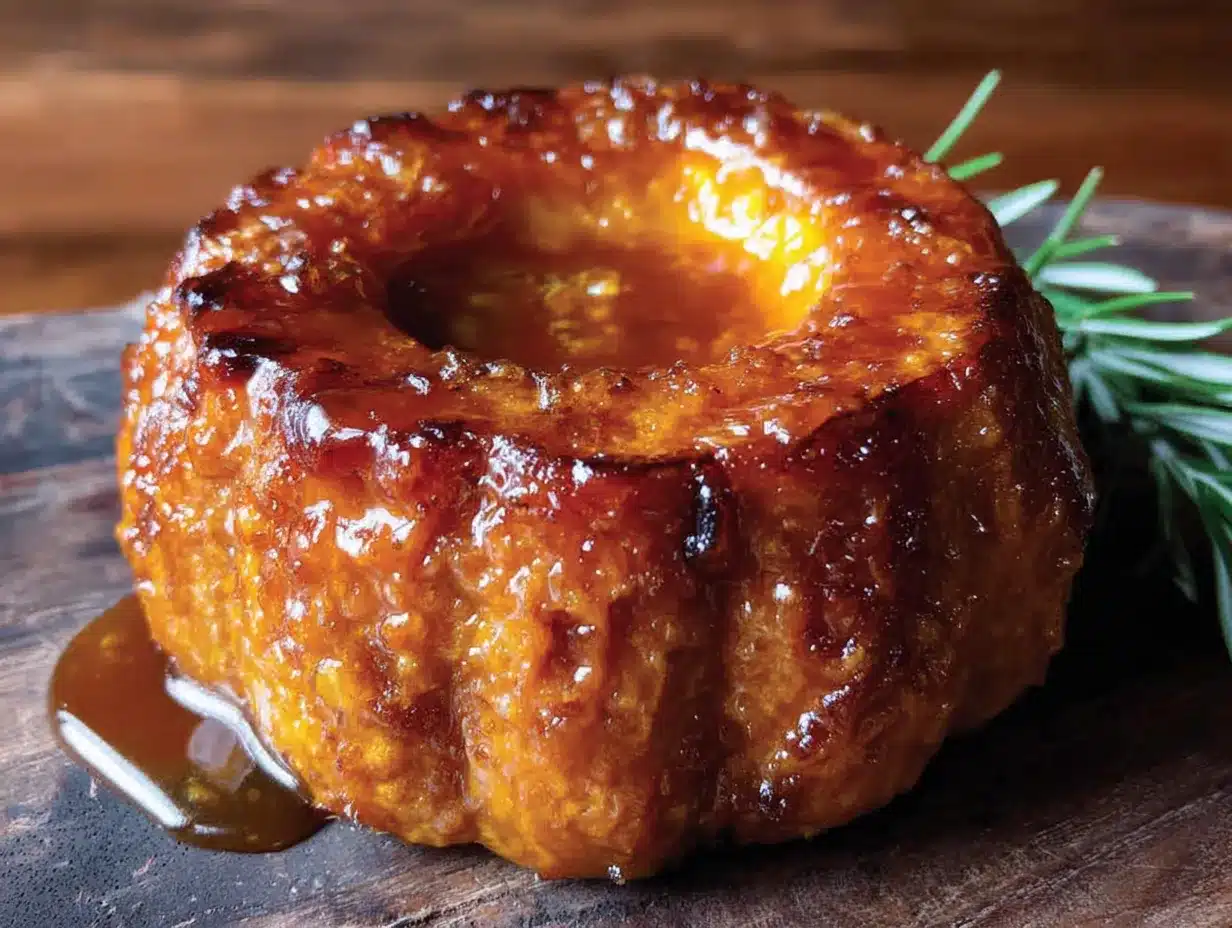
I want something sweet and savory for dinner, but I don’t want another sheet pan of roasted broccoli. That’s the exact thought that hit me last Tuesday, standing in my kitchen with a single honeynut squash sitting on the counter. I bought it on a whim at the farmer’s market because it looked cute—smaller than a butternut, with that deep orange flesh that practically glows. And honestly? I had no idea what to do with it.
So I did what any reasonable person does when faced with an unfamiliar vegetable. I cut it in half, scooped out the seeds, and stared at it for a good minute. Then I remembered that brown sugar in my pantry and that stick of butter that was already at room temperature. Something clicked. I sliced that squash into half-moons, laid them out on a baking sheet, and went to town with a generous sprinkle of brown sugar, a pinch of salt, and a few pats of butter. Twenty-five minutes later, I had the most ridiculously good side dish I’d made in weeks. The edges were caramelized and sticky, the centers were tender enough to eat with a fork, and the flavor was this perfect balance of sweet and earthy. I ate the entire batch standing at the counter. No regrets.
That’s the thing about this Caramelized Brown Sugar Honeynut Squash recipe. It’s not complicated, but it feels special. It’s the kind of dish that makes you wonder why you don’t cook with honeynut squash all the time. And after you try it, you’ll probably ask yourself the same question.
Why You’ll Love This Recipe
I’ve tested this recipe about seven times now, and I can tell you with complete confidence that it delivers every single time. Here’s why this version stands out from every other roasted squash recipe you’ve seen.
- Quick & Easy : From start to finish, this dish comes together in under 30 minutes. That’s faster than delivery, and way more impressive.
- Simple Ingredients : You need exactly five things—honeynut squash, brown sugar, butter, salt, and maybe a pinch of cinnamon if you’re feeling fancy. No grocery store scavenger hunts required.
- Perfect for Any Occasion : This works for a cozy weeknight dinner, a Thanksgiving side dish, or even a fancy brunch spread. It’s versatile like that.
- Crowd-Pleaser : I brought this to a potluck last month, and three people asked for the recipe before I even sat down. Kids love it too, which is always a win.
- Unbelievably Delicious : The caramelization on the edges creates these little crispy bits that are pure magic. The inside stays soft and almost custard-like. It’s texture heaven.
What makes this recipe different from the rest is the technique. Most roasted squash recipes tell you to toss everything in a bowl and dump it on a pan. That works, but it doesn’t give you those gorgeous caramelized edges. I’m going to show you how to arrange the slices so they get maximum contact with the hot pan, which means maximum browning. And that browning? That’s where the flavor lives.
This is the kind of side dish that makes you close your eyes after the first bite. It’s comfort food that feels wholesome and indulgent at the same time. Perfect for impressing dinner guests without breaking a sweat, or for turning a simple Tuesday dinner into something memorable.
What Ingredients You Will Need
This recipe uses simple, wholesome ingredients to deliver bold flavor and satisfying texture without any fuss. Most of these are probably already in your kitchen right now.
- Honeynut Squash (2 medium, about 1 to 1.5 pounds total) – Look for squash that feels heavy for its size and has a deep orange color. The skin is thin enough that you don’t need to peel it, which saves so much time. I usually grab mine from the farmer’s market in the fall, but most grocery stores carry them now.
- Light Brown Sugar (3 tablespoons, packed) – This is the star of the show. Brown sugar has molasses in it, which gives the squash that deep, almost toasty sweetness. Dark brown sugar works too, but it’ll give a stronger molasses flavor. I prefer light brown sugar for a more balanced sweetness.
- Unsalted Butter (2 tablespoons, melted) – Butter adds richness and helps the sugar caramelize. I use unsalted so I can control the salt level. If you only have salted butter, just reduce the added salt slightly.
- Kosher Salt (½ teaspoon) – Don’t skip this. Salt balances the sweetness and makes the squash taste more like itself. I use Diamond Crystal kosher salt; if you use Morton’s, use about ¼ teaspoon instead.
- Ground Cinnamon (¼ teaspoon, optional) – This is totally optional, but I love the warmth it adds. It’s not enough to scream “cinnamon,” just enough to make you wonder what that cozy flavor is.
- Black Pepper (a few cracks, optional) – I add this about half the time. A tiny bit of black pepper brings out the earthy notes in the squash. It’s subtle but nice.
That’s it. Five ingredients, maybe six if you count the cinnamon. No fancy syrups, no complicated spice blends. Just real food that tastes incredible together.
One quick note on ingredient sourcing: I’ve tried this with different brands of brown sugar, and honestly, they all work fine. But I do recommend using a good-quality butter like Kerrygold or Plugrà. Since there are so few ingredients, the quality of each one matters more than usual. Cheap butter has more water content and won’t caramelize as nicely.
Equipment Needed
The beauty of this recipe is that you don’t need much fancy equipment. Here’s what you’ll need:
- Baking Sheet (half-sheet pan, 18×13 inches) – A rimmed baking sheet works best because it catches any buttery juices. I’ve used both aluminum and non-stick, and both work fine. If you have a dark-colored pan, watch the squash closely—it can brown faster.
- Parchment Paper or Aluminum Foil – This makes cleanup so much easier. The caramelized sugar can stick to the pan, and nobody wants to scrub that.
- Sharp Chef’s Knife – Honeynut squash is small but dense. A sharp knife makes cutting through it much safer and easier. I use my 8-inch chef’s knife.
- Cutting Board – Any sturdy cutting board works. I prefer wood because it’s gentler on my knife.
- Small Bowl – For mixing the brown sugar, cinnamon, and salt together before sprinkling.
- Pastry Brush or Spoon – For brushing the melted butter onto the squash. A silicone pastry brush is my favorite, but a regular spoon works just fine.
If you don’t have parchment paper, you can grease the baking sheet with a little extra butter or cooking spray. I’ve done it both ways, and parchment really does make life easier. It’s worth the cost, honestly.
Preparation Method
Alright, let’s get cooking. This is straightforward, but I’ll walk you through every step so you get perfect results the first time.
- Preheat your oven to 400°F (200°C). Place a rack in the middle position. Getting the oven hot before you start is important—the squash needs that initial blast of heat to start caramelizing immediately.
- Prepare the squash. Wash the honeynut squash well and pat it dry. Using a sharp chef’s knife, carefully cut off the stem end and the tip. Then cut the squash in half lengthwise. Use a spoon to scoop out the seeds and stringy bits. Don’t worry about getting every last strand—a few leftover bits won’t hurt. Now slice each half into ½-inch thick half-moons. You’ll get about 6 to 8 slices per squash, depending on size.
- Mix the topping. In a small bowl, combine 3 tablespoons packed light brown sugar, ½ teaspoon kosher salt, and ¼ teaspoon ground cinnamon (if using). Stir with a fork to break up any clumps. Set aside.
- Arrange the squash. Line your baking sheet with parchment paper. Lay the squash slices in a single layer, making sure they don’t overlap. This is crucial—overlapping means steaming instead of caramelizing. If they don’t all fit, use a second baking sheet or cook in batches. Leave a little space between each slice if you can.
- Add the butter. Melt 2 tablespoons of unsalted butter in the microwave or on the stovetop. Using a pastry brush or the back of a spoon, brush the melted butter over each slice of squash. Try to coat both sides if possible, but at minimum coat the top side well.
- Sprinkle the sugar mixture. Sprinkle the brown sugar mixture evenly over the squash slices. Don’t dump it all in one spot—distribute it as evenly as you can. Some will fall onto the pan, and that’s fine. It’ll caramelize there and create those crispy bits.
- Roast for 20-25 minutes. Place the baking sheet in the preheated oven. Roast for 20 minutes, then check for doneness. The squash should be fork-tender and the edges should be bubbling and caramelized. If you want deeper caramelization, give it another 3-5 minutes. Keep an eye on it—brown sugar can go from caramelized to burnt pretty quickly.
- Rest for 2 minutes. Remove the pan from the oven and let the squash rest on the pan for 2 minutes. This allows the caramel to set slightly so it doesn’t slide off when you move the slices.
- Serve immediately. Use a spatula to transfer the squash to a serving platter. Spoon any extra caramelized bits from the pan over the top. Serve warm.
A few sensory cues to watch for: When the squash is done, the edges will look dark amber and slightly crispy. The flesh should yield easily when poked with a fork. You’ll smell a sweet, almost nutty aroma coming from the oven—that’s the sugar caramelizing. If you see any black spots, that means the sugar is burning, so pull it out right away.
One personal tip: I like to flip the squash slices halfway through cooking. It gives you caramelization on both sides, which is next-level delicious. If you do this, use a thin spatula and be gentle—the squash gets soft as it cooks.
Cooking Tips & Techniques
I’ve made this recipe enough times to know exactly where things can go wrong. Here are the tips I wish someone had told me before my first attempt.
Don’t skip the salt. I know it sounds weird to add salt to something sweet, but trust me on this. Salt doesn’t just make things salty—it enhances other flavors and balances sweetness. The first time I made this, I forgot the salt, and it tasted flat. The second time, I added it, and suddenly the squash tasted more like itself. It’s a small step that makes a huge difference.
Cut the slices evenly. This is one of those things that seems fussy but actually matters. If some slices are thicker than others, they’ll cook at different rates. The thin ones will burn before the thick ones are tender. Aim for ½-inch thick slices, and use a ruler if you’re unsure. I’ve done it by eye before, and it’s fine, but even slices give you the most consistent results.
Watch the sugar. Brown sugar burns faster than you think. The difference between perfectly caramelized and burnt is about 2 minutes. I always set a timer for 20 minutes, then check every minute after that. If you see the sugar starting to darken too quickly, you can tent the pan loosely with foil for the last few minutes.
Use room temperature butter. Melted butter is fine, but if you’re brushing it on, room temperature butter spreads more evenly. Cold butter will seize up and not coat the squash properly. I learned this the hard way when I tried to rush things.
Don’t overcrowd the pan. This is the most common mistake I see. If the slices are touching or overlapping, they’ll steam instead of caramelize. You want that direct contact with the hot pan. If you need to use two baking sheets, do it. It’s worth the extra pan to wash.
One of my biggest failures with this recipe happened when I tried to double it for a dinner party. I crammed everything onto one pan, and the squash turned out soft and watery instead of caramelized. It was still edible, but it wasn’t the showstopper I wanted. Learn from my mistake—give the squash room to breathe.
Variations & Adaptations
This recipe is flexible, and I’ve tried several variations that turned out great. Here are some ideas to make it your own.
Maple-Bourbon Version : Replace the brown sugar with 2 tablespoons of pure maple syrup and add 1 tablespoon of bourbon. Mix them together with the melted butter before brushing onto the squash. The bourbon adds a smoky depth that pairs beautifully with the sweet maple. I tried this for a Friendsgiving potluck, and it was a hit.
Savory-Spiced Twist : Skip the cinnamon and add ½ teaspoon of smoked paprika and ¼ teaspoon of cayenne pepper to the brown sugar mixture. This gives the squash a smoky, slightly spicy kick that’s amazing alongside grilled meats. It’s my go-to version when I’m making crispy one-pan lemon herb chicken thighs for dinner.
Vegan Option : Substitute the butter with coconut oil or a high-quality vegan butter. I’ve used both, and coconut oil gives a subtle tropical note that’s actually really nice. Just make sure your vegan butter is unsalted to keep the salt level right.
Air Fryer Method : If you want to save time, you can make this in an air fryer. Preheat to 375°F (190°C), arrange the squash in a single layer in the basket (you may need to work in batches), and cook for 12-15 minutes, flipping halfway through. The air fryer gives you even more caramelization because of the circulating heat. It’s my preferred method when I’m short on time.
Garlic and Herb Version : Add 2 cloves of minced garlic and 1 tablespoon of fresh thyme leaves to the melted butter before brushing. The garlic gets sweet and mellow as it roasts, and the thyme adds an earthy freshness. This version is fantastic alongside easy honey garlic butter salmon sheet pan dinner.
I’ve also tried adding a sprinkle of flaky sea salt right before serving, and it’s a game-changer. The crunchy salt crystals contrast with the soft, sweet squash. It’s a small touch that feels fancy without any extra effort.
Serving & Storage Suggestions
This squash is best served warm, right out of the oven. The caramelized edges are at their crispiest, and the interior is perfectly tender. I like to transfer the slices to a warm serving platter and spoon any leftover caramel from the pan over the top. A sprinkle of fresh thyme or a pinch of flaky sea salt makes it look restaurant-worthy.
For a complete meal, I serve this alongside roasted chicken, pork chops, or grilled salmon. It’s also fantastic with creamy loaded baked potato soup with bacon for a cozy fall dinner. The sweetness of the squash balances the richness of the soup perfectly.
If you have leftovers (which is rare in my house), let the squash cool completely before storing. Place it in an airtight container and refrigerate for up to 4 days. The texture will soften as it sits, but the flavor actually gets better—the caramel continues to penetrate the squash.
To reheat, I recommend using the oven or air fryer. The microwave will make it soggy. Preheat your oven to 350°F (175°C), spread the squash on a baking sheet, and warm for 5-7 minutes. In the air fryer, 3-4 minutes at 350°F does the trick. The edges won’t be as crispy as fresh, but they’ll still be delicious.
You can also freeze this squash. Arrange the cooled slices in a single layer on a parchment-lined baking sheet and freeze until solid, then transfer to a freezer-safe bag. It’ll keep for up to 3 months. Reheat directly from frozen in a 375°F oven for about 10 minutes. The texture won’t be quite the same as fresh, but it’s still a great option for meal prep.
One thing I’ve noticed: the flavor of this squash deepens after a day in the fridge. The brown sugar and butter meld together, and the squash absorbs all that caramel goodness. If you can resist eating it all right away, leftovers are actually a treat.
Nutritional Information & Benefits
Honeynut squash is a nutritional powerhouse, and this recipe keeps things relatively light despite the caramelized sugar coating. Here’s the estimated nutrition per serving (based on 4 servings):
| Nutrient | Amount Per Serving |
|---|---|
| Calories | 185 |
| Total Fat | 6g |
| Saturated Fat | 4g |
| Carbohydrates | 34g |
| Fiber | 5g |
| Sugar | 18g |
| Protein | 2g |
| Vitamin A | 250% DV |
| Vitamin C | 35% DV |
| Potassium | 450mg |
Honeynut squash is packed with beta-carotene, which your body converts into vitamin A. That’s great for eye health and immune function. It’s also a good source of fiber, which helps with digestion and keeps you feeling full. The natural sweetness means you don’t need much added sugar to make it taste amazing.
This recipe is naturally gluten-free and can be made vegan with a simple butter swap. If you’re watching your sugar intake, you can reduce the brown sugar to 2 tablespoons and still get great caramelization. The squash itself is low in calories and high in nutrients, making this a side dish you can feel good about serving.
One thing I love about this recipe is that it satisfies that craving for something sweet without being a dessert. It’s a way to get more vegetables into your diet in a way that actually tastes indulgent. That’s a win in my book.
Conclusion
This Caramelized Brown Sugar Honeynut Squash recipe is proof that the best dishes don’t need to be complicated. With just a few simple ingredients and about 25 minutes, you can turn a humble winter squash into something that feels special enough for a holiday table but easy enough for a random Tuesday night.
I love how versatile this recipe is. You can dress it up with herbs and spices, keep it simple with just brown sugar and butter, or experiment with different flavor combinations. It’s forgiving enough for beginners but impressive enough to serve to guests. And honestly? It’s the kind of dish that makes you look forward to fall produce all year round.
I’d love to hear how this turns out for you. Did you try any variations? Did you serve it alongside something amazing? Drop a comment below and let me know. And if you’re looking for more cozy fall recipes, check out my cozy pumpkin gnocchi with easy sage brown butter for another seasonal favorite.
Now go ahead and make some caramelized squash. You deserve it.
Frequently Asked Questions
Can I use butternut squash instead of honeynut squash?
Yes, you can substitute butternut squash, but you’ll need to peel it first since the skin is thicker. Cut it into similar ½-inch half-moons and follow the same instructions. The cooking time might be slightly longer—about 25-30 minutes—since butternut squash is denser. The flavor will be similar, but honeynut squash is naturally sweeter and has a creamier texture.
Do I have to peel honeynut squash?
No, you don’t need to peel honeynut squash. The skin is thin and tender enough to eat once cooked. It softens during roasting and adds a nice texture contrast. Plus, leaving the skin on saves you time and effort. Just make sure to wash the squash well before cutting.
Can I make this recipe ahead of time?
You can prep the squash up to a day ahead. Slice it, store the pieces in an airtight container in the refrigerator, and assemble right before roasting. Once cooked, this squash is best served fresh, but leftovers reheat well in the oven or air fryer. The texture won’t be as crispy as fresh, but the flavor is still delicious.
How do I prevent the sugar from burning?
Keep an eye on the squash during the last 5 minutes of roasting. If the sugar starts to darken too quickly, you can tent the pan loosely with aluminum foil. Also, make sure your oven temperature is accurate—an oven that runs hot can cause burning. Using light brown sugar instead of dark brown sugar also helps because it has less molasses and burns less easily.
What can I serve with caramelized honeynut squash?
This squash pairs beautifully with roasted chicken, pork chops, grilled salmon, or steak. It’s also a great side dish for Thanksgiving or any holiday meal. For a vegetarian dinner, serve it alongside a hearty grain bowl or with crispy baked eggplant parmesan stacks for a satisfying meatless meal. The sweet and savory flavors complement so many dishes.
Pin This Recipe!
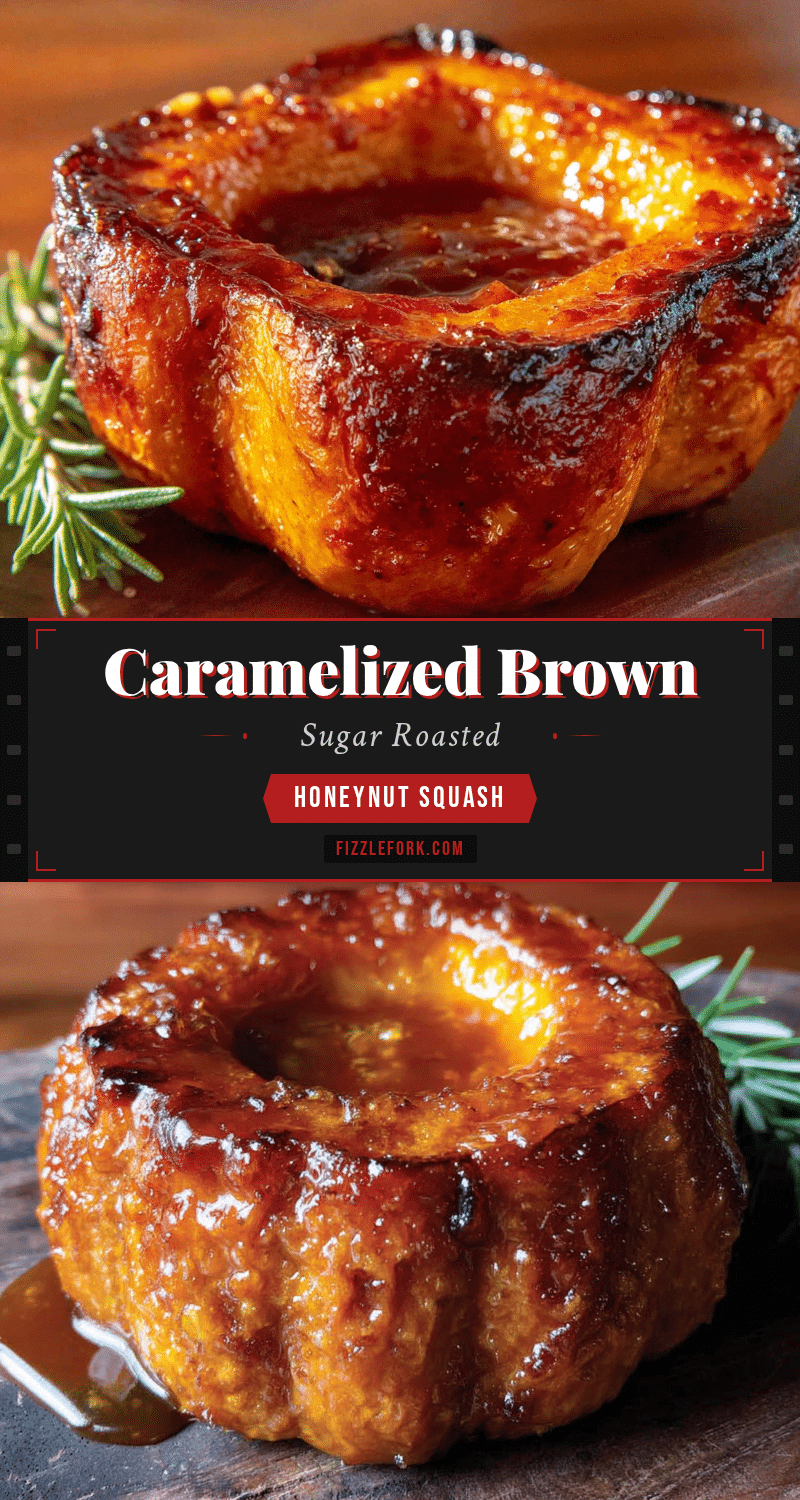
Best Easy Caramelized Brown Sugar Honeynut Squash Recipe
This caramelized brown sugar honeynut squash is a quick and easy side dish that’s sweet, savory, and perfect for any occasion. With just five simple ingredients and under 30 minutes, you’ll have a crowd-pleasing dish that’s both wholesome and indulgent.
- Prep Time: 10 minutes
- Cook Time: 25 minutes
- Total Time: 35 minutes
- Yield: 4 servings 1x
- Category: Side Dish
- Cuisine: American
Ingredients
- 2 medium honeynut squash (about 1 to 1.5 pounds total)
- 3 tablespoons light brown sugar, packed
- 2 tablespoons unsalted butter, melted
- ½ teaspoon kosher salt
- ¼ teaspoon ground cinnamon (optional)
- A few cracks of black pepper (optional)
Instructions
- Preheat your oven to 400°F (200°C). Place a rack in the middle position.
- Wash the honeynut squash well and pat dry. Using a sharp chef’s knife, carefully cut off the stem end and the tip. Cut the squash in half lengthwise. Use a spoon to scoop out the seeds and stringy bits. Slice each half into ½-inch thick half-moons.
- In a small bowl, combine 3 tablespoons packed light brown sugar, ½ teaspoon kosher salt, and ¼ teaspoon ground cinnamon (if using). Stir with a fork to break up any clumps. Set aside.
- Line a baking sheet with parchment paper. Lay the squash slices in a single layer, making sure they don’t overlap.
- Melt 2 tablespoons of unsalted butter. Using a pastry brush or the back of a spoon, brush the melted butter over each slice of squash, coating both sides if possible.
- Sprinkle the brown sugar mixture evenly over the squash slices.
- Roast for 20-25 minutes, until the squash is fork-tender and the edges are bubbling and caramelized. For deeper caramelization, give it another 3-5 minutes, watching carefully to prevent burning.
- Remove the pan from the oven and let the squash rest on the pan for 2 minutes.
- Use a spatula to transfer the squash to a serving platter. Spoon any extra caramelized bits from the pan over the top. Serve warm.
Notes
For best caramelization, arrange slices in a single layer without overlapping. Flip halfway through for even browning. Watch the sugar closely in the last few minutes to prevent burning. Leftovers can be stored in an airtight container in the refrigerator for up to 4 days and reheated in the oven or air fryer.
Nutrition
- Serving Size: 1 serving
- Calories: 185
- Sugar: 18
- Sodium: 290
- Fat: 6
- Saturated Fat: 4
- Carbohydrates: 34
- Fiber: 5
- Protein: 2
Keywords: honeynut squash, caramelized squash, brown sugar squash, roasted squash, easy side dish, fall recipe, vegetarian, gluten-free