I was sorting through a dusty box of old kitchen gadgets at a thrift store last October when the woman running the register—a tiny, silver-haired lady named Edna who looked like she’d been there since the place opened—started talking about dried oranges. Not the kind you buy in a fancy package for fifty bucks, mind you. She was describing how she’d been making them for forty years, every single November, long before anyone called it a “garnish” or put it on a charcuterie board. She told me she learned it from her mother, who learned it from a neighbor who ran a fruit stand during the Depression. And there I was, holding a chipped ceramic bowl I didn’t need, completely captivated by the idea of turning a simple citrus fruit into something that could make a whole room smell like Christmas. I bought the bowl (it was two dollars) and went home with a bag of oranges and a scribbled note on a napkin. Honestly, I didn’t even know you could dry oranges at home without some fancy dehydrator. But Edna’s method was so simple, so obvious, it felt like a secret that had been hiding in plain sight. Maybe you’ve been there—standing in a kitchen, realizing the best things don’t come from a store, but from a little patience and an oven that’s barely warm. That’s how this wholesome dried orange slice garnish became a staple in my holiday kitchen, year after year. It’s the kind of thing that makes you feel like you’ve made something special, even if it’s just for a cup of tea.
Why You’ll Love This Recipe
This isn’t just another pretty garnish. This is a way to bring warmth, aroma, and a genuinely wholesome touch to your holiday drinks without any of the artificial stuff. I’ve tested this method more times than I can count, tweaking temperatures and thickness until I found the sweet spot that works every single time. Here’s why this recipe stands out:
- Simple & Budget-Friendly: You only need oranges and an oven. No fancy equipment, no trips to a specialty store. It’s a garnish that costs pennies to make.
- Wholesome & Natural: No added sugars, no preservatives. Just pure fruit, slowly dried to perfection. Perfect for health-minded readers who want to keep things clean.
- Incredibly Aromatic: The process fills your home with a natural citrus scent that no candle can replicate. It’s like having a holiday potpourri that’s also edible.
- Long-Lasting & Versatile: These slices keep for months. Use them in mulled wine, hot cider, herbal teas, or even as a beautiful gift topper.
- Stress-Free Project: The oven does all the work. You just slice, arrange, and wait. It’s the perfect low-effort task for a cozy afternoon.
What makes this different from other dried fruit recipes is the technique. It’s not about high heat or rushing the process. It’s about low, gentle warmth that preserves the color and flavor without turning your oranges into little brown crisps. This is the method that Edna swore by, and after trying it myself, I get why. It’s foolproof.
What Ingredients You Will Need
This recipe uses a single, simple ingredient to create something truly special. The beauty is in the simplicity, and the quality of what you start with really matters here.
- Fresh Oranges: (3-4 medium oranges) The star of the show. Look for firm, heavy oranges with bright, unblemished skin. Navel oranges are my go-to for their sweetness and consistent shape, but blood oranges or cara cara oranges work beautifully too for a different color. (I personally prefer organic oranges here, especially if you plan to use the slices as a garnish where the peel might touch the drink.)
- Optional: Cinnamon Sticks & Star Anise: (for a spiced version) While not strictly necessary, adding a couple of cinnamon sticks and star anise to the baking sheet infuses the oranges with a gentle, warm holiday spice. It’s a trick I picked up from a friend who runs a small-batch spice company, and it makes the aroma even more intoxicating.
That’s it. Seriously. No sugar, no syrup, no complicated glazes. The natural sugars in the oranges concentrate as they dry, creating a sweet, chewy edge that’s perfect for sipping alongside a warm drink. If you’re looking for a substitution, grapefruit or lemon slices can be dried the same way, but the sweetness of oranges is what makes them so perfect for holiday beverages.
Equipment Needed
You don’t need a dehydrator for this recipe, which is part of the charm. Most of these tools you probably already have in your kitchen.
- Sharp Knife or Mandoline: A sharp chef’s knife works perfectly, but a mandoline will give you the most consistent, even slices. I’ve used both, and while the mandoline is faster, a steady hand with a knife works just as well. Just be careful—those fingers are precious!
- Cutting Board: A sturdy, non-slip board is essential for safe slicing.
- Baking Sheets: You’ll need one or two rimmed baking sheets, depending on how many oranges you’re drying.
- Parchment Paper: This is non-negotiable. Parchment prevents sticking and makes cleanup a breeze. I learned this the hard way after my first batch fused to the pan.
- Paper Towels: For blotting the slices before they go into the oven. It helps remove excess moisture and speeds up the drying time.
- Wire Rack (Optional): Placing a wire rack on the baking sheet allows for better air circulation, which can lead to more even drying. It’s a nice trick if you have one, but not required.
Budget-friendly tip: A basic mandoline from a discount store works just fine. You don’t need a professional-grade tool for this.
Preparation Method
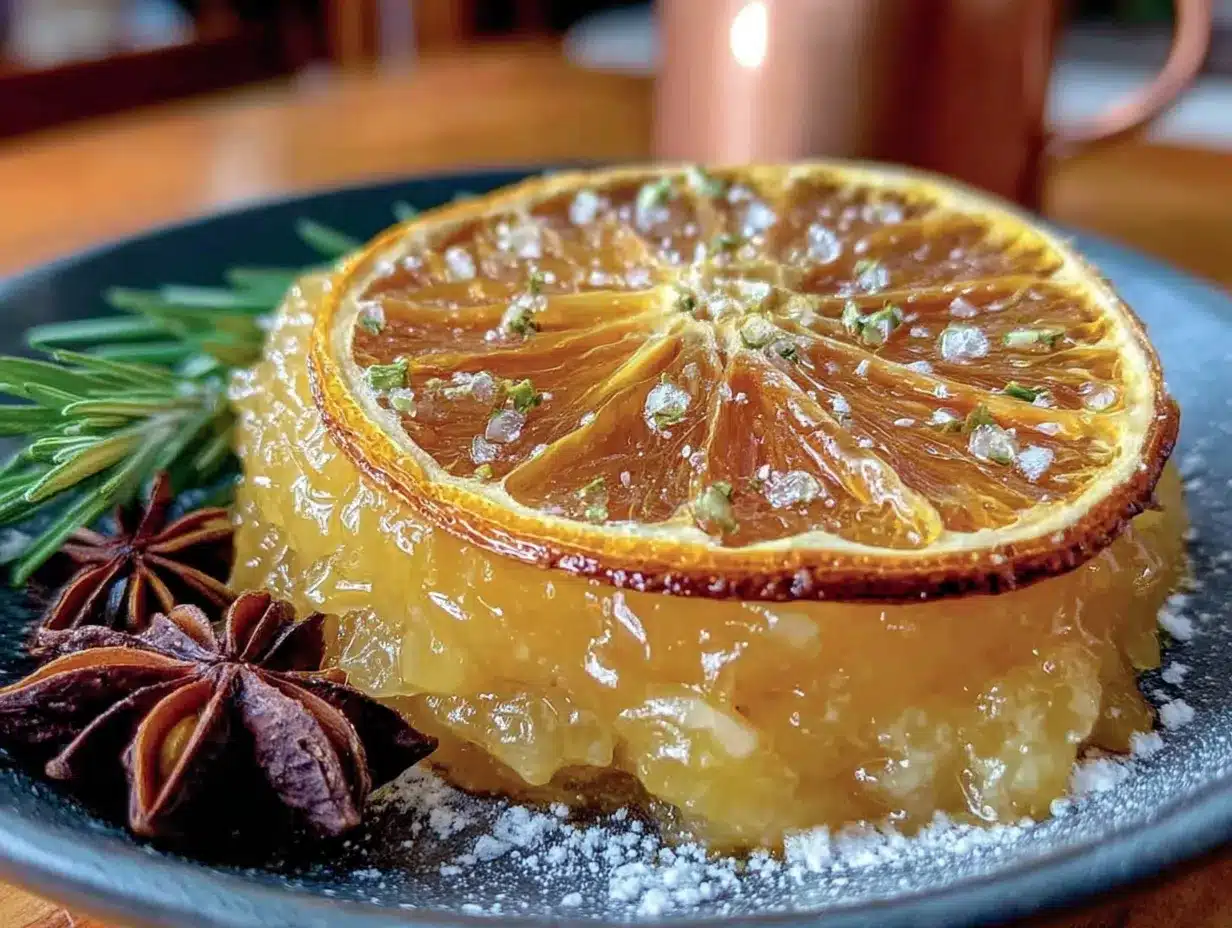
Follow these steps, and you’ll have beautiful, fragrant dried orange slices that look like they came from a high-end kitchen shop.
- Preheat Your Oven: Set your oven to its lowest possible temperature. For most ovens, that’s around 170°F (75°C). If your oven doesn’t go that low, 200°F (95°C) is acceptable, but you’ll need to watch them more closely. The key is low and slow.
- Wash and Slice the Oranges: Scrub the oranges well under warm water to remove any wax or residue. Using a sharp knife or mandoline, slice the oranges into even rounds, about 1/4-inch (6mm) thick. Thinner slices will become brittle, and thicker slices will take forever to dry. Consistency is your friend here. (I once got distracted and ended up with slices ranging from paper-thin to half an inch thick. The thin ones burned, and the thick ones stayed soggy. Learn from my mistake.)
- Blot the Slices: Lay the orange slices in a single layer on a clean kitchen towel or paper towels. Place another towel on top and gently press to absorb as much surface moisture as possible. This step is crucial for preventing steaming and ensuring the slices dry, not bake.
- Arrange on Baking Sheets: Line your baking sheets with parchment paper. Place the orange slices in a single layer, making sure they don’t touch each other. Overcrowding will trap moisture and lead to uneven drying. If you’re adding cinnamon sticks or star anise, scatter them around the pan, not directly on the oranges.
- Bake Low and Slow: Place the baking sheets in the preheated oven. The drying process will take 2.5 to 4 hours, depending on the thickness of your slices and your oven’s actual temperature. Start checking at the 2-hour mark. The slices are done when they are dry to the touch, slightly leathery, and no longer sticky in the center. They should still have some flexibility—they shouldn’t snap like a cracker.
- Cool Completely: Remove the baking sheets from the oven and let the orange slices cool completely on the pan. They will firm up slightly as they cool. This is a good thing.
- Check for Doneness: Once cool, the slices should be dry and pliable. If any slices are still moist in the center, return them to the oven for another 30 minutes. Patience is a virtue here.
Cooking Tips & Techniques
I’ve made a lot of batches of these over the years, and I’ve learned a few things the hard way so you don’t have to.
- The Temperature Trap: The biggest mistake people make is turning the heat up to speed things up. Don’t do it. High heat will cook the oranges, turning them brown and bitter. You want to dry them, not bake them. Low and slow is the only way to preserve that beautiful, vibrant color.
- Slice Thickness Matters: Aim for a consistent 1/4-inch thickness. If you don’t have a mandoline, use a ruler the first time to train your eye. Trust me, it makes a difference.
- Rotate Your Pans: Halfway through the drying time, rotate your baking sheets from top to bottom and front to back. Ovens have hot spots, and this ensures even drying across all the slices.
- The Stickiness Test: The slices are ready when they feel dry to the touch and are no longer sticky. If they still feel tacky, they need more time. There’s no rushing this process.
- Multitasking Strategy: This is a perfect recipe to make while you’re doing other things. Start them in the morning, and they’ll be ready by lunch. Or pop them in before bed and let them dry overnight on the “warm” setting if your oven allows it.
Variations & Adaptations
Once you master the basic method, the possibilities are endless. Here are a few of my favorite twists.
- Spiced Citrus Slices: Before baking, lightly brush the orange slices with a mixture of melted coconut oil and a pinch of cinnamon, nutmeg, and cloves. It adds a subtle warmth that pairs beautifully with mulled wine.
- Blood Orange & Grapefruit Medley: Use a mix of blood oranges and pink grapefruit for a stunning, jewel-toned garnish. The tartness of grapefruit is a lovely counterpoint to sweet holiday drinks.
- Vanilla-Infused Slices: Add a split vanilla bean to the baking sheet with the oranges. The gentle vanilla aroma will infuse the slices, making them perfect for garnishing a creamy eggnog or a warm vanilla latte.
- Herb-Infused Version: Place a few sprigs of fresh rosemary or thyme on the baking sheet. The herbal notes add an unexpected, sophisticated twist that works wonders with gin-based cocktails or hot toddies.
I once tried a batch with a sprinkle of flaky sea salt before baking, thinking it would be a savory-sweet treat. It was… interesting. Not my favorite for drinks, but it made a surprisingly good topping for a cheese board. The moral of the story? Don’t be afraid to experiment, but maybe do a small test batch first.
Serving & Storage Suggestions
These dried orange slices are incredibly versatile. Here’s how to use and store them.
Serving: Use the slices as a floating garnish in mulled wine, hot cider, spiced tea, or even plain sparkling water for a festive touch. They also make a beautiful, edible decoration for holiday cheese boards, cakes, or wrapped up in cellophane bags as a homemade gift. I love dropping one into a mug of hot black tea with a cinnamon stick—it’s like a hug in a cup.
Storage: Once completely cool, store the dried orange slices in an airtight container at room temperature. They will keep for up to 6 months. I keep mine in a glass jar on the counter, and they look so pretty, they double as kitchen decor. If you live in a very humid climate, you might want to add a silica gel packet to the container to absorb any excess moisture.
Reheating: You don’t need to reheat them, but if you want to refresh their aroma, pop them in a low oven (200°F) for 5-10 minutes before using. The flavor actually deepens over time, so a batch that’s a month old can be even more fragrant than a fresh one.
Nutritional Information & Benefits
While this is a garnish and not a meal, it’s still nice to know what you’re working with. A single dried orange slice has about 10-15 calories, mostly from natural sugars. Oranges are packed with vitamin C, and drying them concentrates the fiber and antioxidants. It’s a wholesome, guilt-free way to add flavor and beauty to your holiday drinks.
This recipe is naturally gluten-free, vegan, and Paleo-friendly. The only potential allergen is the fruit itself, which is rare. It’s a wonderful option for anyone looking to reduce processed sugar in their holiday celebrations without sacrificing the festive feel.
Conclusion
There’s something deeply satisfying about making something so beautiful from something so simple. These wholesome dried orange slices are more than just a garnish—they’re a little piece of handmade joy that makes any holiday drink feel special. Whether you’re sipping mulled wine by the fire or handing out warm cider to carolers, these slices add a touch of warmth that no store-bought decoration can match.
I’d love to hear how you use them! Drop a comment below and tell me your favorite holiday drink to garnish, or share a photo of your own batch. And if you try a fun variation, definitely let me know—I’m always looking for new ideas. Until then, happy drying, and here’s to a holiday season filled with simple, wholesome pleasures!
Frequently Asked Questions
Can I use a dehydrator instead of an oven?
Absolutely. If you have a dehydrator, set it to 135°F (57°C) and dry the slices for 4-6 hours, checking periodically. The result is very similar, and a dehydrator is actually more energy-efficient for this task.
Why did my orange slices turn brown?
This usually happens when the oven temperature is too high. The natural sugars in the oranges caramelize and burn, causing browning. Stick to the lowest possible oven temperature, and keep an eye on them.
Can I sweeten the orange slices before drying?
You can, but it’s not necessary. The natural sugars concentrate during drying, making them plenty sweet. If you want a candied version, you can dip them in a simple syrup before drying, but that changes the texture and adds sugar.
How do I know when they are fully dried?
The slices should feel dry to the touch, slightly leathery, and not sticky in the center. They should bend without breaking. If they feel moist or tacky, they need more time.
Can I dry other citrus fruits the same way?
Yes! Lemons, limes, grapefruits, and even kumquats can be dried using the exact same method. Just adjust the slicing thickness accordingly—thinner for smaller fruits, thicker for larger ones.
Pin This Recipe!
Wholesome Dried Orange Slice Garnish for Holiday Drinks

Learn how to make beautiful, fragrant dried orange slices at home with just oranges and an oven. This simple, budget-friendly garnish adds a wholesome touch to mulled wine, hot cider, and other holiday drinks.
- Prep Time: 15 minutes
- Cook Time: 3 hours
- Total Time: 3 hours 15 minutes
- Yield: 24 slices 1x
- Category: Garnish
- Cuisine: American
Ingredients
- 3–4 medium fresh oranges (preferably organic navel oranges)
- Optional: 2 cinnamon sticks and 2 star anise (for a spiced version)
Instructions
- Preheat your oven to its lowest possible temperature, around 170°F (75°C). If your oven doesn’t go that low, 200°F (95°C) is acceptable.
- Wash the oranges well under warm water to remove any wax or residue.
- Using a sharp knife or mandoline, slice the oranges into even rounds, about 1/4-inch (6mm) thick.
- Lay the orange slices in a single layer on a clean kitchen towel or paper towels. Place another towel on top and gently press to absorb as much surface moisture as possible.
- Line your baking sheets with parchment paper. Place the orange slices in a single layer, making sure they don’t touch each other. If using, scatter cinnamon sticks and star anise around the pan.
- Place the baking sheets in the preheated oven. Dry for 2.5 to 4 hours, starting to check at the 2-hour mark. The slices are done when they are dry to the touch, slightly leathery, and no longer sticky in the center.
- Remove the baking sheets from the oven and let the orange slices cool completely on the pan. They will firm up slightly as they cool.
- Once cool, check for doneness. If any slices are still moist in the center, return them to the oven for another 30 minutes.
Notes
The biggest mistake is turning the heat up to speed things up. High heat will cook the oranges, turning them brown and bitter. Low and slow is the only way to preserve the vibrant color. For even drying, rotate the baking sheets halfway through. The slices are ready when they feel dry to the touch and are no longer sticky. Store in an airtight container at room temperature for up to 6 months.
Nutrition
- Serving Size: 1 slice
- Calories: 15
- Sugar: 3
- Carbohydrates: 4
- Fiber: 1
Keywords: dried orange slices, holiday garnish, homemade garnish, citrus garnish, mulled wine garnish, hot cider garnish, edible decoration, natural garnish


