Best Brown Butter Pumpkin Pie with Gingersnap Crust
Introduction
The summer I turned thirty, my neighbor across the hall in our old apartment building knocked on my door holding a pie plate wrapped in foil. Her name was Rosa, and she had this quiet way of showing up when you needed something, even if you didn’t know you needed it yet. She watched me struggle with a store-bought pumpkin pie earlier that week, the crust so soggy it collapsed when I tried to slice it. Rosa didn’t say anything at first. Then she handed me her pie and said, “You try this one. No more sad pies.”
That pie changed everything for me, honestly. The filling had this deep, nutty richness I had never tasted before, and the crust was this spicy, crunchy thing made from crushed cookies. I asked her what her secret was, and she just shrugged and said, “You burn the butter a little. And you throw away the regular crust.” I mean, she didn’t actually say “throw away” but you get the idea. She showed me how to brown butter, standing in my tiny kitchen while the butter sizzled and turned golden, filling the whole place with this warm, toasty smell that made you feel like everything was going to be okay.
I’ve made this pie every Thanksgiving since then, and honestly, it’s become my signature dish. People ask for it at potlucks and dinner parties, and I always tell them the same thing Rosa told me. It is not about fancy techniques or expensive ingredients. It is about paying attention, letting the butter tell you when it is ready, and trusting that a crumbly cookie crust is way better than any pastry you could roll out. Maybe you have been there, standing in your kitchen wondering why your pie crust never turns out right. Let me tell you, this version solves that problem forever.
Why You Will Love This Recipe
This is not just another pumpkin pie recipe. It is the one that makes people close their eyes after the first bite, and I have tested it on enough dinner party guests to know that for sure. Here is why this recipe stands out from every other pumpkin pie you have tried.
- Quick to Assemble: You can have this pie ready for the oven in under 20 minutes. No chilling dough, no rolling pins, no wrestling with pastry that cracks and tears. The gingersnap crust comes together in one bowl with a few pulses in the food processor.
- Simple Ingredients: Everything you need is probably already in your pantry or fridge. Butter, sugar, eggs, pumpkin puree, and a box of gingersnap cookies. No weird specialty items that cost a fortune and only get used once.
- Perfect for Hosting: This pie was made for dinner parties, potlucks, and holiday gatherings. It travels well, slices cleanly, and looks gorgeous on a cake stand with a dusting of cinnamon on top. Your guests will think you spent hours on it.
- Crowd-Pleaser: I have served this to kids who swear they hate pumpkin pie and adults who claim they are “not dessert people.” Every single time, someone asks for the recipe. It is that good.
- Unbelievably Delicious: The brown butter adds this nutty, almost caramel-like depth that regular pumpkin pie just does not have. Combined with the spicy, crunchy gingersnap crust, every bite is a textural and flavor experience that feels both familiar and completely new.
What makes this recipe different is the brown butter technique. It is not complicated, but it transforms the flavor completely. The butter goes through this magical process where the milk solids toast and turn golden, releasing aromas of toasted nuts and caramel. That simple step takes the filling from good to absolutely unforgettable.
This is comfort food reimagined, honestly. It is faster than traditional pumpkin pie, but it has the same soul-soothing satisfaction. Perfect for impressing guests without stress, or turning a simple fall dinner into something memorable.
What Ingredients You Will Need
This recipe uses simple, wholesome ingredients to deliver bold flavor and satisfying texture without the fuss. Most of these are pantry staples, and the few that are not are easy to find at any grocery store.
For the Gingersnap Crust
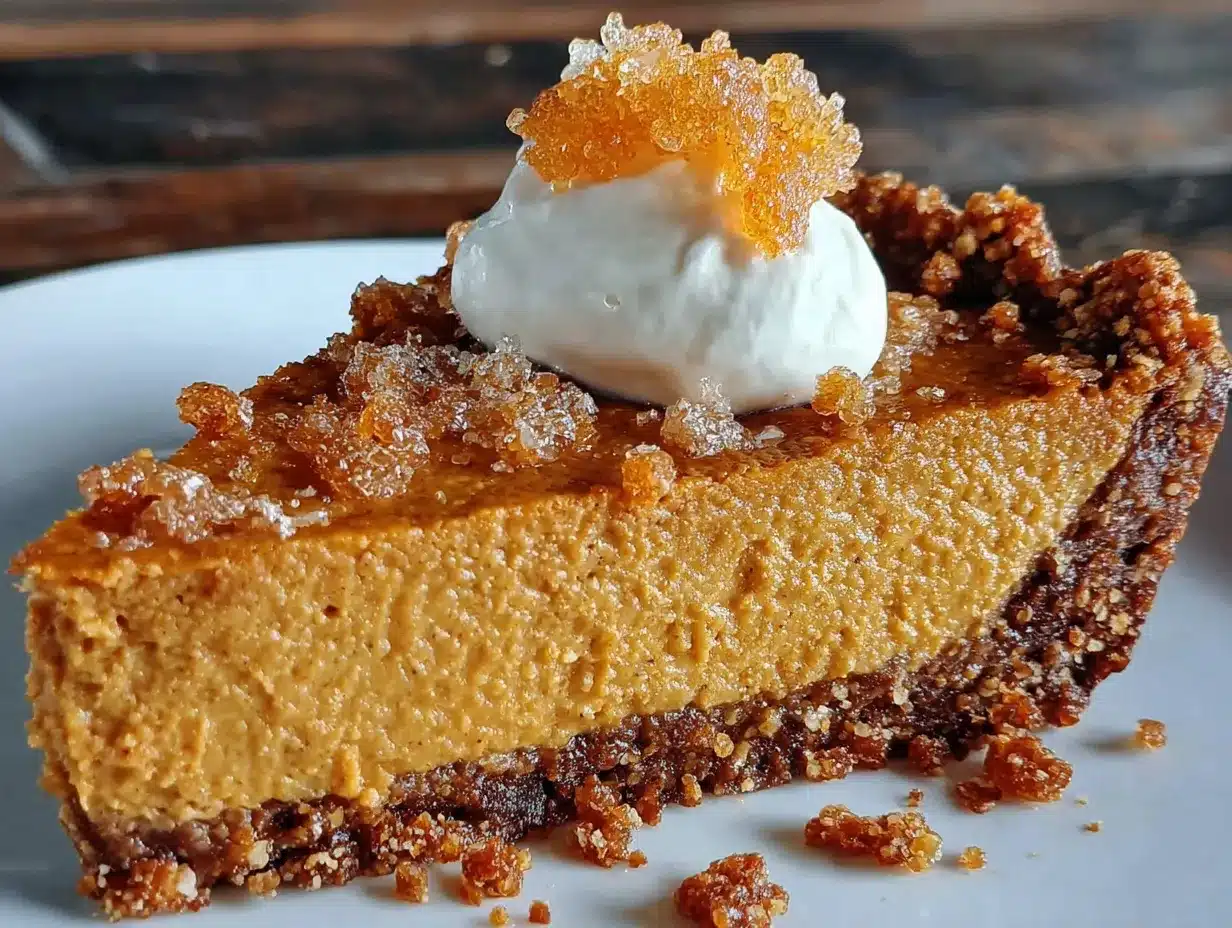
- 2 cups (about 200g) gingersnap cookies, crushed into fine crumbs (I recommend using store-bought gingersnaps, the crispy kind, not the soft ones)
- 6 tablespoons (85g) unsalted butter, melted
- 2 tablespoons (25g) granulated sugar
- 1/4 teaspoon salt (optional, but balances the sweetness nicely)
Look for gingersnap cookies that are firm and crunchy. The soft, cakey ones will not give you that crisp texture you want. I personally like the brand Anna’s Ginger Thins, but any crispy gingersnap works great.
For the Brown Butter Pumpkin Filling
- 1/2 cup (113g) unsalted butter (for browning)
- 1 can (15 ounces or 425g) pumpkin puree (not pumpkin pie filling)
- 3/4 cup (150g) packed light brown sugar
- 1/4 cup (50g) granulated sugar
- 2 large eggs, room temperature
- 1 large egg yolk, room temperature
- 1 teaspoon vanilla extract
- 1 teaspoon ground cinnamon
- 1/2 teaspoon ground ginger
- 1/4 teaspoon ground nutmeg
- 1/4 teaspoon ground cloves
- 1/2 teaspoon salt
- 1 cup (240ml) heavy cream
Make sure you use pure pumpkin puree and not pumpkin pie filling. The pie filling already has sugar and spices added, and it will throw off the whole balance. I always use Libby’s brand, but store brand works just as well.
The heavy cream adds richness and helps the filling set up beautifully. If you want a lighter version, you can substitute half-and-half, but the texture will be slightly less creamy. I have tried it both ways, and honestly, the full cream version is worth it for special occasions.
For the spices, you can use a pre-mixed pumpkin pie spice blend if that is what you have on hand. Use about 2 teaspoons of the blend instead of the individual spices. I prefer mixing my own because I like a little extra ginger, but the pre-made blends work perfectly fine.
Equipment Needed
You do not need a lot of fancy equipment for this recipe. Here is what you will need.
- 9-inch pie dish: A standard glass or ceramic pie dish works great. I prefer glass because you can see when the crust is golden brown on the bottom.
- Food processor or rolling pin: To crush the gingersnap cookies into fine crumbs. A food processor makes this step super quick, but a rolling pin and a zip-top bag work just as well if you do not mind a little arm work.
- Medium saucepan: For browning the butter. Use a light-colored pan so you can see the butter change color.
- Large mixing bowl: For whisking together the filling ingredients.
- Whisk: A good whisk is essential for getting the filling smooth and lump-free.
- Measuring cups and spoons: For accurate measurements.
- Spatula: For scraping every last bit of that brown butter into the bowl.
- Cooling rack: To let the pie cool evenly after baking.
If you do not have a food processor, do not worry. Put the gingersnaps in a sturdy zip-top bag, seal it, and go to town with a rolling pin. It takes a few extra minutes, but it works perfectly. I did it that way for years before I finally bought a food processor.
Preparation Method
Let me walk you through this step by step. I have made this pie more times than I can count, and these are the exact steps that work every single time.
- Preheat your oven to 350°F (175°C). Position a rack in the middle of the oven. This is important because you want even heat distribution.
- Make the gingersnap crust. In a food processor, pulse the gingersnap cookies until they become fine crumbs. You should have about 2 cups of crumbs. Transfer to a medium bowl, add the melted butter, sugar, and salt, and stir until the mixture looks like wet sand. It should hold together when you squeeze a handful.
- Press the crust into the pie dish. Pour the crumb mixture into your 9-inch pie dish. Use the bottom of a measuring cup or a flat-bottomed glass to press the crumbs firmly and evenly across the bottom and up the sides. Make sure the thickness is consistent, especially where the bottom meets the sides. This prevents thin spots that might crumble later.
- Bake the crust. Place the crust in the preheated oven and bake for 10 minutes. It should be fragrant and just starting to turn golden at the edges. Remove from the oven and set aside to cool slightly while you make the filling. Leave the oven on.
- Brown the butter. In a medium saucepan over medium heat, melt the 1/2 cup of butter. Stir frequently with a spatula or whisk. The butter will foam and crackle, then the foam will subside and you will see golden brown specks forming at the bottom of the pan. This takes about 5 to 7 minutes. Watch carefully because it goes from brown to burnt very quickly. When the butter smells nutty and toasty and the specks are amber colored, remove it from the heat immediately. Pour it into a heatproof bowl to stop the cooking process.
- Mix the wet ingredients. In a large bowl, whisk together the pumpkin puree, both sugars, eggs, egg yolk, and vanilla extract until smooth and well combined. Make sure there are no streaks of egg white floating around.
- Add the spices. Whisk in the cinnamon, ginger, nutmeg, cloves, and salt until evenly distributed. The mixture should be fragrant and deeply colored.
- Incorporate the brown butter. Slowly drizzle the warm brown butter into the pumpkin mixture while whisking constantly. You want to incorporate it gradually so it emulsifies properly. The butter should still be liquid, not solidified. If it has cooled and thickened, gently warm it again before adding.
- Add the heavy cream. Pour in the heavy cream and whisk until the filling is completely smooth and uniform. The color should be a beautiful warm orange-brown. Scrape the bottom of the bowl to make sure nothing is stuck there.
- Pour the filling into the crust. Place the pre-baked crust on a baking sheet (this makes it easier to transfer in and out of the oven and catches any potential spills). Slowly pour the filling into the crust, filling it right up to the rim. The filling will puff up slightly as it bakes, so do not overfill.
- Bake the pie. Carefully transfer the baking sheet with the pie to the oven. Bake at 350°F (175°C) for 50 to 60 minutes. The pie is done when the edges are set and slightly puffed, but the center still jiggles slightly when you gently shake the pan. It will continue to set as it cools.
- Cool completely. Remove the pie from the oven and place it on a cooling rack. Let it cool at room temperature for at least 2 hours. Then refrigerate for at least 4 hours, or overnight. This step is crucial for clean slices. Do not skip it, I know it is hard to wait.
A note on the center jiggle: if the whole pie wobbles like jelly, it needs more time. If only the very center has a slight, gentle quiver, it is perfect. Overbaking will cause cracks on the surface, so keep an eye on it during the last 10 minutes.
Cooking Tips and Techniques
After making this pie for years, I have learned a few things the hard way. Let me save you some trouble.
Watch the butter like a hawk. I cannot stress this enough. Brown butter goes from perfect to burnt in about 30 seconds. The first time I made this, I got distracted by my phone and ended up with black butter that smelled like burnt popcorn. Start over if that happens. It is not worth using burnt butter.
Use room temperature eggs. Cold eggs can seize up the brown butter and create a grainy texture. If you forgot to take them out of the fridge, place them in a bowl of warm water for 5 minutes before using.
Do not overmix the filling. Once you add the cream, whisk just until combined. Overmixing incorporates too much air, which can cause the filling to puff up and then collapse, leaving cracks on the surface.
Blind bake the crust properly. Pre-baking the gingersnap crust for 10 minutes ensures it stays crisp and does not get soggy from the wet filling. Do not skip this step, even if you are in a hurry. I tried skipping it once, and the crust turned into a sad, mushy mess.
Let it rest overnight. I know this is the hardest part, but the pie truly tastes better the next day. The flavors meld together, the texture sets perfectly, and the crust stays crisp. Make it a day ahead and thank me later.
Use a sharp knife for clean slices. Run your knife under hot water, wipe it dry, then slice. Clean the blade between each cut. This gives you those beautiful, Instagram-worthy slices.
Variations and Adaptations
This recipe is wonderfully adaptable. Here are some variations I have tried and loved.
Gluten-Free Version: Use gluten-free gingersnap cookies for the crust. Many brands make them now, or you can make your own with gluten-free flour. The filling is naturally gluten-free, so this is an easy swap.
Dairy-Free Version: Substitute the butter in both the crust and filling with a high-quality vegan butter. Use full-fat coconut cream instead of heavy cream. The texture will be slightly different, but still delicious. I tested this for a friend who is dairy-free, and it worked beautifully.
Extra Spicy Version: If you love heat, add 1/4 teaspoon of cayenne pepper or a pinch of black pepper to the filling. The warmth pairs beautifully with the sweetness and the gingersnap crust. I made this for a chili-themed dinner party once, and it was a huge hit.
Chocolate Twist: Add 1/4 cup of melted dark chocolate to the brown butter before mixing it into the filling. It adds a subtle richness that is absolutely divine. This is my secret weapon for when I want to impress someone extra special.
Mini Pies: Use a muffin tin and press the crust into each cup. Fill with the pumpkin mixture and bake for 20 to 25 minutes. Perfect for parties where everyone wants their own little pie.
Serving and Storage Suggestions
This pie is best served cold or at room temperature. I prefer it straight from the fridge because the texture is firmer and the slices hold their shape beautifully.
Presentation Ideas: Dust the top with a light sprinkle of cinnamon or nutmeg before serving. Add a dollop of lightly sweetened whipped cream or a scoop of vanilla ice cream on the side. For a fancy touch, drizzle some caramel sauce over the top and add a few candied pecans.
What to Serve Alongside: This pie pairs wonderfully with a cup of hot coffee or spiced apple cider. If you are hosting a dinner party, serve it after a hearty main course like roasted turkey or braised pork shoulder. The rich, spiced flavors complement savory dishes beautifully.
Storage Instructions: Cover the pie loosely with plastic wrap or aluminum foil and store in the refrigerator for up to 5 days. The crust will stay crisp for the first 2 to 3 days, then soften slightly. It is still delicious, just less crunchy.
Freezing Instructions: You can freeze the fully baked and cooled pie for up to 3 months. Wrap it tightly in plastic wrap, then a layer of foil. Thaw in the refrigerator overnight before serving. Do not freeze the pie before baking, the texture will not be the same.
Reheating Tips: If you prefer warm pie, place individual slices on a baking sheet and warm in a 300°F (150°C) oven for 10 minutes. Do not microwave it, the crust will get soggy and the filling will become runny.
The flavors actually deepen and improve after a day or two in the fridge. I honestly think this pie tastes better on day two than it does on day one. The spices settle in and the brown butter flavor becomes more pronounced.
Nutritional Information and Benefits
Here is the estimated nutritional breakdown for one slice of this pie, based on 8 servings.
| Nutrient | Amount per Slice |
|---|---|
| Calories | 420 |
| Total Fat | 28g |
| Saturated Fat | 16g |
| Cholesterol | 125mg |
| Sodium | 320mg |
| Total Carbohydrates | 40g |
| Dietary Fiber | 3g |
| Sugars | 26g |
| Protein | 5g |
| Vitamin A | 180% DV |
| Vitamin C | 4% DV |
| Calcium | 8% DV |
| Iron | 10% DV |
Pumpkin is packed with vitamin A, which is great for your eyes and immune system. It is also a good source of fiber, which helps with digestion. The brown butter adds healthy fats that help your body absorb the fat-soluble vitamins in the pumpkin.
This recipe contains dairy, eggs, and gluten (from the cookies). For allergen-friendly alternatives, check the variations section above.
Conclusion
This Best Brown Butter Pumpkin Pie with Gingersnap Crust is the dessert that keeps on giving. It is easy enough for a beginner baker but impressive enough to be the star of your Thanksgiving table or any fall gathering. The nutty brown butter, the spicy crunchy crust, the silky smooth filling, every bite is a little piece of heaven.
I love this recipe because it reminds me of Rosa and that summer when I learned that the best things in life often come from simple, unexpected moments. It is not about being a perfect baker or having fancy equipment. It is about paying attention, trusting your instincts, and sharing something delicious with the people you care about.
I would love to hear how this pie turns out for you. Did you try any variations? Did your guests ask for the recipe? Leave a comment below and let me know. And if you share a photo on social media, tag me so I can see your beautiful creation. Happy baking, friends!
Frequently Asked Questions
Can I use store-bought pumpkin pie filling instead of pure pumpkin puree?
No, I do not recommend that. Pumpkin pie filling already has sugar and spices added, which will throw off the balance of this recipe. Stick with pure pumpkin puree for the best results.
Why did my pie crust turn out soggy?
This usually happens if the crust was not pre-baked long enough, or if the filling was poured in while the crust was still hot. Make sure to bake the crust for the full 10 minutes and let it cool slightly before adding the filling.
Can I make this pie ahead of time?
Absolutely. In fact, I recommend it. The pie tastes even better the next day after the flavors have had time to meld. Bake it fully, cool it, and refrigerate overnight. Just add any toppings right before serving.
How do I know when the pie is done baking?
The edges should be set and slightly puffed, but the center should still jiggle slightly when you gently shake the pan. It will continue to set as it cools. If the whole pie wobbles like jelly, it needs more time.
Can I freeze this pie?
Yes, you can freeze the fully baked and cooled pie for up to 3 months. Wrap it tightly in plastic wrap and foil. Thaw in the refrigerator overnight before serving. The texture will be slightly softer than fresh, but still delicious.
Pin This Recipe!
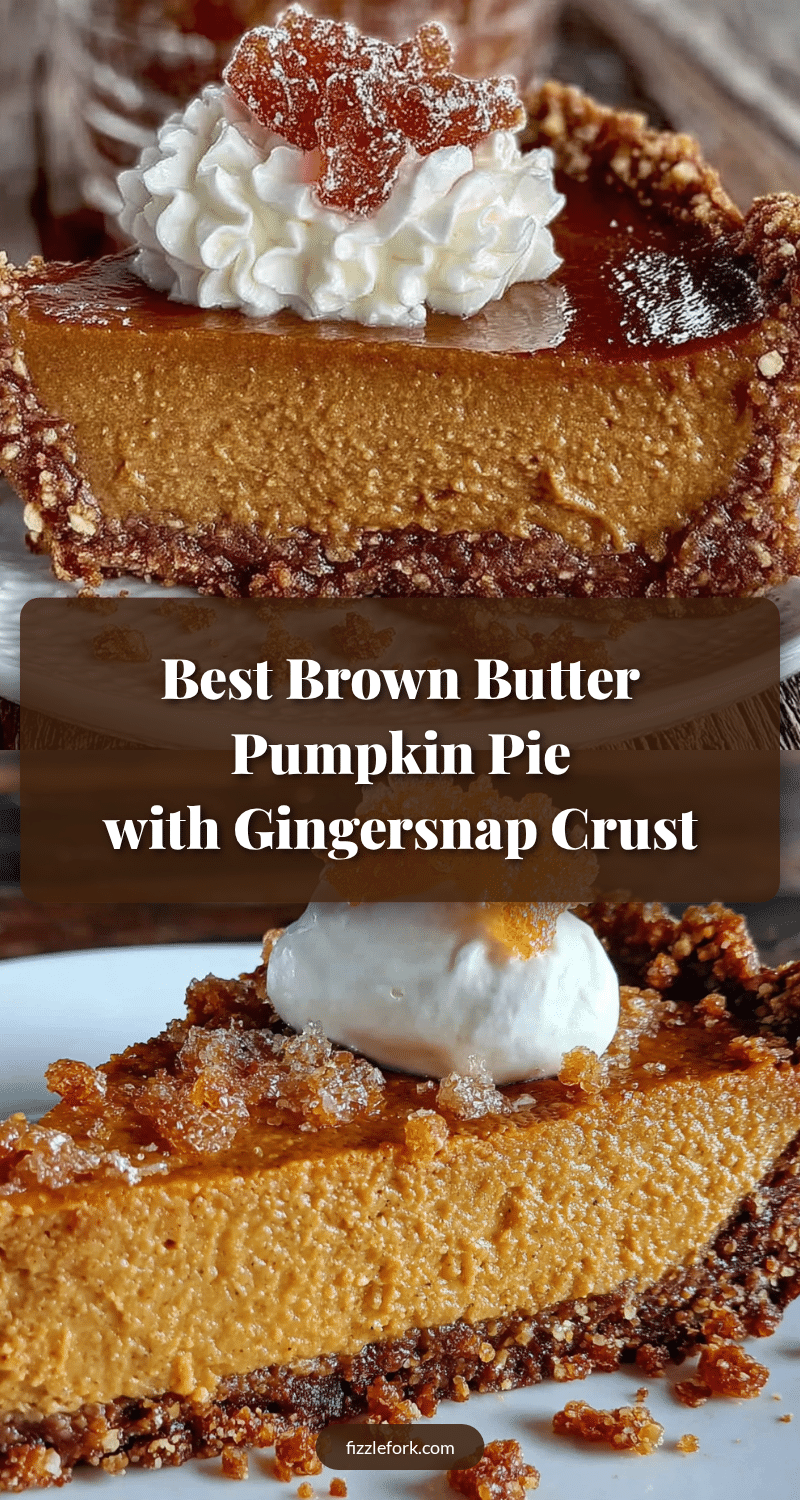
Best Brown Butter Pumpkin Pie with Gingersnap Crust
This pumpkin pie features a nutty brown butter filling and a crunchy gingersnap crust. It’s quick to assemble, uses simple ingredients, and is perfect for holiday gatherings.
- Prep Time: 20 minutes
- Cook Time: 60 minutes
- Total Time: 80 minutes (plus cooling and chilling time)
- Yield: 8 servings 1x
- Category: Dessert
- Cuisine: American
Ingredients
- 2 cups (about 200g) gingersnap cookies, crushed into fine crumbs
- 6 tablespoons (85g) unsalted butter, melted
- 2 tablespoons (25g) granulated sugar
- 1/4 teaspoon salt (optional)
- 1/2 cup (113g) unsalted butter (for browning)
- 1 can (15 ounces or 425g) pumpkin puree (not pumpkin pie filling)
- 3/4 cup (150g) packed light brown sugar
- 1/4 cup (50g) granulated sugar
- 2 large eggs, room temperature
- 1 large egg yolk, room temperature
- 1 teaspoon vanilla extract
- 1 teaspoon ground cinnamon
- 1/2 teaspoon ground ginger
- 1/4 teaspoon ground nutmeg
- 1/4 teaspoon ground cloves
- 1/2 teaspoon salt
- 1 cup (240ml) heavy cream
Instructions
- Preheat your oven to 350°F (175°C). Position a rack in the middle of the oven.
- Make the gingersnap crust: In a food processor, pulse the gingersnap cookies until they become fine crumbs. Transfer to a medium bowl, add the melted butter, sugar, and salt, and stir until the mixture looks like wet sand.
- Press the crust into the pie dish: Pour the crumb mixture into your 9-inch pie dish. Use the bottom of a measuring cup or a flat-bottomed glass to press the crumbs firmly and evenly across the bottom and up the sides.
- Bake the crust: Place the crust in the preheated oven and bake for 10 minutes. Remove from the oven and set aside to cool slightly while you make the filling. Leave the oven on.
- Brown the butter: In a medium saucepan over medium heat, melt the 1/2 cup of butter. Stir frequently. The butter will foam and crackle, then the foam will subside and you will see golden brown specks forming at the bottom of the pan. This takes about 5 to 7 minutes. When the butter smells nutty and toasty and the specks are amber colored, remove it from the heat immediately. Pour it into a heatproof bowl to stop the cooking process.
- Mix the wet ingredients: In a large bowl, whisk together the pumpkin puree, both sugars, eggs, egg yolk, and vanilla extract until smooth and well combined.
- Add the spices: Whisk in the cinnamon, ginger, nutmeg, cloves, and salt until evenly distributed.
- Incorporate the brown butter: Slowly drizzle the warm brown butter into the pumpkin mixture while whisking constantly.
- Add the heavy cream: Pour in the heavy cream and whisk until the filling is completely smooth and uniform.
- Pour the filling into the crust: Place the pre-baked crust on a baking sheet. Slowly pour the filling into the crust, filling it right up to the rim.
- Bake the pie: Carefully transfer the baking sheet with the pie to the oven. Bake at 350°F (175°C) for 50 to 60 minutes. The pie is done when the edges are set and slightly puffed, but the center still jiggles slightly when you gently shake the pan.
- Cool completely: Remove the pie from the oven and place it on a cooling rack. Let it cool at room temperature for at least 2 hours. Then refrigerate for at least 4 hours, or overnight.
Notes
Watch the butter carefully when browning; it can go from perfect to burnt quickly. Use room temperature eggs to prevent the brown butter from seizing. Do not overmix the filling to avoid cracks. Let the pie rest overnight for best flavor and texture. For clean slices, run a sharp knife under hot water and wipe dry between cuts.
Nutrition
- Serving Size: 1 slice
- Calories: 420
- Sugar: 26
- Sodium: 320
- Fat: 28
- Saturated Fat: 16
- Carbohydrates: 40
- Fiber: 3
- Protein: 5
Keywords: pumpkin pie, brown butter, gingersnap crust, Thanksgiving, fall dessert, holiday pie


