The neighborhood fall potluck was in six hours and I’d completely forgotten. Everyone else would be bringing elaborate pies from scratch, hand-rolled pastry crusts, the kind of thing that takes all weekend. I had a can of pumpkin puree, a block of cream cheese, and a package of Nilla Wafers staring at me from the pantry. Not exactly the stuff of baking legend.
I stood there, staring at those three ingredients like they might magically transform into something impressive. My phone buzzed with a text from my neighbor Sarah: “Bringing my famous bourbon pecan pie, what are you bringing?” Panic doesn’t even begin to cover it. I mean, I’d been meaning to make something all week, but between work deadlines and my kid’s soccer schedule, it just slipped.
Then I remembered this little recipe I’d tinkered with last fall. Mini pumpkin cheesecake bites. They’re tiny, they’re adorable, and honestly, they look way more complicated than they actually are. I threw them together in about twenty minutes flat, popped them in the oven, and crossed my fingers.
You know that moment when you show up to a potluck with something you threw together last minute, and everyone pretends to be polite? That’s not what happened here. Sarah’s bourbon pecan pie sat half-eaten while people kept circling back to the little cheesecake bites. Someone actually asked for the recipe before I’d even put my coat down. Maybe you’ve been there—the accidental victory when you least expect it. These mini pumpkin cheesecake bites became my fall go-to, and not just because they saved me that one time. They’re genuinely, unbelievably good.
Why You’ll Love This Recipe
Let me tell you why these little bites have earned a permanent spot in my fall baking rotation. I’ve tested this recipe at least a dozen times—through two different ovens, three brands of cream cheese, and one very memorable incident where I forgot the sugar entirely. Trust me, this version is the one.
- Quick & Easy: From start to finish, you’re looking at about 30 minutes of active time. The oven does most of the work. Perfect for those weeknights when you need a dessert that looks like you tried way harder than you actually did.
- Simple Ingredients: You probably have most of these in your kitchen right now. No trips to specialty stores, no hunting down obscure spices. Just basic baking staples plus a can of pumpkin.
- Perfect for Fall Gatherings: These little guys are ideal for potlucks, Thanksgiving dessert tables, or just a Tuesday night when you need something sweet. They’re portable, they’re portion-controlled, and they disappear fast.
- Crowd-Pleaser: I’ve served these to kids, adults, and that one friend who “doesn’t really like pumpkin.” They all went back for seconds. The creamy texture wins people over every time.
- Unbelievably Delicious: The combination of the buttery cookie crust, the silky pumpkin cheesecake filling, and that subtle warm spice blend? It’s next-level comfort food in two bites.
What makes this recipe different from all the other pumpkin cheesecake recipes out there? It’s the texture. Using room temperature ingredients and the right mixing technique gives you a filling that’s incredibly smooth—no lumps, no cracks, just pure creamy perfection. Plus, the Nilla Wafer crust is a game-changer. No pressing graham cracker crumbs into pans, no messy cleanup. Just a cookie as the base, and you’re done.
This recipe isn’t just good—it’s the kind that makes you close your eyes after the first bite. It’s comfort food reimagined: faster, simpler, but with the same soul-soothing satisfaction. Perfect for impressing guests without stress, or turning a simple fall evening into something memorable.
What Ingredients You Will Need
This recipe uses simple, wholesome ingredients to deliver bold pumpkin flavor and a velvety smooth texture without any fuss. Most of these are pantry staples, especially if you do any fall baking at all.
For the Crust
- Nilla Wafers – 24 cookies (one standard box usually has enough; look for the mini ones if you want even smaller bites, but regular size works perfectly)
- Butter – 2 tablespoons, melted (unsalted is best so you can control the salt level; if you only have salted, skip the pinch of salt below)
- Brown sugar – 1 tablespoon, packed (adds a subtle caramel note that pairs beautifully with pumpkin)
For the Pumpkin Cheesecake Filling
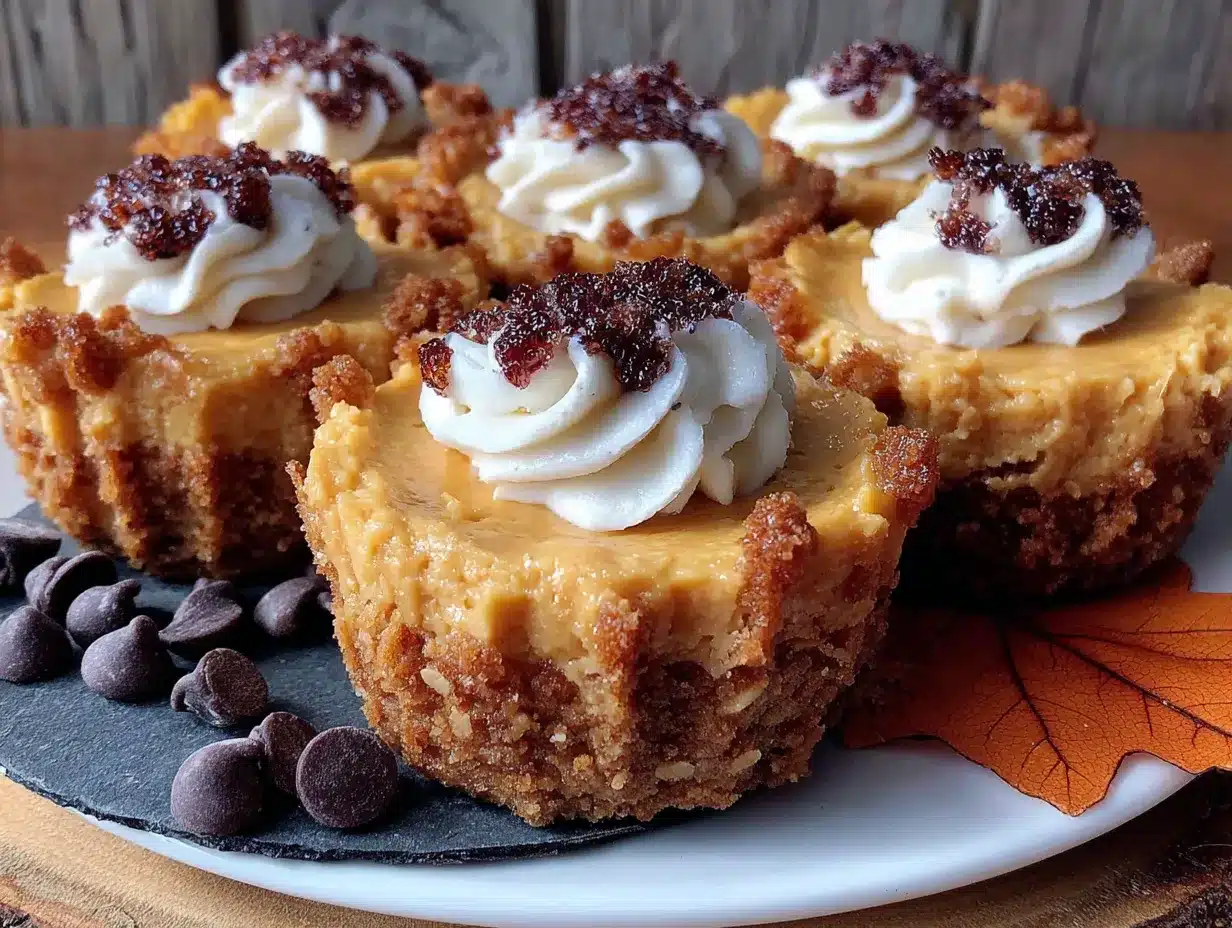
- Cream cheese – 8 ounces, softened to room temperature (I recommend Philadelphia for the creamiest texture; the block kind, not the spreadable tub)
- Granulated sugar – 1/3 cup (just enough sweetness without overpowering the pumpkin)
- Pumpkin puree – 1/2 cup (not pumpkin pie filling—make sure you grab the plain puree. Libby’s is my go-to brand)
- Large egg – 1, room temperature (this helps the filling set up properly; if you forget to take it out ahead, place it in a bowl of warm water for 5 minutes)
- Vanilla extract – 1 teaspoon (pure vanilla extract makes a difference here; the imitation stuff has a chemical aftertaste)
- Pumpkin pie spice – 1 teaspoon (store-bought is fine, but I’ll share my homemade blend in the tips section)
- Cinnamon – 1/2 teaspoon (adds that extra warmth; I use Ceylon cinnamon for a milder, sweeter flavor)
- Salt – 1/8 teaspoon (just a pinch to balance the sweetness and brighten the pumpkin flavor)
For the Topping (Optional but Recommended)
- Whipped cream – for serving (homemade is lovely, but store-bought works in a pinch)
- Caramel sauce – for drizzling (optional, but honestly, when is caramel ever a bad idea?)
- Additional pumpkin pie spice – for dusting (makes them look fancy with zero effort)
Substitution Notes: For a gluten-free version, use gluten-free vanilla wafers or shortbread cookies. The filling is naturally gluten-free. If you don’t have pumpkin pie spice, mix 1/2 teaspoon cinnamon, 1/4 teaspoon ginger, 1/8 teaspoon nutmeg, and a pinch of cloves. For a dairy-free option, use vegan cream cheese and a plant-based butter substitute—just note the texture will be slightly less firm.
Equipment Needed
You don’t need a fancy kitchen to make these little beauties. Here’s what you’ll need:
- Mini muffin tin – 24-cup size (this is non-negotiable; regular muffin tins are too big for these bites)
- Mixing bowls – one medium, one small (I use glass bowls because they’re easy to clean and don’t hold onto smells)
- Hand mixer or stand mixer – a hand mixer works perfectly and takes up less storage space
- Measuring cups and spoons – for accuracy (I’ve learned the hard way that eyeballing baking ingredients rarely ends well)
- Spatula – silicone is best for scraping every last bit of filling
- Small cookie scoop or teaspoon – for evenly portioning the filling (a cookie scoop makes this so much faster)
- Piping bag or zip-top bag – for neat filling (optional, but it makes the process cleaner)
- Cooling rack – for letting the bites cool properly (a wire rack prevents soggy bottoms)
If you don’t have a mini muffin tin, you can use a regular muffin tin with paper liners and adjust the baking time—but honestly, the mini version is what makes these so cute and perfect for parties. I picked up my tin at a thrift store for two dollars, so keep an eye out if you don’t have one. Budget-friendly options exist everywhere.
Preparation Method
Alright, let’s get to the fun part. I’ve broken this down into clear steps, and I’ll share the little tricks I’ve learned along the way.
- Preheat your oven to 350°F (175°C). Line your mini muffin tin with paper liners if you want easy removal. I’ve made these both with and without liners, and honestly, the liners make life so much easier. If you skip them, make sure to grease the tin well with butter or non-stick spray.
- Make the crust. Place one Nilla Wafer flat-side down in each mini muffin cup. That’s it. No crushing, no mixing with butter, no fuss. I told you this was easy. If some of your wafers are broken, just piece them together—nobody will know once the filling is on top.
- Soften the cream cheese. This is probably the most important step. Your cream cheese needs to be at room temperature—soft enough that when you press it with your finger, it leaves an indent. Cold cream cheese will give you lumpy filling, and nobody wants that. Take it out of the fridge at least 30 minutes before you start, or unwrap it and microwave it in 10-second bursts until soft but not warm.
- Beat the cream cheese and sugar together. In your medium mixing bowl, beat the softened cream cheese and granulated sugar until smooth and creamy, about 2 minutes. Scrape down the sides and bottom of the bowl with your spatula halfway through. You want no lumps at all here—this is the foundation of that silky texture.
- Add the pumpkin and egg. Add the pumpkin puree, room temperature egg, vanilla extract, pumpkin pie spice, cinnamon, and salt. Beat on medium speed until everything is well combined and smooth, about 1 minute. The mixture should be a beautiful orange color and smell like fall in a bowl. Scrape the bowl again to make sure everything is incorporated.
- Fill the muffin cups. Spoon or pipe the filling over each Nilla Wafer, filling each cup almost to the top—about 1 tablespoon per cup. A small cookie scoop makes this step go quickly, but a teaspoon works fine. If you’re using a piping bag (or a zip-top bag with the corner snipped off), you’ll get cleaner results and less mess.
- Bake. Bake for 12-15 minutes, or until the edges are set and the centers are just slightly jiggly. This is the sweet spot—overbaked cheesecake gets cracks and a dry texture. At 12 minutes, gently shake the pan. If the centers wobble like Jell-O, they’re done. If they’re liquidy, give them another 2 minutes.
- Cool completely. Let the cheesecake bites cool in the pan on a wire rack for 15 minutes. The residual heat will finish setting the centers. After 15 minutes, carefully remove them from the tin (use a butter knife to gently pry them out if needed) and let them cool completely on the wire rack, about 30 minutes more.
- Chill. This is the hard part—waiting. Refrigerate the cheesecake bites for at least 2 hours, preferably 4 hours or overnight. The texture improves dramatically as they chill. I know it’s tempting to eat one right away, but trust me on this. Cold cheesecake is where the magic happens.
- Add toppings and serve. Just before serving, add a dollop of whipped cream, a drizzle of caramel sauce, and a light dusting of pumpkin pie spice. Or keep them plain—they’re delicious either way.
Cooking Tips & Techniques
After making these mini pumpkin cheesecake bites more times than I care to count, I’ve picked up a few tricks that make the process smoother and the results better.
Room temperature ingredients are non-negotiable. I learned this the hard way after making a batch with cold cream cheese and a cold egg. The filling was lumpy no matter how long I beat it, and the texture was off. Set everything out 30 minutes before you start. Your cream cheese should be soft enough to spread easily, and your egg should feel room temperature to the touch.
Don’t overmix the filling. Once you add the egg, beat just until combined. Overmixing incorporates too much air, which can cause the cheesecake to puff up in the oven and then crack as it cools. You want a dense, creamy texture, not a fluffy one.
Watch the baking time like a hawk. Every oven runs differently. My old oven ran hot and would overbake these in 11 minutes. My current oven takes a full 15 minutes. Start checking at 10 minutes, and pull them out when the edges are set but the centers still have a slight jiggle. They’ll continue to set as they cool.
Use a water bath if you’re feeling fancy. For the silkiest texture with zero cracks, place your mini muffin tin inside a larger baking pan and pour hot water into the larger pan until it reaches about halfway up the sides of the muffin tin. This creates a humid environment that prevents the cheesecake from drying out. I don’t always do this because it’s extra work, but for special occasions, it makes a noticeable difference.
Make your own pumpkin pie spice. Store-bought blends are fine, but homemade lets you customize the flavor. Mix 2 tablespoons cinnamon, 2 teaspoons ginger, 1 1/2 teaspoons nutmeg, 1 teaspoon allspice, and 1 teaspoon cloves. Store it in a small jar, and you’ll have enough for the whole fall season. I keep mine in a little mason jar on my spice rack.
Plan your timing. These are actually better made a day ahead. The flavors meld together overnight, and the texture becomes even creamier. So if you’re bringing them to a potluck or Thanksgiving dinner, make them the day before. One less thing to stress about on the big day.
Variations & Adaptations
One of the best things about this recipe is how easy it is to customize. Here are some variations I’ve tried and loved:
Gluten-Free Version: Swap the Nilla Wafers for gluten-free vanilla wafers or shortbread cookies. The filling is naturally gluten-free, so that’s the only change you need. I’ve used the Schär brand vanilla wafers with great results—they’re a little smaller, so you might need to adjust the filling amount slightly.
Vegan Version: Use vegan cream cheese (Tofutti or Kite Hill work well) and a flax egg (1 tablespoon ground flaxseed mixed with 3 tablespoons water, let sit for 5 minutes). The texture will be slightly less firm, but the flavor is still fantastic. I made these for a friend with dairy allergies, and she couldn’t tell the difference.
Chocolate Pumpkin Version: Add 2 tablespoons of cocoa powder to the filling mixture and reduce the pumpkin pie spice to 1/2 teaspoon. The chocolate and pumpkin combination is surprisingly good—like a pumpkin brownie and cheesecake had a baby. My kids request this version constantly.
Gingersnap Crust: Instead of Nilla Wafers, use mini gingersnap cookies. The spicy ginger flavor pairs beautifully with the pumpkin. This is my personal favorite variation for fall. The gingersnaps add a little extra crunch and warmth that makes these taste even more seasonal.
Maple Pecan Variation: Add 2 tablespoons of maple syrup to the filling (reduce the sugar by 1 tablespoon to balance the sweetness) and top each bite with a small pecan half before baking. The maple flavor complements the pumpkin perfectly, and the pecan adds a nice crunch. This one always gets rave reviews at Thanksgiving.
Low-Sugar Option: Use a sugar substitute like monk fruit sweetener or stevia in place of the granulated sugar. The texture might be slightly different, but the flavor will still be delicious. I’ve used Lakanto monk fruit blend with good results—just note that it’s a bit less sweet than regular sugar, so you might want to add an extra tablespoon.
Serving & Storage Suggestions
These mini pumpkin cheesecake bites are versatile little things. Here’s how to serve and store them for the best results:
Serving Temperature: Serve them cold, straight from the refrigerator. The texture is at its best when chilled—firm, creamy, and perfectly sliceable. If you’ve added whipped cream, add it just before serving so it doesn’t deflate or become watery.
Presentation Ideas: Arrange them on a platter or cake stand for a beautiful presentation. Dust with a little extra pumpkin pie spice or cinnamon for color contrast. If you’re feeling fancy, drizzle caramel sauce over the top in a zigzag pattern. For holiday parties, I like to arrange them on a white platter with fresh cranberries and rosemary sprigs around the edges—it looks gorgeous with minimal effort.
What to Serve With Them: These little bites are perfect on their own, but they pair beautifully with coffee, hot cider, or a warm chai latte. For a dessert board, arrange them alongside fresh fruit, nuts, and dark chocolate. They’re also lovely as part of a Thanksgiving dessert spread with pumpkin pie and apple crisp.
Storage Instructions: Store the cheesecake bites in an airtight container in the refrigerator for up to 5 days. Place them in a single layer, or separate layers with wax paper to prevent sticking. The flavor actually improves after a day or two as the spices meld together.
Freezing Instructions: These freeze beautifully! Place the cooled, un-topped cheesecake bites on a baking sheet and freeze for 1 hour until solid. Transfer to a freezer-safe container or zip-top bag, separating layers with wax paper. They’ll keep for up to 3 months. To thaw, transfer to the refrigerator overnight. Add toppings after thawing, just before serving.
Reheating Note: Don’t reheat these. They’re meant to be served cold. If you’ve stored them properly, just take them out of the fridge and serve. The texture changes if they get warm, becoming softer and less stable.
Nutritional Information & Benefits
While these are definitely a treat, they’re not as indulgent as you might think. Here’s the approximate nutritional breakdown for one mini cheesecake bite (without toppings):
- Calories: 95
- Fat: 5g
- Carbohydrates: 11g
- Protein: 2g
- Sugar: 8g
- Sodium: 85mg
These values are estimates and will vary based on the specific brands and ingredients you use.
Health Benefits of Key Ingredients: Pumpkin puree is packed with vitamin A (important for eye health and immune function), fiber, and antioxidants. It’s also low in calories and adds moisture to baked goods without extra fat. Cream cheese provides calcium and protein, though it’s also high in saturated fat—everything in moderation, right? The cinnamon in the spice blend has anti-inflammatory properties and may help regulate blood sugar.
Dietary Considerations: This recipe can be easily adapted for gluten-free, vegetarian, and low-sugar diets (see the variations section). It contains dairy and eggs, so it’s not suitable for vegan or dairy-free diets without modifications. The bites are relatively low in calories compared to a full slice of cheesecake, making them a good option when you want something sweet without going overboard.
I’m not a nutritionist, and I firmly believe that food should be enjoyed without guilt. But I do appreciate knowing what’s in my food, and I think these little bites strike a nice balance between indulgence and reasonable portions. You can enjoy two or three without feeling like you’ve derailed your whole day.
Conclusion
These mini pumpkin cheesecake bites have become my fall baking signature, and I think they deserve a spot in your rotation too. They’re the kind of recipe that looks impressive but is secretly simple—the perfect combination for anyone who wants to show up to a gathering with something special without spending all day in the kitchen.
What I love most about this recipe is how forgiving it is. I’ve made it with different cream cheese brands, with slightly more or less pumpkin, with various spice blends. It always works. It always tastes delicious. And it always gets compliments. There’s something deeply satisfying about a recipe that makes you look like a hero with minimal effort.
I encourage you to make these your own. Try the gingersnap crust version, or add a swirl of caramel. Experiment with the spice blend until it tastes perfect to you. That’s the beauty of baking—once you understand the basic formula, you can play around and find what makes you happy.
If you make these mini pumpkin cheesecake bites, I’d love to hear about it. Drop a comment below and let me know how they turned out, what variations you tried, or if you have any questions. And if you’re looking for more fall baking inspiration, check out my easy pumpkin bread recipe or my apple cider donut cake—both are weeknight-friendly and absolutely delicious.
Happy baking, friends. Fall is short, so let’s make the most of it with good food and good company.
Frequently Asked Questions
Can I use pumpkin pie filling instead of pumpkin puree?
No, I wouldn’t recommend it. Pumpkin pie filling already has sugar and spices added, which will throw off the sweetness and texture of the cheesecake. Stick with 100% pure pumpkin puree for the best results. If you accidentally grab the wrong can, just add it without the extra sugar and spices, and adjust to taste.
Why did my cheesecake bites crack on top?
Cracks usually happen from overbaking or overmixing. Make sure you pull the bites out when the centers are still slightly jiggly—they’ll continue to set as they cool. Also, avoid overmixing the filling once you add the egg, as too much air can cause cracking. If cracks do appear, don’t worry—a dollop of whipped cream covers them perfectly.
Can I make these without a mini muffin tin?
You can, but the results won’t be quite the same. Use a regular muffin tin with paper liners, fill them about 2/3 full, and bake for 18-22 minutes. You’ll get larger cheesecake bites that need a longer chill time. Alternatively, you can make this as a full-size cheesecake in a 9-inch springform pan—just bake for 35-40 minutes at 350°F.
How far in advance can I make these?
You can make them up to 5 days ahead and store them in the refrigerator. They actually taste better after a day or two because the flavors have time to meld together. You can also freeze them for up to 3 months. Just add the toppings right before serving for the best presentation.
Can I double this recipe?
Absolutely! This recipe doubles beautifully. Just make sure you have two mini muffin tins, or bake them in batches. The filling can be made in the same bowl—just increase the mixing time slightly to ensure everything is well combined. If you’re baking in batches, keep the unused filling at room temperature so it stays easy to work with.
Pin This Recipe!
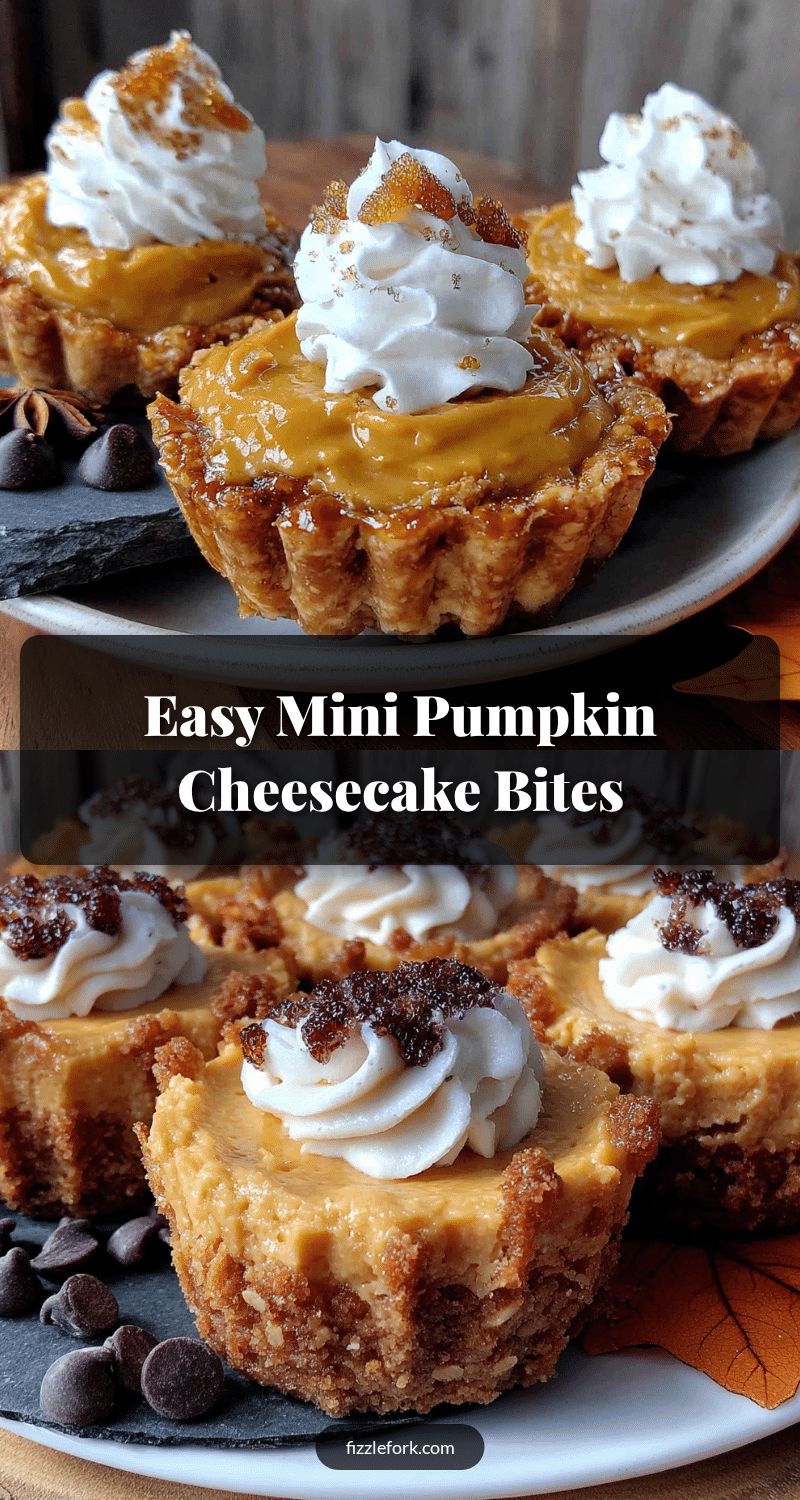
Best Easy Mini Pumpkin Cheesecake Bites Recipe
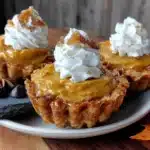
These mini pumpkin cheesecake bites are quick, easy, and perfect for fall gatherings. With a buttery Nilla Wafer crust and silky pumpkin cheesecake filling, they’re a crowd-pleasing dessert that looks impressive but is secretly simple.
- Prep Time: 20 minutes
- Cook Time: 15 minutes
- Total Time: 35 minutes (plus 2 hours chilling)
- Yield: 24 servings 1x
- Category: Dessert
- Cuisine: American
Ingredients
- 24 Nilla Wafers
- 2 tablespoons unsalted butter, melted
- 1 tablespoon packed brown sugar
- 8 ounces cream cheese, softened to room temperature
- 1/3 cup granulated sugar
- 1/2 cup pumpkin puree (not pumpkin pie filling)
- 1 large egg, room temperature
- 1 teaspoon vanilla extract
- 1 teaspoon pumpkin pie spice
- 1/2 teaspoon cinnamon
- 1/8 teaspoon salt
- Whipped cream, for serving (optional)
- Caramel sauce, for drizzling (optional)
- Additional pumpkin pie spice, for dusting (optional)
Instructions
- Preheat your oven to 350°F (175°C). Line a 24-cup mini muffin tin with paper liners or grease well.
- Place one Nilla Wafer flat-side down in each mini muffin cup.
- In a medium mixing bowl, beat the softened cream cheese and granulated sugar together until smooth and creamy, about 2 minutes. Scrape down the sides and bottom of the bowl.
- Add the pumpkin puree, room temperature egg, vanilla extract, pumpkin pie spice, cinnamon, and salt. Beat on medium speed until well combined and smooth, about 1 minute. Scrape the bowl again.
- Spoon or pipe the filling over each Nilla Wafer, filling each cup almost to the top—about 1 tablespoon per cup.
- Bake for 12-15 minutes, or until the edges are set and the centers are just slightly jiggly.
- Let the cheesecake bites cool in the pan on a wire rack for 15 minutes. Then carefully remove them from the tin and let them cool completely on the wire rack, about 30 minutes more.
- Refrigerate the cheesecake bites for at least 2 hours, preferably 4 hours or overnight.
- Just before serving, add a dollop of whipped cream, a drizzle of caramel sauce, and a light dusting of pumpkin pie spice, if desired.
Notes
Room temperature ingredients are key for a smooth filling. Don’t overmix once the egg is added to prevent cracks. For a water bath, place the mini muffin tin inside a larger pan and add hot water halfway up the sides. These are better made a day ahead as flavors meld overnight. For gluten-free, use gluten-free vanilla wafers. For vegan, use vegan cream cheese and a flax egg.
Nutrition
- Serving Size: 1 mini cheesecake bi
- Calories: 95
- Sugar: 8
- Sodium: 85
- Fat: 5
- Saturated Fat: 3
- Carbohydrates: 11
- Protein: 2
Keywords: mini pumpkin cheesecake bites, pumpkin cheesecake, mini cheesecake, fall dessert, easy pumpkin recipe, potluck dessert, Thanksgiving dessert