“Wait—you’re going to throw those away?” My neighbor Maria leaned over my kitchen counter, pointing at the pile of pumpkin guts I was scraping into a bowl. I had just finished carving a lopsided jack-o’-lantern that looked more like a sad potato than a Halloween decoration, and I was about to toss the whole mess into the compost bin.
“Yeah, I mean… what else would I do with them?” I asked, holding up a slimy handful of seeds.
Maria just shook her head and laughed. “Oh honey, you have no idea what you’re missing.”
She pulled up a stool, grabbed a colander, and spent the next ten minutes showing me how to rinse the seeds clean. Then she opened my spice cabinet, started pulling things out, and told me about the sweet and spicy roasted pumpkin seeds her grandmother used to make every autumn back in New Mexico. She described them as “the kind of snack that makes you forget you’re eating something that came out of a pumpkin.” And honestly? She wasn’t wrong.
That night, I made my first batch. They disappeared in about fifteen minutes. And I haven’t thrown away a single pumpkin seed since.
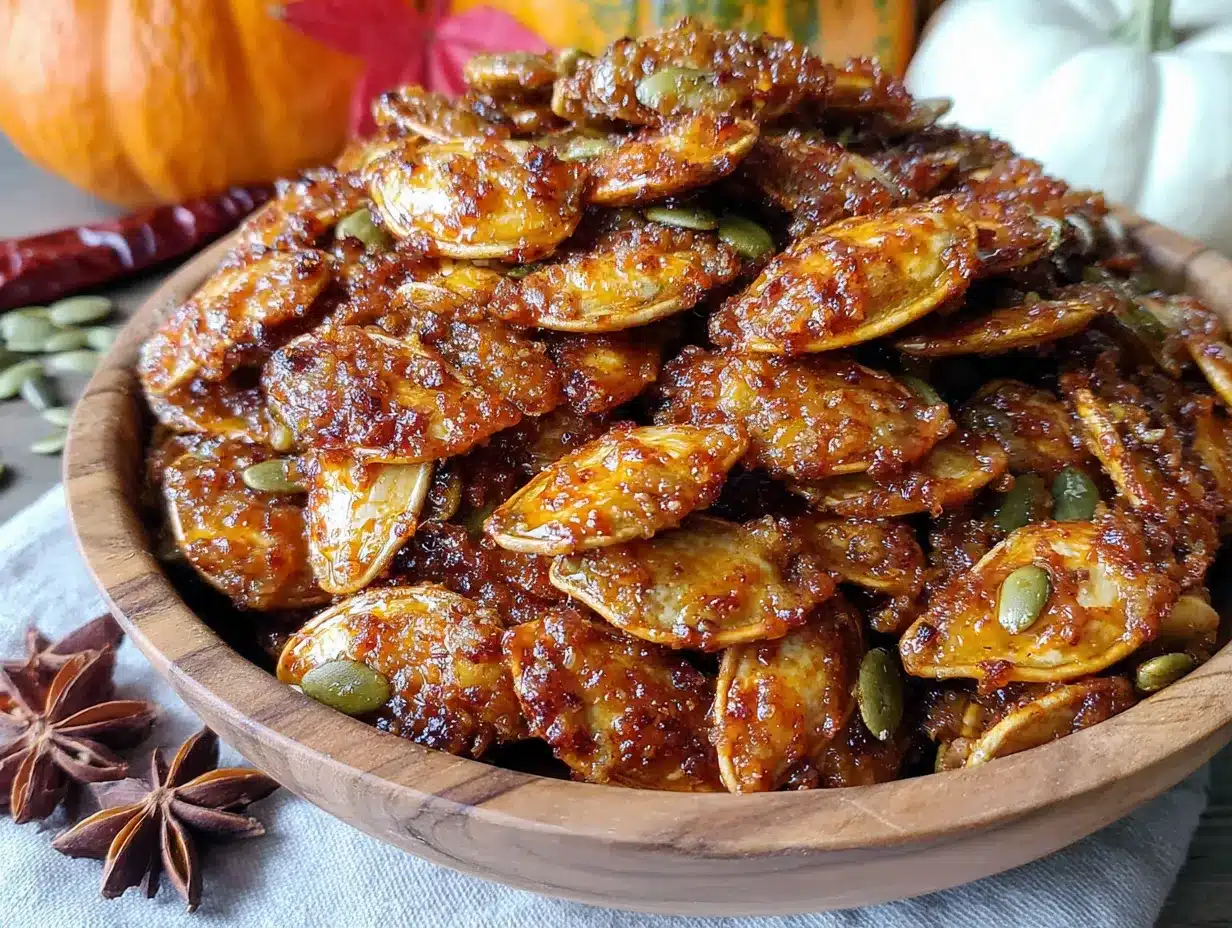
This sweet and spicy roasted pumpkin seeds recipe is the result of years of tweaking that initial lesson. It’s got that perfect balance—warm brown sugar and cinnamon against a kick of cayenne and smoked paprika. They’re crunchy, they’re addictive, and they’re the kind of snack you’ll find yourself making even when there’s not a pumpkin in sight. Let me show you how to make them.
Why You’ll Love This Recipe
I’ve tested this recipe more times than I care to admit. Burnt batches, bland batches, batches that were so spicy they made my eyes water—I’ve made every mistake so you don’t have to. And after all that trial and error, here’s what I know for sure: this version is the one.
- Quick & Easy : From pumpkin to snack plate in under 30 minutes. Perfect for those “I need something salty-sweet right now” moments.
- Simple Ingredients : You probably have everything in your pantry already. No trips to specialty stores, no weird ingredients you’ll never use again.
- Perfect for Fall Gatherings : Halloween parties, Thanksgiving appetizers, football game snacks—these seeds fit everywhere. They’re great alongside our game day football charcuterie board for a crunchy, salty-sweet addition.
- Crowd-Pleaser : I’ve served these to kids, adults, picky eaters, and spice skeptics. They always disappear first.
- Unbelievably Delicious : That crackly caramelized coating with the subtle heat underneath? It’s next-level snack territory.
What makes this recipe different is the technique. Most recipes just toss seeds in oil and spices and hope for the best. But I’ve learned that parboiling the seeds first—yes, boiling them before roasting—makes them extra crunchy all the way through. No chewy centers, no burnt edges. Just perfect, even crunch in every bite.
And honestly? This is the kind of snack that makes you close your eyes after the first bite. It’s comfort food in snack form—familiar but surprising, simple but totally satisfying.
What Ingredients You Will Need
This recipe uses simple, wholesome ingredients that come together to create something genuinely special. Most of these are pantry staples, which makes this recipe perfect for spontaneous snacking.
For the Seeds
- 1 ½ cups raw pumpkin seeds (freshly scooped from a pumpkin or store-bought raw pepitas—both work great)
- 2 tablespoons unsalted butter (melted—I prefer Kerrygold for the richness, but any good butter works)
- 1 tablespoon olive oil (adds crispness and helps the seasoning stick)
For the Sweet and Spicy Coating
- 3 tablespoons light brown sugar (packed—dark brown sugar works too, but light gives a more balanced sweetness)
- 1 teaspoon ground cinnamon (I use McCormick—it’s reliable and fragrant)
- ½ teaspoon smoked paprika (this is the secret ingredient—adds warmth without overwhelming heat)
- ¼ teaspoon cayenne pepper (adjust based on your spice tolerance—¼ teaspoon gives a gentle kick, not a burn)
- ½ teaspoon fine sea salt (don’t skip this—salt balances the sweetness and makes everything pop)
- ¼ teaspoon garlic powder (optional, but I love the savory undertone it adds)
For the salting step before roasting, you’ll also need 2 tablespoons of salt for the boiling water. Most of it gets discarded, so don’t worry about the seeds being too salty.
Ingredient Selection Tips : If you’re scooping seeds from a fresh pumpkin, look for a sugar pumpkin or pie pumpkin—they tend to have more seeds and they’re meatier. But honestly, any carving pumpkin works fine. Just make sure to rinse the seeds really well to remove all the stringy pumpkin flesh. If you’re using store-bought raw pepitas, look for ones that are greenish in color—that means they’re fresh. Pale or yellow seeds are older and won’t be as crunchy.
Substitution Guidance : You can swap the butter for coconut oil if you’re dairy-free. Use maple sugar instead of brown sugar for a less processed option. And if you’re sensitive to spice, reduce the cayenne to just a pinch—you’ll still get warmth from the smoked paprika. For a completely different flavor profile, try our pumpkin spice coffee creamer alongside these seeds for a full fall flavor experience.
Equipment Needed
Nothing fancy here, which is part of the beauty of this recipe. Here’s what you’ll need:
- Colander – for rinsing the seeds clean of pumpkin guts
- Medium saucepan – for boiling the seeds (any pot works, just make sure it’s big enough for the seeds to move freely)
- Baking sheet – a rimmed half-sheet pan is ideal; the rim keeps seeds from sliding off
- Parchment paper – highly recommended for easy cleanup and preventing sticking
- Mixing bowl – for tossing the seeds with butter and spices
- Kitchen towel – for drying the seeds after boiling
- Spatula – for stirring and spreading the seeds on the baking sheet
If you don’t have parchment paper, you can grease the baking sheet lightly with cooking spray. Just watch the seeds closely—they can stick more easily. I’ve used both methods, and honestly, parchment paper saves so much cleanup time. It’s worth the extra sheet.
For the baking sheet, I recommend a heavy-duty one that won’t warp in the oven. Nordic Ware makes excellent ones, but any sturdy rimmed pan works. Thin baking sheets can cause uneven browning, and nobody wants half-burnt seeds.
Preparation Method
This method might seem like a few extra steps compared to just tossing seeds in oil and baking them. But trust me—each step matters. Here’s exactly how to get those perfectly crunchy, caramelized seeds.
Step 1: Clean the Seeds
If you’re using fresh pumpkin seeds, place them in a colander and rinse under cold running water. Use your fingers to separate the seeds from the stringy pumpkin pulp. It takes a few minutes, but get them as clean as possible. Any remaining pulp will burn in the oven and taste bitter. Once they’re clean, shake off the excess water and spread them on a kitchen towel to dry slightly while you preheat the oven.
Time estimate : 5-7 minutes
Step 2: Parboil the Seeds
This is the game-changer step. Fill a medium saucepan with 2 cups of water and add 2 tablespoons of salt. Bring it to a rolling boil. Add the cleaned pumpkin seeds and boil for exactly 10 minutes. The salt water seasons the seeds from the inside out, and the boiling process helps them get extra crunchy when roasted. Drain the seeds in a colander and spread them back on the kitchen towel to dry. Pat them gently—they should be damp but not soaking wet.
Sensory cue : After boiling, the seeds will look slightly plump and feel soft to the touch. Don’t worry—they’ll crisp up beautifully in the oven.
Time estimate : 12 minutes (including bringing water to a boil)
Step 3: Preheat and Prep
Preheat your oven to 350°F (175°C). Line a rimmed baking sheet with parchment paper. While the oven heats, you can start mixing your spice coating.
Time estimate : 10 minutes (use this time to prep the coating)
Step 4: Make the Coating
In a medium mixing bowl, whisk together the brown sugar, cinnamon, smoked paprika, cayenne pepper, salt, and garlic powder (if using). Make sure there are no lumps in the brown sugar—press them out with the back of a spoon if needed. Add the melted butter and olive oil, and stir until you have a smooth, fragrant paste. It should smell warm and slightly spicy.
Personal tip : I like to taste a tiny bit of the coating at this point. It should be slightly sweeter than you think you need—the heat will mellow as it bakes, and the saltiness will balance everything out.
Step 5: Coat the Seeds
Add the dried, parboiled seeds to the bowl with the spice mixture. Use a spatula to toss and stir until every seed is evenly coated. Make sure to scrape the bottom of the bowl—that’s where all the good caramelized bits hide.
Sensory cue : The seeds should look glossy and speckled with the spice mixture. Some clumping is normal, but try to break up any large clusters.
Step 6: Spread and Roast
Spread the coated seeds in a single, even layer on the prepared baking sheet. Try not to overlap them too much—crowding leads to steaming instead of roasting. Bake for 18-22 minutes, stirring halfway through. The seeds are done when they’re golden brown, fragrant, and sound hollow when you tap one with a spoon.
Time estimate : 20 minutes total roasting time
Troubleshooting tip : Every oven runs differently. Start checking at 16 minutes if your oven runs hot. The seeds can go from perfect to burnt very quickly in the last few minutes. Look for a deep golden color—if they look dark brown, they’re probably overdone.
Step 7: Cool Completely
This is the hardest step—waiting. Remove the baking sheet from the oven and let the seeds cool completely on the pan. They’ll continue to crisp up as they cool. Don’t try to rush this by putting them in the fridge; condensation will make them soggy. Give them at least 20-30 minutes.
Sensory cue : When fully cooled, the seeds should snap when you bite into them. No chewy centers, no soft spots.
Time estimate : 25-30 minutes cooling time
Cooking Tips & Techniques
I’ve learned a few things the hard way over the years. Here are the tips that make the biggest difference.
Don’t skip the boil. I know it seems like an extra step. But parboiling the seeds in salted water does two things: it seasons them all the way through, and it helps them achieve that all-over crunch. Seeds that aren’t boiled first often have chewy centers, even when the outside looks perfectly roasted. Trust me on this one—I learned the hard way after three batches of disappointing seeds.
Watch the sugar. Brown sugar burns faster than you think. That’s why 350°F is the sweet spot—hot enough to caramelize the sugar, but not so hot that it burns before the seeds are fully roasted. If your oven runs hot, drop the temperature to 325°F and add a few extra minutes of roasting time.
Stir halfway through. This isn’t optional. The edges of the baking sheet get hotter than the center, so stirring ensures even browning. I use a thin spatula to flip and redistribute the seeds. Some people forget this step and end up with half-burnt, half-raw seeds. Don’t be that person.
Let them cool completely. I know you want to eat them immediately. I do too. But warm seeds are soft seeds. If you eat them straight out of the oven, they’ll taste good but the texture won’t be right. Give them that 20-30 minutes. I promise it’s worth the wait.
Batch size matters. Don’t try to double this recipe on one baking sheet. If you overcrowd the pan, the seeds will steam rather than roast, and you’ll lose that crunch. If you need a bigger batch, use two baking sheets and rotate them halfway through baking.
I once made the mistake of using a dark non-stick baking sheet without adjusting the temperature. The seeds came out almost black on the bottom. Dark pans absorb more heat, so if that’s what you have, reduce the oven temperature by 25°F and check the seeds a few minutes early.
Variations & Adaptations
One of the best things about this recipe is how easy it is to adapt. Here are some of my favorite variations.
Maple Cinnamon Version
Swap the brown sugar for 2 tablespoons of pure maple syrup. Reduce the cayenne to just a pinch and add an extra ½ teaspoon of cinnamon. The maple flavor is more subtle, but it gives the seeds a lovely, almost breakfast-like sweetness. This version is especially good sprinkled over a bowl of our high-protein overnight oats for extra crunch.
Extra Spicy Version
Double the cayenne pepper and add ¼ teaspoon of chili powder. For even more heat, add a pinch of red pepper flakes to the coating. This version is not for the faint of heart—but if you love spicy snacks, it’s incredible. Just have a glass of milk nearby.
Savory Herb Version
Skip the brown sugar entirely and increase the salt to 1 teaspoon. Add 1 teaspoon dried rosemary, ½ teaspoon dried thyme, and ¼ teaspoon black pepper. This savory version is perfect for salads, soups, or just snacking with a cold beer. It’s also great on top of our roasted butternut squash soup for a textural contrast.
Air Fryer Method
If you have an air fryer, you can make these seeds in about 12 minutes. Cook at 300°F for 10-12 minutes, shaking the basket halfway through. The air fryer gives an even, crispy result with less energy and time. Just be careful not to overcrowd the basket—work in batches if needed.
Dietary Adaptations
For a vegan version, use coconut oil or avocado oil instead of butter. For a nut-free version, this recipe is naturally nut-free as written. For a lower-sugar version, use coconut sugar or monk fruit sweetener instead of brown sugar—just note that the caramelization won’t be as pronounced.
Serving & Storage Suggestions
These seeds are incredibly versatile. Here’s how I like to serve and store them.
Serving Temperature : Room temperature is best. The seeds are at their peak crunch when fully cooled. If you’re serving them at a party, I recommend making them the day before—they actually get slightly crunchier after sitting overnight.
Presentation Ideas : Serve them in a simple bowl or jar. For Halloween parties, I love putting them in a small pumpkin-shaped bowl or a mason jar tied with a ribbon. They also make fantastic gifts—portion them into small cellophane bags with a twist tie and a handwritten tag.
How to Use Them : Beyond snacking, these seeds are amazing as a salad topping, especially on fall salads with apples, dried cranberries, and goat cheese. Sprinkle them over roasted vegetables for extra texture. Or crush them and use them as a crust for chicken or fish—trust me, it’s incredible.
Storage Instructions : Store cooled seeds in an airtight container at room temperature for up to 2 weeks. Do not refrigerate them—the moisture will make them soft. If they lose their crunch after a few days, you can re-crisp them in a 300°F oven for 5 minutes. Let them cool completely before storing again.
Freezer Instructions : These seeds freeze beautifully. Place them in a freezer-safe bag or container and freeze for up to 3 months. Thaw at room temperature for about 15 minutes before serving. They won’t lose any crunch—I’ve tested this multiple times.
Flavor Development : The flavors actually deepen and meld together after a day or two. The heat becomes more rounded, and the sweetness feels more integrated. So don’t worry if they taste slightly different on day one—they’ll be even better on day two.
Nutritional Information & Benefits
Pumpkin seeds are a nutritional powerhouse, and this recipe keeps most of those benefits intact. Here’s the estimated nutritional breakdown per ¼ cup serving:
- Calories : 180
- Total Fat : 14g
- Saturated Fat : 4g
- Carbohydrates : 10g
- Fiber : 2g
- Sugar : 6g
- Protein : 7g
- Sodium : 180mg
Health Benefits : Pumpkin seeds are packed with magnesium, zinc, and healthy fats. Magnesium supports muscle function and sleep quality. Zinc is great for immune health—especially relevant during cold and flu season. The fiber and protein make these seeds a satisfying snack that won’t spike your blood sugar.
Dietary Considerations : This recipe is naturally gluten-free and nut-free. For a dairy-free version, swap the butter for coconut oil. It’s also low-carb friendly if you use a sugar substitute—about 4g net carbs per serving with the original recipe.
Allergen Note : As written, this recipe contains dairy (butter). It is free from the top eight allergens except dairy. Always check your spice blends for cross-contamination if you have severe allergies.
I personally love that I can enjoy these as a snack without feeling guilty. They satisfy that craving for something crunchy and sweet, but they’re actually doing my body some good. That’s a win in my book.
Conclusion
These sweet and spicy roasted pumpkin seeds have become a fall tradition in my house. They’re the snack I look forward to making after every pumpkin carving session, the treat I bring to every Halloween party, and the gift I give to neighbors and friends during the holiday season. And honestly? They’re just so much better than anything you can buy at the store.
What I love most about this recipe is how forgiving it is. You can adjust the spice level, swap the sweetener, change up the spices—and it still works. It’s a recipe that invites experimentation, which is exactly the kind of cooking I love.
So go ahead—save those seeds the next time you carve a pumpkin. Or grab a bag of raw pepitas from the store and make these anyway. You don’t need an occasion. You just need a craving for something crunchy, sweet, and just a little bit spicy.
I’d love to hear how yours turn out. Did you add extra cayenne? Try the maple version? Use them as a salad topping? Drop a comment below and let me know. And if you loved this recipe, don’t forget to share it with a friend who needs a new fall snack obsession.
Happy roasting, friends.
Frequently Asked Questions
Can I use store-bought pumpkin seeds instead of fresh?
Absolutely. Raw pepitas (pumpkin seeds without the white shell) work perfectly. Just skip the cleaning step and go straight to parboiling. The cooking time stays the same.
Why did my seeds turn out chewy instead of crunchy?
This usually happens for one of two reasons: either you skipped the parboiling step, or you didn’t let them cool completely before eating. The parboiling process is essential for all-over crunch, and cooling allows the seeds to fully crisp up. Try both next time and see the difference.
Can I make these seeds less spicy for kids?
Definitely. Reduce the cayenne pepper to just a pinch or omit it entirely. The smoked paprika adds warmth without heat, so your kids will still get that smoky flavor. You can also increase the brown sugar slightly for extra sweetness that kids love.
How do I know when the seeds are fully roasted?
Look for a deep golden brown color and listen for a hollow sound when you tap a seed with a spoon. The seeds should also smell fragrant and toasty. If they still look pale or smell raw, give them another 2-3 minutes in the oven.
Can I double this recipe?
Yes, but don’t overcrowd your baking sheet. Use two separate pans and rotate them halfway through baking. The seeds need space to roast evenly—if they’re piled on top of each other, they’ll steam and won’t get crunchy.
Pin This Recipe!
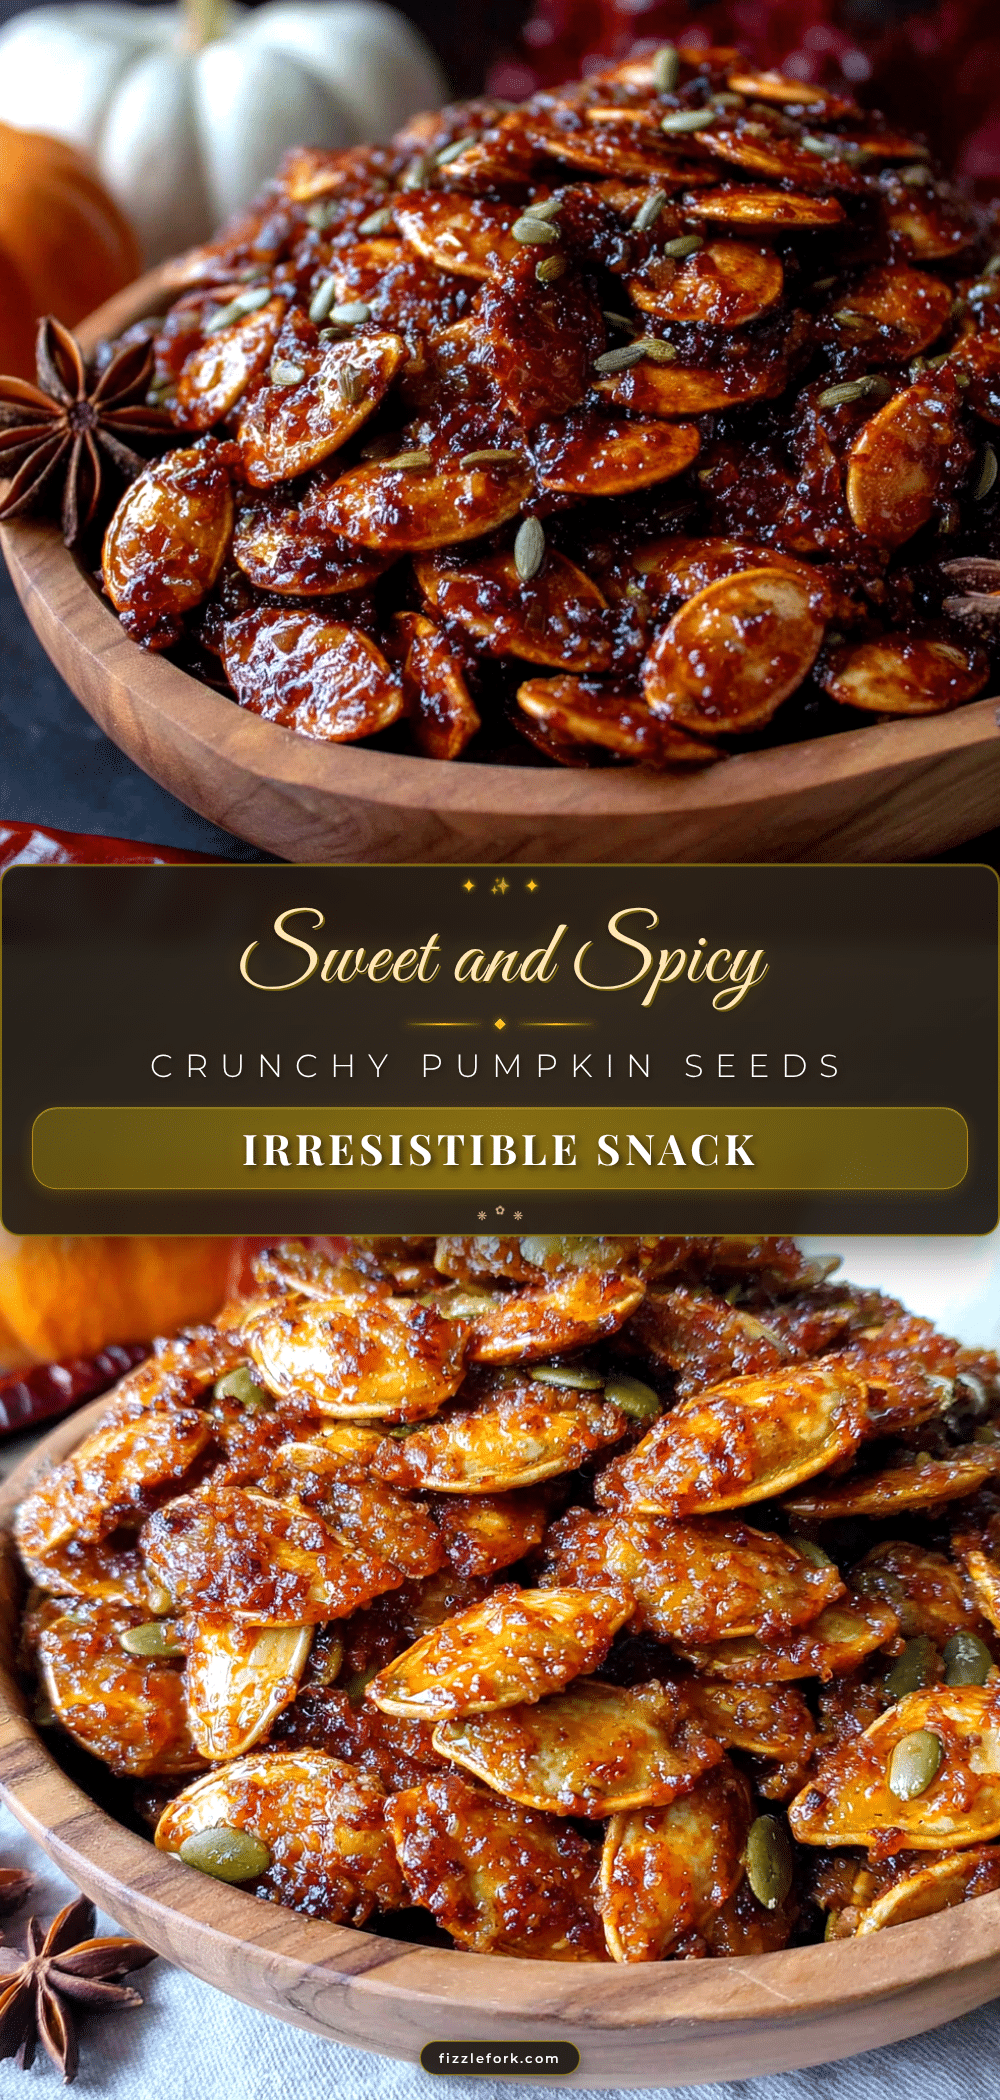
Best Easy Sweet and Spicy Roasted Pumpkin Seeds Recipe
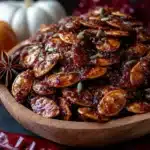
These sweet and spicy roasted pumpkin seeds are perfectly crunchy with a caramelized coating and a subtle kick of heat. Made with simple pantry ingredients, they’re the ultimate fall snack that disappears in minutes.
- Prep Time: 15 minutes
- Cook Time: 20 minutes
- Total Time: 35 minutes
- Yield: 4 servings 1x
- Category: Snack
- Cuisine: American
Ingredients
- 1 ½ cups raw pumpkin seeds (freshly scooped or store-bought raw pepitas)
- 2 tablespoons unsalted butter, melted
- 1 tablespoon olive oil
- 3 tablespoons light brown sugar, packed
- 1 teaspoon ground cinnamon
- ½ teaspoon smoked paprika
- ¼ teaspoon cayenne pepper
- ½ teaspoon fine sea salt
- ¼ teaspoon garlic powder (optional)
- 2 tablespoons salt (for boiling water)
Instructions
- Clean the seeds: Place fresh pumpkin seeds in a colander and rinse under cold water, removing all stringy pulp. Shake off excess water and spread on a kitchen towel to dry slightly.
- Parboil the seeds: Fill a medium saucepan with 2 cups of water and add 2 tablespoons of salt. Bring to a rolling boil. Add the cleaned seeds and boil for exactly 10 minutes. Drain and spread back on the kitchen towel to dry (damp but not soaking).
- Preheat oven to 350°F (175°C). Line a rimmed baking sheet with parchment paper.
- Make the coating: In a medium bowl, whisk together brown sugar, cinnamon, smoked paprika, cayenne, salt, and garlic powder (if using). Add melted butter and olive oil, stirring until smooth.
- Coat the seeds: Add the dried, parboiled seeds to the bowl and toss with a spatula until evenly coated.
- Spread seeds in a single, even layer on the prepared baking sheet. Bake for 18-22 minutes, stirring halfway through, until golden brown and fragrant.
- Cool completely on the baking sheet for 20-30 minutes before serving. The seeds will crisp up as they cool.
Notes
Parboiling the seeds in salted water is essential for all-over crunch. Don’t skip the cooling step—seeds crisp up as they cool. For a dairy-free version, swap butter for coconut oil. For less spice, reduce cayenne to a pinch or omit. Store in an airtight container at room temperature for up to 2 weeks. Re-crisp in a 300°F oven for 5 minutes if needed.
Nutrition
- Serving Size: ¼ cup
- Calories: 180
- Sugar: 6
- Sodium: 180
- Fat: 14
- Saturated Fat: 4
- Carbohydrates: 10
- Fiber: 2
- Protein: 7
Keywords: roasted pumpkin seeds, sweet and spicy pumpkin seeds, fall snack, Halloween snack, pumpkin seeds recipe, easy snack