I made these elderberry gummies three times before I realized I was boiling the life out of the elderberries. That first batch? It turned into a sad, gelatinous brick that tasted more like cough syrup than candy. The second one was barely set—more of a jiggly mess that fell apart the second I tried to pop one out of the mold. It was frustrating, honestly, because I knew these gummies could be a game-changer for my family’s winter wellness routine. I just had to stop fighting the ingredients and start listening to them.
It took a cold, rainy Tuesday in November and a sick toddler to finally get it right. I had a pot of homemade elderberry syrup simmering on the stove—the same one I usually dose out by the spoonful—and I thought, there has to be a better way to get this into a kid who suddenly hates taking anything from a spoon. So I slowed down. I stopped rushing the gelatin bloom. I let the syrup cool just enough before mixing. And when I poured that deep purple liquid into the little bear-shaped molds, I knew—this was the batch.
These gummies are chewy, not tough. They taste like sweet-tart berries, not medicine. And they pack all the immune-supporting goodness of elderberry syrup into a portable, kid-friendly, actually enjoyable little snack. It turns out the secret wasn’t a fancy ingredient—it was patience.
Why You’ll Love This Recipe
Let me tell you why these gummies have earned a permanent spot in my fridge. I’ve tested this recipe on picky kids, skeptical husbands, and even a neighbor who swore she “didn’t do DIY health stuff.” All of them came back for seconds.
- Easy to Make : You don’t need any special skills. If you can stir and pour, you can make these. The whole process takes about 15 minutes of active time.
- Simple Ingredients : No weird additives, no corn syrup, no artificial flavors. Just elderberry syrup, gelatin, and a little honey to round out the tartness.
- Perfect for Cold & Flu Season : These are my go-to for keeping everyone’s immune system in check when the weather turns. They’re way easier to pack in a lunchbox than a bottle of syrup.
- Crowd-Pleaser : Kids think they’re candy. Adults appreciate the health benefits. Everyone wins.
- Unbelievably Delicious : The elderberry flavor is naturally fruity and a little tart. The honey mellows it out beautifully. They taste like a treat you’d actually want to eat.
What makes this recipe different from the dozens I tried before is the temperature control. I learned the hard way that hot liquid destroys gelatin’s ability to set properly. So I let my syrup cool to just warm—like a comfortable bath—before whisking in the gelatin. That one change turned my gummies from a sticky disaster into perfectly bouncy, firm little cubes that hold their shape without being rubbery.
Honestly, this recipe is the kind that makes you feel good about giving your kids something that’s actually good for them. It’s immune support, but it feels like a treat. And that’s a win in my book.
What Ingredients You Will Need
This recipe uses simple, wholesome ingredients to deliver a powerful immune boost without any of the junk you’d find in store-bought gummies. Most of these are pantry staples for anyone who makes their own elderberry syrup.
- Dried elderberries, 1/2 cup – Look for organic, deep purple-black berries. I buy mine from a local herbal shop or online from Mountain Rose Herbs. They should smell fruity and slightly floral, not musty.
- Water, 2 cups – Filtered water works best. Tap water with high mineral content can sometimes affect the gelatin set.
- Honey, 2 tablespoons – Raw, local honey is my preference for its natural enzymes and flavor. You can also use maple syrup if you’re vegan, but it will change the taste slightly.
- Fresh ginger, a 1-inch piece, sliced – Adds a gentle warmth and extra immune support. Don’t skip it—it cuts the tartness of the berries beautifully.
- Cinnamon stick, 1 – For warmth and a subtle spice note. It also helps balance blood sugar, which is a nice bonus.
- Whole cloves, 3 to 4 – Just a few. They’re potent. They add depth and a little antimicrobial action.
- Grass-fed gelatin, 3 tablespoons – This is non-negotiable for the gummy texture. I use Vital Proteins or Great Lakes. Do not substitute with agar-agar unless you’re experienced with it—the texture and setting time are completely different.
- Lemon juice, 1 tablespoon, freshly squeezed – Helps preserve the gummies and brightens the flavor. Don’t use bottled—it tastes flat.
Optional but recommended: a silicone gummy bear mold or any small silicone mold. I’ve used ice cube trays in a pinch, but the gummy bear shapes make them way more fun for kids.
Equipment Needed
You don’t need a fancy kitchen setup for this. Here’s what I use every time:
- Small saucepan – For simmering the elderberries. A 2-quart pot works perfectly.
- Fine-mesh strainer – To catch all the berries, ginger, and spices. Cheesecloth works too, but a strainer is easier.
- Glass measuring cup or mixing bowl – For combining the syrup and gelatin. Glass is best because it doesn’t retain odors.
- Whisk – A small one. You need to get into the corners of the bowl.
- Silicone gummy bear mold – I got a 3-pack on Amazon for under ten bucks. They’re reusable and easy to clean.
- Pipette or small dropper – For filling the molds without making a mess. Not essential, but it saves so much frustration.
- Refrigerator space – The gummies need at least 2 hours to set. Clear a shelf beforehand.
If you don’t have a pipette, you can use a small measuring spoon or even a zip-top bag with the corner snipped off. I’ve done all three. The pipette is worth the few extra dollars.
Preparation Method
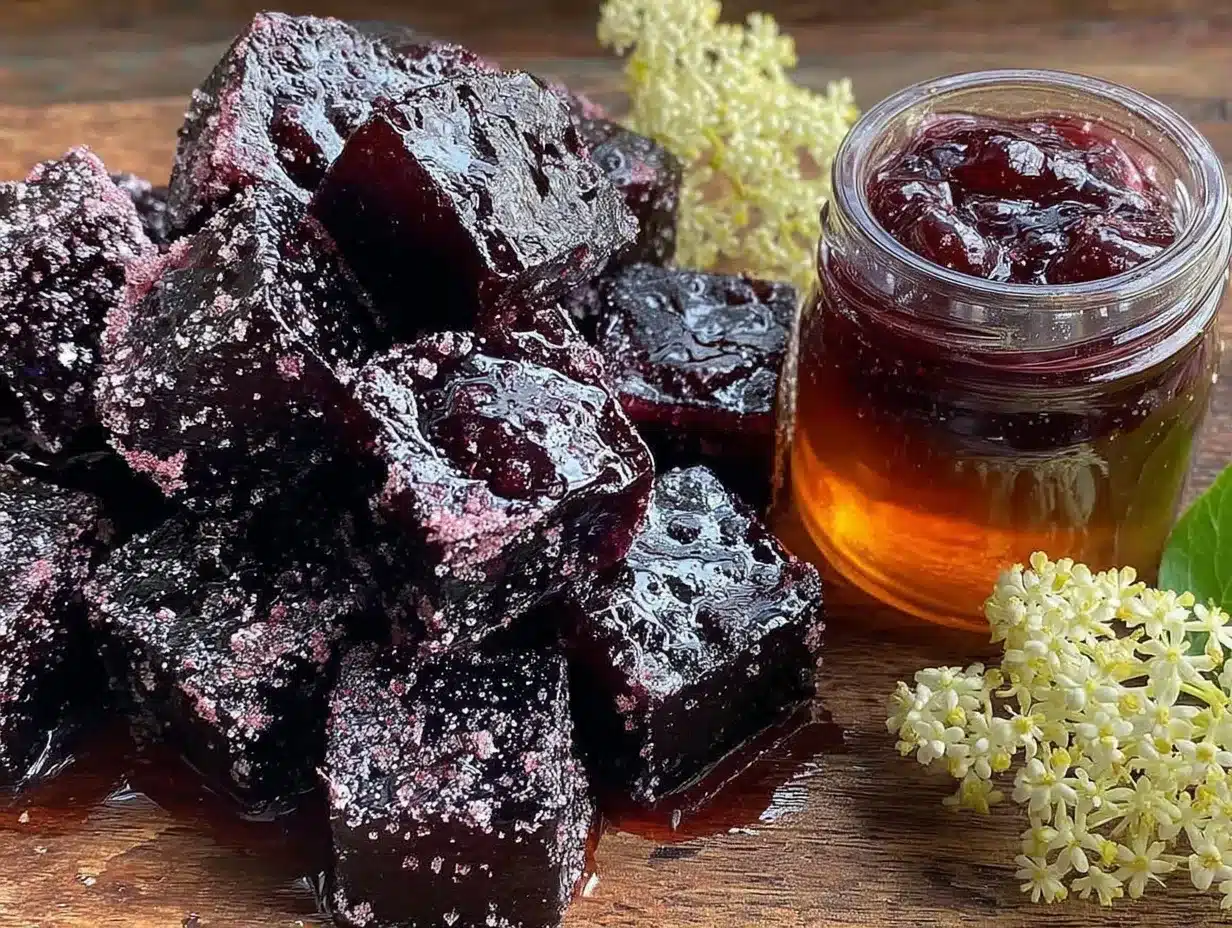
- Make the elderberry syrup base. In a small saucepan, combine the dried elderberries, water, sliced ginger, cinnamon stick, and cloves. Bring to a boil over medium-high heat, then reduce to a simmer. Let it bubble gently for 20 to 25 minutes, or until the liquid has reduced by about half. Your kitchen will smell amazing—like spiced berries and warmth.
- Strain the syrup. Place your fine-mesh strainer over a glass measuring cup or bowl. Carefully pour the mixture through. Use the back of a spoon to press on the berries and extract every last drop of that deep purple goodness. Discard the solids. You should have about 1 cup of concentrated syrup.
- Sweeten and cool. Stir in the honey and lemon juice while the syrup is still warm. Let it cool for about 10 minutes. This step is crucial—if the syrup is too hot, it will destroy the gelatin’s ability to set. You want it warm, like a comfortable bath, not hot.
- Bloom the gelatin. Sprinkle the gelatin evenly over the surface of the warm syrup. Do not dump it all in one spot—it will clump. Let it sit undisturbed for 2 to 3 minutes. It will look slightly spongy on top. That’s exactly what you want.
- Whisk gently. Whisk the gelatin into the syrup until it’s completely dissolved. No lumps, no streaks. This usually takes about a minute of steady whisking. If you see any stubborn clumps, you can set the measuring cup in a bowl of warm water for a minute to help them melt.
- Fill the molds. Use your pipette or dropper to fill each cavity in the silicone mold. Don’t overfill—leave a tiny bit of space at the top. Work quickly but carefully, because the mixture will start to thicken as it cools.
- Refrigerate to set. Place the filled mold on a flat tray (for easy moving) and pop it in the fridge. Let them set for at least 2 hours, but overnight is even better. They should be firm to the touch and pop out of the mold easily.
- Pop them out and store. Gently flex the silicone mold to release the gummies. They should come out cleanly. If they stick, pop the mold back in the fridge for another 30 minutes.
A quick note: if your mixture starts to thicken before you’ve filled all the molds, don’t panic. Just set the measuring cup in a bowl of warm water for a minute to loosen it up again. I’ve had to do this more times than I’d like to admit.
Cooking Tips & Techniques
I’ve made enough batches of these gummies to know exactly where things can go wrong. Here’s what I’ve learned the hard way so you don’t have to.
Temperature is everything. If your syrup is too hot when you add the gelatin, the gummies won’t set. Period. I ruined my first two batches by being impatient. Let the syrup cool to about 110°F—warm to the touch but not hot. If you have an instant-read thermometer, use it. If not, the “comfortable bath” test works fine.
Don’t skip the straining. I know it’s tempting to just pour everything through a coarse strainer, but those tiny berry bits will make your gummies gritty. Press firmly on the berries with a spoon to get all the liquid out, then double-strain if you see any sediment. The texture is worth the extra step.
Whisk like you mean it. Gelatin needs to be fully dissolved to set properly. I whisk in a figure-eight pattern to make sure I’m getting the bottom and sides of the bowl. If you see any little granules floating around, keep whisking.
Work in batches if needed. If you only have one mold, that’s fine. Just pour half the mixture, let it set, then pour the other half. The leftover mixture will firm up in the measuring cup, but you can gently rewarm it in a bowl of hot water to loosen it up again.
Patience pays off. I know you want to eat them right away. I get it. But gummies that haven’t set fully will be sticky and messy. Give them the full 2 hours minimum. Overnight is even better—they develop a firmer, chewier texture that’s closer to store-bought gummy candies.
One more thing: if your gummies come out too soft, you can add an extra teaspoon of gelatin next time. If they’re too hard, reduce the gelatin by a teaspoon. Every brand of gelatin behaves a little differently, so don’t be afraid to tweak.
Variations & Adaptations
One of the best things about this recipe is how flexible it is. Here are a few ways I’ve changed it up depending on what I have on hand or who I’m making them for.
Vegan version : Substitute the gelatin with agar-agar powder. Use 2 tablespoons of agar-agar for the same amount of liquid. The texture will be more jelly-like than chewy, and they need to set at room temperature, not in the fridge. It’s a different experience, but still delicious.
Extra immune boost : Add 1 tablespoon of fresh-squeezed orange juice and a pinch of turmeric powder along with the honey. The orange adds vitamin C, and the turmeric gives a nice golden hue. Just be aware that turmeric can stain your molds—I use a separate mold for this version.
Herbal twist : Swap out the cinnamon and cloves for a few sprigs of fresh thyme and a star anise. It gives the gummies a more savory, grown-up flavor that I actually prefer for myself. My kids are less enthusiastic about this version, so I keep it for my stash.
Lower sugar option : Use a sugar-free sweetener like monk fruit or stevia instead of honey. Start with half the amount and taste as you go. These sweeteners can be much more potent than honey, so a little goes a long way.
Fruitier flavor : Add a handful of frozen raspberries or blackberries to the pot along with the elderberries. It boosts the fruit flavor and adds a little extra color. I did this once when I had a half-empty bag of raspberries in the freezer, and it was a hit.
Serving & Storage Suggestions
These gummies are best served cold, straight from the fridge. They have a satisfyingly firm, chewy texture when chilled. If you leave them out at room temperature for more than an hour, they’ll start to soften and get a little sticky. That’s fine if you’re eating them right away, but they won’t hold their shape as well.
I like to pop a few in a small glass jar for an on-the-go snack. They’re perfect for lunchboxes, road trips, or just keeping on your desk for a mid-afternoon immune boost. My kids grab a couple after school like they’re candy, and I don’t feel the need to limit them—they’re basically concentrated elderberry syrup in a fun form.
Storage : Keep the gummies in an airtight container in the refrigerator. They’ll stay fresh for up to 2 weeks. Layer them between sheets of parchment paper if you’re stacking them, or they’ll stick together. I use a small glass Mason jar with a tight lid.
Freezing : You can freeze these gummies for up to 3 months. Spread them out on a parchment-lined baking sheet and freeze until solid, then transfer to a freezer-safe bag. They thaw in about 10 minutes at room temperature. The texture is slightly softer after freezing, but the flavor is still great.
Reheating : Don’t. These are meant to be eaten cold. If you want a warm immune drink, just make a fresh cup of elderberry tea instead.
One thing I’ve noticed: the flavor actually develops a little more after a day or two in the fridge. The spices mellow out and the honey sweetness becomes more pronounced. So if you can wait, they’re even better on day two.
Nutritional Information & Benefits
These gummies are a concentrated source of immune-supporting goodness. Here’s a rough estimate per serving (about 6 gummies):
| Nutrient | Amount Per Serving |
|---|---|
| Calories | 45 |
| Total Carbohydrates | 10g |
| Sugars | 8g (from honey and elderberries) |
| Protein | 4g (from gelatin) |
| Vitamin C | 4mg (from elderberries and lemon) |
The real benefits go beyond the numbers. Elderberries are packed with antioxidants called anthocyanins, which give them that deep purple color and help support a healthy immune response. The ginger and cinnamon add anti-inflammatory properties, while the honey provides natural antimicrobial benefits. The gelatin is great for gut health and gives your hair, skin, and nails a little boost too.
These gummies are naturally gluten-free, dairy-free, and nut-free. If you use a vegan sweetener like maple syrup instead of honey, they’re also plant-based. Just be aware that traditional gelatin is not vegan, so stick with the agar-agar variation if that’s important to you.
I personally love that I can give these to my kids without worrying about artificial colors, high-fructose corn syrup, or any of the other junk you find in store-bought gummy vitamins. It’s real food, doing real work.
Conclusion
These homemade elderberry syrup gummies have become a staple in our house, and I think they will in yours too. They’re simple enough to make on a Sunday afternoon, but effective enough to actually make a difference when cold season hits. The best part? My kids ask for them. They don’t hide them in the back of the fridge. They reach for them.
I love that this recipe lets me take something I already make—elderberry syrup—and turn it into something entirely new. It’s the same immune support, just in a form that feels like a treat. And honestly, if I have to choose between taking a spoonful of syrup or popping a few chewy, berry-flavored gummies, I’m picking the gummies every time.
If you try this recipe, I’d love to hear how it goes. Did your kids love them? Did you try a fun variation? Drop a comment below and let me know. And if you’re looking for another cozy, immune-supporting treat, you might enjoy my creamy pumpkin chai spice latte—it’s like a warm hug in a mug.
Stay healthy, friends. And eat your gummies.
Frequently Asked Questions
Can I use store-bought elderberry syrup instead of making my own?
Yes, absolutely. If you have a bottle of ready-made elderberry syrup, you can skip the simmering and straining steps. Just warm 1 cup of the syrup gently on the stove, then proceed with the honey, lemon juice, and gelatin. Keep in mind that store-bought syrups vary in sweetness, so you might want to taste it before adding extra honey.
Why are my gummies too soft or too hard?
Texture issues usually come down to the gelatin-to-liquid ratio or the temperature when you added the gelatin. If they’re too soft, try adding an extra teaspoon of gelatin next time. If they’re too hard, reduce the gelatin by a teaspoon. Also, make sure you’re not boiling the mixture after adding the gelatin—that can weaken its setting power.
How many gummies should I eat per day?
For general immune support, 4 to 6 gummies per day is a good guideline for adults. For kids, start with 2 to 3. Think of them as a concentrated version of elderberry syrup—you don’t need a lot. If you’re using them during an active illness, you can double that amount for a few days. But always listen to your body.
Can I use a different type of gelatin?
Grass-fed beef gelatin is my go-to because it’s flavorless and sets firmly. You can also use porcine gelatin, but avoid flavored or sweetened gelatin mixes—they’ll throw off the taste. Collagen peptides are not a substitute here; they don’t set the same way and will leave you with a liquid mess.
How long do these gummies last at room temperature?
They’re fine at room temperature for a few hours, but they’ll start to soften and get sticky. For longer storage, always keep them in the fridge. If you’re packing them for a lunchbox, add a small ice pack to keep them cool. They’ll last up to 2 weeks in the refrigerator and about 3 months in the freezer.
Pin This Recipe!
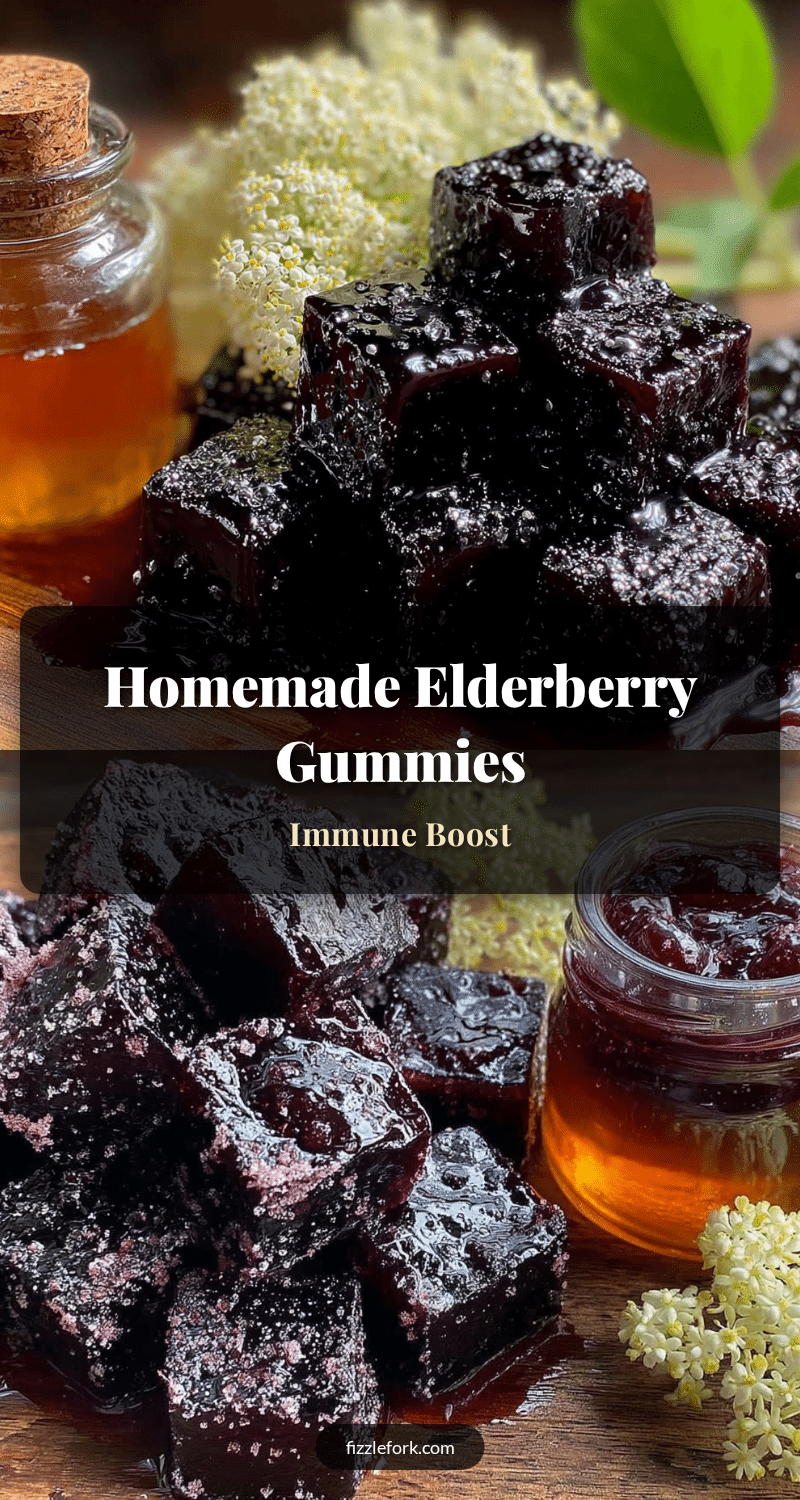
Best Homemade Elderberry Syrup Gummies for Immunity
These elderberry gummies are chewy, not tough. They taste like sweet-tart berries, not medicine. And they pack all the immune-supporting goodness of elderberry syrup into a portable, kid-friendly, actually enjoyable little snack.
- Prep Time: 15 minutes
- Cook Time: 25 minutes
- Total Time: 2 hours 40 minutes (includes setting time)
- Yield: 4 servings 1x
- Category: Snack
- Cuisine: American
Ingredients
- 1/2 cup dried elderberries
- 2 cups filtered water
- 2 tablespoons raw honey
- 1-inch piece fresh ginger, sliced
- 1 cinnamon stick
- 3 to 4 whole cloves
- 3 tablespoons grass-fed gelatin
- 1 tablespoon freshly squeezed lemon juice
Instructions
- Make the elderberry syrup base: In a small saucepan, combine the dried elderberries, water, sliced ginger, cinnamon stick, and cloves. Bring to a boil over medium-high heat, then reduce to a simmer. Let it bubble gently for 20 to 25 minutes, or until the liquid has reduced by about half.
- Strain the syrup: Place a fine-mesh strainer over a glass measuring cup or bowl. Carefully pour the mixture through. Use the back of a spoon to press on the berries and extract every last drop. Discard the solids. You should have about 1 cup of concentrated syrup.
- Sweeten and cool: Stir in the honey and lemon juice while the syrup is still warm. Let it cool for about 10 minutes until it is warm like a comfortable bath, not hot.
- Bloom the gelatin: Sprinkle the gelatin evenly over the surface of the warm syrup. Let it sit undisturbed for 2 to 3 minutes until it looks slightly spongy on top.
- Whisk gently: Whisk the gelatin into the syrup until it is completely dissolved with no lumps or streaks, about 1 minute. If there are stubborn clumps, set the measuring cup in a bowl of warm water for a minute to help them melt.
- Fill the molds: Use a pipette or dropper to fill each cavity in a silicone gummy bear mold. Do not overfill—leave a tiny bit of space at the top. Work quickly but carefully.
- Refrigerate to set: Place the filled mold on a flat tray and refrigerate for at least 2 hours, but overnight is even better. They should be firm to the touch and pop out of the mold easily.
- Pop them out and store: Gently flex the silicone mold to release the gummies. If they stick, pop the mold back in the fridge for another 30 minutes.
Notes
Temperature is crucial: let syrup cool to about 110°F before adding gelatin. If mixture thickens before filling all molds, set the measuring cup in a bowl of warm water to loosen it. For vegan version, substitute gelatin with 2 tablespoons agar-agar powder. Store in airtight container in refrigerator for up to 2 weeks, or freeze for up to 3 months.
Nutrition
- Serving Size: 6 gummies
- Calories: 45
- Sugar: 8
- Sodium: 10
- Carbohydrates: 10
- Protein: 4
Keywords: elderberry gummies, homemade gummies, immune support, elderberry syrup gummies, healthy snacks, kid-friendly, gluten-free, dairy-free


