My neighbor texted me a photo of an empty baking dish at 9:47 PM on a Tuesday. “I hid the last one from my husband,” she wrote. “It’s in the freezer. Don’t tell him.” That dish had held a batch of these pumpkin chocolate chip cookie bars, which I’d dropped off earlier that afternoon on a whim. I hadn’t even tasted them myself yet — I was just testing a new recipe for the blog and needed someone to take the extras off my hands.
Honestly, I almost didn’t bother. It was one of those afternoons where everything felt slightly off — the butter was too cold, the pumpkin puree was the last sad can in the pantry, and I was pretty sure I’d used the wrong measuring cup for the flour. But I pushed through because, well, I’d already made a mess of the kitchen. By the time they came out of the oven, the apartment smelled like a Yankee Candle had exploded in the best possible way. I cut a corner piece while they were still warm — mostly to check if they were even edible — and that was it. I knew I had something good.
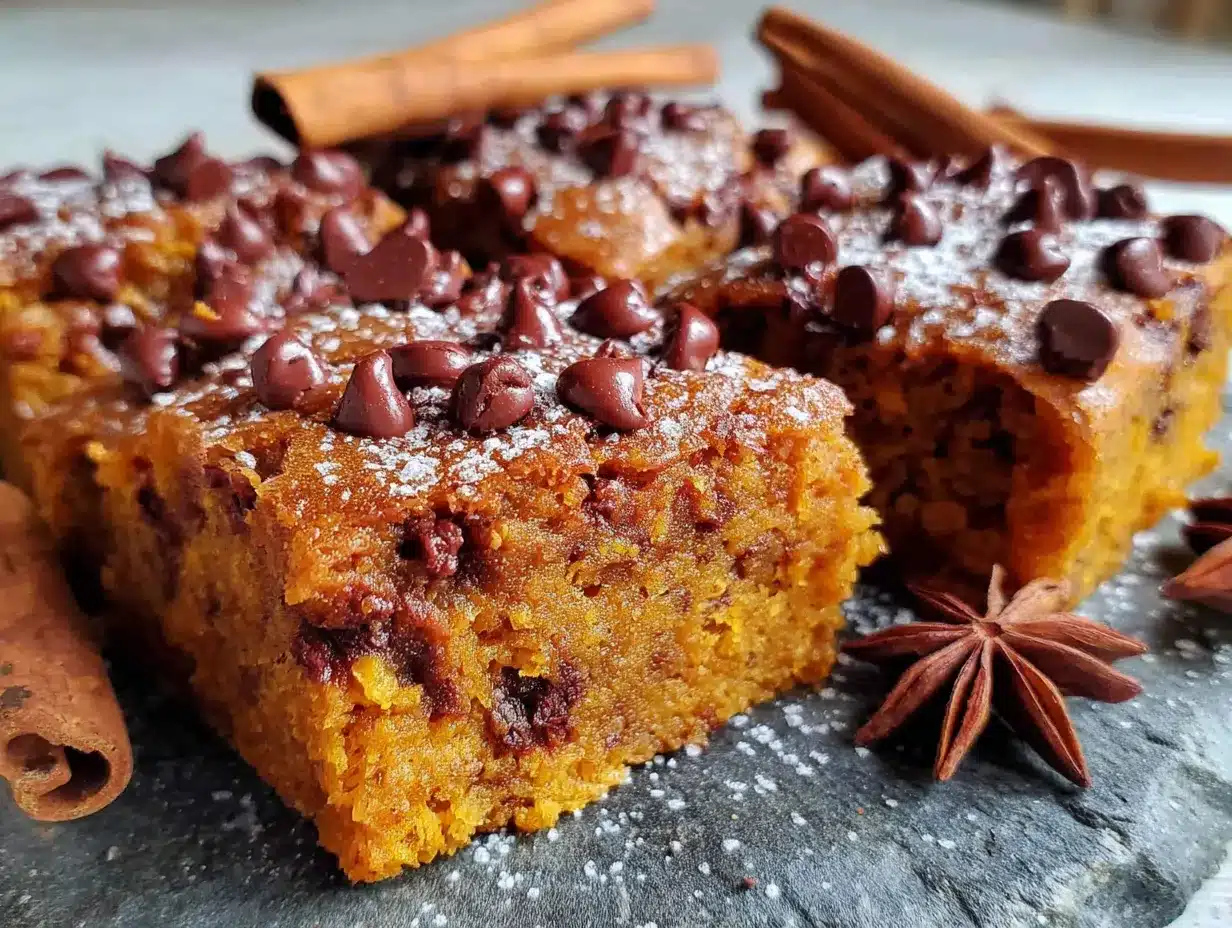
These best pumpkin chocolate chip cookie bars are the kind of dessert that makes you forget you were having a bad day. They’re soft without being cakey, dense without being heavy, and the chocolate chips melt into little pools of sweetness against that warm, spiced pumpkin base. I’ve made them four times since that first batch, tweaking the baking time and the spice ratio until I landed on something that feels just right. And now I’m pretty sure I’ll be making them every single weekend until Thanksgiving rolls around.
Here’s the thing about this recipe — it doesn’t ask much of you. No chilling the dough, no rolling individual cookies, no fussing with parchment paper that keeps curling up. You mix everything in one bowl, spread it in a pan, and let the oven do the heavy lifting. The result is a bar that’s sturdy enough to pack in lunchboxes but tender enough to eat with a fork and a dollop of whipped cream if you’re feeling fancy. I think that’s why my neighbor hid that last piece. Some desserts are worth protecting.
Why You’ll Love This Recipe
I’ve tested this recipe more times than I care to admit — once with too much pumpkin (soggy disaster), once with not enough sugar (sad and flat), and once where I accidentally used pumpkin pie filling instead of puree (surprisingly not terrible, but way too sweet). The version I’m sharing with you today is the one that finally made me stop tweaking and just enjoy the cookies. Here’s why these bars are worth your time:
- One Bowl, No Mixer — You don’t need a stand mixer or even a hand mixer for these. Just a bowl and a spatula. Less dishes means more time to actually eat the cookies.
- Simple Pantry Ingredients — Canned pumpkin, butter, sugar, flour, eggs, and chocolate chips. That’s it. No weird specialty items that you’ll use once and forget about.
- Perfect for Fall Gatherings — Whether it’s a Friendsgiving, a Halloween party, or just a cozy Sunday afternoon, these bars fit right in. They’re portable, sliceable, and everyone loves them.
- Kid-Approved and Adult-Approved — My niece ate three of these in one sitting and then asked if she could have one for breakfast. (I said no, but I thought about it.)
- Incredibly Moist and Flavorful — The pumpkin keeps these bars incredibly soft for days, and the blend of cinnamon, nutmeg, and ginger creates that unmistakable fall flavor without being overpowering.
What sets these best pumpkin chocolate chip cookie bars apart from other pumpkin desserts I’ve tried is the texture. They’re not a cake bar — they’re denser and more satisfying, like the love child of a chocolate chip cookie and a pumpkin bread slice. The edges get slightly chewy, the center stays tender, and every single bite has chocolate in it. I mean that literally — I sprinkle extra chips on top before baking so there’s no chance of a chocolate-free corner.
I made a batch for a potluck last week and watched a grown man eat four of them in the span of about seven minutes. He wasn’t even embarrassed about it. He just shrugged and said, “These are dangerous.” That’s the kind of reaction this recipe gets. It’s the dessert that makes people close their eyes when they take the first bite, and honestly, that never gets old.
What Ingredients You Will Need
This recipe relies on simple, everyday ingredients to create something that tastes anything but ordinary. The pumpkin does the heavy lifting for moisture, the spices bring the warmth, and the chocolate chips provide those little pockets of melted happiness. Here’s everything you’ll need:
For the Cookie Bars:
- 1/2 cup (1 stick) unsalted butter, melted and slightly cooled — I use salted butter in a pinch and just reduce the added salt slightly. Land O’Lakes is my go-to.
- 3/4 cup granulated sugar — Regular white sugar works perfectly here. You can also use coconut sugar for a slightly deeper flavor.
- 1/2 cup packed light brown sugar — Dark brown sugar works too, and it adds even more molasses flavor. Just know the bars will be a bit darker.
- 1 large egg, at room temperature — If you forget to take it out of the fridge, place it in a bowl of warm water for 5 minutes. Works every time.
- 1 teaspoon vanilla extract — Pure vanilla extract is ideal, but imitation works fine in a pinch.
- 3/4 cup pumpkin puree — Make sure you’re getting 100% pumpkin puree, not pumpkin pie filling. Libby’s is my favorite brand. The filling has added sugar and spices that will throw off the recipe.
- 1 1/2 cups all-purpose flour — Spoon and level your flour for the most accurate measurement. Scooping directly from the bag can pack in too much flour and make the bars dry.
- 1 teaspoon baking powder — Make sure it’s fresh. Old baking powder won’t give you the right lift.
- 1/2 teaspoon baking soda — Same goes for this. If you can’t remember when you bought it, it’s probably time for a new container.
- 1/2 teaspoon salt — Fine sea salt or table salt both work. I prefer fine sea salt for even distribution.
- 2 teaspoons ground cinnamon — This is the star spice. Don’t skimp on it.
- 1/2 teaspoon ground nutmeg — Freshly grated is amazing if you have it, but pre-ground works perfectly.
- 1/2 teaspoon ground ginger — Adds a little warmth and bite. You can skip it if you don’t have any, but it really rounds out the flavor.
- 1/4 teaspoon ground cloves — Just a touch. Cloves are strong, so a little goes a long way.
- 1 cup semi-sweet chocolate chips — I use Ghirardelli, but any brand works. Dark chocolate chips are also fantastic here. Reserve about 1/4 cup to sprinkle on top before baking.
Ingredient Tip: If you’re using a different size can of pumpkin puree (like a 29-ounce can), just measure out the 3/4 cup and save the rest for smoothies, oatmeal, or another batch of these bars. You can also freeze leftover pumpkin puree in an airtight container for up to 3 months.
Substitution Notes: For a dairy-free version, use melted coconut oil or vegan butter in place of the regular butter. The texture will be slightly different — a bit more tender — but still delicious. For a gluten-free option, swap the all-purpose flour with a 1:1 gluten-free baking blend. I’ve tested this with King Arthur’s Measure for Measure flour and it worked beautifully.
Equipment Needed
The beauty of this recipe is that it doesn’t require any fancy gadgets. Here’s what you’ll need:
- 9×9-inch square baking pan — An 8×8 pan will also work, but your bars will be slightly thicker and may need a few extra minutes in the oven. A 9×13 pan will make thinner bars that bake faster.
- Large mixing bowl — Any medium-to-large bowl will do. I use my favorite ceramic mixing bowl that I’ve had for years.
- Whisk or spatula — A wooden spoon works too. Honestly, I’ve made these with a fork before and it was fine.
- Measuring cups and spoons — For accuracy, especially with the flour and spices.
- Parchment paper — This is optional but highly recommended. It makes lifting the bars out of the pan so much easier. If you don’t have it, just grease the pan well with butter or non-stick spray.
- Cooling rack — Not strictly necessary, but it helps the bars cool evenly. A kitchen towel laid flat works in a pinch.
- Sharp knife — For cutting clean slices. I use a chef’s knife and wipe it clean between cuts for the neatest edges.
I’ve made these best pumpkin chocolate chip cookie bars in a cheap baking pan from the grocery store and in a fancy ceramic dish my aunt gave me for Christmas. They turned out great both times. Don’t stress about having the perfect equipment. Just use what you’ve got.
Preparation Method
Making these bars is straightforward, but there are a few little tricks I’ve picked up along the way that make a real difference. Follow these steps and you’ll have perfect pumpkin chocolate chip cookie bars every single time.
- Preheat your oven to 350°F (175°C). Line your 9×9 baking pan with parchment paper, leaving a little overhang on two opposite sides. This creates handles that make it easy to lift the bars out later. If you don’t have parchment, grease the pan generously with butter or non-stick spray.
- Melt the butter. Place the 1/2 cup of butter in a microwave-safe bowl and heat in 20-second bursts until fully melted. Let it cool for a couple of minutes while you gather your other ingredients. You don’t want it hot enough to cook the egg when you mix everything together.
- Combine the wet ingredients. In your large mixing bowl, whisk together the melted butter, granulated sugar, and brown sugar until smooth. The mixture should look like wet sand — slightly grainy but well combined. Add the egg and vanilla extract, and whisk until fully incorporated. The mixture should be smooth and glossy at this point.
- Add the pumpkin puree. Stir in the 3/4 cup of pumpkin puree until it’s completely mixed in. The batter will look a bit curdled or separated at first — that’s totally normal. Keep stirring and it will come together into a smooth, thick mixture. This is where the kitchen starts smelling like fall.
- Mix the dry ingredients separately. In a separate small bowl, whisk together the flour, baking powder, baking soda, salt, cinnamon, nutmeg, ginger, and cloves. This ensures the spices and leavening agents are evenly distributed throughout the batter. Trust me, nobody wants a bite that’s pure baking powder.
- Combine wet and dry ingredients. Add the dry ingredients to the wet mixture and stir with a spatula until just combined. Be careful not to overmix — you want to stop as soon as you no longer see streaks of flour. Overmixing develops the gluten and can make the bars tough instead of tender.
- Fold in the chocolate chips. Add 3/4 cup of the chocolate chips to the batter and fold them in gently with your spatula. Reserve the remaining 1/4 cup for the top. The batter will be thick and slightly sticky — that’s exactly what you want.
- Transfer to the pan. Scoop the batter into your prepared baking pan and spread it evenly using the spatula. The batter is thick, so you’ll need to push it into the corners. Wet your spatula slightly if it’s sticking too much. Once it’s evenly spread, sprinkle the reserved 1/4 cup of chocolate chips over the top. This guarantees every bar has visible chocolate on top.
- Bake for 25-30 minutes. Place the pan on the middle rack of your preheated oven. Bake for 25 minutes, then check for doneness. The edges should be golden brown and pulling away slightly from the sides of the pan. The center will still look soft and slightly underdone — that’s fine. A toothpick inserted in the center should come out with a few moist crumbs, not wet batter. If it’s still too wet, bake for another 3-5 minutes and check again.
- Cool completely before cutting. This is the hardest part, I know. Place the pan on a cooling rack and let the bars cool for at least 30 minutes in the pan. Then use the parchment handles to lift the entire block out and transfer it to the cooling rack to cool completely — about another 30 minutes. Cutting them while they’re warm will result in crumbly, messy bars. I learned this the hard way after serving what looked like pumpkin chocolate chip rubble to my book club.
- Slice and serve. Once completely cool, use a sharp knife to cut the bars into 16 equal squares (4 rows by 4 rows). Wipe the knife clean between cuts for the neatest edges. For extra clean cuts, you can chill the bars in the fridge for 15 minutes before slicing.
Sensory Cue: When these bars are done, your whole kitchen should smell like a pumpkin spice candle that’s been burning for hours — warm, sweet, and deeply comforting. The top will look slightly crackly, and the chocolate chips will be set but still soft. If you press gently on the center, it should spring back slightly, like a soft pillow.
Cooking Tips & Techniques
Over the course of testing this recipe, I’ve made plenty of mistakes so you don’t have to. Here are the most important things I’ve learned about making the best pumpkin chocolate chip cookie bars:
Don’t overmix the batter. This is the number one mistake I see people make with any baked good that uses both butter and pumpkin. Pumpkin adds a lot of moisture, which makes the batter seem like it needs more mixing to come together. It doesn’t. Stir just until the flour disappears, then stop. Overmixing develops gluten, which makes the bars tough and bread-like instead of tender and soft.
Use room temperature ingredients. I know it’s annoying to wait for eggs to come to room temperature, but it really does matter. Cold eggs can cause the butter to seize up, creating a lumpy batter that doesn’t bake evenly. If you’re in a hurry, place the egg in a bowl of warm water for 5 minutes. Problem solved.
Measure your flour correctly. This is probably the most common baking mistake in general. Scooping your measuring cup directly into the flour bag packs in way more flour than you actually need. Instead, use a spoon to fluff the flour in its container, then spoon it into your measuring cup and level it off with a knife. This simple change can make the difference between dry, crumbly bars and perfectly moist ones.
Let them cool completely. I cannot stress this enough. The first time I made these, I cut into them after 15 minutes because I couldn’t wait. The bars fell apart, the chocolate chips smeared everywhere, and I ended up eating the pieces with a spoon (which, honestly, wasn’t terrible). But if you want clean, beautiful bars that hold their shape, you need to be patient. The bars continue to set as they cool, and cutting them too early ruins the texture.
Bake on the middle rack. Placing the pan too close to the top or bottom heating element can cause uneven baking. The middle rack ensures the heat circulates evenly around the pan, giving you bars that are golden on top and perfectly baked through the center.
Variations & Adaptations
One of the best things about this recipe is how adaptable it is. Here are some of my favorite variations I’ve tried over the past few weeks:
White Chocolate & Cranberry Pumpkin Bars. Swap the semi-sweet chocolate chips for white chocolate chips and add 1/2 cup of dried cranberries. The tartness of the cranberries balances the sweetness of the white chocolate beautifully. I made these for a Thanksgiving potluck and they disappeared faster than the turkey.
Vegan Pumpkin Chocolate Chip Cookie Bars. Use melted coconut oil instead of butter, a flax egg (1 tablespoon ground flaxseed mixed with 3 tablespoons water, let sit for 5 minutes) instead of the regular egg, and dairy-free chocolate chips. The texture is slightly more tender and a bit less dense, but still incredibly satisfying. My vegan friend couldn’t tell the difference.
Gluten-Free Version. Substitute the all-purpose flour with a 1:1 gluten-free baking blend that contains xanthan gum. I’ve tested this with King Arthur’s Measure for Measure flour and the results were nearly identical to the original. Just be careful not to overmix, as gluten-free batters can get gummy if overworked.
Extra Spiced Pumpkin Bars. If you’re a spice lover like me, double the cinnamon and add an extra 1/4 teaspoon each of nutmeg, ginger, and cloves. You can also add a pinch of cardamom for a more complex flavor profile. These are perfect for those chilly fall evenings when you want something that really warms you up from the inside.
Pumpkin Chocolate Chip Cookie Bars with Cream Cheese Frosting. For an extra indulgent treat, top the cooled bars with a simple cream cheese frosting (4 ounces cream cheese, 2 tablespoons butter, 1 cup powdered sugar, 1/2 teaspoon vanilla — beat until smooth). Spread it over the bars before cutting. This turns them into a dessert that’s fancy enough for company but easy enough for a Tuesday night.
Serving & Storage Suggestions
These best pumpkin chocolate chip cookie bars are incredibly versatile when it comes to serving. Here’s how I like to enjoy them:
Serving Temperature: These bars are delicious at room temperature, but I actually prefer them slightly warm. Pop a bar in the microwave for about 10-15 seconds before serving — the chocolate chips get all melty and the pumpkin flavor becomes even more pronounced. For a truly decadent experience, serve with a scoop of vanilla ice cream or a dollop of whipped cream.
Presentation Ideas: For a casual gathering, arrange the bars on a pretty platter or cake stand. For a more polished look, dust them lightly with powdered sugar just before serving. You can also drizzle them with a simple glaze made from powdered sugar and milk for an extra touch of sweetness.
What to Serve With Them: These bars pair beautifully with a cup of hot coffee, a chai latte, or a glass of cold milk. If you’re serving them as part of a fall dessert spread, they go wonderfully with pumpkin chocolate chip sourdough bread or brown butter pumpkin cream cheese swirl muffins for the ultimate pumpkin-themed dessert table.
Storage Instructions: Store the bars in an airtight container at room temperature for up to 4 days. They’ll stay soft and moist thanks to the pumpkin. If your kitchen is warm, you can store them in the refrigerator, but let them come to room temperature before serving for the best texture. I’ve also frozen these bars successfully — just wrap them individually in plastic wrap, place them in a freezer bag, and freeze for up to 3 months. Thaw at room temperature or warm in the microwave for 15-20 seconds.
How Flavors Develop: Honestly, these bars taste even better the day after they’re made. The spices have time to meld together, and the pumpkin flavor becomes more pronounced. If you can resist eating them all on day one, you’ll be rewarded with an even more delicious treat on day two.
Nutritional Information & Benefits
While these are absolutely a treat, they do offer a few nutritional perks worth noting. Here’s the estimated nutritional breakdown per bar (based on 16 bars):
- Calories: Approximately 210
- Total Fat: 10g
- Saturated Fat: 6g
- Carbohydrates: 30g
- Fiber: 2g
- Sugar: 19g
- Protein: 3g
Health Benefits of Key Ingredients: Pumpkin is packed with vitamin A (in the form of beta-carotene), which supports eye health and immune function. It’s also a good source of fiber, which helps with digestion and keeps you feeling full. The cinnamon in this recipe is known for its anti-inflammatory properties and can help regulate blood sugar levels. Dark chocolate (if you use dark chocolate chips) contains antioxidants called flavonoids, which are linked to heart health.
Dietary Considerations: This recipe is vegetarian and can be made vegan and gluten-free with the substitutions mentioned above. It contains dairy (butter), eggs, and gluten (flour) in its standard form. For a lower-sugar version, you can reduce the granulated sugar to 1/2 cup and the brown sugar to 1/3 cup — the bars will be less sweet but still delicious.
I’m not a nutritionist, and I don’t pretend these are health food. But I do feel a little better about eating a few of these knowing there’s actual pumpkin in there. It’s almost like eating your vegetables, right?
Frequently Asked Questions
Can I use pumpkin pie filling instead of pumpkin puree?
No, I wouldn’t recommend it. Pumpkin pie filling has added sugar and spices that will throw off the balance of this recipe. The bars would end up overly sweet and the spice blend wouldn’t match what we’re going for here. Stick with 100% pumpkin puree for the best results.
Why are my pumpkin chocolate chip cookie bars too wet or soggy?
This usually happens for one of two reasons: you used too much pumpkin, or you didn’t bake them long enough. Make sure you’re measuring exactly 3/4 cup of pumpkin puree, not heaping. Also, be sure to bake until a toothpick inserted in the center comes out with just a few moist crumbs. If the center is still jiggly, they need more time.
Can I make these bars ahead of time for a party?
Absolutely! In fact, I prefer making them a day ahead. The flavors meld together overnight and the texture becomes even better. Just bake, cool completely, store in an airtight container at room temperature, and serve the next day. They’ll be perfect.
Can I freeze these pumpkin chocolate chip cookie bars?
Yes, they freeze beautifully. Wrap individual bars tightly in plastic wrap, then place them in a freezer-safe bag or container. They’ll keep for up to 3 months. To thaw, just leave them at room temperature for about 30 minutes, or microwave for 15-20 seconds for that fresh-from-the-oven warmth.
What if I don’t have a 9×9 baking pan?
No problem! An 8×8 pan will work — your bars will be slightly thicker and may need an extra 3-5 minutes of baking time. A 9×13 pan will give you thinner bars that bake faster, around 20-22 minutes. Just keep an eye on them and check for doneness with a toothpick.
Conclusion
These best pumpkin chocolate chip cookie bars have become my go-to fall dessert for a reason. They’re simple enough to whip up on a random Tuesday when you’re craving something cozy, but impressive enough to bring to any holiday gathering. The combination of warm pumpkin spices and melty chocolate chips is just unbeatable, especially when it all comes together in a soft, tender bar that practically melts in your mouth.
I love that this recipe doesn’t require any special skills or equipment. It’s forgiving, adaptable, and always turns out delicious. Whether you’re a seasoned baker or someone who’s never made a pumpkin dessert in your life, you can absolutely nail these bars on your first try. And if you don’t? Well, that’s what the second batch is for. Trust me, you’ll want to make them again anyway.
If you give these pumpkin chocolate chip cookie bars a try, I’d love to hear how they turn out! Leave a comment below and let me know if you made any fun variations — I’m always looking for new ideas to test in my kitchen. And if you’re craving more fall treats, don’t miss my pumpkin cream cheese cinnamon roll bake or healthy pumpkin protein muffins for even more pumpkin goodness. Happy baking, friends!
Pin This Recipe!
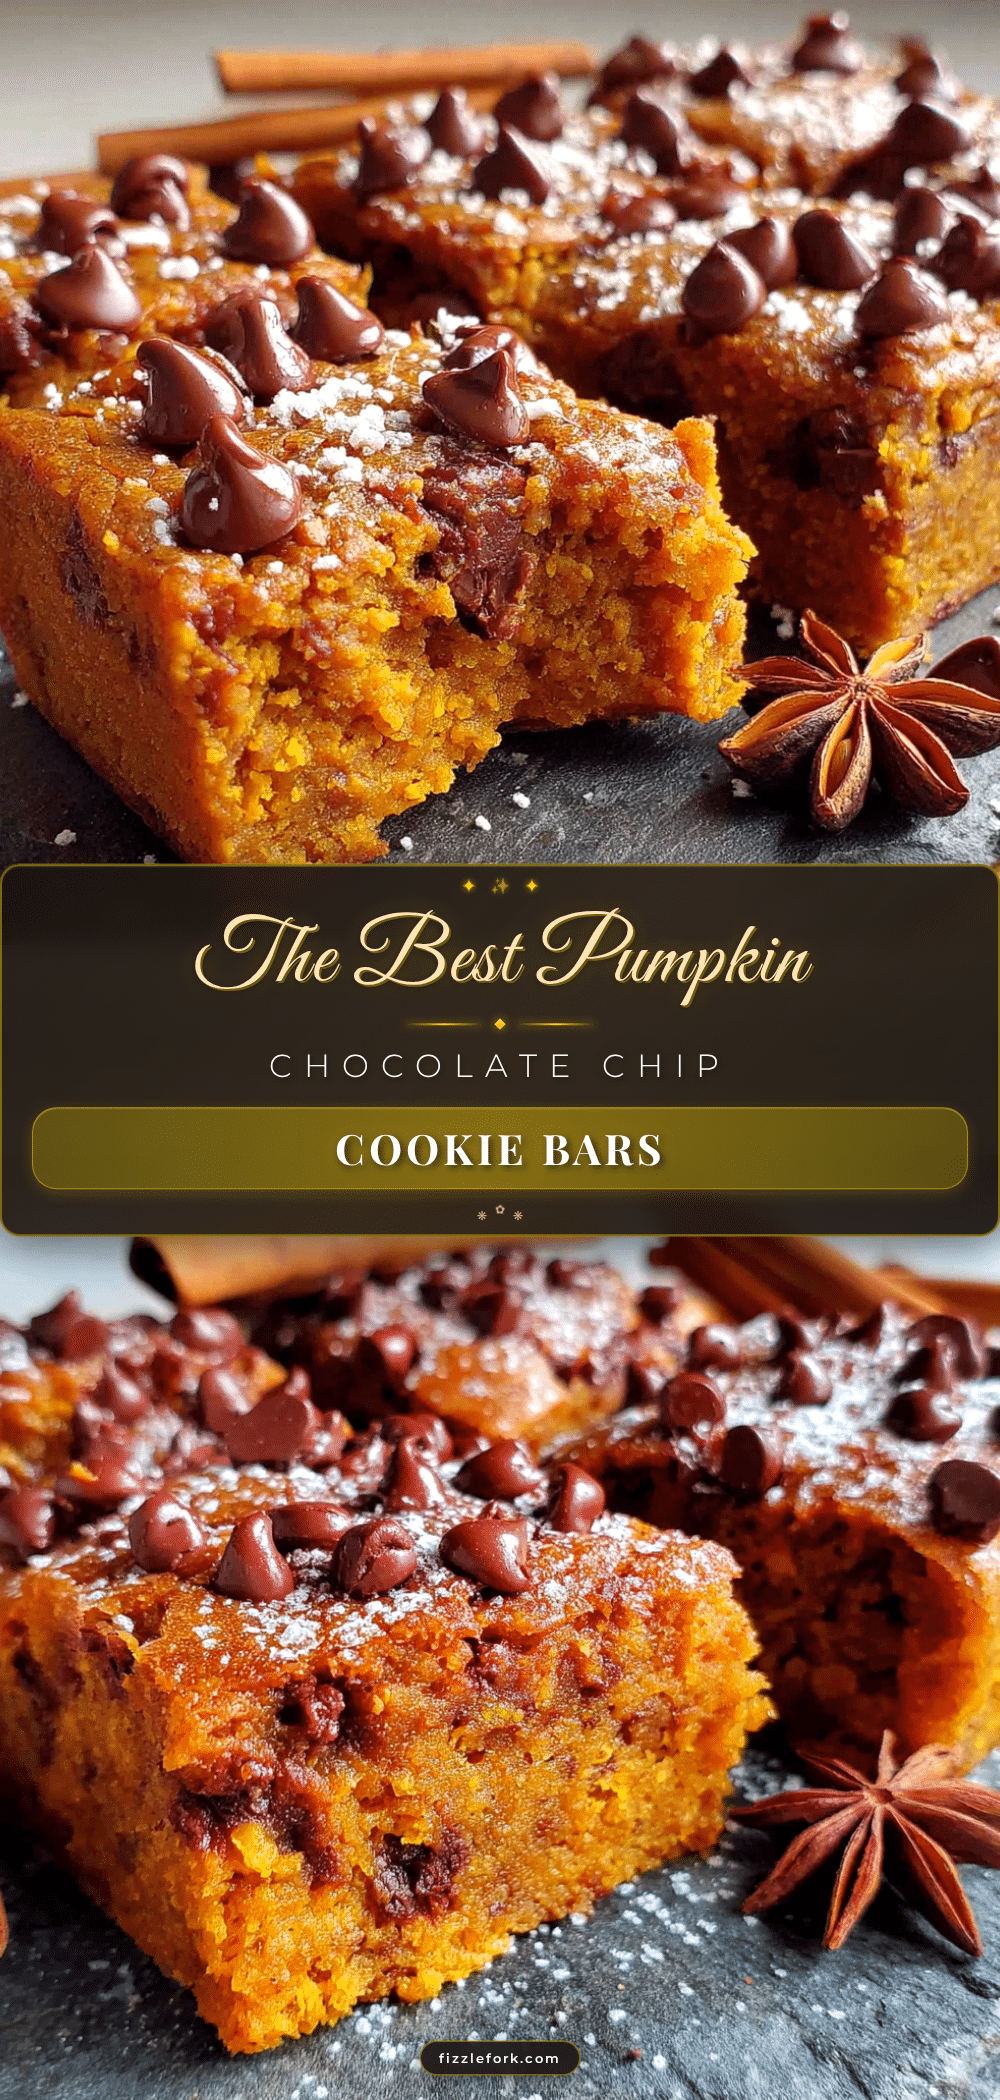
Best Pumpkin Chocolate Chip Cookie Bars: Easy Fall Dessert
These soft, dense pumpkin chocolate chip cookie bars are the ultimate fall dessert. Made in one bowl with simple pantry ingredients, they’re perfect for gatherings and guaranteed to disappear fast.
- Prep Time: 15 minutes
- Cook Time: 30 minutes
- Total Time: 45 minutes
- Yield: 16 bars 1x
- Category: Dessert
- Cuisine: American
Ingredients
- 1/2 cup (1 stick) unsalted butter, melted and slightly cooled
- 3/4 cup granulated sugar
- 1/2 cup packed light brown sugar
- 1 large egg, at room temperature
- 1 teaspoon vanilla extract
- 3/4 cup pumpkin puree
- 1 1/2 cups all-purpose flour
- 1 teaspoon baking powder
- 1/2 teaspoon baking soda
- 1/2 teaspoon salt
- 2 teaspoons ground cinnamon
- 1/2 teaspoon ground nutmeg
- 1/2 teaspoon ground ginger
- 1/4 teaspoon ground cloves
- 1 cup semi-sweet chocolate chips, divided (3/4 cup for batter, 1/4 cup for topping)
Instructions
- Preheat your oven to 350°F (175°C). Line a 9×9-inch baking pan with parchment paper, leaving overhang on two opposite sides. Grease the pan if not using parchment.
- Melt the butter in a microwave-safe bowl in 20-second bursts. Let cool for a couple of minutes.
- In a large mixing bowl, whisk together the melted butter, granulated sugar, and brown sugar until smooth. Add the egg and vanilla extract, whisk until fully incorporated.
- Stir in the pumpkin puree until completely mixed in. The batter may look curdled at first but will become smooth.
- In a separate small bowl, whisk together the flour, baking powder, baking soda, salt, cinnamon, nutmeg, ginger, and cloves.
- Add the dry ingredients to the wet mixture and stir with a spatula until just combined. Do not overmix.
- Fold in 3/4 cup of the chocolate chips. Reserve the remaining 1/4 cup for topping.
- Scoop the batter into the prepared pan and spread evenly. Sprinkle the reserved chocolate chips over the top.
- Bake on the middle rack for 25-30 minutes, until edges are golden and a toothpick inserted in the center comes out with a few moist crumbs.
- Cool in the pan for 30 minutes, then lift out using parchment handles and cool completely on a wire rack (about another 30 minutes).
- Slice into 16 equal squares using a sharp knife, wiping clean between cuts.
Notes
For clean cuts, chill bars in the fridge for 15 minutes before slicing. Bars taste even better the next day as flavors meld. Store in an airtight container at room temperature for up to 4 days, or freeze individually for up to 3 months.
Nutrition
- Serving Size: 1 bar
- Calories: 210
- Sugar: 19
- Sodium: 150
- Fat: 10
- Saturated Fat: 6
- Carbohydrates: 30
- Fiber: 2
- Protein: 3
Keywords: pumpkin chocolate chip cookie bars, fall dessert, pumpkin bars, easy pumpkin recipe, one bowl cookie bars