This was supposed to be a massive batch of cookie dough for the school bake sale. I had the mixer out, the butter softening, and a mental list of thirty cookies I needed to produce. Then my toddler, mid-tantrum about the wrong color cup, yanked the measuring cup right out of my hand. Half the flour went skittering across the counter, a good bit of it landing in my hair, and I stood there staring at the pathetic amount of dough I had left. I was already running late, the kitchen was a flour-bombed disaster zone, and I honestly wanted to cry. But you can’t waste butter, can you? So I scraped together what I had, baked off six sad-looking lumps, and shoved them in my mouth to drown my sorrows. They were perfect. I mean, absolutely, ridiculously perfect. The edges were crispy, the centers were gooey, and they had that slightly salty, deeply buttery flavor that makes you close your eyes. Maybe you’ve been there—standing in a messy kitchen, wondering how you’ll ever get dinner on the table, let alone a treat. This recipe is for those moments. It’s the happy accident that became our go-to for quiet Tuesday afternoons.
Why You’ll Love This Recipe
Let’s be honest, most cookie recipes give you three dozen. That’s great for a party, but for a regular family night? It’s a dangerous amount of temptation sitting on your counter. This small-batch chocolate chip cookie recipe is built for real life. It makes exactly six cookies, which is the perfect number for a family of four to have one each with two leftover for lunchboxes.
- Quick & Easy: From start to finish, you’re looking at about 20 minutes. No chilling required, which is a game-changer when you have a cookie emergency.
- Simple Ingredients: You probably have everything in your pantry right now. No weird flours or specialty extracts—just real butter, sugar, and chocolate.
- Perfect for Small Moments: This is the recipe you make on a rainy afternoon, after a tough homework session, or when you just need a little something sweet without committing to a week’s worth of cookies.
- Crowd-Pleaser: My kids, who are notoriously picky, fight over the last one. The texture is that perfect balance of crisp edge and soft, almost underdone center.
- Unbelievably Delicious: The secret is a slightly higher ratio of brown sugar to white, which gives these cookies a deep, almost caramel-like chewiness. It’s not just another cookie recipe—it’s the one you’ll memorize.
This isn’t just good. It’s the kind of cookie that makes you sigh after the first bite, that little moment of peace in a chaotic day. It’s comfort food, scaled down to fit your actual life.
What Ingredients You Will Need
This recipe uses simple, everyday ingredients to deliver that classic bakery-style cookie flavor. The magic is in the proportions, not the complexity of the list. Most of these are pantry staples, so you can whip up a batch anytime the craving hits.
- Unsalted Butter (3 tablespoons, softened to room temperature): I always use unsalted so I can control the salt level. Let it sit out for about 30 minutes before you start—it should be soft enough to leave a dent when you press it, but not melty. I prefer Kerrygold for its rich flavor, but any good brand works.
- Granulated Sugar (2 tablespoons): This gives the cookies a little crunch on the edges. It’s not a lot, but it makes a difference in the texture.
- Light Brown Sugar (3 tablespoons, packed): This is the star of the show. The molasses in brown sugar adds moisture and that deep, toffee-like flavor. Make sure you pack it firmly into the measuring spoon—don’t just scoop it loosely.
- Large Egg Yolk (1): Just the yolk, not the whole egg. This adds richness and tenderness without making the dough too wet. Save the egg white for your breakfast scramble tomorrow.
- Vanilla Extract (½ teaspoon): Pure vanilla is best, but imitation works in a pinch. It rounds out the sweetness and adds that warm, familiar cookie aroma.
- All-Purpose Flour (⅓ cup + 1 tablespoon, about 50 grams): Spoon and level your flour—don’t scoop directly from the bag or you’ll pack it down and end up with dry cookies. This is the most common mistake I see.
- Baking Soda (¼ teaspoon): This gives the cookies a little lift and helps them spread just the right amount. Make sure it’s fresh—check the date on the box.
- Salt (¼ teaspoon): Don’t skip this. Salt balances the sweetness and makes the chocolate flavor pop. I use fine sea salt for even distribution.
- Semi-Sweet Chocolate Chips (⅓ cup, about 60 grams): Use good quality chips. I love Ghirardelli or Guittard for their meltiness. If you prefer milk chocolate for the kids, go for it, but semi-sweet gives a better balance.
Equipment Needed
You don’t need a fancy kitchen setup for this. I’ve made these cookies in a rental cabin with a rusty whisk and a bent spatula, and they still turned out perfectly. Here’s what you’ll actually need:
- Mixing Bowls: One medium bowl for the wet ingredients and one small bowl for the dry. I use a set of nesting glass bowls—they’re cheap and last forever.
- Wooden Spoon or Rubber Spatula: A sturdy spatula works best for folding the dough together. A whisk is fine for the initial mixing, but switch to a spatula when you add the flour.
- Measuring Spoons and Cups: Accurate measurements matter in a small batch—a little too much flour can ruin the texture. Use proper measuring spoons, not your dinner spoons.
- Baking Sheet: A standard half-sheet pan works great. I line mine with parchment paper for easy cleanup and even browning. Avoid dark non-stick pans—they can cause the bottoms to burn before the centers are done.
- Cookie Scoop (Optional): A 1.5-tablespoon scoop makes perfectly uniform cookies. If you don’t have one, use two spoons to drop the dough. Honestly, I often just use my hands—it’s faster and the kids love helping.
- Cooling Rack: Letting the cookies cool on a rack prevents soggy bottoms. If you don’t have one, slide the parchment paper off the hot pan onto the counter.
Preparation Method
This comes together fast, so preheat your oven first. Get everything measured and ready—mise en place, as the fancy folks say. It makes the whole process smoother, especially if you have little helpers underfoot.
- Preheat your oven to 350°F (175°C). Line a baking sheet with parchment paper. Don’t use wax paper—it will smoke in the oven. I learned that the hard way.
- Cream the butter and sugars. In a medium bowl, combine the softened butter, granulated sugar, and packed brown sugar. Beat with a wooden spoon or spatula for about 2 minutes until the mixture is light, fluffy, and pale in color. Scrape down the sides of the bowl halfway through. This step is important—proper creaming incorporates air, which gives the cookies a tender texture. If your butter is too cold, it won’t cream properly; if it’s too melted, the cookies will spread into flat puddles.
- Add the egg yolk and vanilla. Drop in the egg yolk and pour in the vanilla extract. Mix until just combined—about 30 seconds. The mixture will look a little glossy and smell amazing. Don’t overmix here, or the cookies can become tough later.
- Whisk the dry ingredients. In a small separate bowl, whisk together the flour, baking soda, and salt. Whisking aerates the flour and distributes the leavening agents evenly. If you skip this step, you might bite into a pocket of baking soda—trust me, it’s not pleasant.
- Combine wet and dry. Add the flour mixture to the butter mixture. Fold gently with your spatula, using a scraping motion from the bottom of the bowl. Stop as soon as you see the last streak of flour disappear. Overmixing develops gluten, which makes cookies tough and cakey. We want them tender and chewy.
- Fold in the chocolate chips. Sprinkle the chocolate chips over the dough and fold them in with just a few strokes. Reserve about 6 chips to press into the tops of the dough balls later—this makes them look bakery-perfect. The dough will be soft and slightly sticky, which is exactly right.
- Portion the dough. Use a cookie scoop or your hands to divide the dough into 6 equal portions. Each should be about 1.5 tablespoons. Roll each portion into a smooth ball and place them on the prepared baking sheet, spacing them about 3 inches apart. They will spread, so give them room.
- Bake for 9-11 minutes. Place the sheet on the middle rack. Bake for 9 minutes for soft, gooey centers, or 11 minutes for slightly crisper cookies. The edges should be golden brown and the centers should look puffy and slightly underdone. They will continue to cook on the hot sheet after you pull them out.
- Cool on the baking sheet. Let the cookies rest on the hot baking sheet for 5 minutes. This is crucial—if you move them too soon, they’ll fall apart. After 5 minutes, transfer them to a cooling rack. Press a few extra chocolate chips into the tops while they’re still warm for that picture-perfect look.
Cooking Tips & Techniques
I’ve made this recipe at least twenty times, and I’ve messed it up in almost every way possible. Here’s what I’ve learned so you don’t have to repeat my mistakes.
Don’t skip the creaming step. I know it’s tempting to just stir everything together when you’re in a hurry, but that two minutes of beating the butter and sugar is what gives these cookies their light, tender crumb. If you rush it, you’ll end up with dense, flat discs. I once made this mistake while helping my daughter with homework at the same time—the cookies were edible, but they were a sad, greasy mess.
Watch your oven temperature. Ovens run hot or cold, and it varies wildly. My old apartment oven ran 25 degrees hot, and I burned three batches before I figured it out. Invest in a cheap oven thermometer—it’s the best five dollars you’ll spend. If your cookies are browning too fast on the bottom, slide another baking sheet underneath to insulate them.
Use room temperature butter. This is non-negotiable. Cold butter won’t cream properly, and melted butter will make the cookies spread into thin, crispy wafers. If you forgot to take the butter out, cut it into small cubes and microwave in 5-second bursts, flipping each time, until it’s soft but not melted. It takes patience, but it’s worth it.
Chill if you have time, but don’t stress. This recipe works beautifully without chilling, which is why I love it for quick fixes. However, if you have an extra 30 minutes, popping the dough balls in the fridge will result in thicker, chewier cookies. The cold butter takes longer to melt in the oven, so the cookies spread less. I do this when I want them to look extra pretty for company.
Multitasking tip: Measure your dry ingredients while the butter is softening. Mix the dough while the oven preheats. Clean up the bowls while the cookies are baking. This way, you’re done with the mess by the time the cookies are ready to eat.
Variations & Adaptations
One of the best things about this base recipe is how easily it adapts. I’ve played around with it quite a bit, and these are my favorite variations.
Gluten-Free Version: Substitute the all-purpose flour with a good 1:1 gluten-free baking flour blend. I’ve had great success with King Arthur Measure for Measure. Add an extra tablespoon of flour—gluten-free dough tends to be a bit wetter. Bake for the same time, but let them cool completely on the sheet before moving, as they’re more fragile when warm.
Double Chocolate Twist: Replace 1 tablespoon of the flour with 1 tablespoon of unsweetened cocoa powder. Use dark chocolate chips instead of semi-sweet. The result is a rich, fudgy cookie that my kids call “the brownie cookies.” They disappear even faster than the original.
Add-In Variations: Swap half the chocolate chips for an equal amount of white chocolate chips and dried cranberries for a festive twist. Or use chopped pecans or walnuts—toast them first in a dry pan for 3 minutes for extra flavor. My personal favorite is adding ¼ cup of mini M&Ms for a colorful, kid-friendly version that’s perfect for birthday parties.
Dairy-Free Adaptation: Use a high-quality vegan butter stick (I like Miyoko’s or Country Crock Plant Butter) in place of the dairy butter. The texture will be slightly different—a bit more cake-like—but the flavor is still excellent. Use dairy-free chocolate chips like Enjoy Life brand.
Lower Sugar Option: Reduce the granulated sugar to 1 tablespoon and the brown sugar to 2 tablespoons. The cookies will be less sweet, but the chocolate will still provide plenty of sweetness. Add a pinch more salt to balance the flavors. This version is great for toddlers who don’t need a sugar rush.
Serving & Storage Suggestions
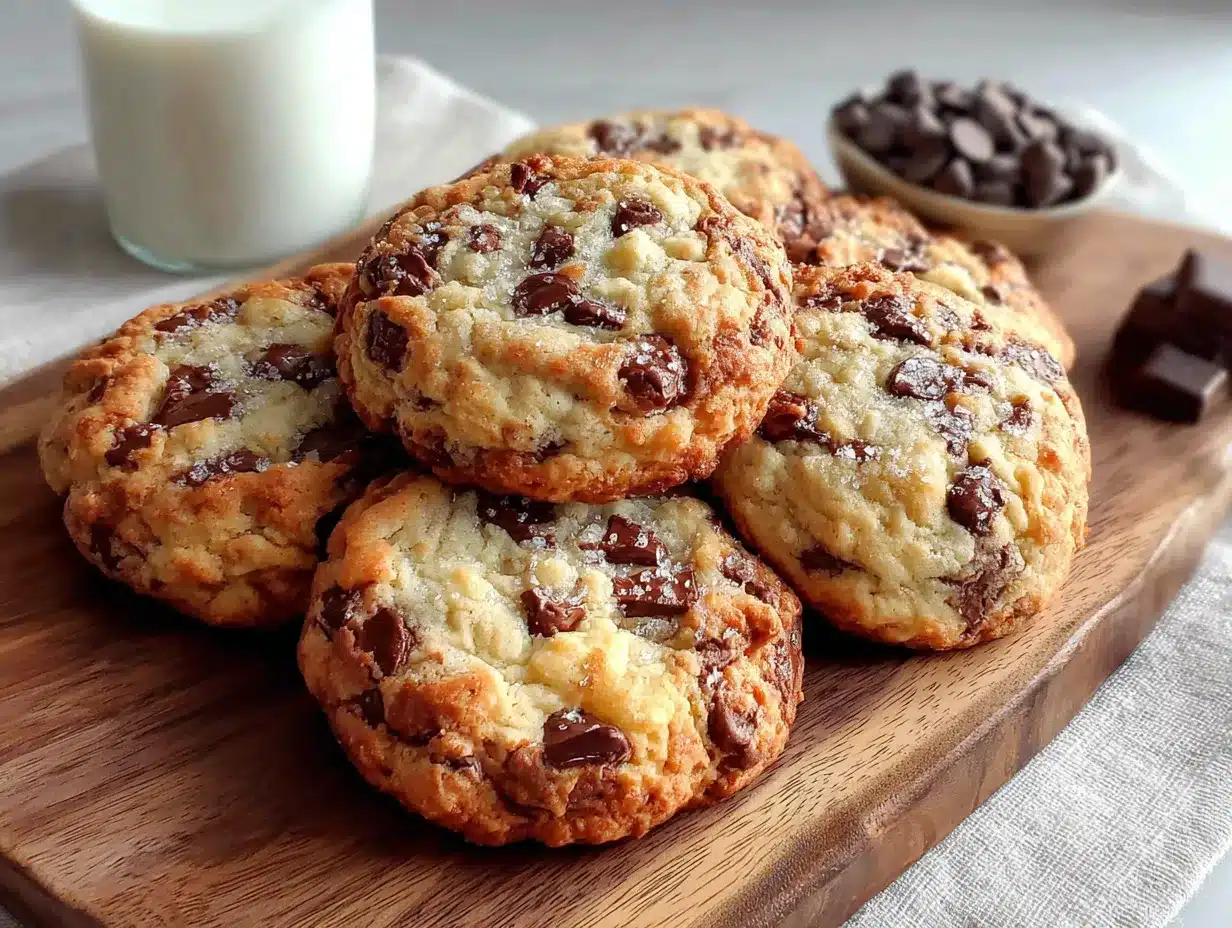
These cookies are best enjoyed warm, about 10 minutes after they come out of the oven. The chocolate is still melty, the edges are crisp, and the center is soft and pillowy. Serve them with a cold glass of milk for the kids or a strong cup of coffee for yourself.
For presentation, I like to arrange them on a small plate or a wooden board. A little dusting of flaky sea salt on top before serving makes them look fancy and adds a lovely sweet-salty contrast. If you’re feeling extra, a scoop of vanilla ice cream between two cookies makes an incredible ice cream sandwich.
Storage: Store any leftover cookies (if there are any—honestly, there usually aren’t) in an airtight container at room temperature for up to 3 days. Place a slice of bread in the container with the cookies—the bread will absorb excess moisture and keep the cookies soft. Replace the bread slice every day if you’re storing them longer.
Freezing: You can freeze the baked cookies for up to 2 months. Wrap each cookie individually in plastic wrap, then place them in a freezer bag. Thaw at room temperature for about 15 minutes, then warm in a 300°F oven for 3-4 minutes. They taste almost as good as fresh.
Freezing the Dough: This is my favorite trick. Portion the dough into balls, place them on a parchment-lined baking sheet, and freeze until solid (about 1 hour). Transfer the frozen dough balls to a freezer bag. When you want fresh cookies, bake directly from frozen—just add 2-3 minutes to the baking time. This way, you’re always 12 minutes away from warm cookies.
The flavor actually improves after the first day. The sugars meld together, and the texture becomes even more chewy. If you can resist eating them all, day-old cookies are a treat.
Nutritional Information & Benefits
Let’s be real—these are cookies. They’re a treat, not a health food. But knowing what’s in them helps you enjoy them mindfully. Here’s the approximate breakdown for one cookie (based on the recipe making six):
| Nutrient | Amount per Cookie |
|---|---|
| Calories | 185 |
| Total Fat | 10g |
| Saturated Fat | 6g |
| Carbohydrates | 23g |
| Sugar | 14g |
| Protein | 2g |
| Sodium | 135mg |
On the bright side, the butter provides a small amount of vitamin A, and the chocolate contains antioxidants called flavonoids. Using semi-sweet chocolate instead of milk chocolate reduces the sugar content slightly. The egg yolk adds choline, which is good for brain health—so you can tell the kids these cookies are brain food. I mean, it’s a stretch, but it works.
This recipe is vegetarian and can be made gluten-free and dairy-free with the substitutions I mentioned above. It contains wheat, dairy, and eggs, so keep that in mind for allergies. If you’re watching your sugar intake, the lower-sugar variation is a good option.
I believe in balance—we eat healthy meals all week, and on the weekends or after a rough day, we have cookies. No guilt, just enjoyment. These cookies are part of that philosophy: a small, perfect indulgence that doesn’t derail your whole week.
Conclusion
This small-batch chocolate chip cookie recipe is the one I turn to again and again. It’s not fancy or complicated—it’s just honest, delicious cookies that come together in minutes with ingredients I always have on hand. It’s the recipe that saved me from a meltdown in a flour-covered kitchen, and now it’s the one my kids request on random Tuesday afternoons when they need a little pick-me-up.
I love that it makes just six cookies. No endless Tupperware containers of stale cookies on the counter, no temptation to eat a dozen in one sitting. Just the perfect amount for a little moment of sweetness. You can customize it however you like—swap the chips, add nuts, make it gluten-free. The base is forgiving and flexible, just like real life.
I’d love to hear how these turn out for you. Did your kids love them? Did you try a fun variation? Drop a comment below and let me know—I read every single one. And if you’re looking for more small-batch treats, check out my small-batch blueberry muffins or one-bowl fudge brownies. Happy baking, friends—you’ve got this!
Frequently Asked Questions
Can I double this recipe to make 12 cookies?
Absolutely. Simply double all the ingredients. Use a whole egg instead of just the yolk—the extra white will add a bit of structure. The baking time stays the same, but you may need to bake in two batches to avoid overcrowding the pan.
Why did my cookies turn out flat?
This usually happens for one of three reasons: your butter was too melted, you didn’t measure the flour correctly (too little flour), or your baking soda is old. Make sure your butter is soft but not liquid, spoon and level your flour, and check that your baking soda is less than six months old.
Can I use margarine instead of butter?
I don’t recommend it. Margarine has a higher water content than butter, which throws off the texture. The cookies will spread more and won’t have that rich, buttery flavor. Stick with real butter for the best results.
Can I make these cookies without an electric mixer?
Yes, and I actually prefer it. A wooden spoon and a little elbow grease work perfectly. The small batch is easy to mix by hand, and you avoid overmixing, which can happen with an electric mixer. Plus, less cleanup!
How do I know when the cookies are done baking?
Look for golden brown edges and puffy, slightly underdone centers. The tops should look set but still soft. If you press gently on the center, it should spring back slightly. Remember, they continue to bake on the hot sheet for 5 minutes after you pull them out, so it’s better to underbake slightly than overbake.
Pin This Recipe!
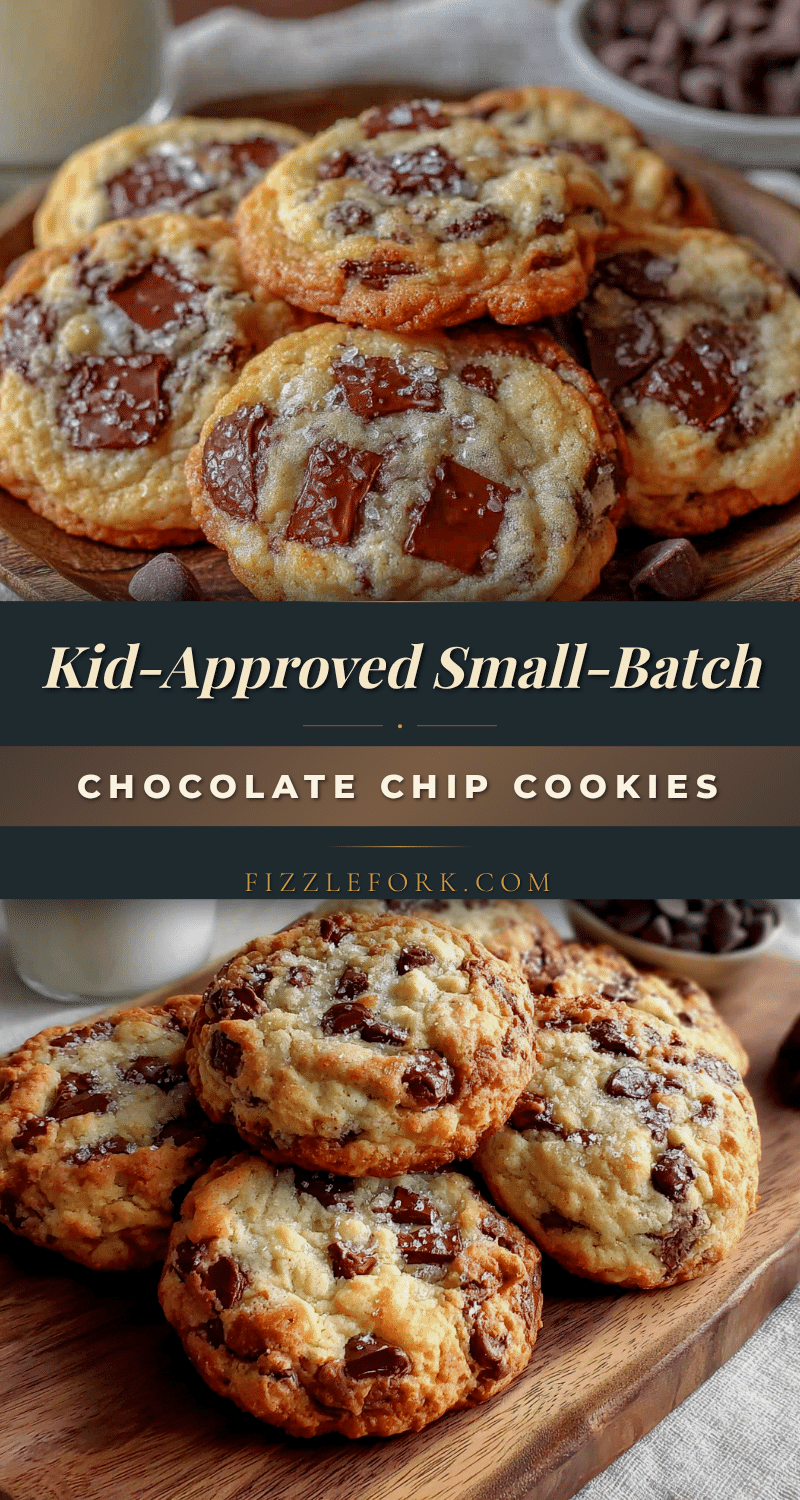
Best Small-Batch Chocolate Chip Cookies (6 Kid-Approved Cookies)
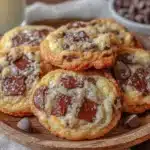
This small-batch chocolate chip cookie recipe makes exactly six perfect cookies with crispy edges, gooey centers, and a deeply buttery flavor. It’s the happy accident that became our go-to for quiet Tuesday afternoons.
- Prep Time: 10 minutes
- Cook Time: 9-11 minutes
- Total Time: 20 minutes
- Yield: 6 cookies 1x
- Category: Dessert
- Cuisine: American
Ingredients
- 3 tablespoons unsalted butter, softened to room temperature
- 2 tablespoons granulated sugar
- 3 tablespoons light brown sugar, packed
- 1 large egg yolk
- ½ teaspoon vanilla extract
- ⅓ cup + 1 tablespoon all-purpose flour (about 50 grams)
- ¼ teaspoon baking soda
- ¼ teaspoon salt
- ⅓ cup semi-sweet chocolate chips (about 60 grams)
Instructions
- Preheat your oven to 350°F (175°C). Line a baking sheet with parchment paper.
- In a medium bowl, combine the softened butter, granulated sugar, and packed brown sugar. Beat with a wooden spoon or spatula for about 2 minutes until light, fluffy, and pale in color. Scrape down the sides of the bowl halfway through.
- Add the egg yolk and vanilla extract. Mix until just combined—about 30 seconds.
- In a small separate bowl, whisk together the flour, baking soda, and salt.
- Add the flour mixture to the butter mixture. Fold gently with a spatula until just combined—stop as soon as the last streak of flour disappears.
- Fold in the chocolate chips with a few strokes. Reserve about 6 chips to press into the tops of the dough balls later.
- Divide the dough into 6 equal portions (about 1.5 tablespoons each). Roll into smooth balls and place on the prepared baking sheet, spacing them about 3 inches apart.
- Bake for 9-11 minutes. For soft, gooey centers, bake 9 minutes; for slightly crisper cookies, bake 11 minutes. Edges should be golden brown and centers puffy and slightly underdone.
- Let the cookies rest on the hot baking sheet for 5 minutes. Then transfer to a cooling rack. Press reserved chocolate chips into the tops while still warm.
Notes
For thicker, chewier cookies, chill the dough balls for 30 minutes before baking. The flavor improves after the first day. Store in an airtight container at room temperature for up to 3 days with a slice of bread to keep them soft. Freeze baked cookies for up to 2 months or freeze dough balls for quick baking later.
Nutrition
- Serving Size: 1 cookie
- Calories: 185
- Sugar: 14
- Sodium: 135
- Fat: 10
- Saturated Fat: 6
- Carbohydrates: 23
- Fiber: 1
- Protein: 2
Keywords: small-batch chocolate chip cookies, 6 cookies, easy cookie recipe, no chill cookies, kid-approved cookies, quick cookies