Halloween cookie recipes always had a problem. They looked the part but tasted like a sugar cookie with food coloring. You know the ones—vibrant orange and green icing, maybe some sprinkles, but nothing that actually screamed Halloween in flavor. For a while, I just accepted that spooky cookies were going to be more about appearance than taste. Then I started playing with black cocoa powder. Not the regular stuff you use for chocolate chip cookies, but the deeply dark, almost Oreo-like black cocoa that turns everything it touches into something mysterious. I had been looking for a Halloween cookie that actually tasted as dramatic as it looked. Something that didn’t need a ton of frosting or artificial coloring to feel festive. These crinkle cookies? They’re the ones that finally fit.
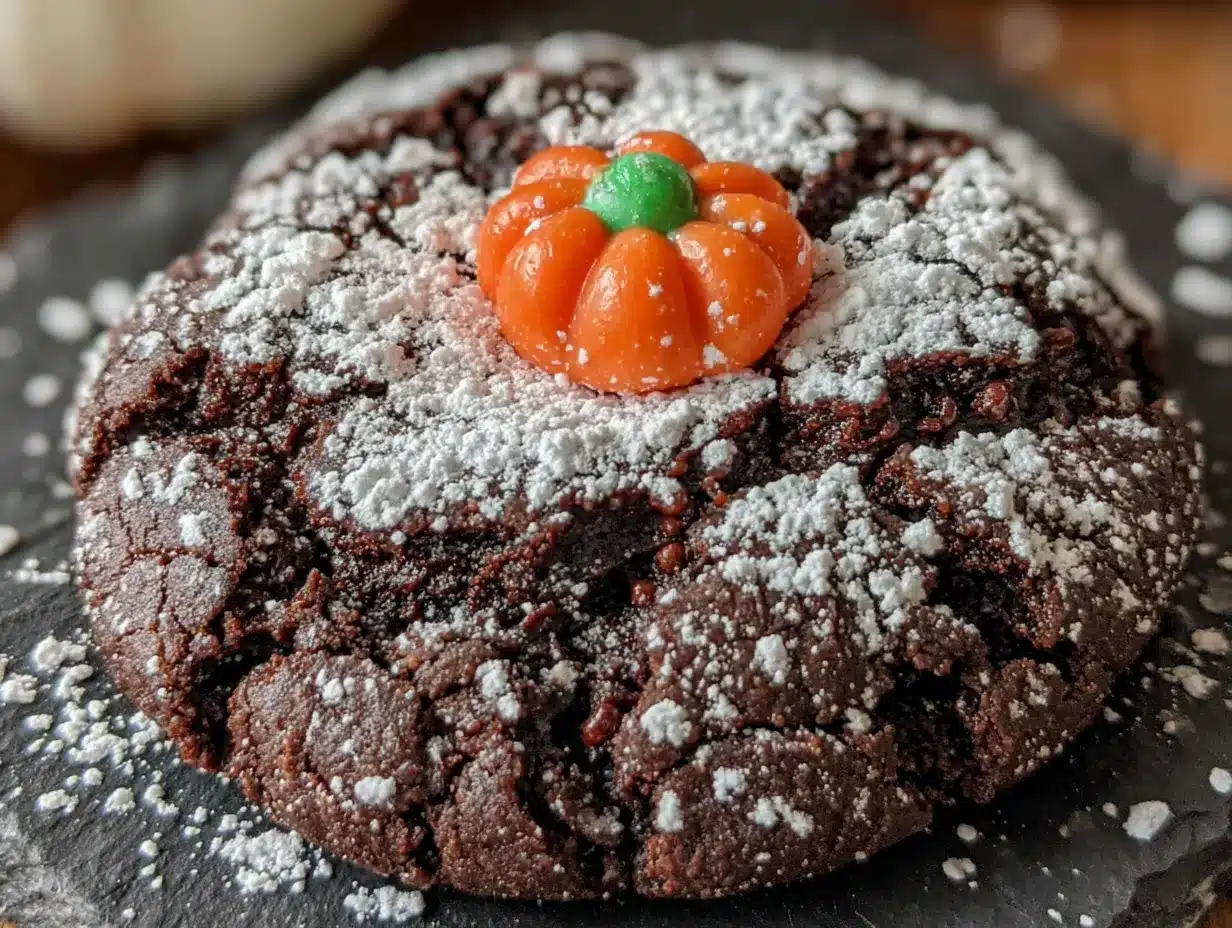
The first batch came out of the oven looking like little moonscapes—cracked, dark, dusted with powdered sugar that made them look like they’d been hit with a light snow. My kid grabbed one before it had even cooled and said, “These taste like Oreos but better.” That’s the thing about black cocoa. It’s not bitter like dark chocolate. It’s almost smoky, with this soft, nostalgic flavor that reminds you of the best packaged chocolate cookies you ate as a kid. These crinkle cookies nail that without any of the weird ingredients.
They come together in about 20 minutes of active time, which matters when you’re juggling costume prep and pumpkin carving. The dough chills for an hour, but that’s passive time—you can go finish hanging fake cobwebs or whatever else October throws at you. And honestly? The contrast of the jet-black cookie against the white powdered sugar is just satisfying to look at. You don’t need royal icing or fancy piping bags. Just a bowl, a whisk, and some patience while the dough rests.
Why You’ll Love This Recipe
I’ve tested this recipe about seven times to get the texture right. Black cocoa behaves differently than regular cocoa powder—it’s less acidic and more absorbent, which means you have to balance the fat and moisture carefully. Too much butter and the cookies spread into flat black puddles. Too little and they’re dry and crumbly. This version hits that sweet spot where the centers stay soft and fudgy while the edges have just a little chew.
- Quick & Easy: Active prep takes about 20 minutes. The dough needs to chill, but that’s hands-off time.
- Simple Ingredients: No specialty items except black cocoa powder, which you can find at most grocery stores or online. Everything else is pantry standard.
- Perfect for Halloween: These look incredible on a dessert table next to Halloween sugar cookies or witch cauldron punch. The dark color makes them stand out without any artificial dye.
- Crowd-Pleaser: Kids love the Oreo-like flavor. Adults love that they’re not overly sweet. Everyone loves the dramatic look.
- Unbelievably Delicious: The black cocoa gives a deep, almost toasty chocolate flavor that regular cocoa just can’t replicate. It’s the kind of cookie that makes you pause after the first bite.
What makes this recipe different from other crinkle cookies is the technique. I use melted butter instead of creaming softened butter, which gives a denser, fudgier texture that works perfectly with black cocoa. The dough gets rolled into balls, then generously coated in powdered sugar before baking. As the cookies spread, the dark dough cracks through the white sugar, creating that signature crinkle look. It’s simple but effective, and it never gets old watching them transform in the oven.
This isn’t just another Halloween cookie. It’s the one that makes people ask, “What’s in these?” It’s comfort food with a dark twist—familiar enough to feel nostalgic, but different enough to feel special. Perfect for Halloween parties, trick-or-treat night, or just because you want something that matches your October mood.
What Ingredients You Will Need
This recipe keeps the ingredient list short and intentional. Each component plays a specific role in getting that soft, fudgy texture and dramatic dark color. Most of these are pantry staples, and the black cocoa powder does the heavy lifting for flavor and appearance.
- Black cocoa powder (½ cup / 50g): This is the star. Regular Dutch-process cocoa won’t give you the same color or flavor. Black cocoa is what makes Oreos taste like Oreos. I prefer the brand Rodelle for its smooth, not-too-bitter profile. If you can only find it online, order ahead—it’s worth having on hand for future batches.
- All-purpose flour (1 cup / 125g): Standard AP flour works perfectly. No need for bread flour or cake flour here. The structure comes from the right ratio of fat to flour.
- Granulated sugar (¾ cup / 150g): Regular white sugar. It dissolves into the butter and egg mixture to create that slightly crackly exterior.
- Unsalted butter (¼ cup / 57g), melted: Melted butter gives these cookies a denser, chewier texture. If you only have salted butter, reduce the added salt to ⅛ teaspoon.
- Large egg (1): Room temperature is best. If you forget to take it out ahead of time, place the egg in a bowl of warm water for 5 minutes.
- Vanilla extract (1 teaspoon): Real vanilla, not imitation. It rounds out the deep cocoa flavor without competing with it.
- Baking powder (1 teaspoon): This gives the cookies their lift and helps create those crinkles as they bake.
- Salt (¼ teaspoon): Just enough to balance the sweetness and enhance the chocolate notes.
- Powdered sugar (½ cup / 60g, for rolling): You’ll need more than you think. The generous coating is what creates the crinkle effect. I usually end up using about ¾ cup total because some gets absorbed or lost during rolling.
Substitution guidance: For a dairy-free version, use vegan butter sticks (not tub margarine) melted. The texture will be slightly different but still good. For a gluten-free option, swap the all-purpose flour with a 1:1 gluten-free baking flour blend that contains xanthan gum. I’ve tested this with King Arthur’s Measure for Measure and it worked well, though the cookies spread slightly more.
The black cocoa powder is non-negotiable for the color, but if you’re in a pinch, you can use half regular Dutch-process cocoa and half black cocoa. You’ll still get a dark cookie, just not the jet-black effect. Learn from my mistake—I tried using only regular cocoa once and ended up with grayish cookies that looked sad.
Equipment Needed
You don’t need much for these cookies, which is part of their appeal. Here’s what you’ll need:
- Mixing bowls: One medium bowl for dry ingredients, one large bowl for wet ingredients.
- Whisk: For combining the dry ingredients and smoothing out the cocoa powder.
- Wooden spoon or rubber spatula: For mixing the dough. A spatula works better for scraping the sides.
- Measuring cups and spoons: Accurate measurements matter with black cocoa because it absorbs liquid differently than regular cocoa.
- Baking sheet: A standard half-sheet pan works. Line it with parchment paper—no greasing needed.
- Parchment paper: Non-negotiable. The cookies will stick to unlined pans.
- Small bowl: For the powdered sugar coating.
- Cooling rack: Lets air circulate so the bottoms don’t get soggy.
- Plastic wrap: To cover the dough while it chills.
If you don’t have a stand mixer, don’t worry. This dough comes together by hand in about 3 minutes. A hand mixer works too, but I actually prefer mixing by hand because it’s easier to avoid overmixing, which can make the cookies tough. As for baking sheets, I’ve used both cheap and expensive ones, and honestly, the cheap ones work fine as long as they’re not warped. If your pan is dark-colored, reduce the oven temperature by 25°F to prevent over-browning on the bottoms.
One tip: use a cookie scoop if you have one. It keeps the dough balls uniform, which means they’ll bake evenly. I use a 1.5-tablespoon scoop, and it makes the process so much faster than rolling by hand.
Preparation Method
This recipe makes about 18 cookies, depending on how large you roll them. The active time is short, but the dough needs at least 1 hour of chilling. Plan accordingly.
- Combine the dry ingredients. In a medium bowl, whisk together the all-purpose flour, black cocoa powder, baking powder, and salt. Black cocoa tends to clump, so whisk thoroughly to break up any lumps. If you see tiny dark specks, keep whisking—they should disappear. Set the bowl aside.
- Mix the wet ingredients. In a large bowl, whisk the melted butter and granulated sugar together until they’re combined. It won’t look creamy like creamed butter and sugar—it’ll be more like wet sand. That’s normal. Add the egg and vanilla extract, then whisk vigorously for about 30 seconds until the mixture is smooth and slightly thickened. You should see small bubbles on the surface.
- Combine wet and dry. Pour the dry ingredients into the wet mixture. Use a rubber spatula to fold everything together until just combined. Don’t overmix. Stop when you can’t see any more streaks of flour. The dough will be quite soft and slightly sticky—that’s correct.
- Chill the dough. Cover the bowl with plastic wrap and refrigerate for at least 1 hour. This step is non-negotiable. The dough needs to firm up so it holds its shape during baking. I’ve rushed this before and ended up with flat, sad cookies. If you’re in a hurry, you can pop the dough in the freezer for 20 minutes, but the texture won’t be quite as good. While the dough chills, preheat your oven to 350°F (175°C) and line a baking sheet with parchment paper.
- Roll and coat. Once the dough is firm, place the powdered sugar in a small bowl. Scoop about 1.5 tablespoons of dough and roll it between your palms into a smooth ball. Drop the ball into the powdered sugar and roll it around until completely coated. The thicker the coating, the more dramatic the crinkle effect. I use my fingers to press the sugar into any bare spots. Place the coated dough balls on the prepared baking sheet, spacing them about 2 inches apart. They’ll spread, so give them room.
- Bake. Bake for 10 to 12 minutes. At 10 minutes, the cookies will look puffed and cracked with soft centers. At 12 minutes, they’ll be slightly firmer with more defined edges. I prefer 11 minutes—the centers stay fudgy while the edges set. The cookies will look underdone when you pull them out. That’s intentional. They continue baking on the hot pan as they cool.
- Cool. Let the cookies rest on the baking sheet for 5 minutes. This allows them to set without breaking apart. Then transfer them to a wire rack to cool completely. The crinkle pattern will become more pronounced as they cool. If you try to move them too soon, they’ll fall apart. I learned this the hard way with my first batch.
Sensory cues: When the cookies are done, the tops should be cracked with visible white sugar lines running through the dark dough. The edges will look set but the centers will still appear soft and slightly puffy. The smell is incredible—deep chocolate with a hint of almost-coffee richness from the black cocoa. The bottoms should be just barely browned, not dark.
Cooking Tips & Techniques
After multiple batches, I’ve picked up a few things that make a real difference. First, don’t skip sifting the powdered sugar if it’s lumpy. I made that mistake once and ended up with uneven white patches on some cookies. A fine-mesh strainer takes two seconds and prevents the problem entirely.
The biggest mistake people make with crinkle cookies is not chilling the dough long enough. I get it—you want cookies now. But warm dough spreads too much, and the crinkle effect depends on the dough holding its shape while the outside sets. One hour minimum. Two hours is better. Overnight works great if you’re planning ahead.
Another tip: use your hands to roll the dough balls firmly. Loose, shaggy balls will fall apart in the powdered sugar and leave you with a mess. Press the dough together until it forms a smooth, cohesive ball. Then roll it generously in the sugar. I like to double-coat mine—roll once, let it sit for 30 seconds, then roll again. The extra layer of sugar creates those beautiful deep cracks.
If your cookies come out flat, the dough was too warm or you used too much butter. If they come out dry and crumbly, you overbaked them or measured the flour incorrectly. Spoon the flour into your measuring cup and level it off—don’t scoop directly from the bag, which packs the flour and gives you too much.
Timing strategy: make the dough the night before you plan to bake. It takes 10 minutes to mix, then you can chill it overnight. The next day, roll, coat, and bake in under 20 minutes. This is my preferred method when I’m hosting a Halloween party and don’t want to be stuck in the kitchen while guests are arriving.
Variations & Adaptations
These cookies are versatile despite their dramatic appearance. Here are some ways to change them up:
- Spicy Black Cocoa Cookies: Add ½ teaspoon of cayenne pepper and ½ teaspoon of cinnamon to the dry ingredients. The heat plays beautifully with the dark cocoa, giving a Mexican chocolate vibe. I tried this for a Halloween party and people couldn’t stop eating them.
- Stuffed Crinkle Cookies: Press a small piece of white chocolate or a marshmallow into the center of each dough ball before rolling in powdered sugar. The white filling contrasts with the dark cookie when you bite into it. Just make sure the filling is fully enclosed so it doesn’t leak out during baking.
- Gluten-Free Version: Substitute the all-purpose flour with a 1:1 gluten-free baking blend. Add ¼ teaspoon of xanthan gum if your blend doesn’t already include it. The texture will be slightly more delicate, but the flavor and appearance are nearly identical.
- Mint Chocolate Version: Add ½ teaspoon of peppermint extract along with the vanilla. These taste like a dark chocolate mint cookie—perfect for a Halloween treat that feels slightly sophisticated. Pair them with a cup of hot cocoa for the ultimate cozy dessert.
- Orange Cream Version: Add 1 teaspoon of orange zest to the wet ingredients. The citrus cuts through the deep cocoa and adds a bright note that’s surprisingly good. The orange and black color combo is also very on-theme for Halloween.
If you’re serving these alongside other treats, they pair beautifully with black velvet Halloween cake for a truly monochromatic dessert spread. The contrast of textures—soft cake and chewy crinkle cookies—is lovely.
Serving & Storage Suggestions
These cookies are best served at room temperature. The texture is soft and fudgy, and the powdered sugar coating stays intact. If you serve them warm, the sugar will melt slightly and the cookies will be more delicate. That’s not a bad thing, but they’re easier to handle when fully cooled.
For presentation, arrange them on a black or dark gray platter to make the white powdered sugar pop. A sprinkle of extra powdered sugar over the top right before serving adds a nice touch. I like to place them next to a bowl of Halloween spiderweb latte for a spooky coffee break.
Storage: Keep the cookies in an airtight container at room temperature for up to 5 days. Place a sheet of parchment paper between layers to prevent the powdered sugar from rubbing off. Do not refrigerate them—the fridge dries out baked goods and makes the texture stale.
Freezing: These cookies freeze beautifully. Place cooled cookies in a single layer in a freezer-safe container with parchment between layers. They’ll keep for up to 3 months. Thaw at room temperature for about 30 minutes before serving. You can also freeze the unbaked dough balls after rolling them in powdered sugar. Place them on a baking sheet in the freezer until solid, then transfer to a freezer bag. Bake directly from frozen, adding 2 to 3 minutes to the baking time.
The flavor actually improves after a day or two. The black cocoa mellows and the texture settles into a perfect fudgy chew. I always try to save a few for the next day—if I can resist eating them all.
Nutritional Information & Benefits
Per cookie (based on 18 cookies): approximately 120 calories, 5g fat, 18g carbohydrates, 2g protein, 1g fiber, 10g sugar. These are estimates and will vary based on exact ingredient brands and measurements.
Black cocoa powder is lower in acidity than regular cocoa, which some people find easier on the stomach. It also contains antioxidants called flavonoids, though the amount is reduced during the Dutch-processing method. Still, it’s a better choice than artificial food coloring for achieving a dramatic dark color.
These cookies are vegetarian and can be made dairy-free and gluten-free with the substitutions mentioned earlier. They contain eggs and wheat (unless using gluten-free flour). If you’re serving them at a party with guests who have allergies, it’s worth labeling them clearly.
From a wellness perspective, these cookies are a treat—not a health food. But they’re made with real ingredients, no preservatives, and no artificial colors. That matters to me when I’m feeding my family. I’d rather give them something homemade with black cocoa than something from a package with a list of unpronounceable ingredients.
Conclusion
These black cocoa Halloween crinkle cookies are the kind of recipe that makes you feel like you’ve discovered a secret. They look dramatic and spooky, taste like the best chocolate cookies you’ve ever had, and come together with minimal effort. No fancy decorating skills required. No expensive ingredients. Just good, honest baking with a dark twist.
What I love most about this recipe is how reliable it is. The dough behaves predictably, the crinkle effect works every time, and the flavor is consistently excellent. It’s become my go-to for Halloween parties, classroom treats, and even just a quiet October afternoon when I want something that feels a little bit magical.
I’d love to hear how yours turn out. Did you try any variations? Did the kids help roll the dough balls? Drop a comment below and let me know. And if you share them on social media, tag me—I love seeing these dark beauties in the wild. Happy Halloween baking, friends. These cookies are worth every minute.
Frequently Asked Questions
Can I use regular cocoa powder instead of black cocoa?
You can, but the cookies won’t be black. They’ll be a dark brown color, and the flavor will be more like a standard chocolate crinkle cookie. For the dramatic Halloween look, black cocoa is essential. If you only have regular cocoa, consider adding a teaspoon of instant espresso powder to deepen the color slightly.
Why did my cookies spread too much?
This usually happens when the dough isn’t chilled enough. Make sure you chill for at least 1 hour, preferably 2. Another cause is using melted butter that’s too warm. Let the melted butter cool to room temperature before mixing. If your kitchen is warm, pop the dough in the fridge for 30 minutes before rolling.
Can I make the dough ahead of time?
Absolutely. The dough keeps in the refrigerator for up to 3 days. Wrap it tightly in plastic wrap so it doesn’t dry out. You can also freeze the dough balls after rolling them in powdered sugar. Bake from frozen, adding 2 to 3 minutes to the baking time.
How do I get the perfect crinkle effect?
Roll the dough balls generously in powdered sugar. I double-coat mine for the best results. Make sure the dough is well-chilled before rolling. And don’t overbake—pull the cookies out when they look puffed and cracked but still soft in the center. The crinkles become more pronounced as they cool.
Can I double this recipe?
Yes, this recipe doubles easily. Just make sure your mixing bowl is large enough to accommodate the extra dough. The chilling time remains the same. You may need to bake in batches, so keep the remaining dough in the refrigerator while the first batch bakes.
Pin This Recipe!
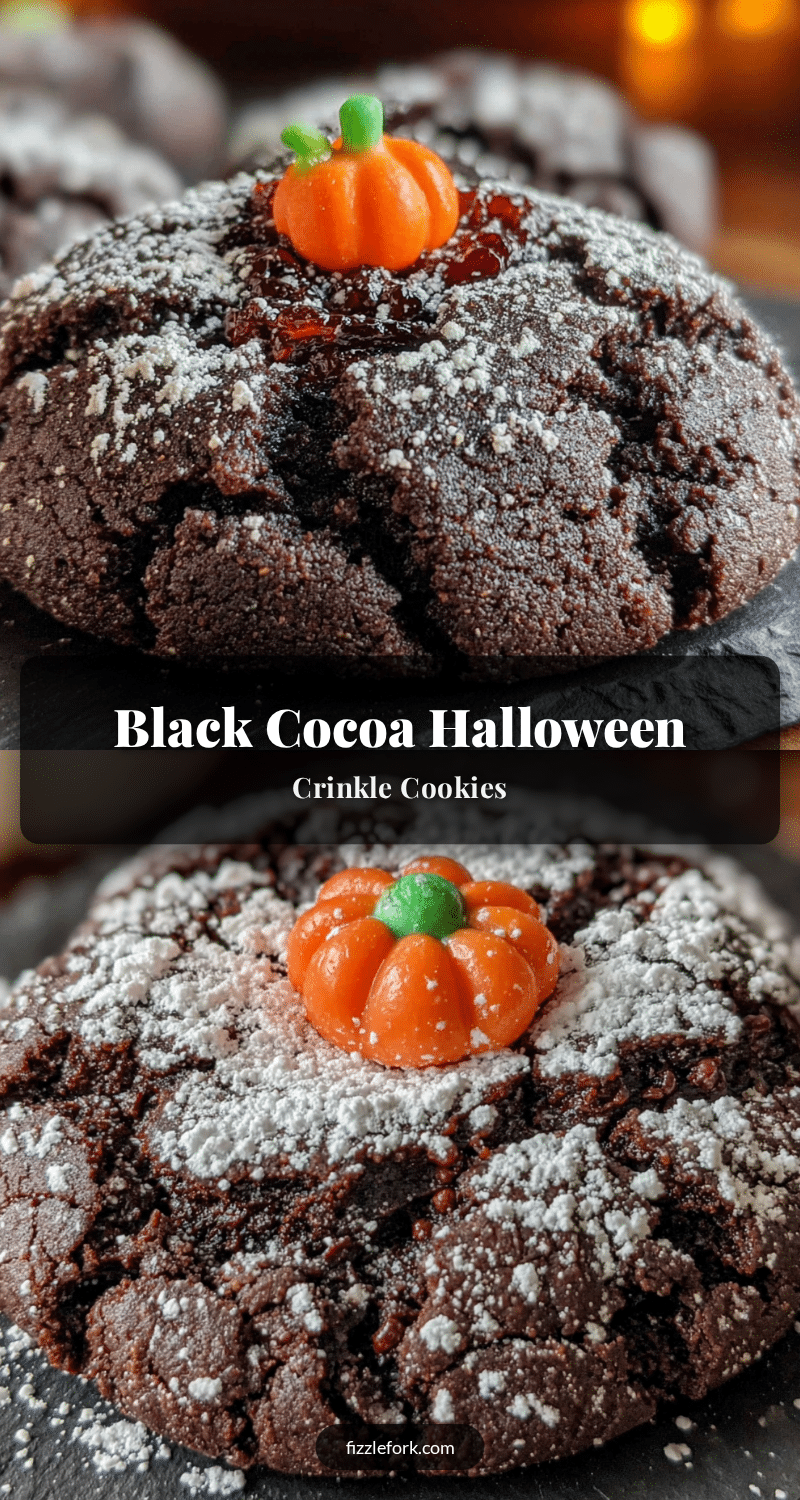
Black Cocoa Halloween Crinkle Cookies: Easy 20-Min Recipe

These black cocoa Halloween crinkle cookies are deeply dark, fudgy, and dusted with powdered sugar for a dramatic crinkle effect. They come together in about 20 minutes of active time and taste like Oreos but better—perfect for Halloween parties or a spooky treat.
- Prep Time: 20 minutes
- Cook Time: 11 minutes
- Total Time: 1 hour 31 minutes (includes 1 hour chilling)
- Yield: 18 cookies 1x
- Category: Dessert
- Cuisine: American
Ingredients
- ½ cup (50g) black cocoa powder
- 1 cup (125g) all-purpose flour
- ¾ cup (150g) granulated sugar
- ¼ cup (57g) unsalted butter, melted
- 1 large egg, room temperature
- 1 teaspoon vanilla extract
- 1 teaspoon baking powder
- ¼ teaspoon salt
- ½ cup (60g) powdered sugar (for rolling, plus more as needed)
Instructions
- In a medium bowl, whisk together the all-purpose flour, black cocoa powder, baking powder, and salt until well combined and no lumps remain. Set aside.
- In a large bowl, whisk the melted butter and granulated sugar together until combined (it will look like wet sand). Add the egg and vanilla extract, then whisk vigorously for about 30 seconds until smooth and slightly thickened.
- Pour the dry ingredients into the wet mixture. Use a rubber spatula to fold together until just combined. The dough will be soft and slightly sticky.
- Cover the bowl with plastic wrap and refrigerate for at least 1 hour (or up to overnight).
- Preheat the oven to 350°F (175°C). Line a baking sheet with parchment paper.
- Place the powdered sugar in a small bowl. Scoop about 1.5 tablespoons of dough and roll into a smooth ball. Roll the ball in the powdered sugar until completely coated. Place on the prepared baking sheet, spacing about 2 inches apart.
- Bake for 10 to 12 minutes. The cookies will look puffed and cracked with soft centers. Let them rest on the baking sheet for 5 minutes, then transfer to a wire rack to cool completely.
Notes
Chill the dough for at least 1 hour to prevent spreading. For a more dramatic crinkle effect, double-coat the dough balls in powdered sugar. The cookies continue to bake on the hot pan after removal, so do not overbake. Store in an airtight container at room temperature for up to 5 days. Freeze baked cookies for up to 3 months.
Nutrition
- Serving Size: 1 cookie
- Calories: 120
- Sugar: 10
- Sodium: 85
- Fat: 5
- Saturated Fat: 3
- Carbohydrates: 18
- Fiber: 1
- Protein: 2
Keywords: black cocoa, Halloween cookies, crinkle cookies, chocolate cookies, easy cookie recipe, spooky cookies, Oreo cookies