Late November dusk settles early over the kitchen counter, and the only thing I want is a bowl of something warm enough to hold my full attention. The squash has been sitting on the cutting board for an hour, its orange flesh catching the last of the daylight through the window. I’d bought it three days ago at the farmers’ market, telling myself I’d get around to it, and now the timing feels right—not rushed, not forced, just the natural rhythm of a quiet Tuesday evening when cooking becomes the main event, not the chore you squeeze between emails.
There’s a particular kind of satisfaction that comes from browning butter. You stand there watching it foam and bubble, and then suddenly, those little amber specks appear at the bottom of the pan, and the smell shifts from ordinary to something almost nutty and deeply comforting. The sage leaves crackle when they hit the hot butter, and for a moment, the whole kitchen smells like autumn decided to move in permanently. This creamy brown butter sage butternut squash mash started as an accident—I was trying to make soup and got distracted by a phone call—but honestly, some of the best recipes come from those happy little mistakes.
What I love about this dish is that it doesn’t try to be anything fancy. It’s just squash, butter, sage, and a few simple seasonings, but when they come together, something shifts. The first time I made it, I stood at the counter eating straight from the bowl, and I realized this was the kind of recipe that sticks with you—not because it’s complicated, but because it feels like you’ve been eating it your whole life. That’s the thing about simple food done right; it doesn’t need a story to feel memorable.
Why You’ll Love This Recipe
Let me tell you why this creamy brown butter sage butternut squash mash has earned a permanent spot in my fall rotation. I’ve tested this recipe at least a dozen times—some batches too watery, others not quite silky enough—and what I’m sharing today is the version that finally made me stop tweaking.
- Ready in 30 minutes : From cutting board to bowl in half an hour. No roasting required, which means you get that deep, caramelized flavor without waiting an hour for the oven.
- Simple ingredients : You probably have most of these in your kitchen right now. Butter, sage, garlic, salt, pepper—that’s it. No fancy grocery store trips needed.
- Perfect for cozy dinners : This mash pairs beautifully with roasted chicken, seared pork chops, or even a simple fried egg for a vegetarian meal that feels complete.
- Crowd-pleaser territory : I’ve served this to picky eaters, vegetable skeptics, and full-on squash enthusiasts, and everyone goes back for seconds. It’s that good.
- Comfort food reimagined : The brown butter adds richness without heaviness, and the sage brings an earthy note that makes this feel special enough for holidays but simple enough for a random Tuesday.
What makes this recipe different from all the other squash mashes out there? It’s the technique. Instead of roasting or boiling the squash separately, we cook it directly in the brown butter and sage mixture, letting it absorb all that nutty flavor as it softens. This isn’t just another version—it’s the version that makes you close your eyes after the first bite.
What Ingredients You Will Need
This recipe uses simple, wholesome ingredients to deliver bold flavor and satisfying texture without the fuss. Most of these are pantry staples, especially during fall, and the ones that aren’t are easy to find at any grocery store.
- Butternut squash, 1 medium (about 2 pounds) : Look for one with a long neck and firm skin. The neck portion has fewer seeds and less stringy flesh, which makes for a smoother mash. (Peeled and cubed into 1-inch pieces)
- Unsalted butter, 4 tablespoons (½ stick) : I use unsalted so I can control the salt level. Kerrygold or any European-style butter works beautifully here because of its higher fat content, which browns more evenly. (Cut into tablespoon-sized pieces)
- Fresh sage leaves, 10-12 leaves : Don’t use dried sage for this—it won’t crisp up the same way, and the flavor is completely different. Fresh sage is worth the extra few seconds to find. (Left whole for frying, then chopped for mixing)
- Garlic, 3 cloves : Smashed and roughly chopped. You want it to infuse the butter without burning. (Minced or thinly sliced)
- Heavy cream or full-fat coconut milk, ¼ cup : This adds the creamy factor. For a dairy-free version, coconut milk works beautifully and doesn’t overpower the sage. (Room temperature preferred)
- Salt, 1 teaspoon : I prefer fine sea salt for even seasoning. (Adjust to taste)
- Black pepper, ½ teaspoon : Freshly ground makes a difference here. (Plus more for garnish)
- Optional: Pinch of nutmeg or cayenne : A tiny pinch of nutmeg adds warmth, while cayenne gives it a subtle kick. I usually go with nutmeg for a classic fall flavor. (Freshly grated if possible)
Ingredient tip : If you can’t find fresh sage, you can use dried sage, but reduce the amount to 1 teaspoon and add it to the butter after browning rather than frying it. The texture won’t be the same, but the flavor will still be lovely.
Substitution note : Kabocha or buttercup squash work well here too. They’re slightly sweeter and creamier than butternut, so you might want to reduce the cream slightly. Acorn squash is a bit more fibrous, so the texture won’t be as silky, but it’s still delicious.
Equipment Needed
You don’t need much for this recipe, which is part of why I love it. Here’s what you’ll need:
- Large skillet or sauté pan : A 12-inch skillet with high sides works best. You need enough surface area for the squash to cook evenly without steaming. I use my trusty cast iron skillet—it holds heat beautifully and gives the squash a slight caramelization on the edges.
- Sharp chef’s knife : Butternut squash is tough to cut, so a sharp knife is non-negotiable. I learned this the hard way after almost losing a fingernail to a dull blade. A good 8-inch chef’s knife makes quick work of it.
- Vegetable peeler : A Y-shaped peeler is my preference for squash. It’s faster and gives you more control than a standard straight peeler.
- Wooden spoon or silicone spatula : For stirring the squash as it cooks. Wooden spoons are gentle on your pans and don’t conduct heat, which is nice when you’re standing over the stove for 15 minutes.
- Potato masher or immersion blender : A potato masher gives you a chunkier, more rustic texture. If you want ultra-smooth mash, use an immersion blender or transfer to a food processor. I prefer the masher because it leaves some texture, but both work great.
- Measuring spoons and cups : For accuracy, especially with the salt and cream.
Budget-friendly tip : Don’t have a potato masher? A fork works in a pinch, though it takes a bit more elbow grease. And if you don’t have a cast iron skillet, any heavy-bottomed pan will do—just keep an eye on the heat so the butter doesn’t burn.
Preparation Method
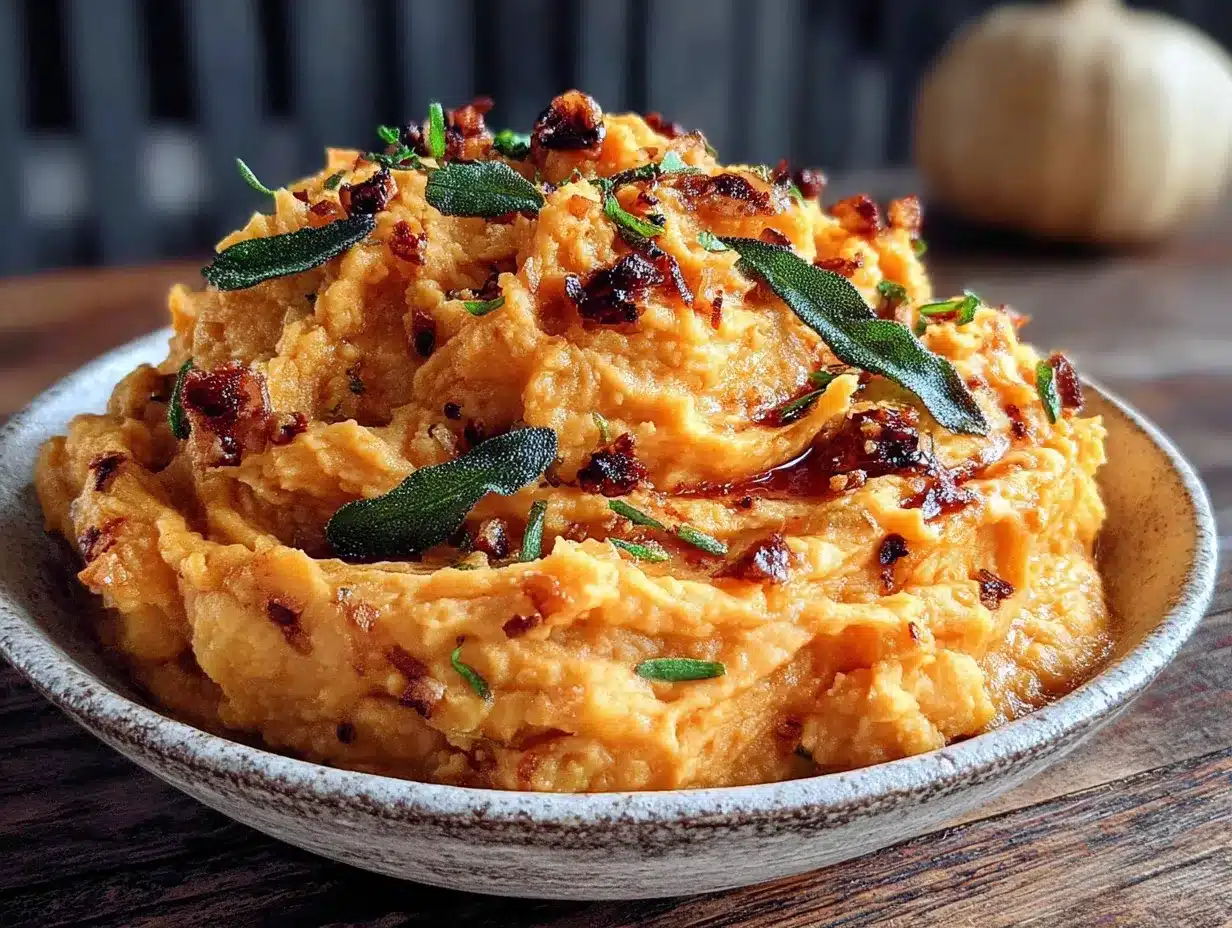
Let me walk you through this step by step. I’ve included time estimates and sensory cues so you know exactly what to look for at each stage.
Step 1: Prep the Squash (5 minutes)
Peel the butternut squash using a vegetable peeler. Cut off the top and bottom ends, then slice it in half where the narrow neck meets the bulbous bottom. Scoop out the seeds from the bottom half with a spoon (save them for roasting if you’re feeling ambitious). Cut the squash into 1-inch cubes. Try to keep them roughly the same size so they cook evenly. You should have about 4-5 cups of cubed squash.
Step 2: Brown the Butter (4-5 minutes)
Place your skillet over medium heat and add the butter. Let it melt completely, then swirl the pan occasionally. The butter will start to foam and bubble—this is normal. After about 3 minutes, you’ll notice the foam subsiding and tiny brown specks forming at the bottom of the pan. The smell will shift from milky to nutty and toasty. This is your cue to move quickly—brown butter can go from perfect to burnt in seconds.
Step 3: Fry the Sage (1 minute)
Drop the sage leaves into the brown butter. They’ll sizzle and crisp up almost immediately. Let them fry for about 20-30 seconds, then use a slotted spoon to transfer them to a paper towel-lined plate. They’ll continue to crisp as they cool. The leaves should be dark green and slightly translucent when done.
Step 4: Cook the Squash (12-15 minutes)
Add the chopped garlic to the brown butter and stir for about 30 seconds until fragrant. Then add the cubed squash, salt, and pepper. Stir everything together so the squash is coated in that gorgeous brown butter. Spread the squash in an even layer and let it cook undisturbed for 3-4 minutes. This gives it a nice golden crust on the bottom. Stir, then repeat. The squash should be fork-tender and starting to fall apart when you press it.
Step 5: Add the Cream (2 minutes)
Pour in the heavy cream (or coconut milk) and stir gently. Let it simmer for 1-2 minutes until the cream thickens slightly and coats the squash. If you’re using nutmeg or cayenne, add it now. The mixture should look glossy and smell incredibly rich.
Step 6: Mash to Perfection (2 minutes)
Remove the skillet from heat. Use your potato masher to mash the squash to your desired consistency. I like mine with some texture—not completely smooth, but creamy enough to hold a swirl. If you prefer a silky puree, use an immersion blender for 30 seconds. Taste and adjust seasoning—you might want a bit more salt or pepper.
Step 7: Serve and Garnish (1 minute)
Transfer the mash to a serving bowl. Crumble the crispy sage leaves over the top and drizzle with any remaining brown butter from the pan. Add a final crack of black pepper and a pinch of flaky sea salt if you have it. Serve immediately while it’s warm and inviting.
Pro tip : If the mash seems too thick after sitting, stir in a splash of warm cream or milk before serving. It loosens up beautifully without losing flavor.
Cooking Tips & Techniques
I’ve made this recipe enough times to know where things can go wrong, so let me save you some trouble.
Don’t rush the brown butter. This is the most important step. Medium heat is your friend here—high heat will burn the butter before it has a chance to brown properly. I once tried to speed things up and ended up with acrid, bitter butter that ruined the whole batch. Patience pays off. Watch for that nutty aroma and those amber specks, and pull it off the heat immediately.
Cut the squash evenly. I cannot stress this enough. If some pieces are twice the size of others, you’ll end up with mushy bits and hard bits in the same pan. Take the extra minute to make them uniform. Your future self will thank you.
Toast the sage leaves first. Frying the sage in the brown butter before cooking the squash serves two purposes: you get crispy sage for garnish, and the butter is infused with sage flavor from the start. Don’t skip this step and just sprinkle dried sage on top—the difference is night and day.
Let the squash develop a crust. When you add the squash to the pan, resist the urge to stir constantly. Let it sit for 3-4 minutes to develop golden-brown edges. Those caramelized bits add so much depth of flavor. I learned this trick from making hash browns, and it applies here beautifully.
Mind the cream temperature. Cold cream added to hot squash can cause the butter to seize up and separate. Take the cream out of the fridge when you start cooking, or microwave it for 15 seconds. Room temperature cream incorporates much more smoothly.
Variations & Adaptations
This recipe is wonderfully flexible, and I’ve tried several variations over the years. Here are my favorites:
Vegan Version
Swap the butter for vegan butter or coconut oil, and use full-fat coconut milk instead of heavy cream. The coconut flavor is subtle enough that it complements the sage rather than competing with it. I’ve made this for vegan friends and they couldn’t tell the difference.
Keto/Low-Carb Adaptation
Replace the butternut squash with cauliflower. Steam or roast the cauliflower first, then proceed with the brown butter and sage as written. It’s not exactly the same, but the brown butter does heavy lifting here, and the result is surprisingly satisfying. Add an extra tablespoon of cream for richness.
Spicy Kick
Add ½ teaspoon of red pepper flakes along with the garlic, or stir in a minced fresh chili. The heat cuts through the richness of the brown butter beautifully. I made this version for a game day gathering and it disappeared faster than the regular batch.
Maple Brown Butter Version
Drizzle 1 tablespoon of maple syrup over the squash during the last 2 minutes of cooking. The sweetness pairs wonderfully with the sage and adds a lovely glaze. This version is especially good alongside roasted pork or as a Thanksgiving side dish.
Herb-Infused Variation
Add fresh thyme sprigs or rosemary to the butter while it browns. Remove them before adding the squash. The herbal notes add complexity without overpowering the sage. I tried this with rosemary during a particularly chilly December evening, and it felt like the coziest thing I’d ever made.
Serving & Storage Suggestions
Serving temperature : This mash is best served hot, straight from the pan. It cools down quickly, so I recommend transferring it to a warmed bowl if you’re not serving immediately. You can keep it warm in a 200°F oven for up to 30 minutes, covered with foil.
What to serve with it : This creamy brown butter sage butternut squash mash pairs beautifully with so many dishes. Try it alongside tender shredded chicken for an easy weeknight dinner, or serve it with maple dijon salmon for a more elegant meal. It’s also fantastic under a fried egg for breakfast, or as a side for sausage and apple roast. For a complete fall dinner, consider pairing it with chicken and wild rice soup for a cozy, soul-warming meal.
Storage instructions : Leftover mash keeps well in an airtight container in the refrigerator for up to 5 days. The flavors actually meld together overnight, so leftovers might taste even better. To reheat, warm it in a skillet over medium-low heat with a splash of cream or milk, stirring occasionally. You can also microwave it in 30-second bursts, stirring between each.
Freezing tips : This mash freezes beautifully for up to 3 months. Let it cool completely, then transfer to a freezer-safe container or zip-top bag. Thaw overnight in the refrigerator, then reheat as directed above. The texture might be slightly looser after freezing, so stir in a bit of cream to bring it back to life.
Nutritional Information & Benefits
Here’s the approximate nutritional breakdown per serving (based on 4 servings):
| Nutrient | Amount per Serving |
|---|---|
| Calories | 245 |
| Total Fat | 18g |
| Saturated Fat | 11g |
| Carbohydrates | 22g |
| Fiber | 4g |
| Sugar | 6g (natural) |
| Protein | 3g |
| Vitamin A | 297% DV |
| Vitamin C | 35% DV |
| Potassium | 582mg |
Health benefits : Butternut squash is packed with vitamin A (over 290% of your daily needs per serving), which supports eye health and immune function. It’s also rich in fiber, which aids digestion and keeps you feeling full. The brown butter adds healthy fats that help your body absorb fat-soluble vitamins. This dish is naturally gluten-free and can be made dairy-free with simple substitutions.
Dietary considerations : This recipe is vegetarian, gluten-free, and can easily be made vegan and dairy-free. It’s also relatively low in sugar compared to many fall side dishes—the sweetness comes entirely from the squash itself.
Conclusion
This creamy brown butter sage butternut squash mash is one of those recipes that proves simple ingredients, treated with care, can create something truly memorable. It’s the kind of dish that makes you slow down and actually taste what you’re eating—the nutty depth of the brown butter, the earthy whisper of sage, the natural sweetness of squash that’s been cooked just right.
I hope you give this recipe a try, whether it’s for a quiet weeknight dinner or a holiday gathering. Feel free to play around with the variations—add a pinch of cinnamon, swap in coconut milk, or pile it high with crispy sage. This recipe is forgiving and adaptable, just like the best comfort food always is.
If you make this, I’d love to hear how it turned out. Drop a comment below or tag me in your photos—there’s something special about knowing this little mash made its way into your kitchen. Happy cooking, and don’t forget to save those crispy sage leaves for the top!
Frequently Asked Questions
Can I make this recipe ahead of time?
Absolutely. You can prepare the mash up to 2 days in advance and store it in the refrigerator. Reheat it gently on the stovetop with a splash of cream or milk to restore the creamy texture. I’d recommend adding the crispy sage garnish just before serving so it stays crunchy.
Can I use frozen butternut squash?
Yes, but the texture will be slightly different. Frozen squash releases more water as it cooks, so you’ll need to cook it a bit longer to evaporate the excess moisture. I recommend thawing it first and patting it dry with paper towels. The flavor will still be delicious, but the mash might be a touch looser.
How do I prevent the brown butter from burning?
Keep the heat at medium and watch carefully. The butter will foam, then the foam will subside, and you’ll see brown specks forming at the bottom. As soon as you smell that nutty aroma, remove the pan from the heat. If you see black specks or smell something acrid, you’ve gone too far—start over. It happens to everyone at least once!
Can I make this without a potato masher?
Definitely. A fork works in a pinch, though it takes more effort. You can also use an immersion blender for a smooth puree, or transfer the squash to a food processor and pulse until it reaches your desired consistency. Just be careful not to over-process, or you’ll end up with a gummy texture.
Is this recipe suitable for babies or toddlers?
Yes, with a few adjustments. Skip the salt and pepper, and mash it until very smooth. The brown butter and sage add wonderful flavor without needing seasoning. You can also thin it with a bit of breast milk, formula, or whole milk to reach a consistency that’s safe for your little one. Always test the temperature before serving.
Pin This Recipe!
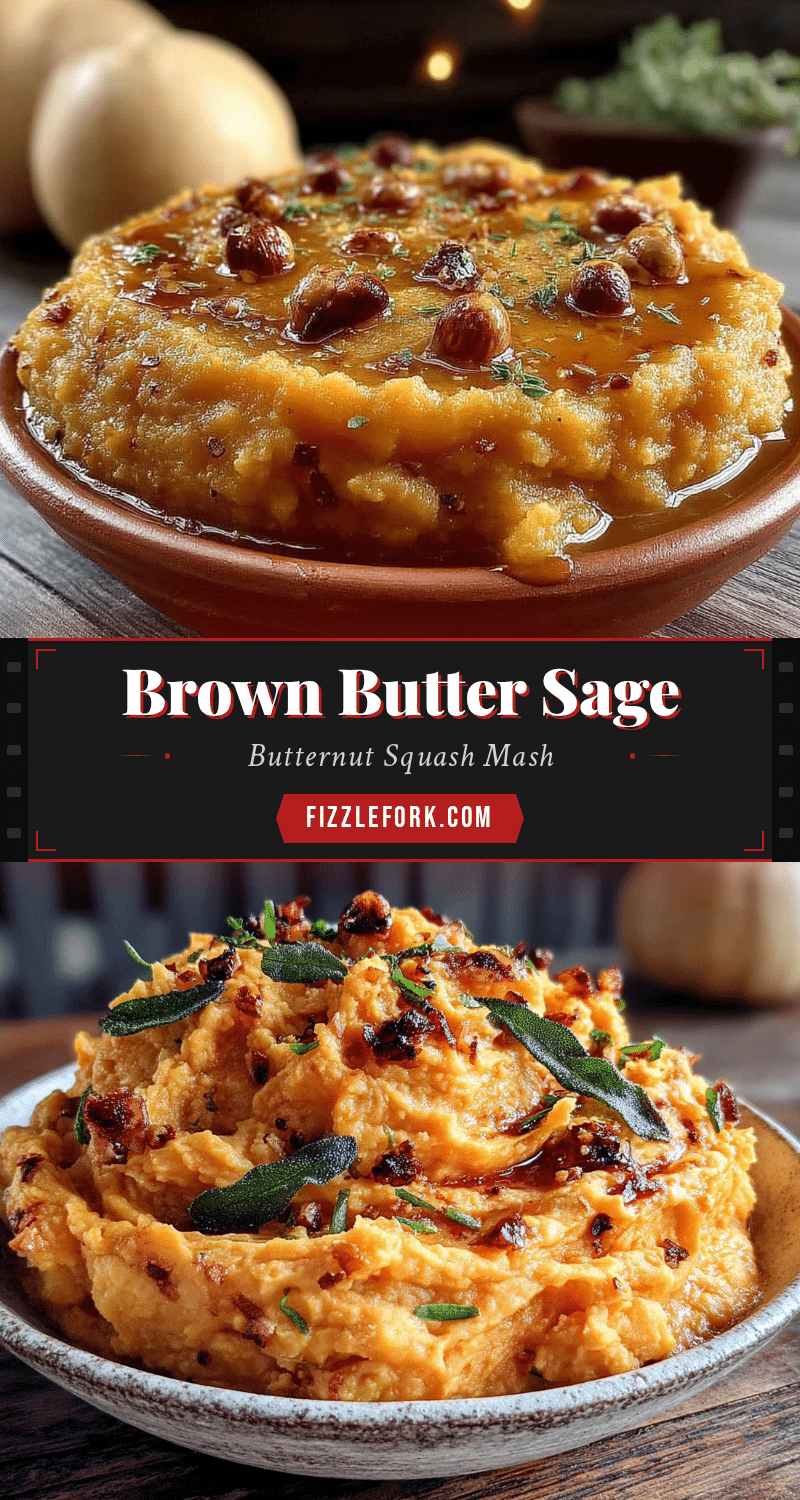
Creamy Brown Butter Sage Butternut Squash Mash: Easy 30-Min Recipe

A quick and comforting butternut squash mash made with brown butter and sage, ready in 30 minutes. Perfect for cozy dinners or holiday gatherings.
- Prep Time: 5 minutes
- Cook Time: 25 minutes
- Total Time: 30 minutes
- Yield: 4 servings 1x
- Category: Side Dish
- Cuisine: American
Ingredients
- 1 medium butternut squash (about 2 pounds), peeled and cubed into 1-inch pieces
- 4 tablespoons unsalted butter (½ stick), cut into tablespoon-sized pieces
- 10–12 fresh sage leaves, left whole for frying, then chopped for mixing
- 3 cloves garlic, smashed and roughly chopped
- ¼ cup heavy cream or full-fat coconut milk, room temperature
- 1 teaspoon fine sea salt
- ½ teaspoon freshly ground black pepper
- Optional: pinch of nutmeg or cayenne
Instructions
- Peel the butternut squash using a vegetable peeler. Cut off the top and bottom ends, then slice it in half where the narrow neck meets the bulbous bottom. Scoop out the seeds from the bottom half with a spoon. Cut the squash into 1-inch cubes. You should have about 4-5 cups of cubed squash.
- Place your skillet over medium heat and add the butter. Let it melt completely, then swirl the pan occasionally. The butter will start to foam and bubble. After about 3 minutes, the foam will subside and tiny brown specks will form at the bottom of the pan. The smell will shift from milky to nutty and toasty. This is your cue to move quickly—brown butter can go from perfect to burnt in seconds.
- Drop the sage leaves into the brown butter. They’ll sizzle and crisp up almost immediately. Let them fry for about 20-30 seconds, then use a slotted spoon to transfer them to a paper towel-lined plate. They’ll continue to crisp as they cool. The leaves should be dark green and slightly translucent when done.
- Add the chopped garlic to the brown butter and stir for about 30 seconds until fragrant. Then add the cubed squash, salt, and pepper. Stir everything together so the squash is coated in that gorgeous brown butter. Spread the squash in an even layer and let it cook undisturbed for 3-4 minutes. This gives it a nice golden crust on the bottom. Stir, then repeat. The squash should be fork-tender and starting to fall apart when you press it.
- Pour in the heavy cream (or coconut milk) and stir gently. Let it simmer for 1-2 minutes until the cream thickens slightly and coats the squash. If you’re using nutmeg or cayenne, add it now. The mixture should look glossy and smell incredibly rich.
- Remove the skillet from heat. Use your potato masher to mash the squash to your desired consistency. I like mine with some texture—not completely smooth, but creamy enough to hold a swirl. If you prefer a silky puree, use an immersion blender for 30 seconds. Taste and adjust seasoning—you might want a bit more salt or pepper.
- Transfer the mash to a serving bowl. Crumble the crispy sage leaves over the top and drizzle with any remaining brown butter from the pan. Add a final crack of black pepper and a pinch of flaky sea salt if you have it. Serve immediately while it’s warm and inviting.
Notes
Don’t rush the brown butter—medium heat is key. Cut the squash evenly for uniform cooking. Fry the sage leaves first to infuse the butter. Let the squash develop a golden crust by not stirring constantly. Use room temperature cream to prevent separation. If the mash seems too thick after sitting, stir in a splash of warm cream or milk before serving.
Nutrition
- Serving Size: 1 serving
- Calories: 245
- Sugar: 6
- Sodium: 582
- Fat: 18
- Saturated Fat: 11
- Carbohydrates: 22
- Fiber: 4
- Protein: 3
Keywords: butternut squash mash, brown butter sage, fall side dish, easy 30-minute recipe, creamy squash mash