I want crispy chicken thighs tonight, and I want them fast. No deep fryer, no gallon of oil, no standing over a sputtering pan. The air fryer is already on the counter, and there’s a pack of bone-in, skin-on thighs in the fridge that I bought with exactly this moment in mind. The only question is the glaze—something sticky, something savory-sweet, something that will caramelize in the last few minutes and make the skin shatter when I bite into it. Honey and garlic. Obviously. It’s one of those combinations that feels almost too simple to be this good, but that’s the thing about simple—it works because it’s honest. No weird ingredients, no complicated techniques. Just fat, salt, heat, and a little bit of patience.
The air fryer changed the way I cook chicken thighs, honestly. I used to think the only way to get truly crispy skin was to pan-sear and finish in the oven, which works but takes forever and leaves your kitchen smelling like a diner for two days. The air fryer does the job in half the time, with less mess, and the results are consistently ridiculous. The skin crisps up like it’s been fried, the meat stays juicy, and the glaze reduces into this sticky, almost candied coating that makes you want to eat the whole batch standing at the counter. I have done that, by the way. No regrets.
This recipe came together on a Tuesday night when I was tired, hungry, and unwilling to compromise. I wanted something that felt like a treat but didn’t require a trip to the store or an hour of active cooking. These thighs deliver. They’re the kind of dinner that makes you feel like you actually know what you’re doing in the kitchen, even when you’re just winging it. And the glaze? It’s the kind of thing you’ll want to put on everything—chicken, salmon, roasted vegetables, maybe even your morning toast. I’m not joking. Trust me on this one.
Why You’ll Love This Recipe
Let me tell you why this recipe works, and why it’s going to become a regular in your dinner rotation. I’ve tested this method at least a dozen times, tweaking temperatures, timing, and glaze ratios until everything clicked. The result is a recipe that’s forgiving enough for a weeknight but impressive enough for company.
- Quick & Easy : From fridge to table in under 30 minutes. The air fryer does all the heavy lifting, and the glaze comes together while the chicken cooks. No marinating required.
- Simple Ingredients : You probably already have everything you need. Chicken thighs, honey, soy sauce, garlic, and a few pantry staples. No fancy grocery runs necessary.
- Perfect for Busy Weeknights : This is the kind of meal you can throw together after a long day when you want something satisfying without spending an hour in the kitchen. It pairs beautifully with rice, roasted vegetables, or a simple salad.
- Crowd-Pleaser : Kids love the sweet-savory glaze, adults appreciate the crispy skin, and everyone goes back for seconds. I’ve served these at casual dinners and holiday gatherings alike, and they disappear every time.
- Unbelievably Delicious : The texture is what gets me. The skin turns shatteringly crisp, almost like fried chicken, while the meat underneath stays tender and juicy. The glaze caramelizes into a sticky, glossy coating that’s pure comfort.
What makes this recipe different from the countless other honey garlic chicken recipes out there? It’s the method. Most recipes either brush the glaze on too early (which makes the skin soggy) or skip the air fryer entirely (which means longer cook times and less crispiness). I found the sweet spot: cook the thighs skin-side down first to render the fat, flip them, then glaze them in the final minutes so the sugar caramelizes without burning. It’s a small tweak that makes a huge difference.
This recipe isn’t just good—it’s the kind that makes you close your eyes after the first bite. It’s comfort food reimagined: faster, easier, and just as soul-soothing as anything that takes hours to make. Perfect for impressing guests without stress, or turning a simple Tuesday dinner into something memorable.
What Ingredients You Will Need
This recipe uses simple, wholesome ingredients to deliver bold flavor and satisfying texture without the fuss. Most of these are pantry staples, but a few specific choices can make a real difference in the final result.
For the Chicken
- Bone-in, skin-on chicken thighs (4-6 thighs, about 1.5-2 pounds total) — The bone keeps the meat juicy during cooking, and the skin is essential for that crispy texture. If you only have boneless, skinless thighs, reduce cooking time by about 5-7 minutes, but you’ll miss out on the crispy skin.
- Olive oil or avocado oil (1 tablespoon) — Helps the seasoning stick and promotes browning. Avocado oil has a higher smoke point, which is ideal for air frying.
- Salt (1 teaspoon, preferably kosher) — I use Diamond Crystal kosher salt. If you’re using table salt, reduce to ¾ teaspoon.
- Black pepper (½ teaspoon, freshly ground) — Adds a subtle warmth that balances the sweet glaze.
- Garlic powder (½ teaspoon) — Not the same as fresh garlic, but it adds a savory depth that holds up during the initial cooking phase.
- Paprika (½ teaspoon) — I prefer smoked paprika here for a subtle smokiness, but sweet paprika works too.
For the Honey Garlic Glaze
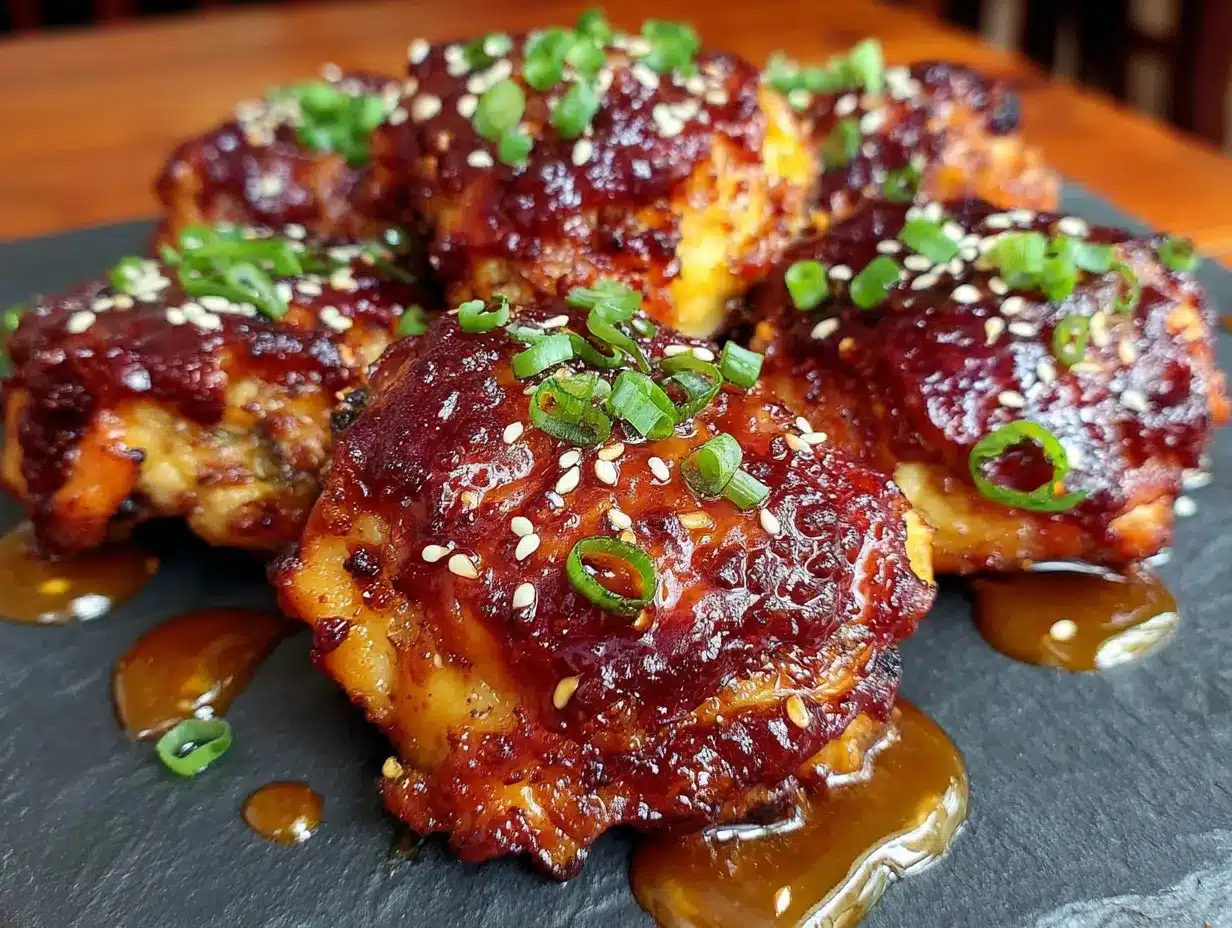
- Honey (¼ cup) — Use a good quality honey. The flavor really comes through, so avoid the cheap stuff that tastes like corn syrup. Local honey is ideal if you can get it.
- Soy sauce (2 tablespoons) — Regular or low-sodium both work. If you’re gluten-free, use tamari or coconut aminos.
- Garlic (4-5 cloves, minced) — Fresh garlic is non-negotiable here. The pre-minced stuff in a jar won’t give you the same pungent, aromatic kick. I use a microplane for the finest mince.
- Rice vinegar (1 tablespoon) — Adds acidity to balance the sweetness. Apple cider vinegar or white wine vinegar work as substitutes.
- Sesame oil (1 teaspoon) — Optional, but it adds a lovely nutty aroma that complements the honey and garlic. Toasted sesame oil is best.
- Cornstarch (1 teaspoon, mixed with 1 tablespoon water) — This is optional, but if you want a thicker, more clingy glaze, stir in the cornstarch slurry at the end.
For Garnish (Optional but Recommended)
- Sesame seeds (1 tablespoon, toasted) — Adds a nice crunch and visual appeal.
- Green onions (2-3, thinly sliced) — Freshness and color to balance the rich glaze.
- Red pepper flakes (¼ teaspoon, or to taste) — For a touch of heat if you like it.
Ingredient Selection Tips: When choosing chicken thighs, look for ones with even fat distribution and skin that’s intact. I prefer organic or pasture-raised chicken when possible—the flavor is noticeably better, and the skin crisps up more consistently. For the honey, I’m partial to wildflower or orange blossom honey for their floral notes. If you’re using a very dark, robust honey like buckwheat, reduce the amount slightly as it can overpower the garlic.
Equipment Needed
You don’t need much for this recipe, which is part of its charm. Here’s what you’ll need:
- Air fryer — Any brand works. I use a 5.8-quart basket-style air fryer, but an oven-style works too. Just make sure there’s enough space for the thighs to sit in a single layer without overcrowding. If your air fryer is smaller, cook in batches.
- Tongs — For flipping the chicken. Silicone-tipped tongs are gentle on the air fryer basket’s non-stick coating.
- Small saucepan — For making the glaze. A 1-quart saucepan is perfect.
- Mixing bowl — For tossing the chicken with oil and seasonings.
- Pastry brush or silicone basting brush — For applying the glaze. A spoon works in a pinch, but a brush gives more even coverage.
- Instant-read thermometer — This is non-negotiable for perfectly cooked chicken. Chicken thighs are safe at 165°F, but they’re best at 175-185°F where the connective tissue breaks down and the meat becomes fork-tender.
- Cutting board and knife — For mincing garlic and slicing green onions.
- Paper towels — For patting the chicken dry. This step is crucial for crispy skin.
Budget-Friendly Alternatives: If you don’t have a pastry brush, use the back of a spoon to spread the glaze. No instant-read thermometer? Cut into the thickest part of a thigh to check if the juices run clear, but I really recommend picking up a thermometer—they’re cheap and take the guesswork out of cooking meat.
Preparation Method
Let’s get cooking. This whole process takes about 25-30 minutes from start to finish, and most of that is hands-off air fryer time.
Step 1: Prep the Chicken (5 minutes)
Take the chicken thighs out of the fridge and pat them dry with paper towels. This is the most important step for crispy skin—moisture is the enemy of crispiness. Really get in there and make sure the skin is as dry as possible. Let them sit at room temperature for about 10 minutes while you prepare the other ingredients. This helps them cook more evenly.
In a mixing bowl, combine the olive oil, salt, pepper, garlic powder, and paprika. Add the chicken thighs and toss until each piece is evenly coated. Don’t skip this step—the oil helps the skin crisp up, and the seasoning forms a flavorful base layer before the glaze goes on.
Step 2: Make the Glaze (5 minutes)
While the chicken rests, make the glaze. In a small saucepan, combine the honey, soy sauce, minced garlic, rice vinegar, and sesame oil (if using). Bring to a simmer over medium heat, then reduce the heat to low and let it bubble gently for 2-3 minutes. The glaze will thicken slightly as it cooks. If you want a thicker glaze, stir in the cornstarch slurry and cook for another 30 seconds until it becomes glossy and coats the back of a spoon. Remove from heat and set aside.
Pro tip: Taste the glaze before you use it. If it’s too sweet, add a splash more vinegar. If it’s too salty, add a teaspoon of honey. Adjust it to your preference—you’re the one eating it.
Step 3: Air Fry the Chicken (18-20 minutes)
Preheat your air fryer to 380°F (193°C) for 3 minutes. Place the seasoned chicken thighs in the air fryer basket, skin-side down, in a single layer. Make sure they’re not touching—air needs to circulate around each piece for even cooking. If you have to crowd them, cook in batches.
Cook at 380°F for 10 minutes. The skin-side down position allows the fat to render out and the skin to start crisping. After 10 minutes, flip the thighs using tongs. They should be golden brown on the skin side already. Cook for another 5 minutes at 380°F.
Step 4: Glaze and Finish (3-5 minutes)
After the second flip (total of 15 minutes), brush the honey garlic glaze generously over each thigh. Use the pastry brush to coat the skin and the exposed meat. Flip them back over so the glazed side is up, and brush the other side too. Don’t be shy—you want that sticky coating.
Increase the air fryer temperature to 400°F (204°C) and cook for an additional 3-5 minutes. The high heat will caramelize the sugars in the glaze, creating a sticky, almost candied coating. Watch closely during this phase—honey can burn quickly. You want the glaze to be bubbling and darkening, but not blackening.
Step 5: Check for Doneness (1 minute)
Use your instant-read thermometer to check the internal temperature of the thickest part of a thigh, avoiding the bone. You’re looking for 175-185°F (80-85°C). Yes, that’s higher than the USDA’s 165°F minimum, but chicken thighs are dark meat—they need that higher temperature to break down collagen and become truly tender. At 165°F, they’ll be safe but chewy. At 180°F, they’ll be fork-tender and juicy.
If the thighs haven’t reached temperature yet, cook for another 2-3 minutes and check again. Every air fryer runs slightly differently, so trust your thermometer over the timer.
Step 6: Rest and Serve (5 minutes)
Remove the chicken thighs from the air fryer and let them rest on a cutting board or plate for 5 minutes. This allows the juices to redistribute, ensuring every bite is moist and flavorful. During this time, you can brush on any remaining glaze from the saucepan for an extra layer of sticky goodness.
Sprinkle with toasted sesame seeds, sliced green onions, and red pepper flakes if you’re using them. Serve immediately.
Cooking Tips & Techniques
After making this recipe more times than I can count, I’ve learned a few things the hard way. Here are my best tips for air fryer chicken thigh success:
Don’t overcrowd the basket. This is the number one mistake people make with air fryers. If the thighs are touching or overlapping, they’ll steam instead of crisp. You want hot air circulating around each piece. If you’re cooking for a crowd, cook in batches and keep the finished thighs warm in a 200°F oven.
Pat the skin really, really dry. I cannot stress this enough. Wet skin = soggy skin. Use paper towels and press firmly to absorb as much moisture as possible. Some people even let the seasoned chicken sit uncovered in the fridge for an hour to dry out the skin further—this works brilliantly if you have the time.
Start skin-side down. This allows the fat to render directly onto the hot surface of the air fryer basket, which helps the skin crisp up from the start. If you start skin-side up, the fat has to render through the meat first, which takes longer and can leave the skin chewy.
Watch the glaze carefully. Honey burns faster than you think. The difference between perfectly caramelized and burnt is about 60 seconds. Check the chicken at the 3-minute mark after glazing, and if it’s already dark and bubbling, pull it out. You can always add more glaze after cooking if needed.
Use a meat thermometer. I know I keep saying this, but it’s because I’ve ruined too many batches of chicken by guessing. An instant-read thermometer costs less than $15 and will save you from dry, overcooked meat or undercooked, unsafe chicken. It’s the best investment you can make for your kitchen.
Let the chicken rest. I know you’re hungry, I get it. But cutting into the thighs right away will release all the juices onto the cutting board, leaving you with dry meat. Five minutes of patience makes a world of difference.
Variations & Adaptations
One of the best things about this recipe is how adaptable it is. Here are some of my favorite variations:
Spicy Honey Garlic Chicken
Add 1-2 teaspoons of sriracha or gochujang (Korean chili paste) to the glaze. The heat balances the sweetness beautifully. I also like to sprinkle red pepper flakes on the finished dish for an extra kick. This version is my go-to when I want something with a little more personality.
Lemon Herb Version
Replace the soy sauce with lemon juice and add 1 teaspoon of dried oregano and ½ teaspoon of thyme to the seasoning mix. The citrus brightens up the rich chicken, and the herbs add a Mediterranean flair. Serve with a side of roasted potatoes and a simple Greek salad for a complete meal.
Gluten-Free Adaptation
Use tamari or coconut aminos instead of soy sauce. The rest of the ingredients are naturally gluten-free. For a grain-free option, serve with cauliflower rice or roasted vegetables instead of regular rice.
Oven Method
If you don’t have an air fryer, you can make this in the oven. Preheat to 425°F (218°C). Place the seasoned thighs on a wire rack set over a baking sheet (this allows air to circulate underneath). Bake for 25 minutes, then brush with glaze and bake for another 5-10 minutes until the glaze is caramelized and the internal temperature reaches 175-185°F. The skin won’t be quite as crispy as the air fryer version, but it’s still delicious.
Boneless, Skinless Thighs
If that’s all you have, reduce the cooking time to 12-15 minutes total (6 minutes per side at 380°F, then glaze and cook 2-3 minutes at 400°F). The meat will be tender and flavorful, but you’ll miss the crispy skin. I’ve done this on busy nights when that’s what I had in the fridge, and it still hits the spot.
Serving & Storage Suggestions
These crispy air fryer chicken thighs are best served immediately, straight from the air fryer, when the skin is at its crispiest and the glaze is still warm and sticky. But they’re versatile enough to work in a variety of settings.
Serving Ideas:
- Over steamed jasmine rice or coconut rice with a side of roasted broccoli or green beans. The rice soaks up the extra glaze beautifully.
- Alongside a crisp Asian-style slaw with sesame ginger dressing for a lighter meal.
- Sliced over a bed of greens with avocado, cucumber, and a drizzle of the leftover glaze for an amazing salad.
- With roasted sweet potatoes and sautéed spinach for a hearty, balanced dinner.
Storage: Leftover chicken thighs can be stored in an airtight container in the refrigerator for up to 4 days. The skin will lose its crispiness as it sits, but the flavor will actually deepen as the glaze marinates the meat.
Reheating: The best way to reheat these is in the air fryer at 350°F for 3-4 minutes. This will restore some of the crispiness. You can also reheat in a 375°F oven for 8-10 minutes. Avoid the microwave—it will turn the skin rubbery and sad.
Freezing: These freeze well for up to 3 months. Let them cool completely, then wrap individually in plastic wrap and place in a freezer bag. To reheat, thaw in the refrigerator overnight, then reheat in the air fryer at 350°F for 5-6 minutes.
Meal Prep Tip: Make a double batch on Sunday and use the leftovers throughout the week. I like to shred the cold chicken and toss it into salads or grain bowls for easy lunches. The honey garlic flavor works surprisingly well in a cold pasta salad too.
Nutritional Information & Benefits
Here’s an approximate nutritional breakdown per serving (based on 4 servings, using skin-on thighs and all the glaze):
| Nutrient | Amount per Serving |
|---|---|
| Calories | 385 |
| Protein | 28g |
| Fat | 22g |
| Saturated Fat | 6g |
| Carbohydrates | 18g |
| Fiber | 0g |
| Sugar | 17g |
| Sodium | 780mg |
Chicken thighs are an excellent source of protein, B vitamins (especially B6 and B12), and minerals like selenium and phosphorus. The skin contains healthy fats, though it’s higher in calories than breast meat. The honey in the glaze provides quick energy and contains antioxidants, while garlic is known for its immune-boosting properties.
Dietary Considerations: This recipe is naturally dairy-free and nut-free. For a gluten-free version, use tamari instead of soy sauce. For a lower-sugar option, reduce the honey to 2 tablespoons and add an extra tablespoon of soy sauce and a splash of water to maintain the glaze consistency.
Allergen Note: This recipe contains soy (soy sauce) and sesame (sesame oil). Both can be omitted or substituted if needed.
Conclusion
This recipe is proof that you don’t need complicated techniques or fancy ingredients to make something truly special. Crispy, juicy chicken thighs with a sticky-sweet honey garlic glaze—what’s not to love? The air fryer does most of the work, and the result is a dinner that feels like a treat without requiring a trip to a restaurant.
I love this recipe because it’s forgiving, adaptable, and consistently delivers. Whether you’re cooking for a busy family, meal-prepping for the week, or just treating yourself to something delicious, these chicken thighs will not let you down. And the best part? You can tweak the glaze to suit your mood—spicier, tangier, sweeter—it’s all up to you.
If you make this recipe, I’d love to hear about it. Leave a comment below and let me know how it turned out, what variations you tried, or any questions you have. And if you’re looking for more easy, delicious dinners, check out these flavorful honey garlic grilled chicken thighs with fresh peach salsa for a summery twist, or this crispy garlic parmesan air fryer chicken thighs for another air fryer favorite. Happy cooking!
Frequently Asked Questions
Can I use boneless, skinless chicken thighs?
Yes, but the cooking time will be shorter (about 12-15 minutes total) and you won’t get the crispy skin. The glaze will still be delicious, and the meat will stay juicy if you don’t overcook it. Check the internal temperature and aim for 175°F.
Why is my chicken skin not crispy?
Most likely, the skin wasn’t dry enough before cooking, or the basket was overcrowded. Make sure to pat the skin thoroughly with paper towels and cook in a single layer with space between each piece. Starting skin-side down also helps.
Can I make the glaze ahead of time?
Absolutely. The glaze can be made up to a week in advance and stored in an airtight container in the refrigerator. Let it come to room temperature or gently reheat it before using. You may need to whisk in a teaspoon of water if it thickens too much.
How do I prevent the glaze from burning?
Add the glaze only in the last 3-5 minutes of cooking, and watch it closely. The high sugar content in honey can burn quickly at high temperatures. If you notice the glaze darkening too fast, reduce the air fryer temperature to 375°F for the final glazing step.
Can I cook frozen chicken thighs in the air fryer?
I don’t recommend it for this recipe. Frozen chicken will release too much moisture as it thaws, preventing the skin from crisping. If you’re in a pinch, thaw the thighs completely in the refrigerator overnight, then pat them dry and proceed with the recipe as written.
Pin This Recipe!
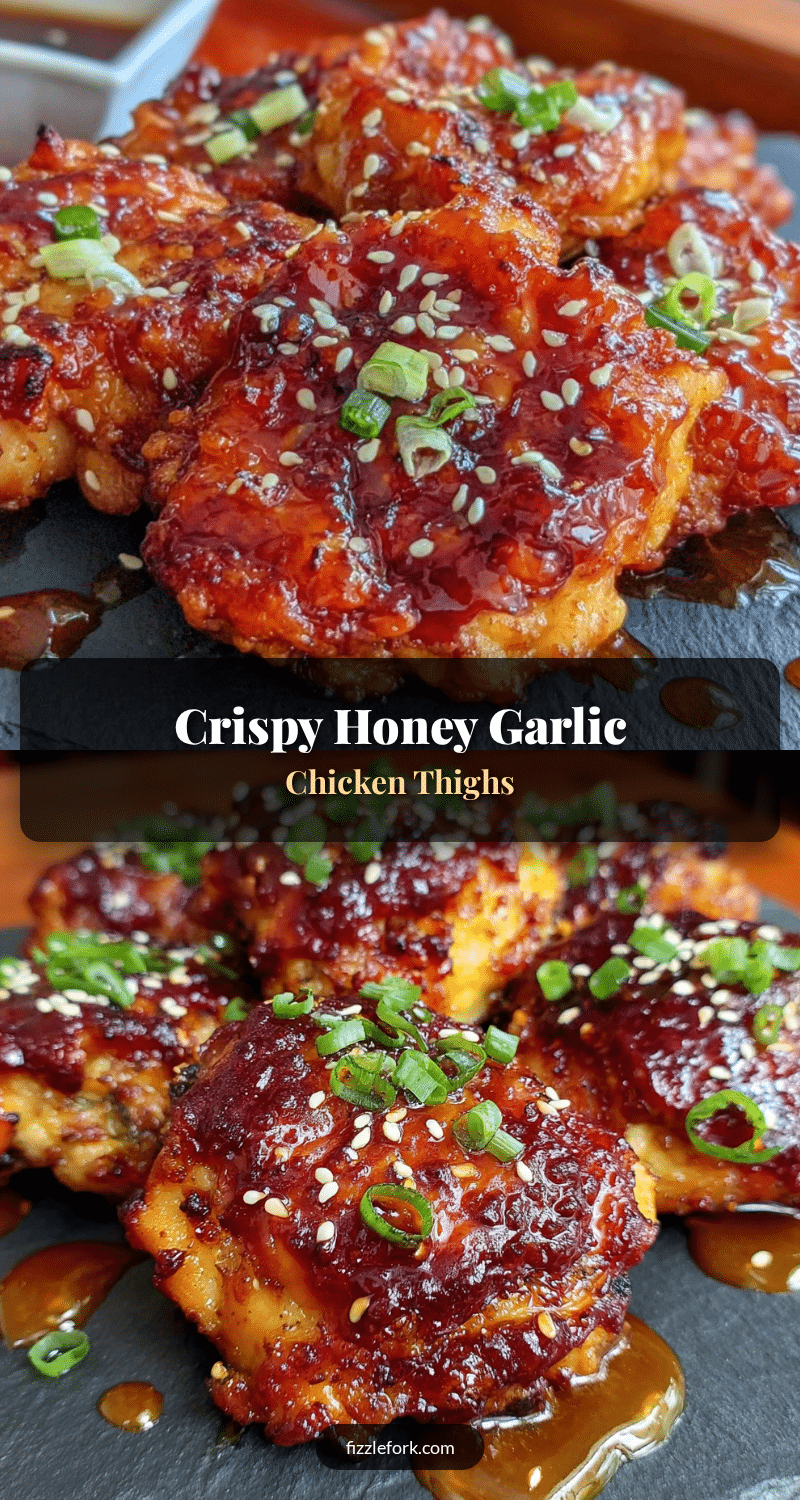
Crispy Air Fryer Chicken Thighs with Honey Garlic Glaze

Crispy, juicy air fryer chicken thighs with a sticky-sweet honey garlic glaze. Ready in under 30 minutes with simple ingredients, this easy weeknight dinner delivers shatteringly crisp skin and tender meat.
- Prep Time: 10 minutes
- Cook Time: 18-20 minutes
- Total Time: 28-30 minutes
- Yield: 4 servings 1x
- Category: Main Course
- Cuisine: American
Ingredients
- 4–6 bone-in, skin-on chicken thighs (about 1.5–2 pounds total)
- 1 tablespoon olive oil or avocado oil
- 1 teaspoon kosher salt (or ¾ teaspoon table salt)
- ½ teaspoon freshly ground black pepper
- ½ teaspoon garlic powder
- ½ teaspoon smoked paprika (or sweet paprika)
- ¼ cup honey
- 2 tablespoons soy sauce (or tamari for gluten-free)
- 4–5 cloves garlic, minced
- 1 tablespoon rice vinegar (or apple cider vinegar)
- 1 teaspoon toasted sesame oil (optional)
- 1 teaspoon cornstarch mixed with 1 tablespoon water (optional, for thicker glaze)
- 1 tablespoon toasted sesame seeds (for garnish)
- 2–3 green onions, thinly sliced (for garnish)
- ¼ teaspoon red pepper flakes (optional, for garnish)
Instructions
- Pat the chicken thighs dry with paper towels. Let them sit at room temperature for 10 minutes.
- In a mixing bowl, combine olive oil, salt, pepper, garlic powder, and paprika. Add chicken thighs and toss to coat evenly.
- In a small saucepan, combine honey, soy sauce, minced garlic, rice vinegar, and sesame oil. Bring to a simmer over medium heat, then reduce to low and cook for 2-3 minutes. If using cornstarch slurry, stir it in and cook for 30 seconds until thickened. Remove from heat.
- Preheat air fryer to 380°F (193°C) for 3 minutes.
- Place chicken thighs skin-side down in the air fryer basket in a single layer without overcrowding. Cook at 380°F for 10 minutes.
- Flip the thighs and cook for another 5 minutes at 380°F.
- Brush the glaze generously over both sides of the thighs. Increase air fryer temperature to 400°F (204°C) and cook for 3-5 minutes, watching closely to prevent burning.
- Check internal temperature with an instant-read thermometer; it should reach 175-185°F (80-85°C) in the thickest part.
- Remove from air fryer and let rest for 5 minutes. Brush with any remaining glaze.
- Sprinkle with sesame seeds, green onions, and red pepper flakes if desired. Serve immediately.
Notes
Pat the chicken skin very dry for maximum crispiness. Start skin-side down to render fat. Watch the glaze carefully in the final minutes to prevent burning. Let the chicken rest for 5 minutes before serving. For gluten-free, use tamari instead of soy sauce.
Nutrition
- Serving Size: 1 thigh with glaze
- Calories: 385
- Sugar: 17
- Sodium: 780
- Fat: 22
- Saturated Fat: 6
- Carbohydrates: 18
- Protein: 28
Keywords: air fryer chicken thighs, honey garlic chicken, crispy chicken thighs, easy weeknight dinner, air fryer recipe, chicken thigh recipe