The way those olive legs just stick out from under the black bean body—it gets me every single time. Honestly, the whole point of this platter is that moment when someone reaches for a veggie and accidentally grabs a spider leg first, then does this double-take. I made this for a Halloween party that snuck up on me last year—the kind where you promise to bring something “fun” at 10 PM the night before and then stare into your fridge at 11 PM wondering what you were thinking. I had a can of black beans, a bag of baby carrots, some cream cheese, and this wild idea that wouldn’t let me sleep until I tried it. The first spider looked more like a confused tick, but the second one? That little guy had presence. By the third, I was laughing in my kitchen at 1 AM, arranging legs just so, and I knew this was the kind of dumb, wonderful thing that makes Halloween actually fun. It’s not fancy. It’s not complicated. But when you set this tray down and watch people’s faces go from “oh, veggies” to “oh my god, spiders,” you’ll get it. That’s the whole reason this recipe stuck with me.
This Easy Black Bean Spider Veggie Tray is the Halloween appetizer you didn’t know you needed—but trust me, you do.
Why You’ll Love This Recipe
Look, I’ve tested a lot of appetizers in my time. Some are gorgeous but take forever. Others are fast but look like an afterthought. This one hits that sweet spot where it’s genuinely impressive without making you want to throw a rolling pin across the room. Here’s why it works:
- Unbelievably Easy: We’re talking 15 minutes of assembly. No baking, no cooking, no melting chocolate in a double boiler. Just arrange and serve.
- Healthy-ish Halloween: Let’s be real—by the end of October, we’ve all eaten our body weight in candy corn. This gives guests something fresh and crunchy to snack on between sugar bombs.
- Kid-Friendly Fun: My niece helped me make these last weekend and she was more careful with spider leg placement than I’ve ever seen her be with anything. It’s an activity AND a snack.
- Customizable for Any Crowd: Vegetarian by default, gluten-free without trying, and you can swap in whatever veggies your people actually eat.
- Zero Special Equipment: No spider-shaped cookie cutters, no fancy molds. Just a platter and your hands.
What makes this different from every other veggie tray out there is the presentation. I’ve seen Halloween veggie platters that are just… vegetables arranged in a circle with dip in the middle. That’s not a spider. That’s a sad vegetable gathering. This one actually looks like something crawled onto your table, and that visual joke is what makes people smile. It’s not just another version—it’s the version that makes your party memorable without making you sweat.
Plus, there’s something deeply satisfying about watching a grown adult hesitate before grabbing a carrot stick because they’re not sure if it’s a spider leg. I’m not saying that’s the whole reason I make this, but… I’m also not not saying that.
What Ingredients You Will Need
This recipe uses simple, wholesome ingredients that you can find at any grocery store. The magic isn’t in rare ingredients—it’s in how you put them together.
- Black beans (1 can, 15 oz, drained and rinsed) – These are your spider bodies. Look for beans that are mostly whole and not too mushy. I prefer Bush’s or Goya brands for their firm texture. Rinse them well and pat them dry so the cream cheese sticks.
- Cream cheese (4 oz, softened) – This acts like glue for the spider eyes and gives the beans something to hold onto. Full-fat works best for sticking power, but Neufchâtel (reduced fat) works fine too.
- Black olives (1 can, sliced) – These become the spider eyes. Those little white pimiento centers look surprisingly creepy when perched on a black bean body. Use regular sliced black olives, not the jumbo whole ones.
- Baby carrots (1 bag, about 12 oz) – Spider legs! The shape of baby carrots is perfect—slightly curved, tapered at one end, and sturdy enough to poke into the dip without flopping over.
- Celery sticks (4-5 stalks, cut into 3-inch pieces) – More leg options. The pale green adds nice color contrast against the orange carrots.
- Cucumber (1 large, cut into spears) – Yet another leg choice. English cucumbers work best since they have fewer seeds and a crisp texture.
- Bell peppers (1 each red and yellow, cut into strips) – These add color variety and a sweet crunch. Plus, they look great poking out from under a black bean body.
- Ranch dip or hummus (1 cup) – The “web” your spiders sit on. Use store-bought or homemade. I’m partial to a thick, herby ranch for that classic veggie tray vibe.
- Cherry tomatoes (1 cup) – Optional, but I like to scatter a few around for color. They also make great mini spider bodies if you want to mix it up.
That’s it. Eight ingredients, most of which are probably already in your fridge. The beauty of this recipe is its flexibility—use whatever crunchy vegetables your family loves. Broccoli florets work. Snap peas work. Even pretzel sticks work if you’re feeling rebellious.
Equipment Needed
You don’t need much for this one, which is honestly my favorite kind of recipe.
- Large serving platter or cutting board – A white platter makes the spiders pop, but a wooden cutting board gives it that rustic charcuterie vibe. I use a 12-inch round white platter and it fits about 8-10 spiders comfortably.
- Small bowl – For the dip. A round bowl that fits in the center of your platter works best.
- Butter knife or small spatula – For spreading a tiny bit of cream cheese on each black bean. A toothpick works too if you’re feeling precise.
- Cutting board and knife – For cutting celery, cucumber, and bell peppers into uniform pieces.
- Paper towels – Pat those beans dry! Wet beans won’t hold cream cheese, and nobody wants slippery spiders.
No food processor required. No oven needed. No special Halloween-themed platter (though if you have one, by all means use it). This is a “open the fridge and go” kind of recipe, and I love that about it.
Preparation Method
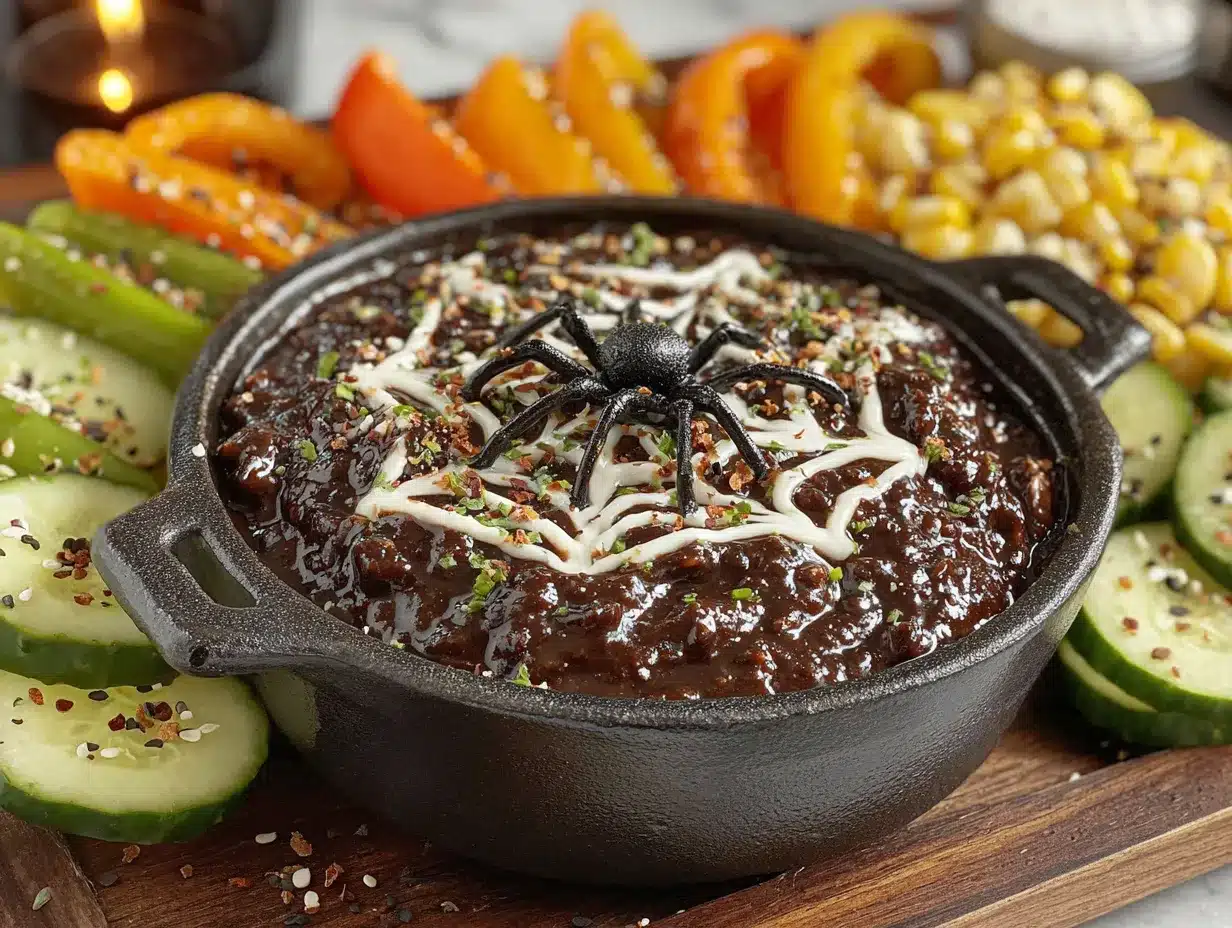
Let’s build some spiders. This takes about 15 minutes from start to finish, and most of that time is just cutting vegetables.
- Prep your veggies first. Wash and dry all your vegetables. Cut celery into 3-inch pieces. Slice cucumber into spears about the same length. Cut bell peppers into strips about 1/2 inch wide. Set everything aside on a plate. You want all your leg options ready to go before you start assembling spiders.
- Make your dip base. Spoon your ranch dip or hummus into the small bowl and place it in the center of your serving platter. Smooth it out a bit with the back of a spoon. This is your “web.” If you want to get fancy, use a toothpick to swirl the dip into a spiral pattern—it actually looks like a spider web and takes about 5 seconds.
- Prepare your black bean bodies. Drain and rinse your black beans. Spread them out on a paper towel-lined plate and pat them dry. You want them as dry as possible so the cream cheese sticks. Pick out the best-looking beans—about 20 to 24 whole ones. The rest can go in a salad or something later.
- Add the eyes. Take a tiny amount of softened cream cheese on the tip of a butter knife or toothpick. Dab it onto one end of a black bean. Press a sliced olive (pimiento side up) onto the cream cheese. The cream cheese acts like glue. Repeat for all your spider bodies. It helps to do this step assembly-line style—dab all the beans first, then add all the eyes.
- Arrange your spiders on the platter. Place each finished spider body around the edge of your dip bowl, spacing them evenly. The eyes should face outward so guests see them first. I usually fit 8 to 10 spiders around a standard 6-inch dip bowl.
- Add the legs. Here’s where it gets fun. For each spider, arrange 8 vegetable pieces as legs—4 on each side. Push the ends of the vegetables slightly under the black bean body so it looks like the legs are attached. Mix and match your vegetables for variety. A spider with two carrot legs, two celery legs, two cucumber legs, and two pepper legs looks more organic than one with all the same vegetable.
- Fill in the gaps. Scatter any remaining vegetable pieces and cherry tomatoes around the platter. This fills empty space and gives guests more to grab. It also makes the platter look abundant and intentional rather than sparse.
- Serve immediately or refrigerate. If you’re making this ahead, cover the whole platter with plastic wrap and refrigerate for up to 4 hours. The vegetables stay crunchy, and the dip stays cold. Add the legs right before serving if you want maximum crispness.
A few notes from experience: Don’t overcrowd your platter. Spiders need space to be seen. If you try to cram 15 spiders onto a small platter, they just look like a pile of beans with legs. Also, press those legs firmly into the dip. A spider with loose legs looks like it’s about to fall apart, and not in a fun Halloween way.
Cooking Tips & Techniques
I learned most of these the hard way, so you don’t have to.
The cream cheese trick is everything. The first time I made these, I tried to balance olive slices directly on the black beans. They fell off. Every single one. I stood there in my kitchen, surrounded by rogue olive slices, questioning my life choices. Then I remembered cream cheese exists. A tiny dab—and I mean tiny, like half a pea-sized amount—holds those olive eyes in place for hours. Room temperature cream cheese works best. Cold cream cheese is too stiff and will just pull the bean apart.
Dry beans are happy beans. Wet black beans are slippery and uncooperative. After rinsing, let them sit on paper towels for a full 5 minutes. Pat them gently but thoroughly. This also helps the cream cheese adhere better. I’ve made the mistake of rushing this step and ended up with spiders that looked like they were sweating. Not a good look.
Variety in leg placement. Don’t line up all the legs perfectly parallel. Real spider legs (not that I’ve studied them extensively, but I’ve looked at pictures) angle outward at different degrees. Make some legs point forward, some backward, some slightly up. This gives your spiders personality. My favorite spider had one carrot leg that stuck straight up like it was waving. My nephew named him Wavy Dave.
Make it ahead strategy. You can prep all the components the night before—wash and cut vegetables, make the dip, drain the beans, and even assemble the spider bodies with eyes. Store everything separately in the fridge. Then on party day, just arrange everything on the platter. This takes about 3 minutes and makes you look like a Halloween hero with zero morning-of stress.
Double-check your audience. Some people are genuinely creeped out by spiders. I learned this when my friend Sarah refused to touch any of the vegetables because “they came from spiders.” Fair enough. If you’re serving a crowd that includes arachnophobes, consider making a few “friendly” spiders with googly eyes instead of olive eyes, or arrange a separate veggie section that’s clearly spider-free. Label it “Safe Zone” or something. Communication prevents veggie tray trauma.
Variations & Adaptations
This recipe is endlessly flexible, which is why I keep coming back to it.
The Dairy-Free Version: Skip the cream cheese and use a tiny dab of hummus or mashed avocado to attach the olive eyes. It works surprisingly well, though avocado eyes might slide around a bit more. Use a dairy-free ranch or a bean dip for the center bowl.
The Spicy Spider: Swap the ranch dip for a spicy sriracha mayo or a chipotle hummus. The heat adds a fun kick that contrasts with the cool vegetables. I made this version for a Halloween party that was also a hot sauce tasting, and the spiders were the most popular item on the table.
The Dessert Spider: Use chocolate hummus or cookie butter as the “dip” in the center. Replace the vegetables with pretzel sticks (legs), chocolate chips (eyes), and graham cracker sticks (more legs). The black bean bodies stay the same—they look surprisingly natural in a dessert context because they’re already dark and round. This version is a hit with kids who won’t touch vegetables but will eat anything that looks like a bug.
The Mini Spider Bites: Instead of one large platter, make individual servings. Place a small dollop of dip in the bottom of a shot glass or small cup. Perch one spider on top with legs sticking out. These are perfect for parties where people are standing and mingling. I made these for a Halloween movie night and they were gone in 10 minutes.
The Seasonal Swap: In summer, use fresh green beans or sugar snap peas as legs for a brighter color palette. In fall, add roasted pumpkin seeds scattered around the platter for texture. You can even use small pretzel sticks as legs for a salty crunch that pairs beautifully with a sweet dip.
Serving & Storage Suggestions
This platter is best served cold, right out of the fridge. The vegetables stay crisp, the dip stays thick, and the spiders hold their shape. If you’re serving it at room temperature, it’ll be fine for about 2 hours—after that, the cream cheese might start to soften and the vegetables might wilt slightly.
For presentation, I like to place the platter on a dark surface—black tablecloth, dark wood, or even a black trash bag smoothed out under a table runner. The contrast makes the orange carrots and green celery pop. Add some battery-operated tea lights around the platter for a spooky glow. Just don’t put them too close to the dip or you’ll have warm ranch, and nobody wants that.
As for what to serve alongside it, this platter pairs beautifully with other Halloween appetizers. I love setting it next to my Easy Spider Web Charcuterie Board for Halloween for a full creepy spread. The two together cover both the veggie crowd and the cheese-and-meat crowd. If you’re going all out, add some Spooky Witch Finger Pretzel Treats for a sweet-and-salty balance.
Storage: If you have leftovers (unlikely, but possible), remove the spider bodies from the platter and store them in an airtight container in the fridge for up to 2 days. The vegetables can be stored separately and used for lunch the next day. The dip keeps for about a week. Don’t try to reassemble the spiders after storage—the vegetables will have released moisture and the cream cheese won’t hold as well. Just enjoy the components separately.
One thing I’ve noticed: the flavors actually get better after a few hours in the fridge. The vegetables absorb a tiny bit of moisture and become even crunchier (counterintuitive, I know). The dip thickens up. The whole thing tastes more cohesive. So don’t stress about making it fresh—a little time in the fridge actually helps.
Nutritional Information & Benefits
Per serving (about 1 spider with 4 vegetable pieces and 2 tablespoons of dip):
- Calories: 145
- Protein: 6g
- Fat: 8g
- Carbohydrates: 14g
- Fiber: 5g
- Sugar: 4g
These numbers are estimates and will vary based on your specific dip and vegetable choices. The ranch version is slightly higher in fat; the hummus version is slightly higher in protein.
The health benefits here are sneaky good. Black beans are packed with fiber and plant-based protein—they keep you full without weighing you down. The rainbow of vegetables provides a variety of vitamins and antioxidants. Carrots are loaded with beta-carotene (good for eyesight, which you’ll need for spotting spiders). Celery is mostly water and fiber, making it a guilt-free crunch. And the dip? Well, ranch has some calcium from the dairy, and hummus has healthy fats from olive oil and tahini. It’s not a health food, but it’s certainly better than the alternative of eating your weight in Halloween candy.
This recipe is naturally gluten-free, vegetarian, and can be made vegan with simple swaps. It’s also nut-free as written, making it safe for school parties and potlucks where allergies are a concern.
Conclusion
Look, I know a veggie tray isn’t the most glamorous thing you’ll bring to a Halloween party. It’s not a triple-layer chocolate cake or a cheese board that looks like it belongs in a magazine. But that’s kind of the point. This Easy Black Bean Spider Veggie Tray is the appetizer that makes people laugh. It’s the one that gets photographed before anyone eats it. It’s the one that kids remember and adults secretly love because it gives them permission to play with their food.
I’ve made this for three Halloweens now, and every single time, someone asks for the recipe. Not because it’s complicated or groundbreaking, but because it’s genuinely fun. And isn’t that what Halloween is supposed to be? A little bit spooky, a little bit silly, and full of things that make you smile.
So grab a can of black beans, raid your vegetable drawer, and make some spiders. Customize them however you want—long legs, short legs, googly eyes, angry eyes. Snap a photo and tag me, because I genuinely want to see your creepy creations. And if you have a story about a spider that made someone scream-laugh at your party, I want to hear that too.
Happy Halloween, and happy snacking!
Frequently Asked Questions
Can I make this spider veggie tray the night before?
Yes! Prep all the components the night before—wash and cut vegetables, make the dip, and assemble the spider bodies with eyes. Store everything separately in the fridge. Assemble the platter about 30 minutes before serving for the freshest presentation. The legs stay crunchier if you add them right before serving.
What if I can’t find black beans? Can I use another bean?
Absolutely. Small dark red kidney beans work well, though they’re slightly larger. You can also use chickpeas (garbanzo beans) for a lighter-colored spider body—they look more like a tarantula that way. Just make sure whatever bean you use is firm and not mushy.
How many spiders does this recipe make?
One can of black beans (15 oz) gives you about 20 to 24 good-sized beans for spider bodies. That makes 8 to 10 spiders, depending on how many you want around your dip bowl. If you’re feeding a crowd, double the recipe and use two smaller dip bowls on a larger platter.
Can I use a different dip instead of ranch?
Absolutely! Hummus, guacamole, spinach artichoke dip, French onion dip, or even a spicy queso all work beautifully. Just make sure the dip is thick enough to hold the vegetable legs upright. Thin dips will cause your spiders to collapse, and nobody wants a flat spider.
My olive eyes keep falling off the black beans. What am I doing wrong?
Two things to check: First, make sure your black beans are completely dry. Pat them with a paper towel until they’re dry to the touch. Second, use room temperature cream cheese. Cold cream cheese is too stiff to spread and won’t hold the olive in place. A tiny dab—about the size of a small pea—is all you need. Press gently and hold for 3 seconds. If they’re still falling off, try using a tiny bit of hummus instead—it’s sticker than you’d think.
Pin This Recipe!
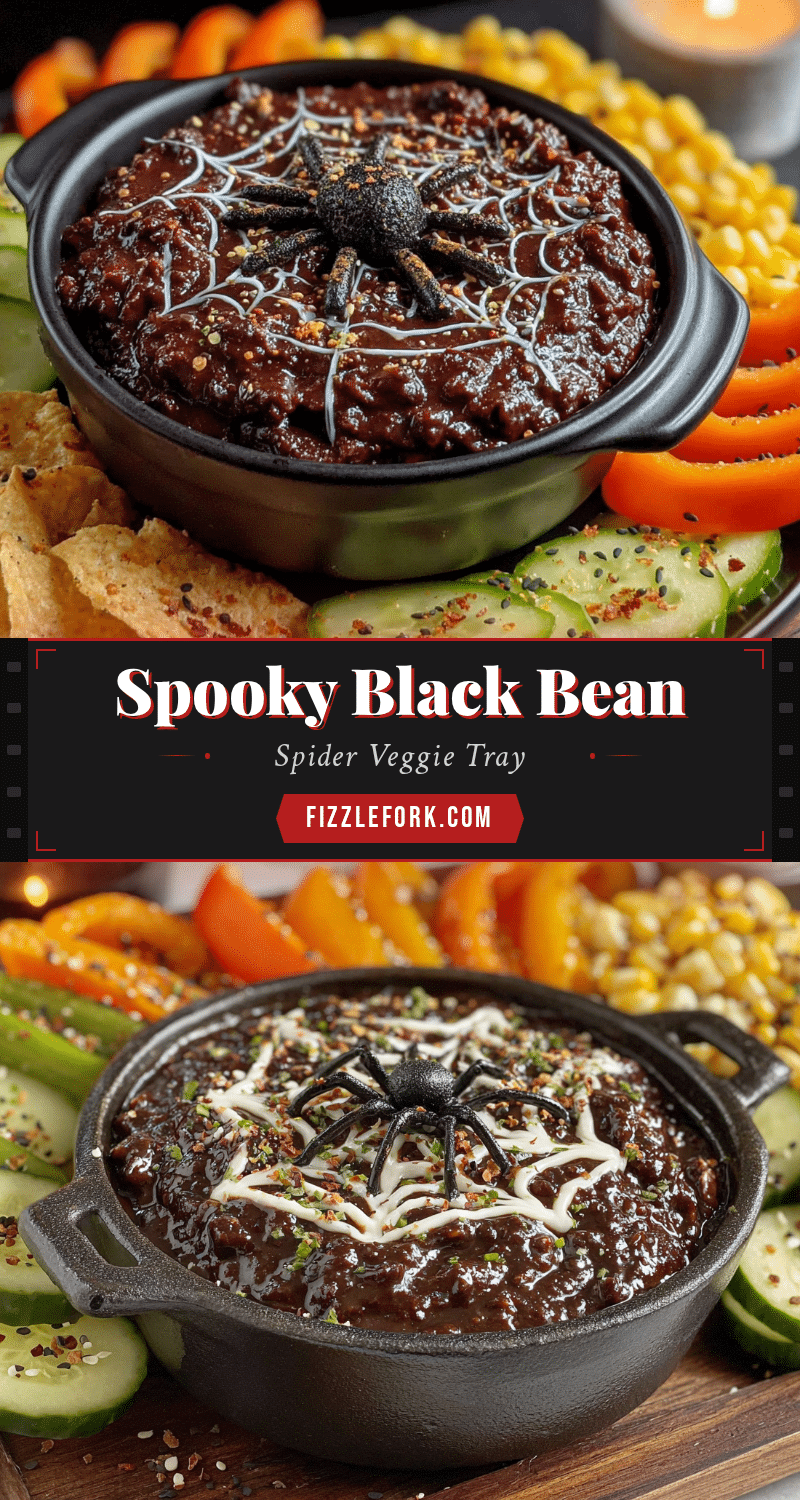
Easy Black Bean Spider Veggie Tray: Perfect Halloween Appetizer
This Easy Black Bean Spider Veggie Tray is the Halloween appetizer you didn’t know you needed—but trust me, you do. It’s a fun, healthy-ish snack that turns simple vegetables into adorable (and slightly creepy) spiders, perfect for parties and kid-friendly fun.
- Prep Time: 15 minutes
- Cook Time: 0 minutes
- Total Time: 15 minutes
- Yield: 8-10 spiders (about 8-10 servings) 1x
- Category: Appetizer
- Cuisine: American
Ingredients
- 1 can (15 oz) black beans, drained and rinsed
- 4 oz cream cheese, softened
- 1 can sliced black olives
- 1 bag (12 oz) baby carrots
- 4–5 celery stalks, cut into 3-inch pieces
- 1 large cucumber, cut into spears
- 1 red bell pepper, cut into strips
- 1 yellow bell pepper, cut into strips
- 1 cup ranch dip or hummus
- 1 cup cherry tomatoes (optional)
Instructions
- Prep your veggies first. Wash and dry all your vegetables. Cut celery into 3-inch pieces. Slice cucumber into spears about the same length. Cut bell peppers into strips about 1/2 inch wide. Set everything aside on a plate.
- Make your dip base. Spoon your ranch dip or hummus into a small bowl and place it in the center of your serving platter. Smooth it out a bit with the back of a spoon. Optionally, use a toothpick to swirl the dip into a spiral pattern.
- Prepare your black bean bodies. Drain and rinse your black beans. Spread them out on a paper towel-lined plate and pat them dry. Pick out about 20 to 24 whole beans.
- Add the eyes. Take a tiny amount of softened cream cheese on the tip of a butter knife or toothpick. Dab it onto one end of a black bean. Press a sliced olive (pimiento side up) onto the cream cheese. Repeat for all spider bodies.
- Arrange your spiders on the platter. Place each finished spider body around the edge of your dip bowl, spacing them evenly with eyes facing outward. Fit 8 to 10 spiders around a standard 6-inch dip bowl.
- Add the legs. For each spider, arrange 8 vegetable pieces as legs—4 on each side. Push the ends of the vegetables slightly under the black bean body. Mix and match vegetables for variety.
- Fill in the gaps. Scatter any remaining vegetable pieces and cherry tomatoes around the platter.
- Serve immediately or refrigerate. If making ahead, cover the whole platter with plastic wrap and refrigerate for up to 4 hours. Add the legs right before serving for maximum crispness.
Notes
The cream cheese trick is everything: use room temperature cream cheese to hold olive eyes in place. Dry beans are happy beans: pat black beans dry after rinsing for better adhesion. Variety in leg placement gives spiders personality. Make ahead strategy: prep components the night before and assemble on party day. Double-check your audience for arachnophobia.
Nutrition
- Serving Size: 1 spider with 4 vege
- Calories: 145
- Sugar: 4
- Fat: 8
- Carbohydrates: 14
- Fiber: 5
- Protein: 6
Keywords: Halloween appetizer, veggie tray, black bean spider, easy Halloween snack, kid-friendly Halloween, healthy Halloween snack, vegetarian appetizer, gluten-free appetizer