I bought a bag of pretzel rods specifically for a “grown-up” snack board I was planning. You know, the kind with fancy cheese and figs. It took about ten minutes of staring at those perfectly straight sticks for that plan to fall apart completely. My kids were already deep into Halloween mode, and I had a bag of melting wafers in the pantry that was practically screaming for a purpose. So I grabbed some almonds, a tube of red gel icing, and thought, “Well, this is either going to be brilliant or a total mess.”
Honestly, it was a little of both at first. The first “finger” I made looked less like a witch and more like a sad, melted snowman. But after a few tries—and a lot of giggling from my seven-year-old—I figured out the trick. You have to be a little bit heavy-handed with the almond “nail” and not overthink the knuckle wrinkles. The result was a batch of the creepiest, most delicious little treats I’d ever made. They were perfect for our pumpkin cold foam party we were planning for the weekend.
These Spooky Witch Finger Pretzel Rod Treats are the kind of recipe that makes you feel like a Halloween hero without spending all day in the kitchen. They’re salty, sweet, and just the right amount of gross. And honestly, that’s the best kind of Halloween snack.
Why You’ll Love These Spooky Witch Finger Pretzel Treats
- Quick & Easy: From start to finish, you’re looking at about 20 minutes of active work. The rest is just chilling time in the fridge.
- Simple Ingredients: You only need four main ingredients—pretzel rods, green candy melts, sliced almonds, and red decorating gel. No weird specialty items.
- Perfect for Halloween Parties: These are the star of any spooky spread. Kids go wild for them, and adults can’t help but smile (and grab a second one).
- No-Bake & Kid-Friendly: This is a great recipe to make with little helpers. They can help dip and place the “fingernails” while you handle the hot candy melts.
- Unbelievably Realistic: The combination of the almond nail and the red gel “blood” at the base makes these look genuinely creepy. It’s the perfect balance of fun and fright.
This recipe isn’t just another chocolate-covered pretzel. It’s a conversation starter. It’s the treat that everyone will be taking pictures of before they take a bite. It’s comfort food turned into a Halloween prop—salty, sweet, and totally satisfying.
What Ingredients You Will Need
This recipe uses simple, pantry-friendly ingredients to create a snack that looks far more complicated than it is. You can find everything at your local grocery store without any fuss.
- Pretzel Rods (1 bag, about 12 ounces): These are the “bones” of our witch fingers. Look for thick, sturdy rods that won’t snap easily when you dip them. I prefer the Snyder’s of Hanover brand for their consistent size.
- Green Candy Melts (1 bag, about 10 ounces): This gives the fingers their classic, spooky witch-green color. You can use Wilton or Ghirardelli brand. If you can’t find green, white chocolate with green food coloring works just as well.
- Sliced Almonds (about ¼ cup): These become the creepy, jagged fingernails. Look for raw or roasted, unsalted almonds. The natural shape of the sliced almond is perfect for this.
- Red Decorating Gel (1 tube): This is for the “blood” at the base of the nail. You can also use red frosting in a piping bag, but the gel is neater and easier to control.
- Optional – Coconut Oil (1 teaspoon): If your candy melts are too thick, a tiny bit of coconut oil will thin them out for a smoother dip. It also gives the coating a nice shine.
Equipment Needed
You don’t need a fancy kitchen to pull these off. Here’s what you’ll need:
- Microwave-Safe Bowl: For melting the candy melts. A glass measuring cup works great because it’s deep enough for dipping.
- Baking Sheet: Lined with parchment paper or a silicone baking mat. This is where your witch fingers will set.
- Small Spatula or Spoon: For stirring the melts and helping to coat the pretzels if the bowl isn’t deep enough.
- Tweezers (Optional but Helpful): For placing the almond “nails” precisely. Your fingers work too, but the tweezers keep things cleaner.
- Piping Bag or Small Zip-Top Bag: If you want to be extra precise with the red gel, you can transfer it to a small piping bag. Usually, the tube it comes in is fine.
Preparation Method
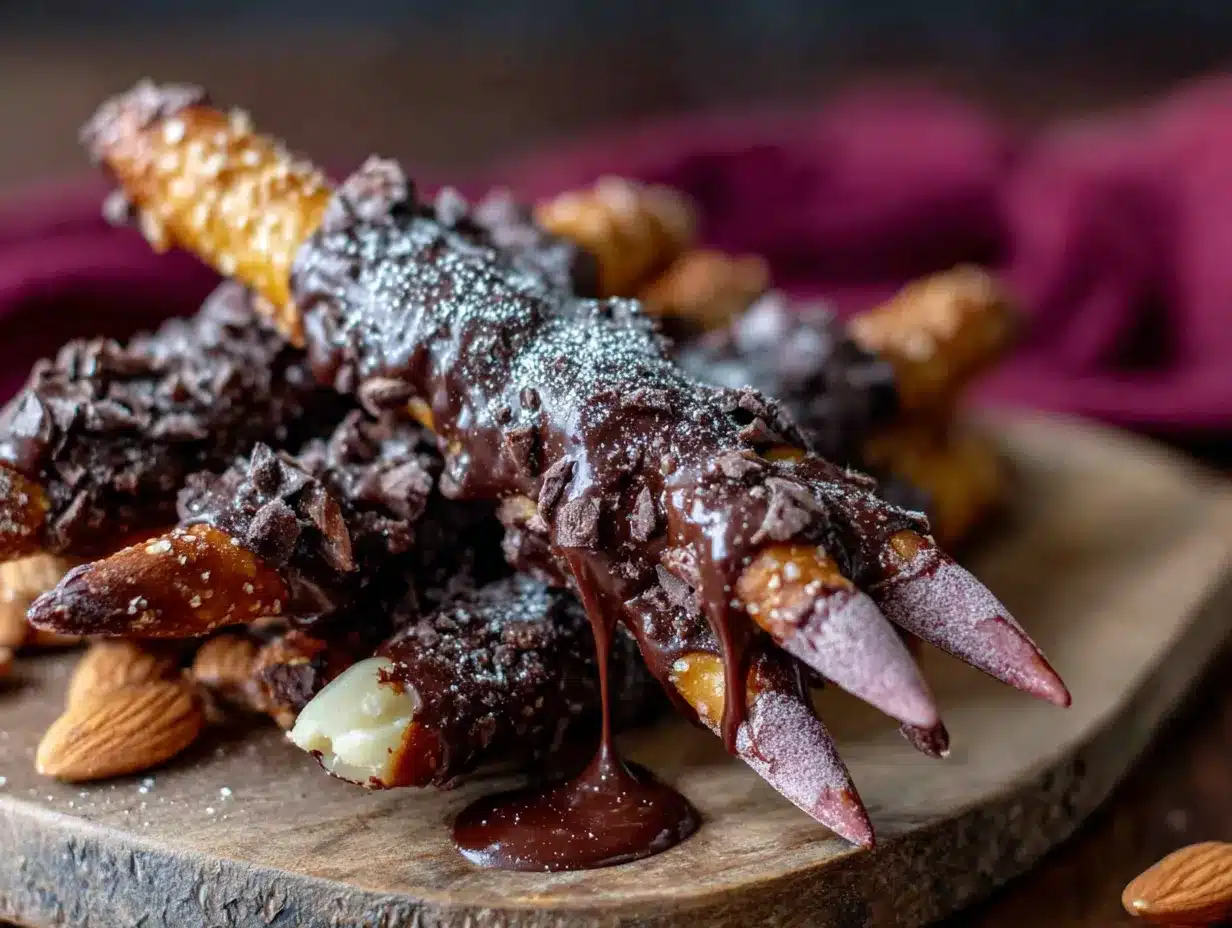
Let’s get creepy! Follow these steps, and you’ll have a batch of witch fingers in no time.
- Prep Your Workspace: Line a large baking sheet with parchment paper or a silicone mat. This is where your finished fingers will go to set. Have your pretzel rods, sliced almonds, and red gel ready to go.
- Melt the Candy Melts: Place the green candy melts in a microwave-safe bowl. Microwave in 30-second intervals, stirring well after each one. It usually takes about 1.5 to 2 minutes total. Be careful not to overheat them, or they’ll seize up. If the mixture is too thick, stir in a teaspoon of coconut oil until smooth.
- Dip the Pretzels: Holding a pretzel rod by one end, dip the other two-thirds into the melted green candy. Let any excess drip back into the bowl. You want an even coating, but you don’t want it too thick. Use a small spatula to help coat the pretzel if needed.
- Place on the Sheet: Gently place the coated pretzel onto the prepared baking sheet. Repeat with the remaining pretzels, working in batches of 4-5 at a time so the coating doesn’t set before you add the nails.
- Add the Fingernails: While the coating is still wet, gently press a sliced almond onto the tip of each pretzel. The pointed end of the almond should face outward, away from the pretzel. Press it down just enough so it sticks. The almond should look like a long, jagged fingernail.
- Create the Knuckle Lines: Once you’ve placed the nails, use the back of a small knife or a toothpick to gently drag lines across the wet coating to create knuckle wrinkles. Make 2-3 lines about halfway down the coated portion. Don’t press too hard—you just want an indentation.
- Add the “Blood”: Now for the fun part. Squeeze a small dot of red decorating gel at the base of the almond “nail.” Let it drip down slightly to look like a bloody cuticle. You can also add a few more drops randomly on the “finger” for a gory effect.
- Let Them Set: Allow the witch fingers to set completely at room temperature. This takes about 15-20 minutes. If you’re in a hurry, you can pop the baking sheet in the refrigerator for 10 minutes.
- Serve and Enjoy: Once the coating is firm, carefully peel them off the parchment paper. Arrange them on a platter like a severed hand for maximum spooky effect.
Cooking Tips & Techniques
I learned a few things the hard way so you don’t have to. Here are my best tips for perfect witch fingers:
- Don’t Overheat the Candy Melts: This is the number one mistake. If they get too hot, they become thick and lumpy. Always melt them slowly and stir frequently. If they seize up, you can try adding a little more coconut oil, but it’s often easier to just start over.
- Work in Small Batches: The coating sets up fast. Only dip 4-5 pretzels at a time before adding the nails and knuckle lines. This keeps the coating wet and workable.
- Use a Deep Bowl for Dipping: A tall, narrow bowl or a liquid measuring cup is much easier to dip into than a wide, shallow one. It helps you get a more even coat without wasting candy melts.
- Don’t Overthink the Knuckles: They don’t need to be perfect. In fact, the more uneven and slightly messy they are, the more realistic (and creepy) they look. A little wobble is part of the charm.
- Let Them Set Completely: Don’t rush this step. If you try to move them before the coating is fully hard, you’ll end up with a sticky, green mess. Patience is key here.
Variations & Adaptations
Once you’ve mastered the basic witch finger, the possibilities are endless. Here are a few fun twists:
- Zombie Fingers: Use white or gray candy melts instead of green. Add a few drops of green or purple food coloring for a bruised, undead look.
- Mummy Fingers: After dipping the pretzel in white candy melts, let it set slightly. Then, drizzle more white melt back and forth over the finger to create a “bandage” effect. Add tiny black candy eyes for a fun touch.
- Vampire Fingers: Use red or dark red candy melts. Instead of an almond, use a whole peanut or a cashew for the nail. Add a drop of red gel at the tip for a bloody bite mark.
- Peanut Butter Witch Fingers: Before dipping, spread a thin layer of peanut butter on the pretzel rod. Then dip it in the green candy melts. The salty-sweet combo is incredible.
- Gluten-Free Option: Simply swap the pretzel rods for a gluten-free brand. The rest of the ingredients are naturally gluten-free. They work just as well.
Serving & Storage Suggestions
These treats are best enjoyed within a day or two of making them. Here’s how to serve and store them like a pro:
- Serving: Arrange them on a black platter or a bed of crushed chocolate cookies (to look like dirt) for a dramatic effect. You can also stand them upright in a small jar or cup for a “hand reaching out of the ground” look.
- Storage: Store any leftover witch fingers in an airtight container at room temperature. Do not refrigerate them, as the candy melts can get sticky and the pretzels can lose their crunch.
- Make-Ahead: You can make these up to 3 days in advance. Just keep them in a cool, dry place. They actually look even creepier after a day or two as the red gel settles.
- Freezing: I don’t recommend freezing these. The pretzels will become soft and stale when thawed. They’re best made fresh.
Nutritional Information & Benefits
Let’s be real—these are a treat, not a health food. But here’s a rough estimate so you know what you’re working with. Per serving (1 witch finger):
- Calories: ~180
- Fat: 9g
- Carbohydrates: 22g
- Sugar: 14g
- Protein: 3g
The almonds do add a small amount of healthy fats and vitamin E. And the pretzels provide a quick source of energy. But honestly, this is a fun, once-a-year indulgence. It’s the kind of treat that brings people together and makes memories. And for me, that’s worth more than the nutritional stats. If you’re looking for something a little lighter to balance out the sugar, these go great with a healthy strawberry cheesecake overnight oats breakfast the next morning.
Conclusion
These Spooky Witch Finger Pretzel Rod Treats are more than just a snack—they’re a Halloween experience. They’re easy enough for a weeknight, impressive enough for a party, and fun enough to make with the whole family. The salty crunch of the pretzel, the sweet coating, and the creepy-cute design make them a total winner.
Don’t be afraid to get creative with your own variations. Maybe you want to try a different color or add sprinkles. The best part is making them your own. I promise, once you see the look on your kids’ faces (or your party guests’ faces) when they see these, you’ll be hooked.
So go ahead—grab your ingredients, put on a spooky playlist, and get dipping. And when you do, come back and tell me about it in the comments. I’d love to hear how your witch fingers turned out. Happy Halloween!
Frequently Asked Questions
Can I use white chocolate chips instead of candy melts?
Yes, you can! Just add a little green food coloring to melted white chocolate chips. Candy melts are easier to work with because they’re designed to set up hard, but white chocolate works in a pinch. Just be careful not to overheat it.
How do I keep the almond nails from falling off?
The key is to press the almond into the coating while it’s still wet. If the coating has started to set, the almond won’t stick. Work in small batches and press firmly but gently.
Can I make these dairy-free or vegan?
Absolutely! Look for dairy-free and vegan candy melts or white chocolate. Most pretzel rods are vegan, and sliced almonds are naturally plant-based. Check the label on your red gel to make sure it’s vegan-friendly.
My candy melts are too thick. What should I do?
Add a teaspoon of coconut oil or vegetable shortening to the melted candy. Stir it in well until the mixture smooths out. This will also give your witch fingers a nice, glossy finish.
How far in advance can I make these?
You can make them up to 3 days ahead of time. Store them in an airtight container at room temperature. Do not refrigerate them, as the moisture can make the pretzels soft and the coating sticky.
Pin This Recipe!

Spooky Witch Finger Pretzel Treats: Easy Halloween Snack

These Spooky Witch Finger Pretzel Rod Treats are salty, sweet, and just the right amount of gross. They’re quick and easy to make with simple ingredients, perfect for Halloween parties.
- Prep Time: 20 minutes
- Cook Time: 0 minutes
- Total Time: 35 minutes
- Yield: 12 servings 1x
- Category: Dessert
- Cuisine: American
Ingredients
- 1 bag (about 12 ounces) pretzel rods
- 1 bag (about 10 ounces) green candy melts
- ¼ cup sliced almonds
- 1 tube red decorating gel
- 1 teaspoon coconut oil (optional)
Instructions
- Prep Your Workspace: Line a large baking sheet with parchment paper or a silicone mat. Have your pretzel rods, sliced almonds, and red gel ready to go.
- Melt the Candy Melts: Place the green candy melts in a microwave-safe bowl. Microwave in 30-second intervals, stirring well after each one, until melted (about 1.5 to 2 minutes total). If too thick, stir in a teaspoon of coconut oil until smooth.
- Dip the Pretzels: Holding a pretzel rod by one end, dip the other two-thirds into the melted green candy. Let any excess drip back into the bowl. Use a small spatula to help coat if needed.
- Place on the Sheet: Gently place the coated pretzel onto the prepared baking sheet. Repeat with remaining pretzels, working in batches of 4-5 at a time.
- Add the Fingernails: While the coating is still wet, gently press a sliced almond onto the tip of each pretzel, pointed end outward. Press down just enough so it sticks.
- Create the Knuckle Lines: Use the back of a small knife or a toothpick to gently drag 2-3 lines across the wet coating about halfway down the coated portion to create knuckle wrinkles.
- Add the ‘Blood’: Squeeze a small dot of red decorating gel at the base of the almond ‘nail’ and let it drip down slightly. Add a few more drops randomly for a gory effect.
- Let Them Set: Allow the witch fingers to set completely at room temperature for 15-20 minutes, or refrigerate for 10 minutes if in a hurry.
- Serve and Enjoy: Once firm, carefully peel them off the parchment paper. Arrange on a platter like a severed hand for maximum spooky effect.
Notes
Don’t overheat the candy melts; work in small batches to keep coating wet; use a deep bowl for easier dipping; don’t overthink the knuckles—imperfections add to the creepy effect; let set completely before moving.
Nutrition
- Serving Size: 1 witch finger
- Calories: 180
- Sugar: 14
- Fat: 9
- Carbohydrates: 22
- Protein: 3
Keywords: Halloween, witch fingers, pretzel treats, easy snack, no-bake, kid-friendly, spooky


