It was 11:47 PM on a random Wednesday, and I was hit with a craving for something rich, buttery, and utterly comforting. You know that feeling when your brain decides it needs the culinary equivalent of a warm hug, and nothing else will do? I wanted garlic butter chicken so bad I could almost taste it. But here’s the thing—I’d spent the weekend indulging at a friend’s birthday dinner, and my body was gently reminding me that maybe, just maybe, I didn’t need another heavy, cream-laden meal at nearly midnight.
I opened the fridge, fully expecting to close it and order takeout. But there they were—four boneless, skinless chicken thighs I’d bought on a whim, sitting next to a bag of baby potatoes that were starting to look at me with a certain desperation. I had butter, of course, and garlic. But I also had a half-full container of Greek yogurt that I’d been using for breakfast parfaits. And honestly? That’s where the magic happened. I swapped out half the butter for a yogurt-based marinade, cut the oil in half, and decided to roast everything together on one sheet pan like a lunatic at midnight.
Let me tell you—I almost burned the garlic because I got distracted scrolling my phone. The kitchen smelled insanely good, and I stood there in my pajamas, eating a piece of chicken directly off the pan because I couldn’t wait for a plate. It was juicy, it was garlicky, it had that golden-brown crust we all chase, but it didn’t leave me feeling like I’d swallowed a brick. Maybe you’ve been there—wanting the comfort without the guilt, the flavor without the food coma. This recipe is exactly that. It’s the version I keep making, even in broad daylight, because it actually works.
Why You’ll Love This Recipe
I’ve tested this recipe more times than I care to admit. The first few attempts were good, but something was off—the chicken was dry, or the potatoes weren’t crispy enough, or the garlic butter sauce was too greasy. After a solid six trials (and one very memorable kitchen fire involving a paper towel), I landed on this version. It’s been tested by my neighbor, my mom, and even my picky-eating cousin who claimed he didn’t like chicken thighs. He ate three servings.
- Quick & Easy: From fridge to table in about 45 minutes. The active prep time is maybe 15 minutes, and then your oven does the heavy lifting. Perfect for those nights when you’re running late but still want something that feels special.
- Simple Ingredients: You probably have garlic, butter, and potatoes in your kitchen right now. The yogurt is the only “surprise” ingredient, and honestly, it’s a game-changer. No trips to specialty stores required.
- Perfect for Weeknight Dinners: This isn’t a weekend-project recipe. It’s the kind of meal you can throw together on a Tuesday after work, and it still feels like you put in effort.
- Crowd-Pleaser: I’ve served this to meat-and-potatoes types and health-conscious friends alike. Everyone leaves happy. The chicken stays juicy, the potatoes soak up all that garlicky goodness, and there’s never leftovers.
- Unbelievably Delicious: Here’s the thing—this isn’t a “good for a healthy recipe” recipe. It’s just a good recipe, period. The yogurt keeps the chicken tender without weighing it down, and the butter-garlic combination is still front and center. You won’t miss the extra fat.
What makes this different from the thousand other garlic butter chicken recipes out there? It’s the balance. Most versions drown everything in butter and cream, which tastes amazing but leaves you feeling sluggish. Other “light” versions strip away all the flavor and leave you with sad, dry chicken. This one hits the sweet spot—enough butter to feel indulgent, but lightened up with yogurt and a smart roasting technique that lets the ingredients shine without drowning in fat. It’s comfort food reimagined, and honestly, it’s the only version I make anymore.
What Ingredients You Will Need
This recipe uses simple, wholesome ingredients that work together to deliver bold flavor without the heavy feeling. Most of these are pantry staples, and the substitutions are incredibly forgiving if you need to adapt.
- Boneless, skinless chicken thighs (about 1.5 lbs or 680g) – I prefer thighs over breasts here because they stay juicier and have more flavor. If you only have breasts, reduce cooking time by about 5-7 minutes and check for doneness early.
- Baby potatoes (1 lb or 450g) – Halved or quartered depending on size. Yukon Gold or red potatoes work beautifully. They get creamy on the inside and crispy on the edges.
- Unsalted butter (2 tablespoons, softened) – I use Kerrygold when I can find it, but any good-quality unsalted butter works. The salt content varies in salted butter, so stick with unsalted to control the seasoning.
- Plain Greek yogurt (3 tablespoons) – This is my secret weapon. It adds tanginess and helps the chicken stay incredibly moist. Full-fat or 2% works best; non-fat can be a bit thin but still works in a pinch.
- Garlic (5-6 cloves, minced) – Fresh garlic is non-negotiable here. The pre-minced stuff in jars has a different flavor and won’t give you that aromatic punch. Trust me on this.
- Olive oil (1 tablespoon) – Just enough to help everything crisp up without making it greasy. A good extra virgin olive oil adds a subtle fruitiness.
- Lemon juice (1 tablespoon, fresh) – Brightens everything up and cuts through the richness. Bottled lemon juice works in a pinch, but fresh really does make a difference.
- Dried oregano (1 teaspoon) – Adds an earthy, slightly peppery note that pairs beautifully with garlic. You can substitute thyme or rosemary if that’s what you have.
- Paprika (1 teaspoon) – I use smoked paprika for depth, but sweet paprika works too. This adds color and a subtle warmth that makes the dish feel more complex.
- Salt and black pepper (to taste) – About 1 teaspoon of salt and 1/2 teaspoon of pepper is my starting point, but adjust based on your preference.
- Fresh parsley (for garnish, optional) – Adds a pop of color and freshness. If you don’t have it, don’t stress—the dish is still gorgeous without it.
Equipment Needed
You don’t need a fancy kitchen to pull this off. Here’s what I use every time:
- Large sheet pan (half-sheet size, about 13×18 inches) – A rimmed baking sheet is ideal because it catches all the juices. If you don’t have one, a large roasting pan works, but you might need to extend cooking time slightly since the heat circulates differently.
- Parchment paper or aluminum foil – For easy cleanup. I prefer parchment because nothing sticks to it, but foil works fine if you give it a quick spray of cooking oil.
- Mixing bowl (medium) – For combining the yogurt, butter, garlic, and seasonings. Any bowl works, but a wide one makes mixing easier.
- Chef’s knife and cutting board – For mincing garlic and halving potatoes. A sharp knife makes this process so much faster and safer.
- Measuring spoons – For accuracy, especially with the seasonings. I’ve eyeballed it before and ended up with overly garlicky chicken (which, honestly, wasn’t the worst problem to have).
- Meat thermometer (optional but recommended) – Chicken thighs are done at 165°F (74°C), but I pull them at 160°F because they continue cooking while resting. A thermometer takes the guesswork out of it.
I bought my sheet pan from a restaurant supply store for about $12, and it’s been going strong for years. You really don’t need expensive equipment—just something that conducts heat evenly and fits in your oven.
Preparation Method
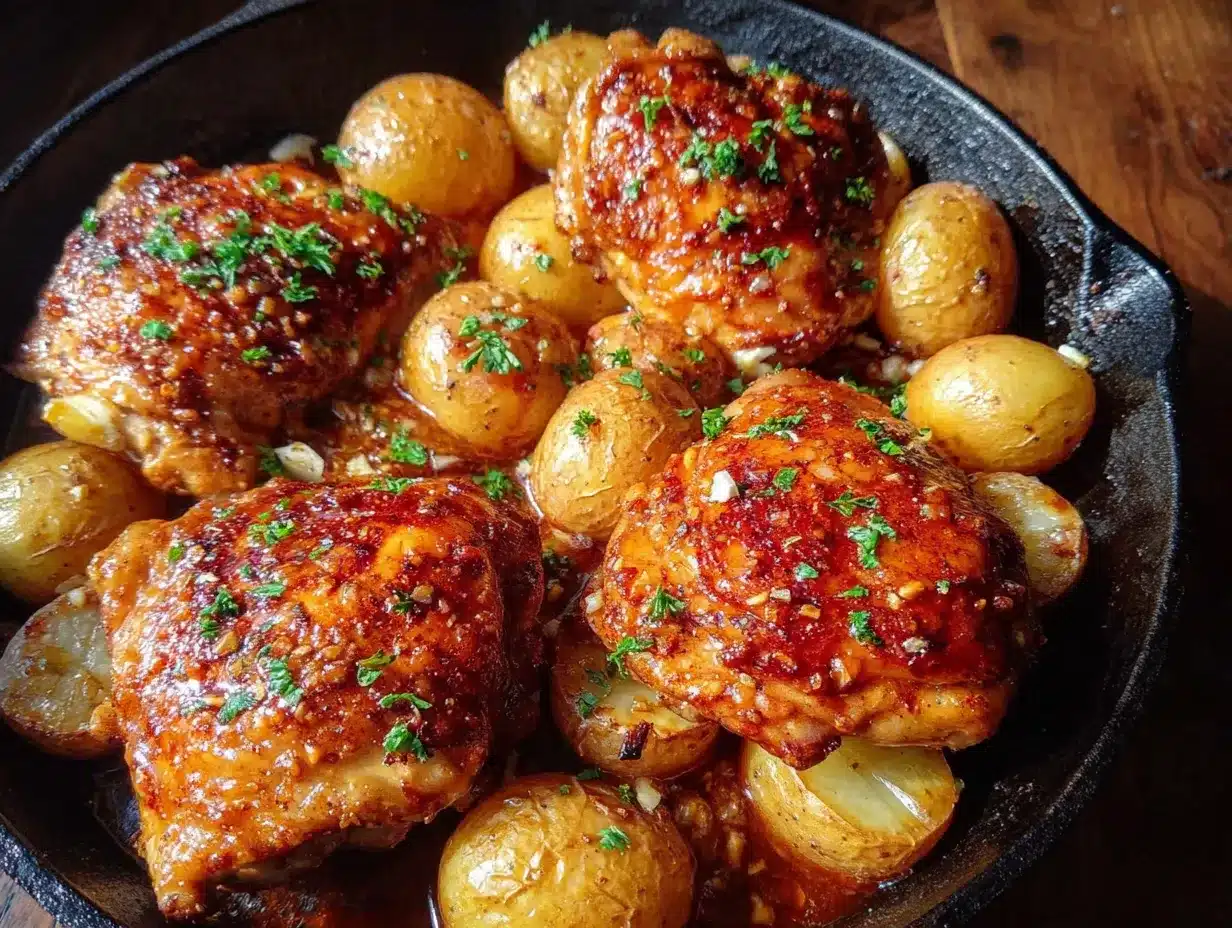
Let me walk you through this step by step. I’ve made this so many times that I’ve got the timing down to a science, and I’ll share every little trick I’ve picked up along the way.
- Preheat your oven to 400°F (200°C). This is important—you want the oven screaming hot so the potatoes get crispy and the chicken develops that golden crust. While it’s heating, line your sheet pan with parchment paper or foil. I forgot to do this once and spent 20 minutes scrubbing burnt-on garlic butter off the pan. Learn from my mistakes.
- Prep the potatoes. Wash and dry your baby potatoes, then halve them (or quarter if they’re on the larger side). You want them roughly the same size so they cook evenly. Toss them with 1/2 tablespoon of olive oil, a pinch of salt, and a crack of black pepper. Spread them out on one half of your sheet pan. Don’t overcrowd them—if they’re piled on top of each other, they’ll steam instead of roast.
- Make the garlic butter yogurt mixture. In your mixing bowl, combine the softened butter, Greek yogurt, minced garlic, lemon juice, dried oregano, paprika, 1/2 teaspoon of salt, and 1/4 teaspoon of black pepper. Mix until everything is well combined. It should look like a thick, creamy paste. Taste it—it should be punchy and flavorful. If it tastes flat, add a pinch more salt.
- Prep the chicken. Pat the chicken thighs dry with paper towels. This is crucial for browning. If they’re wet, they’ll steam instead of sear. Place them in the bowl with the yogurt mixture and toss to coat evenly. Let them sit for 5 minutes while the potatoes get a head start in the oven. I’ve let them marinate for up to an hour in the fridge, and it only gets better.
- Start the potatoes. Place the sheet pan with the potatoes in the oven and roast for 10 minutes. This gives them a head start since they take longer than the chicken. Set a timer—I’ve gotten distracted and let them go 15 minutes, which made them a bit too brown on the edges. Still delicious, but not ideal.
- Add the chicken. After 10 minutes, pull the sheet pan out (careful, it’s hot!). Push the potatoes to one side and arrange the chicken thighs in a single layer on the other side. Pour any remaining yogurt mixture over the chicken and potatoes. Return the pan to the oven.
- Roast for 25-30 minutes. The chicken should reach an internal temperature of 165°F (74°C), and the potatoes should be fork-tender with crispy edges. Halfway through (around the 15-minute mark), flip the chicken and toss the potatoes for even cooking. If the garlic looks like it’s burning, don’t panic—just move the chicken to a different spot on the pan. I’ve had a few cloves get a little dark, and it just adds a slightly nutty flavor.
- Rest and garnish. Once everything is done, remove the pan from the oven and let it rest for 5 minutes. This lets the juices redistribute in the chicken. Sprinkle with fresh parsley if you’re using it, and give everything a final squeeze of lemon if you want extra brightness.
Cooking Tips & Techniques
I’ve made every mistake you can imagine with this recipe, and I’m sharing them so you don’t have to. Here’s what I’ve learned the hard way:
Don’t skip drying the chicken. The first time I made this, I was in a rush and skipped patting the chicken dry. The result? Pale, soggy chicken that looked more boiled than roasted. Moisture is the enemy of browning, and browning is where all the flavor lives. Take the extra 30 seconds.
Watch your garlic. Garlic burns faster than you think, especially when it’s sitting directly on a hot pan. If you notice the garlic pieces getting dark before the chicken is done, you can gently scrape them off and mix them into the potatoes. Burnt garlic tastes bitter and can ruin the whole dish. I learned this the hard way when I walked away to answer a phone call and came back to a smoky kitchen.
Use a meat thermometer. I know, I know—it feels fussy. But chicken thighs are forgiving, and they can handle a few extra minutes without drying out. But if you pull them too early, they’re rubbery, and too late, they’re dry. 165°F is the magic number, but I pull mine at 160°F and let carryover cooking do the rest. A $10 thermometer has saved me more times than I can count.
Don’t overcrowd the pan. If you’re doubling the recipe, use two sheet pans. When the pan is too crowded, everything steams instead of roasting, and you lose that beautiful golden crust. I made this mistake when cooking for a dinner party, and while the flavor was still good, the texture was disappointing.
Let it rest. I know you’re hungry. I know the kitchen smells amazing. But if you cut into that chicken immediately, all those juices are going to run out onto the cutting board instead of staying in the meat. Five minutes. Set a timer. It’s worth it.
Variations & Adaptations
This recipe is incredibly flexible, and I’ve tried several variations depending on what I have on hand or who I’m cooking for.
Dairy-Free Version: Swap the butter for a plant-based butter (I like Miyoko’s) and use a dairy-free yogurt like coconut or almond-based. The flavor changes slightly—coconut yogurt adds a subtle sweetness—but it’s still delicious. I made this for a friend with a dairy allergy, and she asked for the recipe immediately.
Spicy Kick: Add 1/2 teaspoon of red pepper flakes or a minced serrano pepper to the yogurt mixture. I tried this on a whim when I was craving heat, and it transformed the dish completely. The spice cuts through the richness beautifully.
Vegetable Swap: Not in the mood for potatoes? Try sweet potatoes, carrots, or even cauliflower florets. The cooking time stays roughly the same, though sweet potatoes might need an extra 5 minutes. I’ve also used broccoli (added halfway through cooking) for a lower-carb option.
Herb Variation: If oregano isn’t your thing, try rosemary or thyme. I’ve even used a teaspoon of Italian seasoning in a pinch. Fresh herbs work too—just double the amount since dried herbs are more concentrated.
One-Pan Meal: Add a handful of green beans or asparagus spears to the pan during the last 10 minutes of cooking. They’ll roast perfectly and soak up all those garlicky juices. I do this when I want to keep cleanup to an absolute minimum.
Serving & Storage Suggestions
This dish is best served hot, straight from the oven. The contrast between the crispy potatoes and the tender chicken is what makes it special. I like to plate everything on a large platter family-style, with a sprinkle of fresh parsley and an extra crack of black pepper on top.
For sides, this is a complete meal on its own, but I’ve served it with a simple green salad dressed with lemon vinaigrette when I want something fresh on the side. A crusty piece of bread is also wonderful for sopping up any leftover garlic butter sauce from the pan. If you’re feeling fancy, a glass of crisp white wine like Sauvignon Blanc pairs beautifully with the garlic and lemon.
Storage: Leftovers keep well in an airtight container in the refrigerator for up to 4 days. The potatoes will lose some of their crispiness, but the flavor only gets better as it sits. I actually love the leftovers cold, straight from the fridge—the garlic flavor becomes more pronounced.
Reheating: The best way to reheat is in a 350°F oven for about 10 minutes. This brings back some of the crispiness. The microwave works in a pinch, but the potatoes will be soft rather than crispy. I’ve also reheated it in an air fryer at 375°F for 5 minutes, and it comes out almost as good as fresh.
Freezing: This dish freezes surprisingly well. Place cooled leftovers in a freezer-safe container and freeze for up to 3 months. Thaw overnight in the refrigerator and reheat in the oven. The texture won’t be quite as perfect as fresh, but it’s still a solid meal for busy nights.
Nutritional Information & Benefits
Here’s the thing about this recipe—it’s lighter than traditional garlic butter chicken, but it doesn’t feel like a compromise. By swapping out half the butter for Greek yogurt, we’re cutting the saturated fat significantly while adding protein and probiotics. Chicken thighs are naturally higher in iron and zinc than chicken breasts, and they’re more forgiving to cook, which means less chance of dry, overcooked meat.
The potatoes provide complex carbohydrates for steady energy, plus fiber and potassium. Garlic isn’t just for flavor—it’s been linked to immune support and heart health. And the olive oil adds healthy monounsaturated fats that help your body absorb the fat-soluble vitamins from the vegetables.
Estimated per serving (based on 4 servings):
- Calories: 420
- Protein: 32g
- Fat: 22g (8g saturated)
- Carbohydrates: 28g
- Fiber: 3g
- Sugar: 3g
- Sodium: 580mg
This recipe is naturally gluten-free and can be made dairy-free with simple substitutions. If you’re watching your sodium, reduce the added salt and rely on the garlic and herbs for flavor.
Frequently Asked Questions
Can I use chicken breasts instead of thighs?
Yes, but reduce the cooking time by about 5-7 minutes and check for doneness early. Chicken breasts dry out faster than thighs, so a meat thermometer is your best friend here. I’d also recommend pounding them to an even thickness for consistent cooking.
Can I make this in advance?
Absolutely. You can prep the yogurt mixture and cut the potatoes up to 24 hours in advance. Store them separately in the refrigerator, then toss everything together just before roasting. The chicken can marinate in the yogurt mixture for up to 8 hours for even more flavor.
Why did my garlic burn?
Garlic burns when it’s exposed to high heat for too long, especially if it’s sitting directly on the pan. To prevent this, make sure the garlic is well mixed into the yogurt mixture, which provides some protection. If you notice it browning too quickly, you can cover the pan loosely with foil for the last 10 minutes of cooking.
Can I add vegetables to the pan?
Yes! Broccoli, green beans, bell peppers, and zucchini all work well. Add heartier vegetables like carrots or Brussels sprouts at the beginning with the potatoes, and add tender vegetables like asparagus or zucchini during the last 10 minutes of cooking.
How do I know when the chicken is done?
The safest way is to use a meat thermometer inserted into the thickest part of the thigh. It should read 165°F (74°C). If you don’t have a thermometer, cut into the thickest piece—the juices should run clear, and there should be no pinkness at the bone (if using bone-in).
Conclusion
This recipe has become a staple in my kitchen for good reason. It’s the kind of meal that feels indulgent but doesn’t leave you feeling heavy, and it comes together with minimal effort on a weeknight. I love that I can throw it together with ingredients I usually have on hand, and it always delivers—crispy potatoes, juicy chicken, and that irresistible garlic butter flavor that makes everyone at the table go quiet for a minute.
I hope you give this a try and make it your own. Maybe you’ll add extra garlic, or swap in sweet potatoes, or serve it with a side of roasted broccoli. That’s the beauty of a recipe like this—it’s a starting point, not a rulebook. If you make it, I’d love to hear how it turned out. Drop a comment below or tag me in your photos. And if you’re looking for another one-pan dinner that’s just as easy, you might love my crispy garlic chicken for a different take on the same idea.
Happy cooking, and don’t forget to save room for leftovers the next day—they’re even better, if you can believe it.
Pin This Recipe!
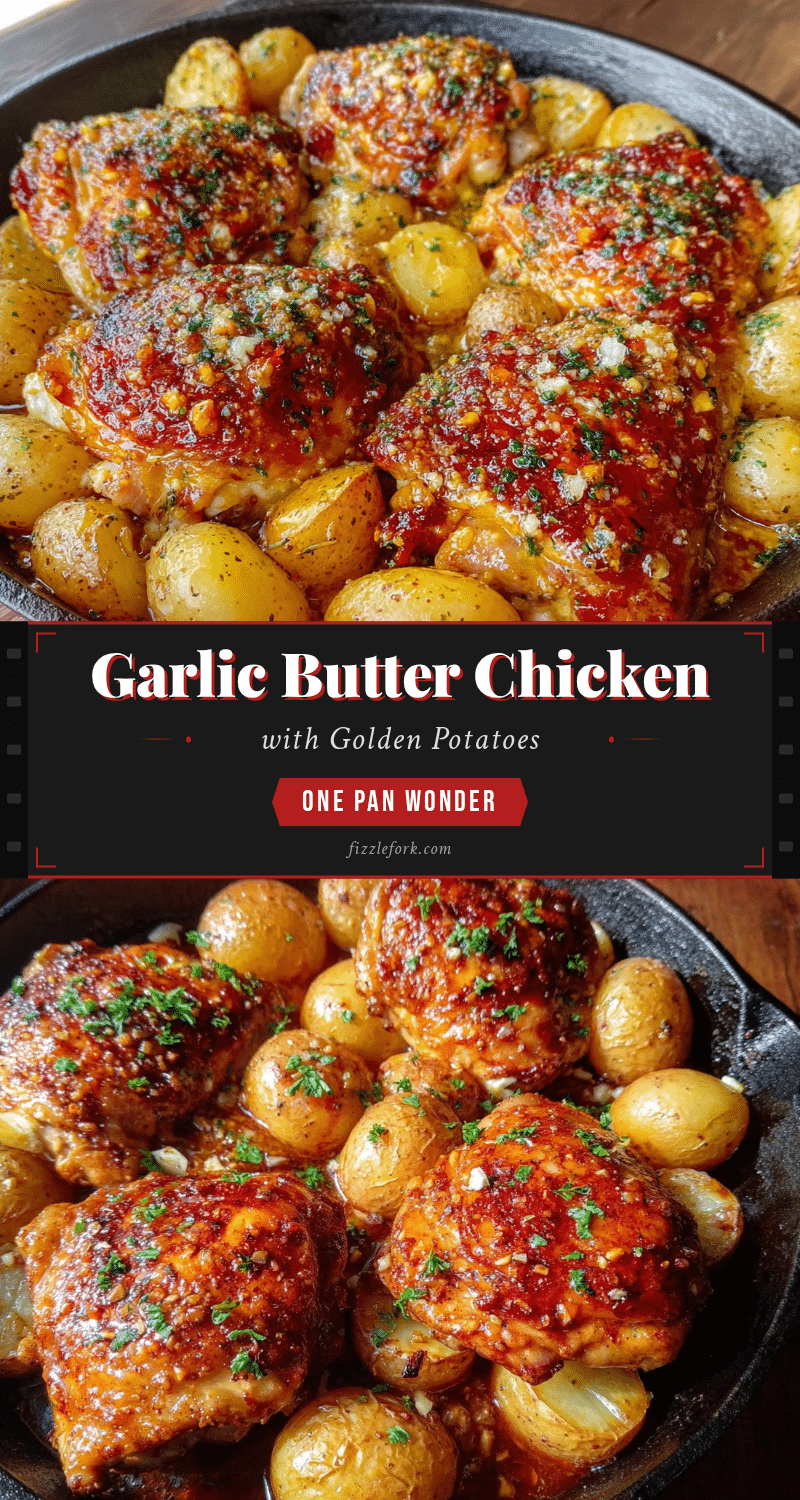
Easy Garlic Butter Chicken Thighs with Potatoes

Juicy garlic butter chicken thighs and crispy roasted potatoes come together on one sheet pan for a quick, comforting weeknight dinner. This lighter version uses Greek yogurt to keep the chicken tender without the heavy feeling.
- Prep Time: 15 minutes
- Cook Time: 30 minutes
- Total Time: 45 minutes
- Yield: 4 servings 1x
- Category: Main Course
- Cuisine: American
Ingredients
- 1.5 lbs (680g) boneless, skinless chicken thighs
- 1 lb (450g) baby potatoes, halved or quartered
- 2 tablespoons unsalted butter, softened
- 3 tablespoons plain Greek yogurt (full-fat or 2%)
- 5–6 cloves garlic, minced
- 1 tablespoon olive oil
- 1 tablespoon fresh lemon juice
- 1 teaspoon dried oregano
- 1 teaspoon paprika (smoked or sweet)
- 1 teaspoon salt (or to taste)
- 1/2 teaspoon black pepper (or to taste)
- Fresh parsley for garnish (optional)
Instructions
- Preheat oven to 400°F (200°C). Line a large sheet pan with parchment paper or aluminum foil.
- Wash and dry baby potatoes. Halve or quarter them to uniform size. Toss with 1/2 tablespoon olive oil, a pinch of salt, and black pepper. Spread on one half of the sheet pan.
- In a mixing bowl, combine softened butter, Greek yogurt, minced garlic, lemon juice, dried oregano, paprika, 1/2 teaspoon salt, and 1/4 teaspoon black pepper. Mix into a thick paste.
- Pat chicken thighs dry with paper towels. Place in the bowl with the yogurt mixture and toss to coat evenly. Let sit for 5 minutes.
- Place the sheet pan with potatoes in the oven and roast for 10 minutes.
- After 10 minutes, remove the pan. Push potatoes to one side and arrange chicken thighs in a single layer on the other side. Pour any remaining yogurt mixture over chicken and potatoes.
- Roast for 25-30 minutes, flipping chicken and tossing potatoes halfway through, until chicken reaches an internal temperature of 165°F (74°C) and potatoes are fork-tender with crispy edges.
- Remove from oven and let rest for 5 minutes. Garnish with fresh parsley if desired.
Notes
Pat chicken dry for best browning. Watch garlic to prevent burning; if it darkens too quickly, scrape it off and mix into potatoes. Use a meat thermometer for perfect doneness (pull at 160°F for carryover cooking). Don’t overcrowd the pan—use two sheet pans if doubling. Let chicken rest 5 minutes before serving.
Nutrition
- Serving Size: 1 serving (about 1 c
- Calories: 420
- Sugar: 3
- Sodium: 580
- Fat: 22
- Saturated Fat: 8
- Carbohydrates: 28
- Fiber: 3
- Protein: 32
Keywords: garlic butter chicken, sheet pan chicken, chicken thighs, roasted potatoes, easy dinner, weeknight meal, one-pan recipe


