I wasn’t expecting baking advice from my accountant, but there I was, standing in his driveway on a crisp October afternoon, watching him wrestle a giant cardboard skeleton into his trunk while he described exactly how to make these Easy Halloween Rice Krispie Ghosts with White Chocolate. He was supposed to be helping me with quarterly taxes, but somehow we got onto the topic of Halloween parties, and he casually mentioned his “secret weapon” for the neighborhood potluck. I almost laughed. Bob, the man who color-codes his spreadsheets, had strong opinions about marshmallow treats.
He told me about the year he tried fancy ghost cookies, spent three hours piping royal icing, and showed up with a tray of lopsided disasters. “Kids don’t care about perfect,” he said, slamming the trunk shut. “They care about something they can grab and go.” That stuck with me. The next weekend, I gave his method a shot, and honestly, it was the most fun I’d had in the kitchen in weeks. There’s something ridiculously satisfying about dipping a sticky square into melted white chocolate and watching it turn into a little ghost. I mean, you don’t even need a cookie cutter for this.
I’ve made these every year since, and they’ve become my go-to for Halloween gatherings. They’re the kind of treat that makes people smile before they even take a bite. Maybe you’ve been there—standing in the party aisle, overwhelmed by options, wanting something that feels special but doesn’t require a culinary degree. That’s exactly where these come in. They look like you tried, but between us, they’re almost too easy. Let me show you how it’s done.
Why You’ll Love This Recipe
These Easy Halloween Rice Krispie Ghosts with White Chocolate are the perfect party trick for any host who wants to impress without the stress. I’ve tested this method more times than I can count, and it delivers every single time. Here is why this recipe will become your Halloween MVP:
- Incredibly Simple: You only need five ingredients and about 20 minutes of active time. No baking, no complicated techniques, no messing with candy thermometers.
- Kid-Friendly Fun: This is the recipe you can actually make with your kids or guests. They can help shape the ghosts and add the chocolate eyes. It’s a whole activity, not just a dessert.
- Perfect for Parties: These hold up beautifully on a dessert table. They don’t melt, they don’t get soggy, and they’re easy for guests to grab without plates or forks.
- Totally Customizable: You can make them spooky, cute, or somewhere in between. Add sprinkles, use colored candy melts, or pipe on different faces. Each batch can be totally unique.
- Crowd-Pleasing Classic: Everyone loves Rice Krispie treats. Adding a white chocolate coating and turning them into ghosts just makes them even more irresistible. I’ve never brought a tray of these home with leftovers.
What makes this version different from other Halloween treats? It’s the texture. The white chocolate adds a satisfying snap when you bite into it, contrasting with the soft, chewy center. It’s not just another Rice Krispie treat—it’s a ghost with personality. And honestly, it’s the kind of recipe that makes you feel like a kitchen rockstar, even if you’re just melting marshmallows. Perfect for that Halloween party where you want to show up with something that steals the table.
What Ingredients You Will Need
This recipe uses simple, pantry-friendly ingredients to create something that looks way more impressive than it actually is. Here is exactly what you need to make these Easy Halloween Rice Krispie Ghosts with White Chocolate:
- 6 cups Rice Krispies cereal (or any crispy rice cereal) – This gives the ghosts their classic crunch. I’ve tried generic brands, and honestly, the name-brand Rice Krispies hold up better and stay crispier longer.
- 4 tablespoons unsalted butter – Use the real stuff here, not margarine. Salted butter works in a pinch, just skip the extra salt. The butter adds richness and helps the marshmallows melt smoothly.
- 1 package (10 oz) regular marshmallows – Mini marshmallows melt faster, but regular ones work just fine. I prefer Jet-Puffed for consistent results. Avoid using stale marshmallows—they won’t melt as evenly.
- 1/4 teaspoon vanilla extract – This is optional but recommended. It rounds out the sweetness and adds a warm flavor note that makes these taste homemade.
- Pinch of salt – A tiny bit of salt balances the sweetness. Don’t skip it, even if you’re using salted butter. Trust me on this.
- 12 oz white chocolate melting wafers or white chocolate chips – Melting wafers (like Ghirardelli or Wilton) give the smoothest coating. White chocolate chips work too, but they need a tablespoon of coconut oil or shortening to thin them out for dipping.
- Candy eyes or mini chocolate chips – For the ghost faces. I use Wilton candy eyes because they’re quick and cute. Mini chocolate chips work great too, and you can find them in any grocery store.
- Optional: Sprinkles, edible glitter, or black decorating gel – For decorating. Orange and black sprinkles are fun for Halloween. Edible glitter makes them look magical.
For the white chocolate, I’ve learned that quality matters. Cheap white chocolate can seize up or taste waxy. I usually grab the Ghirardelli melting wafers from the baking aisle—they melt like a dream and taste buttery. If you’re dairy-free, there are good plant-based white chocolate options now, just check that they’re labeled for melting.
Equipment Needed
You don’t need fancy tools for this recipe. Here is what you’ll need:
- Large pot (at least 4 quarts) – For melting the butter and marshmallows. A non-stick pot makes cleanup much easier.
- Wooden spoon or silicone spatula – For stirring the marshmallow mixture. Silicone is great because nothing sticks to it.
- 9×13 inch baking dish – For pressing the Rice Krispie mixture. Glass or metal both work fine.
- Parchment paper or wax paper – Lining the dish is essential for easy removal. You’ll also need it for setting the ghosts.
- Sharp knife or cookie cutter – A knife works perfectly for cutting squares. If you want perfectly shaped ghosts, a ghost-shaped cookie cutter is fun but totally optional.
- Microwave-safe bowl or double boiler – For melting the white chocolate. A microwave is faster and works perfectly if you go in 30-second bursts.
- Fork or dipping tool – For dipping the squares into the white chocolate. A fork works, but I actually prefer using two forks to flip them easily.
- Baking sheet lined with parchment – For the dipped ghosts to set on.
I’ve made these with just a pot and a microwave, so don’t overthink the equipment. If you don’t have a 9×13 dish, you can press the mixture into any flat pan. The thickness will just vary slightly.
Preparation Method
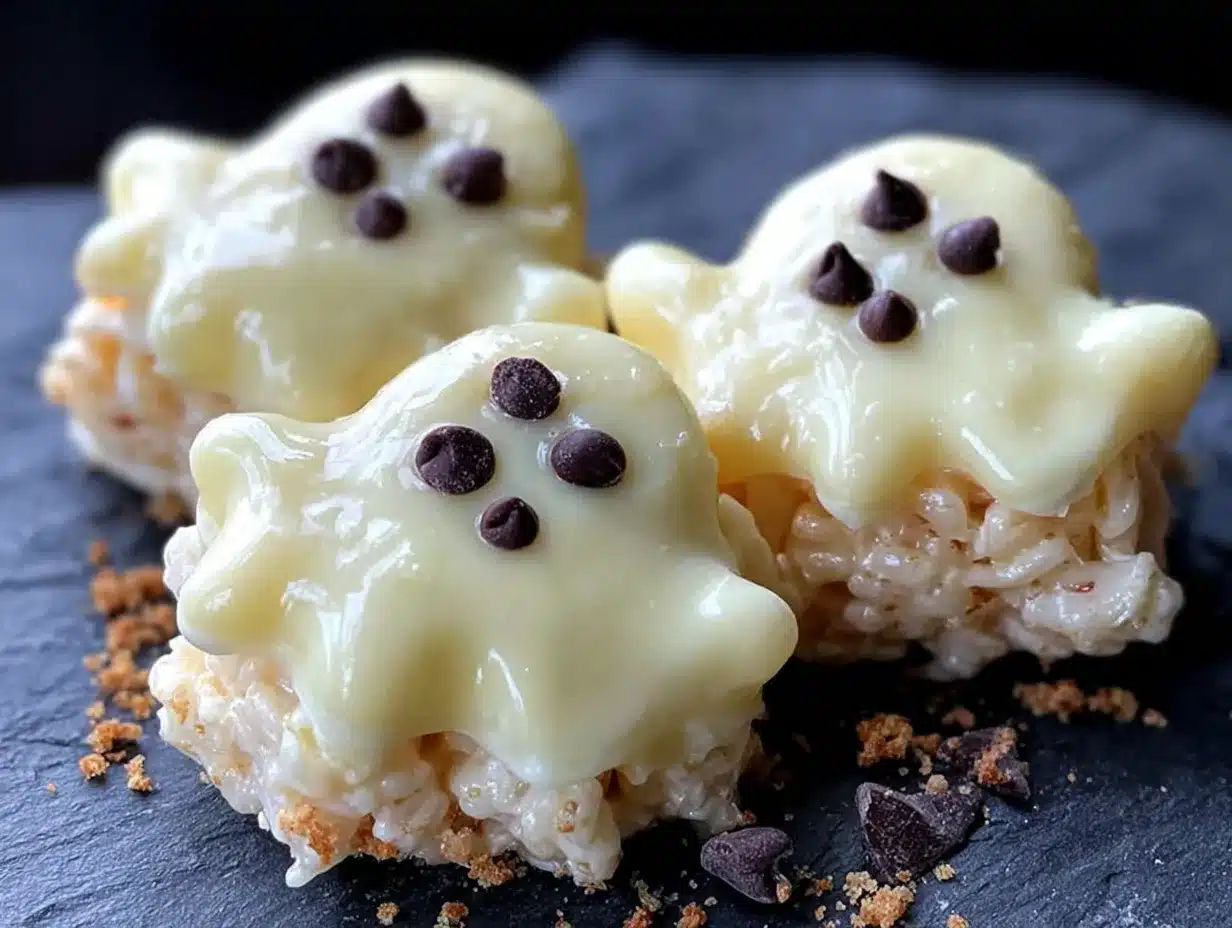
Let me walk you through making these Easy Halloween Rice Krispie Ghosts with White Chocolate step by step. I’ve made plenty of mistakes along the way, so I’ll warn you about the common pitfalls.
Step 1: Prepare Your Pan and Space
Line a 9×13 inch baking dish with parchment paper, leaving some overhang on two sides. This makes lifting the whole block out later super easy. Lightly grease the parchment with butter or non-stick spray. Set aside a baking sheet lined with parchment for the finished ghosts.
Step 2: Melt the Butter and Marshmallows
In a large pot over medium-low heat, melt the 4 tablespoons of butter. Once it’s fully melted, add the entire package of marshmallows. Stir constantly with your wooden spoon or spatula until the marshmallows are completely melted and smooth. This takes about 5-7 minutes. Don’t walk away here—marshmallows can burn quickly if the heat is too high. The mixture should be glossy and stretchy, not brown or crusty.
Step 3: Add Vanilla and Salt
Remove the pot from the heat. Stir in the vanilla extract and a pinch of salt. The salt will dissolve into the warm mixture. Give it a good stir to combine everything evenly.
Step 4: Add the Cereal
Pour the 6 cups of Rice Krispies cereal into the pot. Fold it gently into the marshmallow mixture using a folding motion. Be careful not to crush the cereal too much—you want those crispy bits to stay intact. It should take about a minute of folding to get everything evenly coated. The mixture will be warm and sticky.
Step 5: Press Into the Pan
Transfer the mixture into your prepared baking dish. Grease your hands or a spatula with a little butter or non-stick spray, then press the mixture into an even layer. Don’t press too hard—you want the treats to be tender, not compacted like a brick. Just gently pat it down until it’s flat and even. Let it cool at room temperature for about 20 minutes, or until it’s firm enough to cut.
Step 6: Cut Into Ghost Shapes
Once cooled, lift the block out using the parchment overhang. Place it on a cutting board. Use a sharp knife to cut the block into 12-16 squares, depending on how big you want your ghosts. I usually aim for about 2-inch squares. If you’re using a ghost cookie cutter, press it firmly into the block and wiggle gently to release the shape. Don’t worry if they’re not perfect—the white chocolate coating will hide any rough edges.
Step 7: Melt the White Chocolate
Place the white chocolate melting wafers in a microwave-safe bowl. Microwave in 30-second intervals, stirring between each, until the chocolate is completely smooth. This usually takes about 1.5 to 2 minutes total. Be careful not to overheat it—white chocolate burns easily and becomes grainy. If it’s too thick, stir in a teaspoon of coconut oil or shortening to thin it out.
Step 8: Dip the Ghosts
Working one at a time, drop a Rice Krispie square into the melted white chocolate. Use a fork to gently turn it and coat all sides. Lift it out with the fork, letting the excess chocolate drip back into the bowl. Transfer it to the parchment-lined baking sheet. Repeat with all the squares. Work quickly—the chocolate will start to set as it cools.
Step 9: Add the Faces
While the white chocolate is still wet, press two candy eyes or mini chocolate chips onto each ghost for eyes. You can also add a tiny dot for a mouth using a toothpick dipped in black decorating gel or melted dark chocolate. Work in small batches so the chocolate doesn’t set before you add the faces.
Step 10: Let Them Set
Allow the ghosts to set completely at room temperature. This takes about 30 minutes to an hour, depending on your kitchen temperature. Don’t put them in the fridge—condensation can make the white chocolate bloom and look streaky. Once set, they’re ready to serve or store.
Cooking Tips & Techniques
Over the years, I’ve learned a few things the hard way so you don’t have to. Here are my best tips for perfect Easy Halloween Rice Krispie Ghosts with White Chocolate:
Don’t Overheat the Marshmallows
Low and slow is the way to go. High heat makes marshmallows turn into a tough, chewy mess. Keep the heat on medium-low and stir constantly. The moment they’re smooth, pull them off the heat. I once got distracted and ended up with a pot of caramelized sugar—not what we’re going for here.
Use Fresh Cereal
Stale cereal makes for sad, soggy treats. Check the expiration date on your Rice Krispies before starting. If the cereal has been open for weeks, it might have absorbed moisture from the air. Fresh cereal gives that satisfying crunch that makes these so good.
Work in Batches for Dipping
If you’re making a double batch, don’t try to dip all the ghosts at once. Melt the white chocolate in smaller batches so it stays fluid and easy to work with. Reheated chocolate can get thick and lumpy. I usually melt half the chocolate, dip half the ghosts, then melt the rest.
Keep Your Hands Greased
When pressing the Rice Krispie mixture into the pan, grease your hands with butter or non-stick spray. The mixture is incredibly sticky, and this trick saves you from a sticky mess. I keep a small bowl of melted butter nearby for re-greasing.
Let Them Set Fully
Patience is key here. If you try to move the ghosts before the white chocolate has fully set, you’ll end up with smudged faces and fingerprints. Give them a full hour at room temperature. They’ll be perfectly firm and ready to transport.
Variations & Adaptations
One of the best things about this recipe is how easy it is to change up. Here are some variations I’ve tried and loved:
Spooky Spider Version
Instead of ghost faces, dip the squares in dark chocolate and add eight pretzel stick legs on each side. Use candy eyes on top. These look terrifying and delicious. I made these for a Halloween party last year and they were gone in minutes.
Pumpkin Patch Treats
Skip the white chocolate and use orange candy melts instead. Add a green candy melt or a small piece of green licorice on top for a stem. These are perfect if you’re hosting a fall gathering that isn’t specifically Halloween-themed.
Gluten-Free Option
Rice Krispies are naturally gluten-free, but check the label to make sure. Some generic brands add barley malt. Use certified gluten-free marshmallows and white chocolate, and you’re good to go. I’ve served these to gluten-sensitive friends with zero issues.
Dairy-Free Adaptation
Use dairy-free butter (like Miyoko’s or Earth Balance) and dairy-free white chocolate. Most marshmallows are dairy-free, but double-check. The texture will be slightly different, but they’re still delicious. I tested this version for a friend who’s lactose intolerant, and she couldn’t tell the difference.
Extra Spooky Decorations
Sprinkle orange and black sprinkles over the wet white chocolate. Add a dusting of edible glitter for a magical effect. You can also pipe little spiderwebs using black decorating gel. Let your creativity run wild—these are meant to be fun.
Serving & Storage Suggestions
These Easy Halloween Rice Krispie Ghosts with White Chocolate are best served at room temperature. Arrange them on a platter or cake stand for a party. They make a great centerpiece for a Halloween dessert table. I like to put them on a black platter with some fake spiderwebs and plastic spiders around them for extra creepiness.
For a Halloween party, serve them alongside other no-bake treats like pumpkin dip with apple slices or caramel popcorn. They pair well with warm apple cider or hot chocolate. If you’re hosting a potluck, these travel beautifully—just stack them in a single layer in a container with parchment between layers.
Storage Instructions:
Store leftovers in an airtight container at room temperature for up to 5 days. Do not refrigerate—the white chocolate can develop condensation and look streaky. If you need to store them longer, you can freeze them for up to 2 months. Place them in a single layer in a freezer-safe container with parchment between layers. Thaw at room temperature for about 30 minutes before serving.
The flavors actually get better after a day or two. The marshmallow center softens slightly, and the white chocolate stays firm. I’ve made these a day ahead for parties and they were perfect. Just don’t add the faces until right before serving if you’re worried about the candy eyes falling off during storage.
Nutritional Information & Benefits
Here are the approximate nutritional values for one ghost (based on 12 servings):
- Calories: 290
- Total Fat: 14g
- Saturated Fat: 8g
- Cholesterol: 15mg
- Sodium: 190mg
- Total Carbohydrates: 40g
- Dietary Fiber: 0g
- Sugars: 28g
- Protein: 3g
These are definitely a treat, not an everyday snack. But let’s be honest—Halloween is about indulgence. The Rice Krispies provide a bit of iron and B vitamins from the fortified cereal. White chocolate contains calcium from the milk solids. Marshmallows, well, they’re mostly sugar and air, but they make people happy.
If you’re looking to lighten them up, you can use lower-sugar marshmallows and sugar-free white chocolate. The texture will be slightly different, but they’ll still be tasty. For a protein boost, you can mix in a scoop of vanilla protein powder with the cereal, though I haven’t tested that myself.
Conclusion
These Easy Halloween Rice Krispie Ghosts with White Chocolate are the perfect example of how simple ingredients can turn into something truly special. They’re fun to make, even more fun to eat, and they always get a reaction. Whether you’re hosting a big Halloween bash or just want to surprise your family with a spooky treat, this recipe delivers.
I love how forgiving this recipe is. You can mess up the cutting, over-melt the chocolate, forget the salt—and they’ll still turn out adorable and delicious. That’s the beauty of it. It’s not about perfection; it’s about having fun and sharing something sweet with the people you care about.
So grab your ingredients, put on some spooky music, and get ready to make the cutest ghosts on the block. I’d love to hear how yours turn out! Drop a comment below and let me know what decorations you used. Did you make them spooky or cute? Did your kids help? Share your photos and tag me—I can’t wait to see your ghost creations. Happy Halloween, friends!
Frequently Asked Questions
Can I use marshmallow creme instead of regular marshmallows?
You can, but the texture will be different. Marshmallow creme is softer and won’t give the same structure. Stick with regular marshmallows for the best results. If you only have creme, use about 1 and 1/2 cups and reduce the butter to 3 tablespoons.
How do I keep the white chocolate from seizing up?
White chocolate seizes when it comes into contact with water. Make sure your bowl and utensils are completely dry. If it does seize, add a teaspoon of coconut oil or shortening and stir gently. Don’t add water—it will make it worse.
Can I make these ahead of time?
Absolutely. You can make them up to 2 days ahead and store them in an airtight container at room temperature. For best results, add the faces right before serving so the candy eyes stay fresh and bright.
Why did my Rice Krispie treats turn out hard?
This usually happens when the marshmallow mixture is overheated or when the treats are pressed too firmly into the pan. Keep the heat low and press gently. The mixture should be tender, not compacted.
Can I use dark chocolate instead of white chocolate?
Yes! Dark chocolate ghosts are delicious and look more spooky. Use dark chocolate melting wafers and follow the same dipping instructions. You might want to use white candy eyes so they stand out against the dark chocolate.
Pin This Recipe!
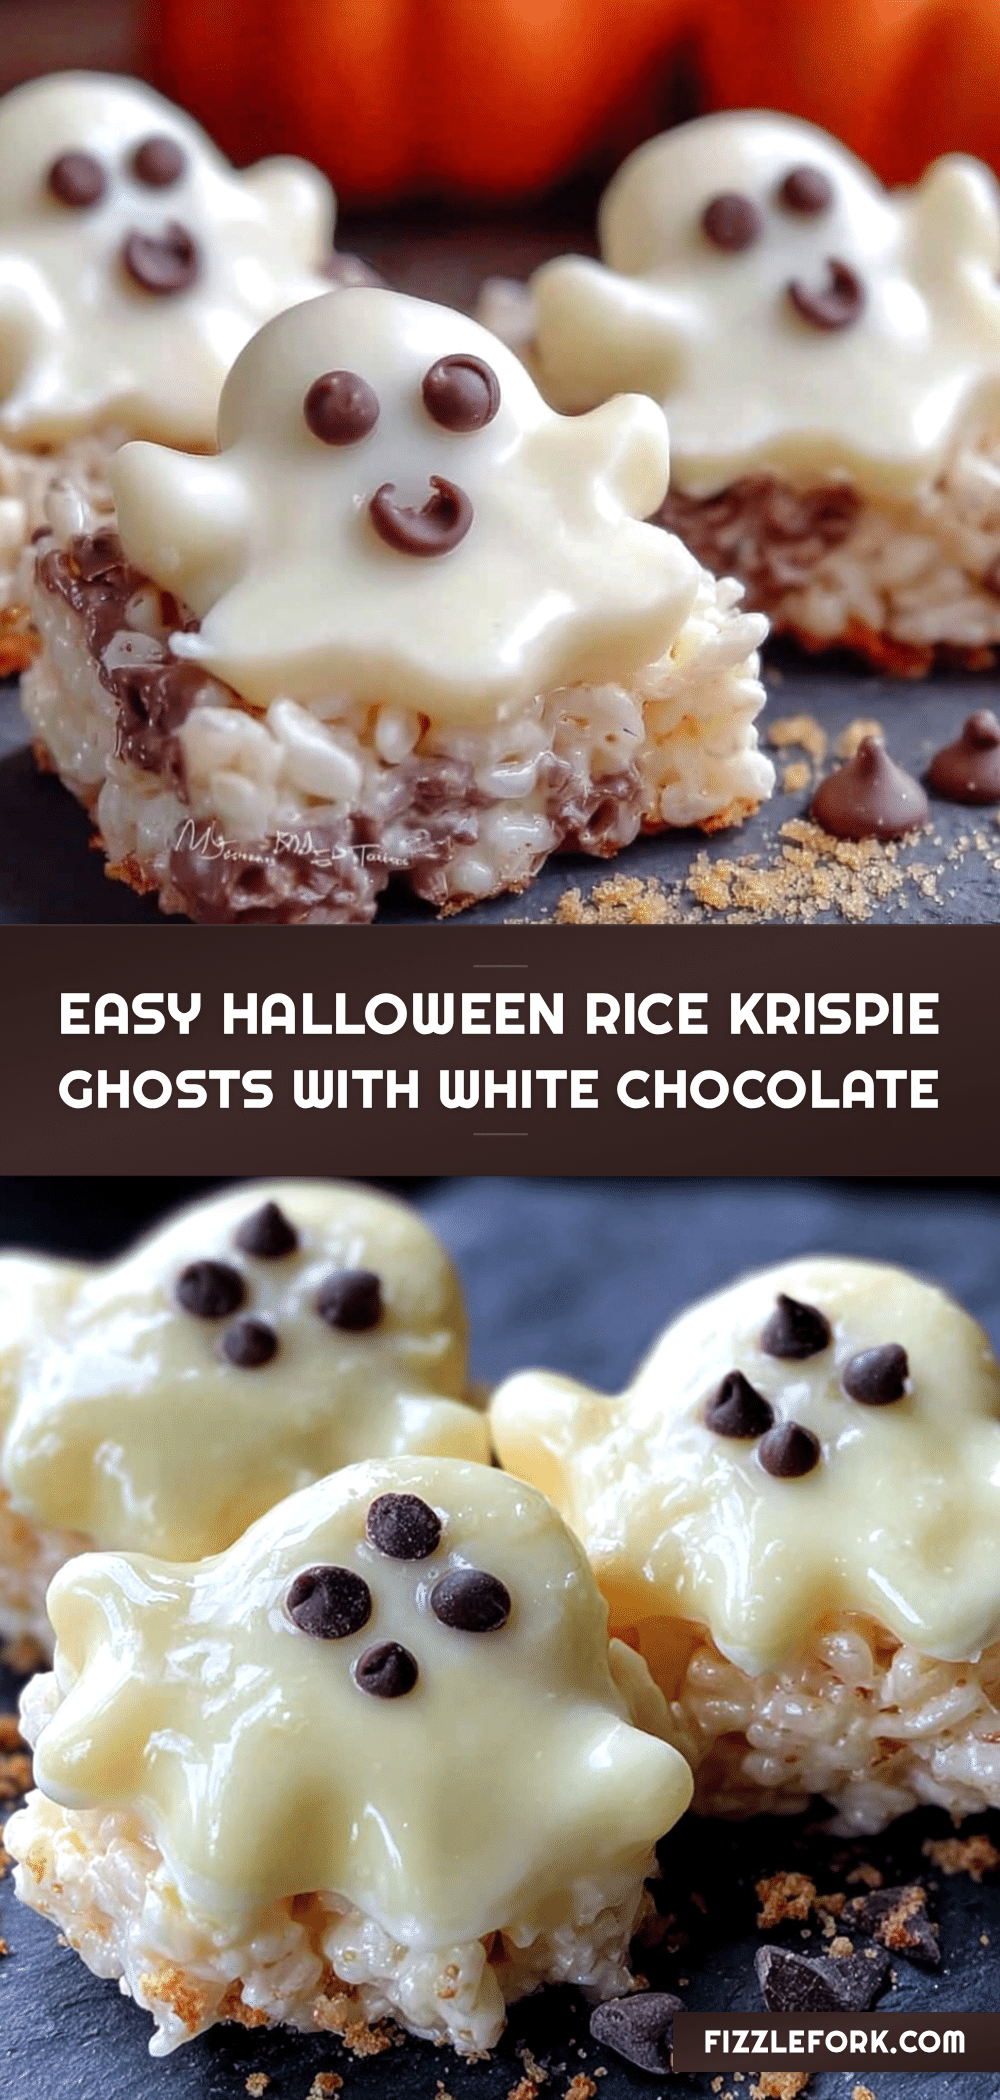
Easy Halloween Rice Krispie Ghosts with White Chocolate
These Easy Halloween Rice Krispie Ghosts with White Chocolate are the perfect party trick for any host who wants to impress without the stress. They’re fun to make, even more fun to eat, and they always get a reaction.
- Prep Time: 20 minutes
- Cook Time: 10 minutes
- Total Time: 1 hour 30 minutes
- Yield: 12-16 servings 1x
- Category: Dessert
- Cuisine: American
Ingredients
- 6 cups Rice Krispies cereal
- 4 tablespoons unsalted butter
- 1 package (10 oz) regular marshmallows
- 1/4 teaspoon vanilla extract
- Pinch of salt
- 12 oz white chocolate melting wafers or white chocolate chips
- Candy eyes or mini chocolate chips
- Optional: Sprinkles, edible glitter, or black decorating gel
Instructions
- Line a 9×13 inch baking dish with parchment paper, leaving some overhang on two sides. Lightly grease the parchment with butter or non-stick spray. Set aside a baking sheet lined with parchment for the finished ghosts.
- In a large pot over medium-low heat, melt the 4 tablespoons of butter. Once fully melted, add the entire package of marshmallows. Stir constantly until the marshmallows are completely melted and smooth, about 5-7 minutes.
- Remove the pot from the heat. Stir in the vanilla extract and a pinch of salt.
- Pour the 6 cups of Rice Krispies cereal into the pot. Fold gently into the marshmallow mixture using a folding motion until evenly coated.
- Transfer the mixture into the prepared baking dish. Grease your hands or a spatula with a little butter or non-stick spray, then press the mixture into an even layer. Let cool at room temperature for about 20 minutes.
- Once cooled, lift the block out using the parchment overhang. Place on a cutting board. Use a sharp knife to cut the block into 12-16 squares, about 2-inch each.
- Place the white chocolate melting wafers in a microwave-safe bowl. Microwave in 30-second intervals, stirring between each, until completely smooth, about 1.5 to 2 minutes total.
- Working one at a time, drop a Rice Krispie square into the melted white chocolate. Use a fork to gently turn and coat all sides. Lift out with the fork, letting excess chocolate drip back into the bowl. Transfer to the parchment-lined baking sheet. Repeat with all squares.
- While the white chocolate is still wet, press two candy eyes or mini chocolate chips onto each ghost for eyes. Optionally, add a tiny dot for a mouth using a toothpick dipped in black decorating gel or melted dark chocolate.
- Allow the ghosts to set completely at room temperature, about 30 minutes to an hour. Do not refrigerate.
Notes
Don’t overheat the marshmallows; use fresh cereal; work in batches for dipping; keep your hands greased when pressing the mixture; let the ghosts set fully at room temperature. For dairy-free, use dairy-free butter and white chocolate. For gluten-free, ensure all ingredients are certified gluten-free.
Nutrition
- Serving Size: 1 ghost
- Calories: 290
- Sugar: 28
- Sodium: 190
- Fat: 14
- Saturated Fat: 8
- Carbohydrates: 40
- Protein: 3
Keywords: Halloween, Rice Krispie treats, ghosts, white chocolate, no-bake, easy, kid-friendly, party dessert


