I burned the edges of my first batch of homemade fruit and nut granola bars four times before I figured out the right baking time. Honestly, I didn’t even really like granola bars that much back then—I thought they were too dry or too sweet, the kind of snack you reluctantly munch on during a hike or at your desk. But one afternoon, desperate for a bite that felt both wholesome and satisfying, I decided to tinker with a mix of nuts and dried fruits I’d been hoarding in the pantry. The kitchen smelled nutty and warm, with just a hint of honey sweetness in the air.
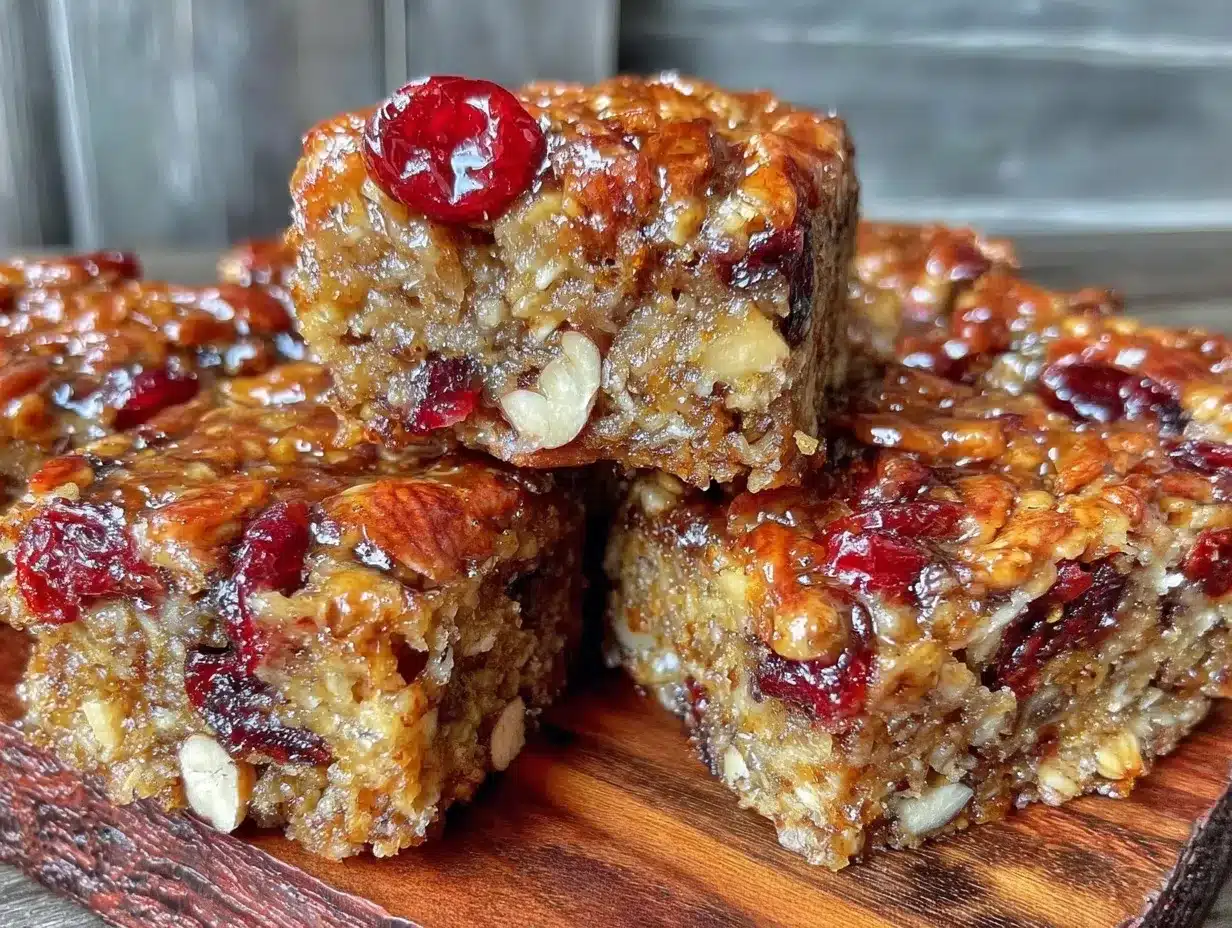
What surprised me wasn’t just that the bars came together faster than I expected, but that they tasted like a homemade treat and not a packaged snack. They had this perfect chewy crunch, a burst of natural fruit sweetness, and a subtle toasted nuttiness that made snacking something to actually look forward to. I kept tweaking the recipe until it felt just right—no soggy middles or burnt bits, just a simple bar you can grab and go.
These easy homemade fruit and nut granola bars stuck with me because they aren’t fussy, and they don’t pretend to be. They’re a humble little snack with honest ingredients, perfect for those moments when you want something quick but wholesome. I still make them when I need a break between busy days or a treat that’s a bit more thoughtful than a candy bar. And that’s why I think you’ll appreciate them too.
Why You’ll Love This Recipe
Let me tell you why these easy homemade fruit and nut granola bars have become my go-to snack and why they might become yours as well:
- Quick & Easy: You can have these bars ready in under 30 minutes, including baking time—perfect for busy afternoons or last-minute snack cravings.
- Simple Ingredients: No fancy or hard-to-find items here. Most are pantry staples like rolled oats, nuts, and dried fruit you probably already have on hand.
- Perfect for Snack Time: Whether it’s a mid-morning pick-me-up or an afternoon nibble, these bars fit right in with your daily routine.
- Crowd-Pleaser: Kids love them, and adults appreciate the natural sweetness and satisfying texture—no complaints at my house!
- Unbelievably Delicious: The combo of toasted nuts and chewy dried fruit with just the right touch of honey gives you that comforting, homemade feel.
What makes this recipe different from the rest? Well, I learned that lightly toasting the oats and nuts before mixing really brings out their flavor, and binding the bars with a mix of honey and natural nut butter (I usually use almond butter) creates a chewy texture that holds together without being too sticky or hard. I’ve also swapped in different dried fruits depending on the season—cranberries in winter, apricots in summer—and each batch feels new yet familiar.
This recipe isn’t just a snack; it’s a little bite of homemade care that you can trust to keep you going. It’s that moment when you close your eyes after the first bite and realize a granola bar can actually be enjoyable. Honestly, it’s like the snack version of a warm, satisfying meal—just easier to carry around.
What Ingredients You Will Need
This recipe uses simple, wholesome ingredients to deliver bold flavor and satisfying texture without the fuss. Most items are pantry staples, but feel free to mix and match with what you have on hand.
- Rolled oats (2 cups / 180g) – Use old-fashioned oats for best chewiness.
- Mixed nuts (1 cup / 120g) – I like a blend of almonds, walnuts, and pecans, roughly chopped.
- Dried fruit (1 cup / 140g) – Chopped dried apricots, cranberries, or raisins work great. In summer, swapping in dried cherries or blueberries feels fresh.
- Honey (1/3 cup / 113g) – Acts as a natural sweetener and binder.
- Nut butter (1/2 cup / 128g) – Almond or peanut butter, smooth or crunchy depending on your mood (I usually go smooth for easier mixing).
- Vanilla extract (1 teaspoon) – Adds a subtle warmth.
- Ground cinnamon (1/2 teaspoon) – Optional, but gives a nice hint of spice.
- Salt (1/4 teaspoon) – Balances the sweetness.
- Chia seeds or flaxseeds (2 tablespoons) – Optional, for a little extra nutrition and texture.
If you want to make these gluten-free, just double-check your oats are certified gluten-free. For a vegan version, swap the honey with maple syrup or agave nectar. I’ve tried both, and while the texture changes slightly, the bars still hold together nicely.
I recommend brands like Bob’s Red Mill for oats and MaraNatha for nut butters—they give consistent texture and flavor, which matters when you’re aiming for that perfect bar. Also, if you’re short on time, pre-chopped nuts and mixed dried fruit blends from the bulk aisle are a real time-saver.
Equipment Needed
To make these fruit and nut granola bars, here’s what you’ll want in your kitchen arsenal:
- Mixing bowls: One large bowl for combining dry ingredients and another small one for wet ingredients. I prefer glass or stainless steel because they’re easy to clean and don’t hold odors.
- Baking pan: An 8×8-inch (20×20 cm) square pan works perfectly. If you don’t have one, a similarly sized round cake pan or a loaf pan will do, but the bars will be thicker.
- Measuring cups and spoons: Accurate measurements help with the texture, especially for the wet ingredients.
- Spatula or wooden spoon: To mix everything thoroughly.
- Parchment paper: Crucial for lining the pan so bars come out cleanly without sticking.
- Oven: For toasting and baking. If you’d rather skip the oven, you can try no-bake versions—though the texture will be different.
On a budget? You can often find baking pans and parchment at discount stores or online. I’ve also used silicone baking mats instead of parchment, which are reusable and eco-friendly. Just a heads up: if using a different pan size, baking times will vary.
Preparation Method
- Preheat your oven to 350°F (175°C). Line your 8×8-inch pan with parchment paper, leaving some overhang on the sides for easy removal.
- Toast the oats and nuts: Spread oats and chopped nuts evenly on a baking sheet. Bake for 10 minutes, stirring halfway through to avoid burning. You’ll smell the nuts toasting—this step amps up the flavor and crunch.
- Mix the wet ingredients: In a medium bowl, whisk together the honey, nut butter, vanilla extract, cinnamon, and salt until smooth and well combined. If your nut butter is thick, warming it slightly in the microwave for 20 seconds helps it blend better.
- Combine dry and wet: Transfer the toasted oats and nuts to a large mixing bowl. Add dried fruit and seeds if using. Pour the wet mixture over the dry and stir with a spatula until everything is coated evenly.
- Press the mixture into the pan: Using the spatula or your hands (lightly wet to prevent sticking), press the mixture firmly into the parchment-lined pan. This step is key—press down hard so the bars hold together after baking.
- Bake: Place the pan in the oven and bake for 15-18 minutes, watching carefully near the end. The edges should be golden brown, and the center set but not hard. (If you want softer bars, reduce baking time by a couple of minutes.)
- Cool completely: Remove from the oven and let the pan cool on a wire rack for at least 30 minutes. This lets the bars firm up, making them easier to cut.
- Cut into bars: Using the parchment overhang, lift the granola out of the pan. Place on a cutting board and slice into 8-10 bars with a sharp knife. Store in an airtight container for up to a week.
Pro tip: If the bars crumble when cutting, pop them in the fridge for 15 minutes before slicing next time. It really helps them hold shape. Also, if you like a little crunch on top, sprinkle extra nuts on the pressed mixture before baking.
Cooking Tips & Techniques
Making granola bars might seem straightforward, but a few tricks can mean the difference between crumbly snacks and bars that hold tight:
- Don’t skip toasting: Toasting the oats and nuts separately draws out their natural oils and flavors. Without this, the bars taste flat and less crunchy.
- Press firmly: You can’t press too hard when packing the mixture into the pan. This step prevents crumbling and keeps the bars together after baking.
- Watch your oven: Every oven runs a little hot or cold. Start checking your bars at 15 minutes to avoid burning, especially if you’re using a darker pan which heats faster.
- Mix wet ingredients thoroughly: Make sure honey and nut butter are well combined. If too thick, gently warm them to make mixing easier and ensure even coating.
- Experiment with seeds: Adding chia, flax, or even pumpkin seeds boosts nutrition and adds textural interest. Just don’t overload or the bars can get too dense.
- Storage is key: Store bars in a cool, dry place. If your kitchen is humid, the bars may soften—refrigerate to keep them firm.
I learned these the hard way after a few batches that were either too hard or fell apart mid-snack. Honestly, baking granola bars felt a bit intimidating at first, but once I got the timing and texture right, they became a kitchen staple. If you want a shortcut, you can check out my easy no-bake granola bar bites recipe for some quick alternatives.
Variations & Adaptations
One of the best parts about homemade granola bars? They’re incredibly flexible. Here are some ways to make this recipe your own:
- Flavor swaps: Instead of the classic fruit and nut combo, try coconut flakes and macadamia nuts for a tropical vibe, or pumpkin seeds and dried cherries for fall-inspired bars.
- Dietary tweaks: For a nut-free version, swap nut butter with sunflower seed butter and replace nuts with seeds like pumpkin, sunflower, or hemp. This keeps the bars allergy-friendly but still delicious.
- Sweetener alternatives: Use maple syrup or agave nectar instead of honey for vegan versions. Just keep in mind these will make the bars a bit softer.
- Texture changes: Add puffed quinoa or millet for a light crunch, or fold in mini dark chocolate chips after baking for a sweet surprise.
- Cooking method: If you want a no-bake option, you can refrigerate the pressed bars for 2 hours instead of baking. They’ll be softer but still tasty and easy to make.
Personally, I once made a batch with dried figs and hazelnuts that stole the show at a weekend picnic. The slight chewiness of figs paired with roasted hazelnuts was a real winner. If you’re curious about other wholesome snack ideas, my banana oat energy balls might inspire your next batch.
Serving & Storage Suggestions
These granola bars are best served at room temperature, making them perfect for grab-and-go snack time. They pair wonderfully with a cup of tea, coffee, or even a cold glass of milk for an afternoon boost.
If you’re packing them for lunchboxes or hiking, wrap each bar individually in parchment or reusable wax paper for easy snacking on the move. For a little extra indulgence, spread a thin layer of nut butter or cream cheese on top just before eating.
For storage, keep the bars in an airtight container at room temperature for up to 5 days. In warmer or humid climates, I recommend refrigerating them to prevent softening, where they can last up to two weeks.
You can freeze wrapped bars for up to 3 months—just thaw wrapped bars overnight in the fridge or at room temperature before enjoying. The flavors actually deepen a bit after resting, so they taste even better the next day.
Nutritional Information & Benefits
Each homemade fruit and nut granola bar (assuming 8 bars per batch) contains approximately:
| Calories | 180-200 kcal |
|---|---|
| Protein | 5 grams |
| Fat | 9 grams (mostly healthy fats from nuts) |
| Carbohydrates | 22 grams |
| Fiber | 4 grams |
| Sugar | 10 grams (natural sugars from honey and dried fruit) |
These bars provide a good balance of macronutrients, with healthy fats, fiber, and natural sugars that give you sustained energy without the crash. Nuts contribute heart-healthy monounsaturated fats and protein, while the oats and seeds add fiber and important minerals.
They’re gluten-free if you use certified oats, and can easily be made vegan by swapping honey for maple syrup. Just watch for nut allergies if serving to kids or guests—there are simple seed-only options for that.
From my wellness perspective, these bars fit nicely into an active lifestyle—they’re not overly processed and avoid refined sugars, which makes them my preferred on-the-go snack over store-bought bars packed with additives.
Conclusion
These easy homemade fruit and nut granola bars bring together simple ingredients to make a snack that’s genuinely satisfying without a fuss. They’re adaptable, wholesome, and a little reminder that good snacks don’t have to be complicated or expensive.
Feel free to tweak the nuts, fruits, or flavorings to suit your taste or pantry stash. I love how this recipe encourages creativity while delivering consistent results. Honestly, they’re one of the few snacks I make regularly because they hit that sweet spot between healthy and delicious.
Give them a try, and let me know how you customize your bars. I’d love to hear your favorite combos or if you’ve tried my other easy snacks like the crispy mini bagel pizzas for a quick savory bite alongside.
Here’s to homemade snacks that actually make snack time something to look forward to.
FAQs
Can I use quick oats instead of rolled oats for these granola bars?
Quick oats can be used, but the texture will be softer and less chewy. Rolled oats hold up better to toasting and baking, giving the bars more structure.
How long do homemade granola bars last?
Stored in an airtight container at room temperature, they last about 5 days. Refrigeration extends shelf life to around two weeks, and you can freeze them for up to 3 months.
Can I add chocolate chips to the bars?
Yes! Add mini chocolate chips after baking or fold them in before pressing the mixture into the pan (just be aware they may melt slightly during baking).
What is the best nut butter to use?
Almond or peanut butter works well. Choose natural, unsweetened options for the best flavor and texture. If thick, warm it slightly to blend easily.
Are these granola bars gluten-free?
They can be, if you use certified gluten-free oats. Always check labels to avoid cross-contamination if you have gluten sensitivities.
Pin This Recipe!
Easy Homemade Fruit and Nut Granola Bars
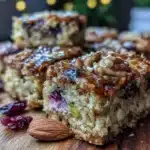
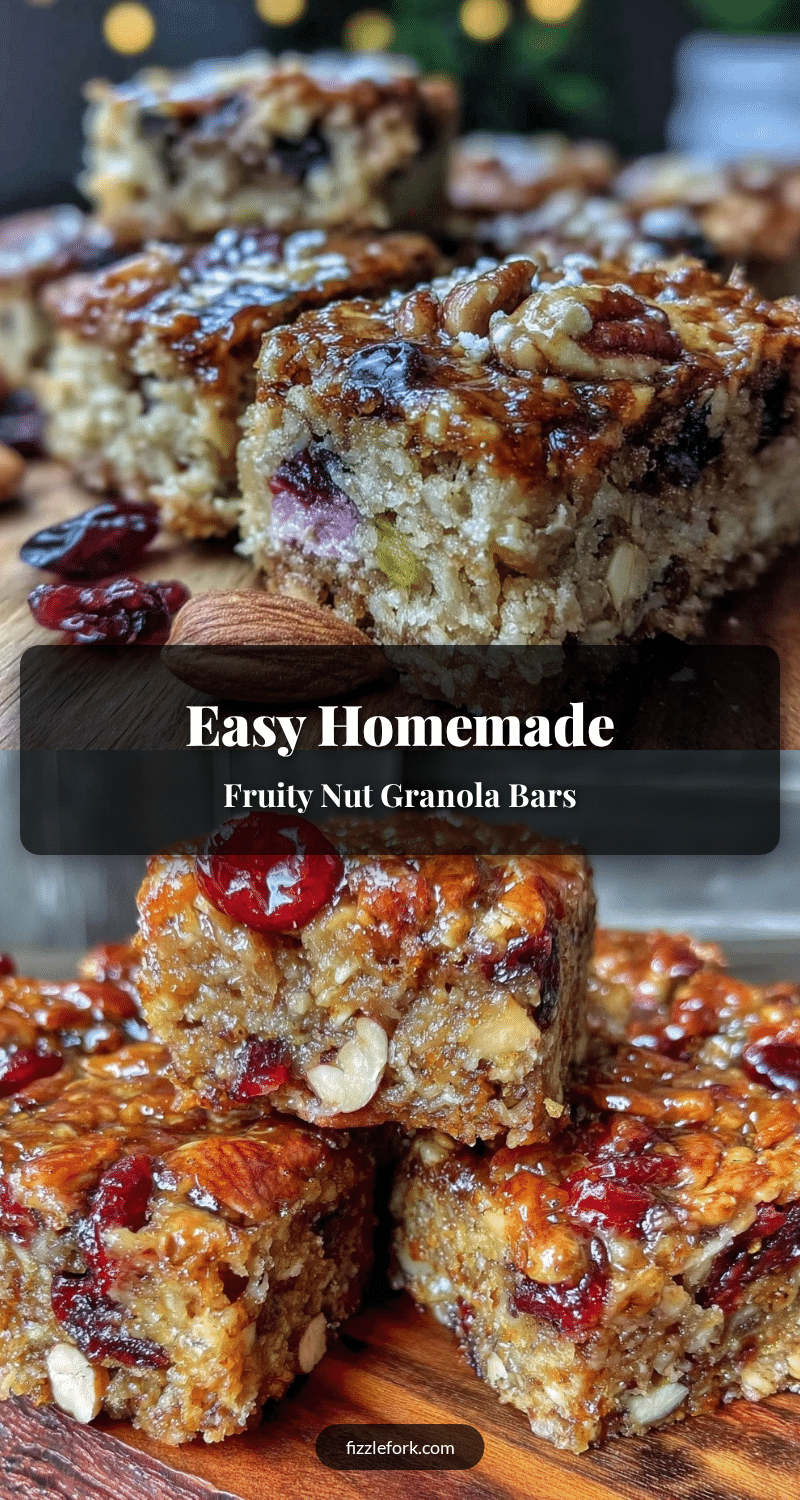
These easy homemade fruit and nut granola bars are a quick, wholesome snack with a perfect chewy crunch, natural fruit sweetness, and toasted nuttiness. Made with simple pantry staples, they are adaptable, delicious, and perfect for on-the-go snacking.
- Prep Time: 10 minutes
- Cook Time: 25 minutes
- Total Time: 35 minutes
- Yield: 8-10 bars 1x
- Category: Snack
- Cuisine: American
Ingredients
- 2 cups (180g) rolled oats (old-fashioned for best chewiness)
- 1 cup (120g) mixed nuts (almonds, walnuts, pecans, roughly chopped)
- 1 cup (140g) dried fruit (chopped apricots, cranberries, raisins, or seasonal options like cherries or blueberries)
- 1/3 cup (113g) honey
- 1/2 cup (128g) nut butter (almond or peanut butter, smooth or crunchy)
- 1 teaspoon vanilla extract
- 1/2 teaspoon ground cinnamon (optional)
- 1/4 teaspoon salt
- 2 tablespoons chia seeds or flaxseeds (optional)
Instructions
- Preheat your oven to 350°F (175°C). Line an 8×8-inch pan with parchment paper, leaving some overhang for easy removal.
- Toast the oats and chopped nuts on a baking sheet for 10 minutes, stirring halfway through to avoid burning.
- In a medium bowl, whisk together honey, nut butter, vanilla extract, cinnamon, and salt until smooth. Warm nut butter slightly if thick.
- Transfer toasted oats and nuts to a large mixing bowl. Add dried fruit and seeds if using. Pour wet mixture over dry and stir until evenly coated.
- Press the mixture firmly into the parchment-lined pan using a spatula or lightly wet hands.
- Bake for 15-18 minutes until edges are golden and center is set but not hard. Reduce time slightly for softer bars.
- Cool completely on a wire rack for at least 30 minutes to firm up.
- Lift granola out using parchment overhang and cut into 8-10 bars. Store in an airtight container.
Notes
Toast oats and nuts to enhance flavor and crunch. Press mixture firmly to prevent crumbling. Watch baking time closely to avoid burning. Warm nut butter if thick for easier mixing. Refrigerate bars before cutting if they crumble. Store bars in airtight container; refrigerate in humid climates. Freeze for up to 3 months.
Nutrition
- Serving Size: 1 bar (assuming 8 ba
- Calories: 190
- Sugar: 10
- Sodium: 100
- Fat: 9
- Saturated Fat: 1
- Carbohydrates: 22
- Fiber: 4
- Protein: 5
Keywords: granola bars, homemade snack, fruit and nut bars, healthy snack, easy granola bars, no refined sugar, chewy granola bars